AUX GMC YUKON DENALI 2004 Owners Manual
[x] Cancel search | Manufacturer: GMC, Model Year: 2004, Model line: YUKON DENALI, Model: GMC YUKON DENALI 2004Pages: 468, PDF Size: 3.18 MB
Page 162 of 468
Reading Lamps
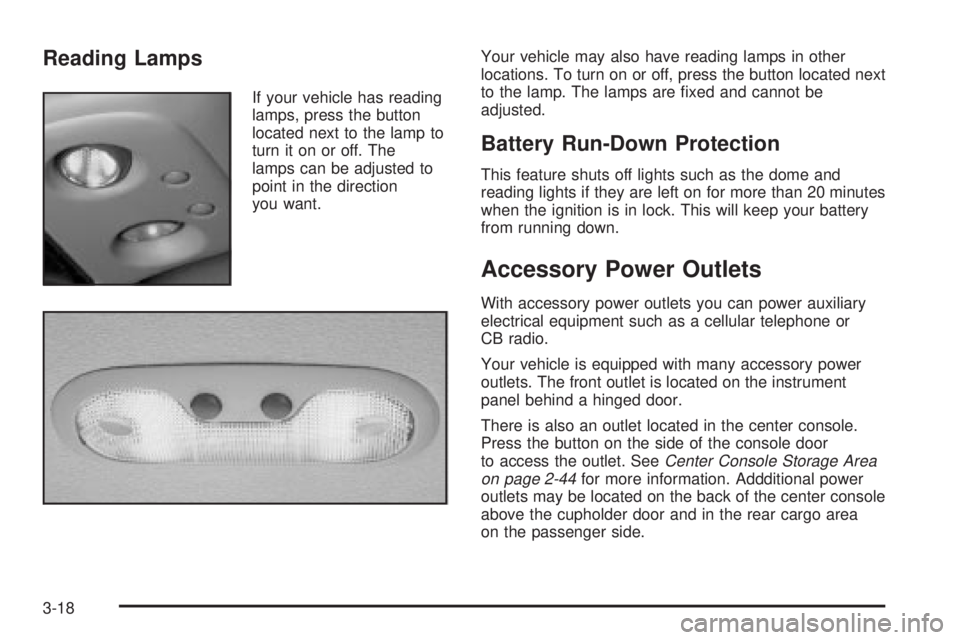
If your vehicle has reading
lamps, press the button
located next to the lamp to
turn it on or off. The
lamps can be adjusted to
point in the direction
you want.Your vehicle may also have reading lamps in other
locations. To turn on or off, press the button located next
to the lamp. The lamps are ®xed and cannot be
adjusted.
Battery Run-Down Protection
This feature shuts off lights such as the dome and
reading lights if they are left on for more than 20 minutes
when the ignition is in lock. This will keep your battery
from running down.
Accessory Power Outlets
With accessory power outlets you can power auxiliary
electrical equipment such as a cellular telephone or
CB radio.
Your vehicle is equipped with many accessory power
outlets. The front outlet is located on the instrument
panel behind a hinged door.
There is also an outlet located in the center console.
Press the button on the side of the console door
to access the outlet. See
Center Console Storage Area
on page 2-44for more information. Addditional power
outlets may be located on the back of the center console
above the cupholder door and in the rear cargo area
on the passenger side.
3-18
Page 171 of 468
Operation Tips
·
Keep the hood and front air inlets free of ice, snow,
or any other obstruction (such as leaves). The
heater and defroster will work far better, reducing
the chance of fogging the inside of your windows.
·Keep the air path under the front seats clear
of objects. This helps air to circulate throughout your
vehicle.
·Adding outside equipment to the front of your
vehicle, such as hood-air de¯ectors, etc., may affect
the performance of the heating and air conditioning
system. Check with your dealer before adding
equipment to the outside of your vehicle.
Rear Climate Control System
With this system the front or rear passengers can
control the air temperature, air ¯ow and fan speed for
the rear seat passengers. The climate control has
an overhead control near the driver and a control on the
back of the center console.
Driver Overhead Control
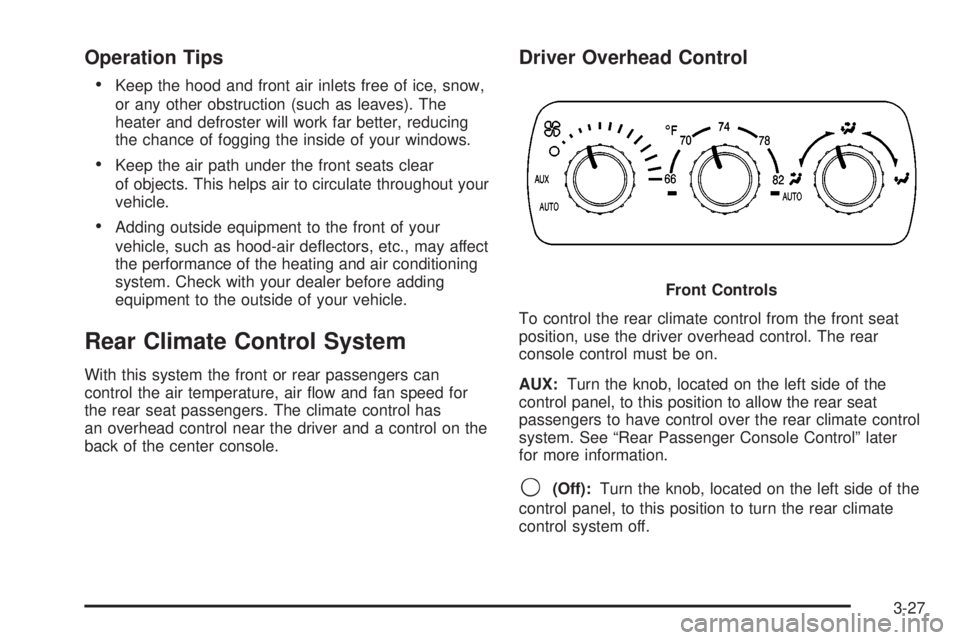
To control the rear climate control from the front seat
position, use the driver overhead control. The rear
console control must be on.
AUX:Turn the knob, located on the left side of the
control panel, to this position to allow the rear seat
passengers to have control over the rear climate control
system. See ªRear Passenger Console Controlº later
for more information.
9(Off):Turn the knob, located on the left side of the
control panel, to this position to turn the rear climate
control system off.Front Controls
3-27
Page 172 of 468
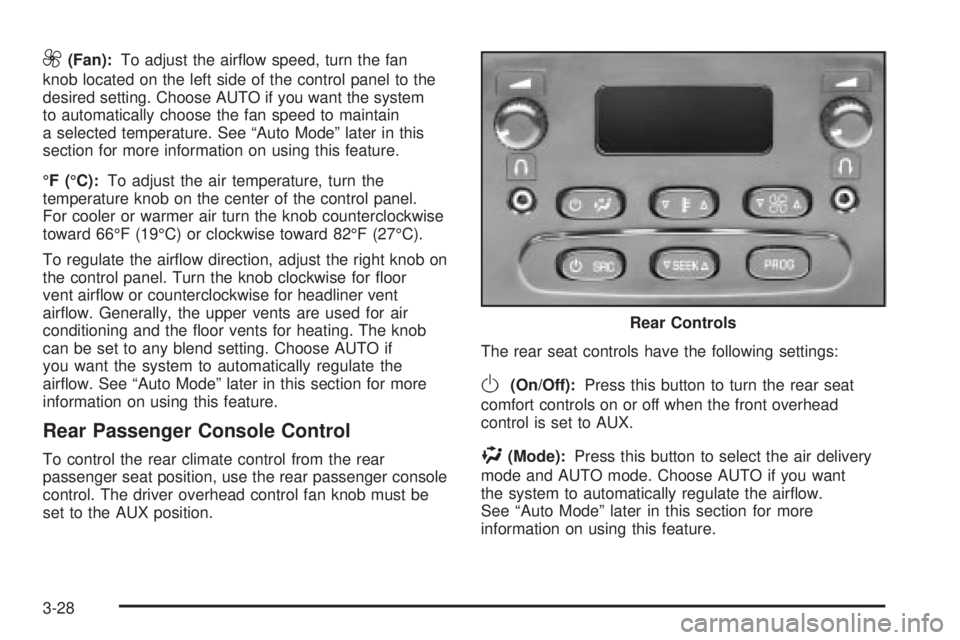
9(Fan):To adjust the air¯ow speed, turn the fan
knob located on the left side of the control panel to the
desired setting. Choose AUTO if you want the system
to automatically choose the fan speed to maintain
a selected temperature. See ªAuto Modeº later in this
section for more information on using this feature.
ÉF (ÉC):To adjust the air temperature, turn the
temperature knob on the center of the control panel.
For cooler or warmer air turn the knob counterclockwise
toward 66ÉF (19ÉC) or clockwise toward 82ÉF (27ÉC).
To regulate the air¯ow direction, adjust the right knob on
the control panel. Turn the knob clockwise for ¯oor
vent air¯ow or counterclockwise for headliner vent
air¯ow. Generally, the upper vents are used for air
conditioning and the ¯oor vents for heating. The knob
can be set to any blend setting. Choose AUTO if
you want the system to automatically regulate the
air¯ow. See ªAuto Modeº later in this section for more
information on using this feature.
Rear Passenger Console Control
To control the rear climate control from the rear
passenger seat position, use the rear passenger console
control. The driver overhead control fan knob must be
set to the AUX position.The rear seat controls have the following settings:
O(On/Off):Press this button to turn the rear seat
comfort controls on or off when the front overhead
control is set to AUX.
%(Mode):Press this button to select the air delivery
mode and AUTO mode. Choose AUTO if you want
the system to automatically regulate the air¯ow.
See ªAuto Modeº later in this section for more
information on using this feature.Rear Controls
3-28
Page 184 of 468
·Low transmission ¯uid level
·High transmission ¯uid level
·Restricted air ¯ow to the radiator and the auxiliary
transmission oil cooler (if equipped).
A temporary solution to hotter transmission operating
temperatures may be to let the transmission cool down.
If the transmission is operated at higher temperatures
on a frequent basis, see
Scheduled Maintenance
on page 6-4for the proper transmission maintenance
intervals.
Tire Pressure Light
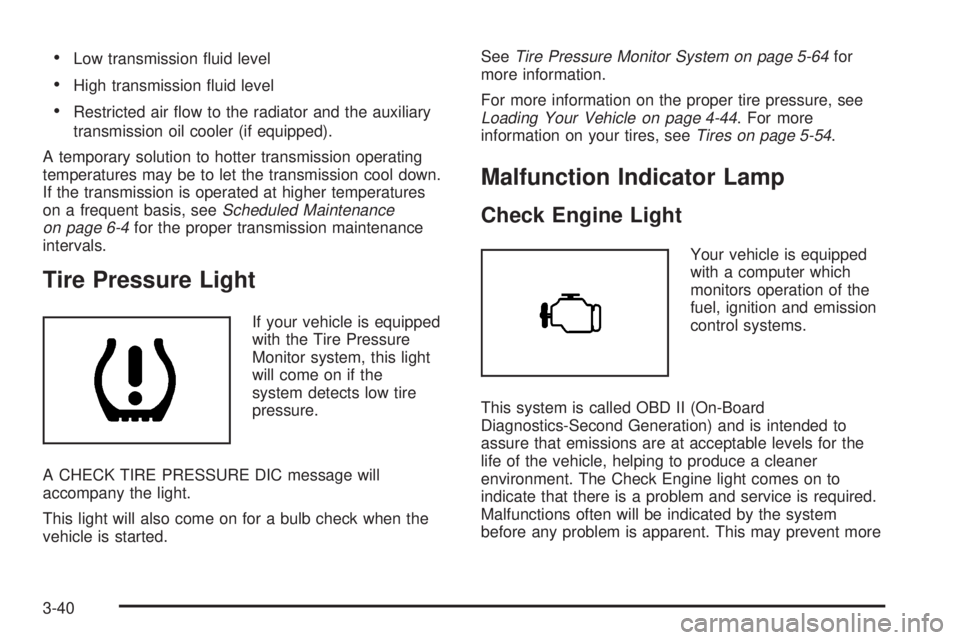
If your vehicle is equipped
with the Tire Pressure
Monitor system, this light
will come on if the
system detects low tire
pressure.
A CHECK TIRE PRESSURE DIC message will
accompany the light.
This light will also come on for a bulb check when the
vehicle is started.See
Tire Pressure Monitor System on page 5-64for
more information.
For more information on the proper tire pressure, see
Loading Your Vehicle on page 4-44. For more
information on your tires, seeTires on page 5-54.
Malfunction Indicator Lamp
Check Engine Light
Your vehicle is equipped
with a computer which
monitors operation of the
fuel, ignition and emission
control systems.
This system is called OBD II (On-Board
Diagnostics-Second Generation) and is intended to
assure that emissions are at acceptable levels for the
life of the vehicle, helping to produce a cleaner
environment. The Check Engine light comes on to
indicate that there is a problem and service is required.
Malfunctions often will be indicated by the system
before any problem is apparent. This may prevent more
3-40
Page 225 of 468
When using the wired headphones, if the front seat
passengers play a CD in the Radio with Six-Disc CD
(if equipped) or use XMŸ Satellite Radio Service
(48 contiguous US states, if equipped), you will hear the
audio for these sources, instead of the DVD or CD
that is currently playing through the RSE.
If an error message appears on the video screen, see
ªDVD Messagesº later in this section.
DVD Player Buttons
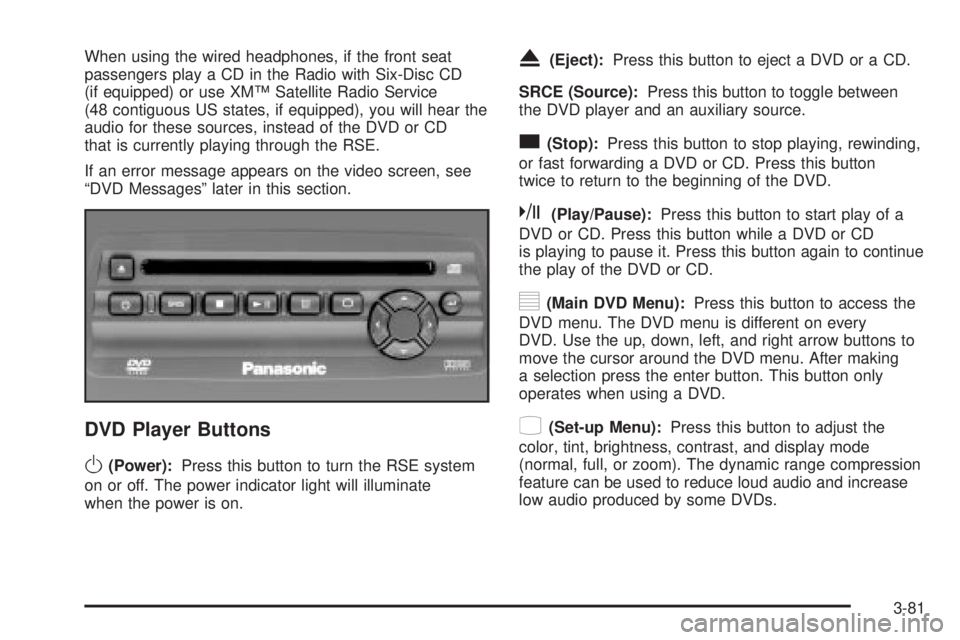
O(Power):Press this button to turn the RSE system
on or off. The power indicator light will illuminate
when the power is on.
X(Eject):Press this button to eject a DVD or a CD.
SRCE (Source):Press this button to toggle between
the DVD player and an auxiliary source.
c(Stop):Press this button to stop playing, rewinding,
or fast forwarding a DVD or CD. Press this button
twice to return to the beginning of the DVD.
k(Play/Pause):Press this button to start play of a
DVD or CD. Press this button while a DVD or CD
is playing to pause it. Press this button again to continue
the play of the DVD or CD.
y(Main DVD Menu):Press this button to access the
DVD menu. The DVD menu is different on every
DVD. Use the up, down, left, and right arrow buttons to
move the cursor around the DVD menu. After making
a selection press the enter button. This button only
operates when using a DVD.
z(Set-up Menu):Press this button to adjust the
color, tint, brightness, contrast, and display mode
(normal, full, or zoom). The dynamic range compression
feature can be used to reduce loud audio and increase
low audio produced by some DVDs.
3-81
Page 229 of 468
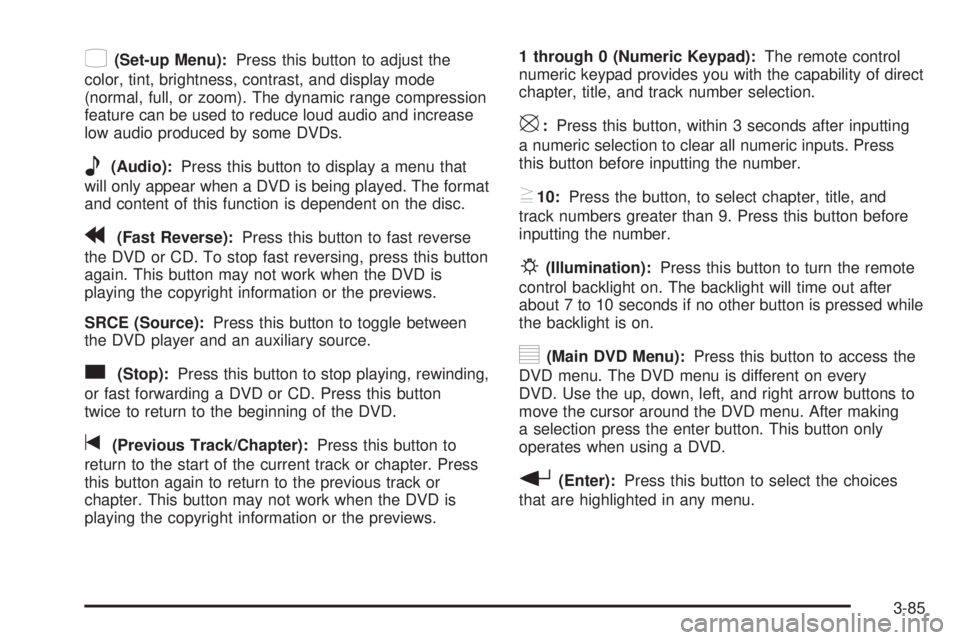
z(Set-up Menu):Press this button to adjust the
color, tint, brightness, contrast, and display mode
(normal, full, or zoom). The dynamic range compression
feature can be used to reduce loud audio and increase
low audio produced by some DVDs.
e(Audio):Press this button to display a menu that
will only appear when a DVD is being played. The format
and content of this function is dependent on the disc.
r(Fast Reverse):Press this button to fast reverse
the DVD or CD. To stop fast reversing, press this button
again. This button may not work when the DVD is
playing the copyright information or the previews.
SRCE (Source):Press this button to toggle between
the DVD player and an auxiliary source.
c(Stop):Press this button to stop playing, rewinding,
or fast forwarding a DVD or CD. Press this button
twice to return to the beginning of the DVD.
t(Previous Track/Chapter):Press this button to
return to the start of the current track or chapter. Press
this button again to return to the previous track or
chapter. This button may not work when the DVD is
playing the copyright information or the previews.1 through 0 (Numeric Keypad):The remote control
numeric keypad provides you with the capability of direct
chapter, title, and track number selection.
\:Press this button, within 3 seconds after inputting
a numeric selection to clear all numeric inputs. Press
this button before inputting the number.
}10:Press the button, to select chapter, title, and
track numbers greater than 9. Press this button before
inputting the number.
P(Illumination):Press this button to turn the remote
control backlight on. The backlight will time out after
about 7 to 10 seconds if no other button is pressed while
the backlight is on.
y(Main DVD Menu):Press this button to access the
DVD menu. The DVD menu is different on every
DVD. Use the up, down, left, and right arrow buttons to
move the cursor around the DVD menu. After making
a selection press the enter button. This button only
operates when using a DVD.
r(Enter):Press this button to select the choices
that are highlighted in any menu.
3-85
Page 231 of 468
Headphones
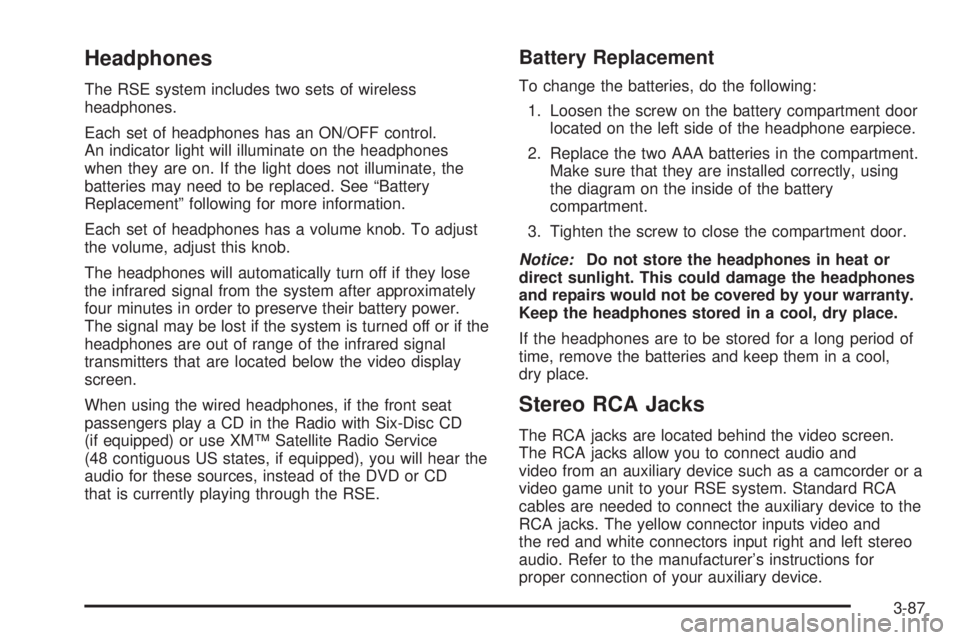
The RSE system includes two sets of wireless
headphones.
Each set of headphones has an ON/OFF control.
An indicator light will illuminate on the headphones
when they are on. If the light does not illuminate, the
batteries may need to be replaced. See ªBattery
Replacementº following for more information.
Each set of headphones has a volume knob. To adjust
the volume, adjust this knob.
The headphones will automatically turn off if they lose
the infrared signal from the system after approximately
four minutes in order to preserve their battery power.
The signal may be lost if the system is turned off or if the
headphones are out of range of the infrared signal
transmitters that are located below the video display
screen.
When using the wired headphones, if the front seat
passengers play a CD in the Radio with Six-Disc CD
(if equipped) or use XMŸ Satellite Radio Service
(48 contiguous US states, if equipped), you will hear the
audio for these sources, instead of the DVD or CD
that is currently playing through the RSE.
Battery Replacement
To change the batteries, do the following:
1. Loosen the screw on the battery compartment door
located on the left side of the headphone earpiece.
2. Replace the two AAA batteries in the compartment.
Make sure that they are installed correctly, using
the diagram on the inside of the battery
compartment.
3. Tighten the screw to close the compartment door.
Notice:Do not store the headphones in heat or
direct sunlight. This could damage the headphones
and repairs would not be covered by your warranty.
Keep the headphones stored in a cool, dry place.
If the headphones are to be stored for a long period of
time, remove the batteries and keep them in a cool,
dry place.
Stereo RCA Jacks
The RCA jacks are located behind the video screen.
The RCA jacks allow you to connect audio and
video from an auxiliary device such as a camcorder or a
video game unit to your RSE system. Standard RCA
cables are needed to connect the auxiliary device to the
RCA jacks. The yellow connector inputs video and
the red and white connectors input right and left stereo
audio. Refer to the manufacturer's instructions for
proper connection of your auxiliary device.
3-87
Page 232 of 468
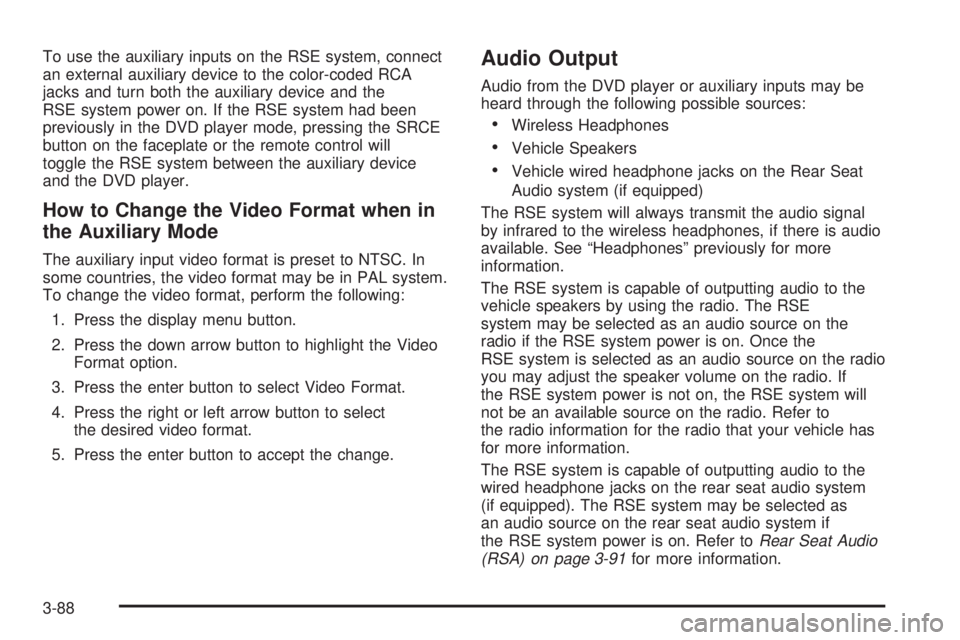
To use the auxiliary inputs on the RSE system, connect
an external auxiliary device to the color-coded RCA
jacks and turn both the auxiliary device and the
RSE system power on. If the RSE system had been
previously in the DVD player mode, pressing the SRCE
button on the faceplate or the remote control will
toggle the RSE system between the auxiliary device
and the DVD player.
How to Change the Video Format when in
the Auxiliary Mode
The auxiliary input video format is preset to NTSC. In
some countries, the video format may be in PAL system.
To change the video format, perform the following:
1. Press the display menu button.
2. Press the down arrow button to highlight the Video
Format option.
3. Press the enter button to select Video Format.
4. Press the right or left arrow button to select
the desired video format.
5. Press the enter button to accept the change.
Audio Output
Audio from the DVD player or auxiliary inputs may be
heard through the following possible sources:
·Wireless Headphones
·Vehicle Speakers
·Vehicle wired headphone jacks on the Rear Seat
Audio system (if equipped)
The RSE system will always transmit the audio signal
by infrared to the wireless headphones, if there is audio
available. See ªHeadphonesº previously for more
information.
The RSE system is capable of outputting audio to the
vehicle speakers by using the radio. The RSE
system may be selected as an audio source on the
radio if the RSE system power is on. Once the
RSE system is selected as an audio source on the radio
you may adjust the speaker volume on the radio. If
the RSE system power is not on, the RSE system will
not be an available source on the radio. Refer to
the radio information for the radio that your vehicle has
for more information.
The RSE system is capable of outputting audio to the
wired headphone jacks on the rear seat audio system
(if equipped). The RSE system may be selected as
an audio source on the rear seat audio system if
the RSE system power is on. Refer to
Rear Seat Audio
(RSA) on page 3-91for more information.
3-88
Page 233 of 468
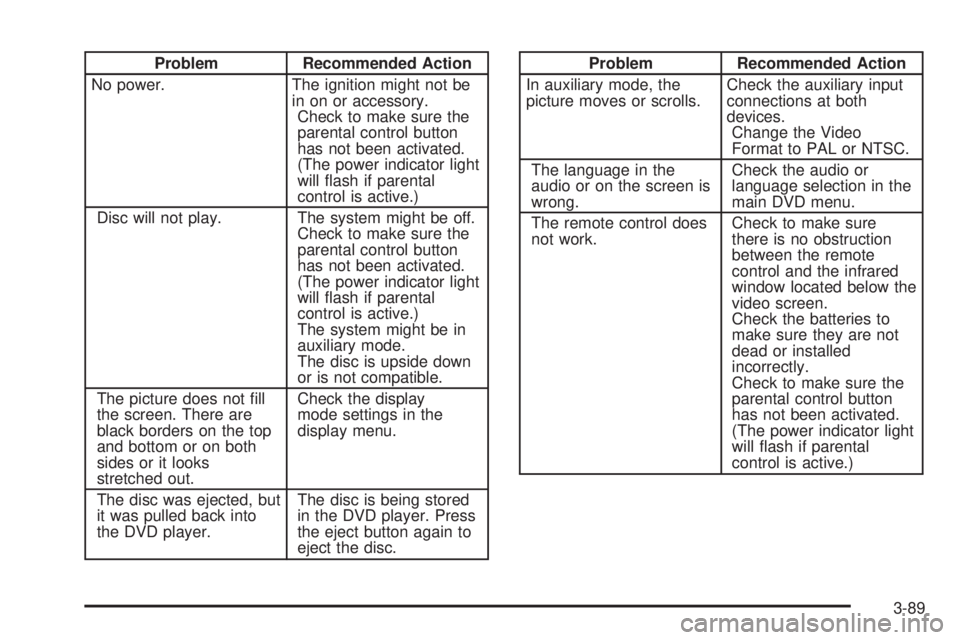
Problem Recommended Action
No power. The ignition might not be
in on or accessory.
Check to make sure the
parental control button
has not been activated.
(The power indicator light
will ¯ash if parental
control is active.)
Disc will not play. The system might be off.
Check to make sure the
parental control button
has not been activated.
(The power indicator light
will ¯ash if parental
control is active.)
The system might be in
auxiliary mode.
The disc is upside down
or is not compatible.
The picture does not ®ll
the screen. There are
black borders on the top
and bottom or on both
sides or it looks
stretched out.Check the display
mode settings in the
display menu.
The disc was ejected, but
it was pulled back into
the DVD player.The disc is being stored
in the DVD player. Press
the eject button again to
eject the disc.Problem Recommended Action
In auxiliary mode, the
picture moves or scrolls.Check the auxiliary input
connections at both
devices.
Change the Video
Format to PAL or NTSC.
The language in the
audio or on the screen is
wrong.Check the audio or
language selection in the
main DVD menu.
The remote control does
not work.Check to make sure
there is no obstruction
between the remote
control and the infrared
window located below the
video screen.
Check the batteries to
make sure they are not
dead or installed
incorrectly.
Check to make sure the
parental control button
has not been activated.
(The power indicator light
will ¯ash if parental
control is active.)
3-89
Page 234 of 468

Problem Recommended Action
After stopping the player, I
push Play but sometimes
the DVD starts where I
left off and sometimes at
the beginning.If the stop button was
pressed one time, the
DVD player will resume
playing where the DVD
was stopped. If the stop
button was pressed two
times the DVD player will
begin to play from the
beginning of the DVD.
The auxiliary source is
running but there is no
picture or sound.Check that the DVD
player is in the auxiliary
source mode.
Check the auxiliary input
connections at both
devices.
My disc is stuck in the
player. The Load/Eject
button does not work.Turn the DVD power off,
then on and press the
Load/Eject button on the
DVD player.
Do not attempt to forcibly
remove the disc from the
DVD player. This could
permanently damage the
disc and DVD player.Problem Recommended Action
Sometimes the wireless
headphone audio cuts out
or buzzes.Check for obstructions,
low batteries, reception
range, and interference
from cellular telephone
towers or by using your
cellular telephone in the
vehicle.
Check that the
headphones are facing
the front of the vehicle.
I lost the remote and/or
the headphones.See your dealer for
assistance.
The DVD is playing, but
there is no picture or
sound.Check that the DVD
player is in DVD mode.
The audio/video skips or
jumps.The DVD or CD could be
dirty, scratched, or
damaged.
What is the best way to
clean the video screen?Wipe the video screen
with a damp, soft cloth.
The audio from the radio
for the Radio with
Six-Disc CD and XMŸ
has taken over the audio
from the DVD or CD
when using the wired
headphones.The RSE is working
correctly.
Use the wireless
headphones or have the
front seat passengers
listen to another audio
source.
3-90