display GMC YUKON DENALI 2008 User Guide
[x] Cancel search | Manufacturer: GMC, Model Year: 2008, Model line: YUKON DENALI, Model: GMC YUKON DENALI 2008Pages: 502, PDF Size: 6.18 MB
Page 144 of 502
To be detected, objects must be at least 10 inches
(25.4 cm) off the ground and below liftgate level. Objects
must also be within 8 feet (2.5 m) from your rear
bumper. This distance may be less during warmer or
humid weather.
A single beep will sound the �rst time an object is
detected between 20 inches (0.5 m) and 8 feet (2.5 m)
away. Beeping will occur for three seconds when
you are closer than 1 foot (0.3 m) from the object.
The following describes what will occur with the URPA
display as you get closer to a detected object:
Description English Metric
amber light 8 ft 2.5 m
amber/amber lights 40 in 1.0 m
amber/amber/red lights 23 in 0.6 m
amber/amber/red lights
�ashing and beep for
three seconds1 ft 0.3 mThe system can be
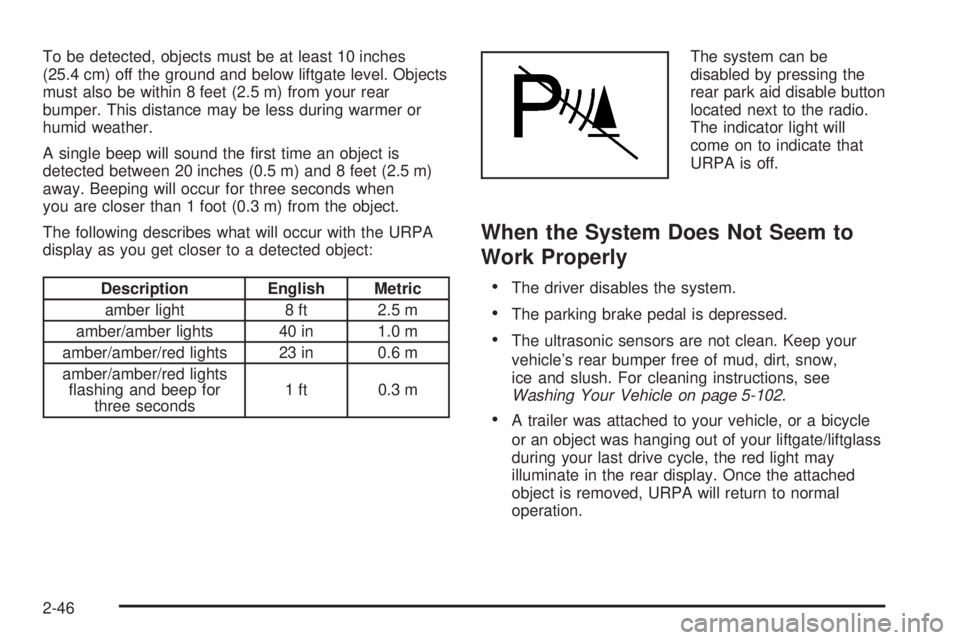
disabled by pressing the
rear park aid disable button
located next to the radio.
The indicator light will
come on to indicate that
URPA is off.
When the System Does Not Seem to
Work Properly
The driver disables the system.
The parking brake pedal is depressed.
The ultrasonic sensors are not clean. Keep your
vehicle’s rear bumper free of mud, dirt, snow,
ice and slush. For cleaning instructions, see
Washing Your Vehicle on page 5-102.
A trailer was attached to your vehicle, or a bicycle
or an object was hanging out of your liftgate/liftglass
during your last drive cycle, the red light may
illuminate in the rear display. Once the attached
object is removed, URPA will return to normal
operation.
2-46
Page 164 of 502
Engine Coolant Temperature Gage..................3-41
Tire Pressure Light.......................................3-41
Malfunction Indicator Lamp.............................3-42
Oil Pressure Gage........................................3-45
Oil Pressure Light.........................................3-46
Security Light...............................................3-46
Fog Lamp Light............................................3-47
Cruise Control Light......................................3-47
Highbeam On Light.......................................3-47
Tow/Haul Mode Light....................................3-47
Fuel Gage...................................................3-48
Low Fuel Warning Light.................................3-48
Driver Information Center (DIC).......................3-49
DIC Operation and Displays
(Using DIC Buttons)...................................3-49
DIC Operation and Displays
(Using Trip Odometer Reset Stem)..............3-54DIC Warnings and Messages.........................3-56
DIC Vehicle Customization (With DIC Buttons). . . .3-64
Audio System(s).............................................3-73
Setting the Clock..........................................3-74
Radio(s) (MP3).............................................3-76
Using an MP3 (Radio with Six-Disc Player)......3-94
Using an MP3 (Radio with CD and DVD
Player).....................................................3-99
XM Radio Messages...................................3-104
Navigation/Radio System..............................3-105
Rear Seat Entertainment (RSE) System.........3-105
Rear Seat Audio (RSA)................................3-115
Theft-Deterrent Feature................................3-116
Audio Steering Wheel Controls......................3-117
Radio Reception.........................................3-118
Rear Side Window Antenna..........................3-119
XM™ Satellite Radio Antenna System............3-119
Section 3 Instrument Panel
3-2
Page 169 of 502
Tilt Wheel
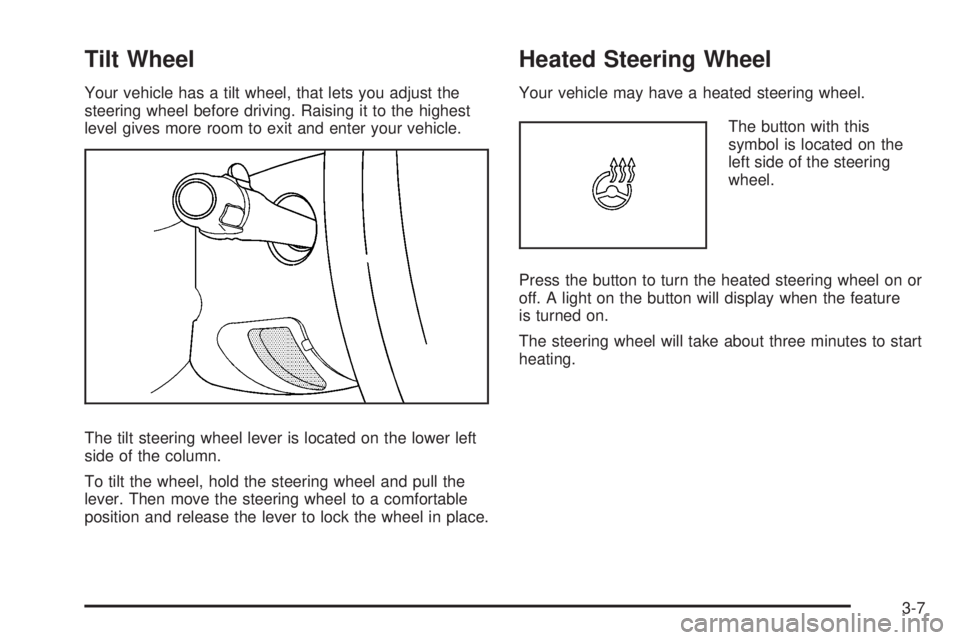
Your vehicle has a tilt wheel, that lets you adjust the
steering wheel before driving. Raising it to the highest
level gives more room to exit and enter your vehicle.
The tilt steering wheel lever is located on the lower left
side of the column.
To tilt the wheel, hold the steering wheel and pull the
lever. Then move the steering wheel to a comfortable
position and release the lever to lock the wheel in place.
Heated Steering Wheel
Your vehicle may have a heated steering wheel.
The button with this
symbol is located on the
left side of the steering
wheel.
Press the button to turn the heated steering wheel on or
off. A light on the button will display when the feature
is turned on.
The steering wheel will take about three minutes to start
heating.
3-7
Page 182 of 502
Dome Lamp Override
The dome lamp override button is located next to the
exterior lamps control.
k(Dome Off):Press the button in and the dome
lamps remain off when a door is opened. Press
the button again to return it to the extended position so
that the dome lamps come on when a door is opened.
Entry Lighting
Your vehicle has an illuminated entry feature.
When the doors are opened, the dome lamps will come
on if the dome override button is in the extended
position. If the dome override button is pressed in, the
lamps will not come on.
Exit Lighting
The interior lamps come on when the key is removed
from the ignition. They turn off automatically in
20 seconds. The lights do not come on if the dome
override button is pressed in.
Front Reading Lamps
The reading lamps are located on the overhead console.
To turn the reading lamps on or off, press the button
located next to each lamp.
The lamps can be adjusted to a desired direction.
Your vehicle may also have reading lamps in other
locations. To turn the lamps on or off, press the button
located next to the lamp. These lamps are �xed and
cannot be adjusted.
Electric Power Management
The vehicle has Electric Power Management (EPM) that
estimates the battery’s temperature and state of
charge. It then adjusts the voltage for best performance
and extended life of the battery.
When the battery’s state of charge is low, the voltage is
raised slightly to quickly put the charge back in. When
the state of charge is high, the voltage is lowered slightly
to prevent overcharging. If the vehicle has a voltmeter
gage or a voltage display on the Driver Information
Center (DIC), you may see the voltage move up
or down. This is normal. If there is a problem, an alert
will be displayed.
3-20
Page 183 of 502
The battery can be discharged at idle if the electrical
loads are very high. This is true for all vehicles. This is
because the generator (alternator) may not be
spinning fast enough at idle to produce all the power
that is needed for very high electrical loads.
A high electrical load occurs when several of the
following loads are on: headlamps, high beams, fog
lamps, rear window defogger, climate control fan at high
speed, heated seats, engine cooling fans, trailer
loads, and loads plugged into accessory power outlets.
EPM works to prevent excessive discharge of the
battery. It does this by balancing the generator’s output
and the vehicle’s electrical needs. It can increase
engine idle speed to generate more power, whenever
needed. It can temporarily reduce the power demands of
some accessories.
Normally, these actions occur in steps or levels, without
being noticeable. In rare cases at the highest levels
of corrective action, this action may be noticeable to the
driver. If so, a Driver Information Center (DIC)
message might be displayed, such as Battery Saver
Active or Service Battery Charging System. If this
message is displayed, it is recommended that the driver
reduce the electrical loads as much as possible. See
DIC Warnings and Messages on page 3-56.Battery Run-Down Protection
This feature shuts off the dome, and reading lamps
if they are left on for more than 10 minutes when
the ignition is off. This will keep the battery from
running down.
Accessory Power Outlet(s)
Accessory power outlets can be used to connect
auxiliary electrical equipment, such as a cellular
telephone or CB radio.
There are two under the climate controls, one inside the
center �oor console, one on the rear of the center
�oor console and one accessory power outlet in the rear
cargo area on the passenger side.
To use an accessory power outlet, remove the protective
cap. When not in use, always cover the accessory
power outlet with the protective cap.
3-21
Page 185 of 502
Climate Controls
Dual Automatic Climate Control
System
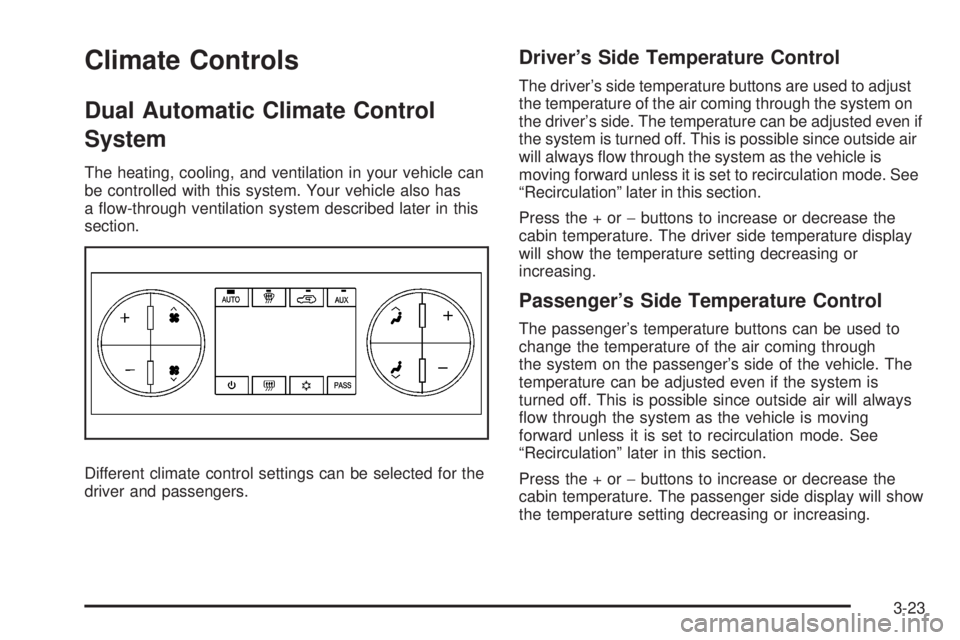
The heating, cooling, and ventilation in your vehicle can
be controlled with this system. Your vehicle also has
a �ow-through ventilation system described later in this
section.
Different climate control settings can be selected for the
driver and passengers.
Driver’s Side Temperature Control
The driver’s side temperature buttons are used to adjust
the temperature of the air coming through the system on
the driver’s side. The temperature can be adjusted even if
the system is turned off. This is possible since outside air
will always �ow through the system as the vehicle is
moving forward unless it is set to recirculation mode. See
“Recirculation” later in this section.
Press the + or−buttons to increase or decrease the
cabin temperature. The driver side temperature display
will show the temperature setting decreasing or
increasing.
Passenger’s Side Temperature Control
The passenger’s temperature buttons can be used to
change the temperature of the air coming through
the system on the passenger’s side of the vehicle. The
temperature can be adjusted even if the system is
turned off. This is possible since outside air will always
�ow through the system as the vehicle is moving
forward unless it is set to recirculation mode. See
“Recirculation” later in this section.
Press the + or−buttons to increase or decrease the
cabin temperature. The passenger side display will show
the temperature setting decreasing or increasing.
3-23
Page 186 of 502
The passenger’s temperature setting can be set to match
the driver’s temperature setting by pressing the PASS
button and turning off the PASS indicator. When the
passenger’s temperature setting is set different than the
driver’s setting, the indicator on the PASS button will
illuminate and both the driver’s side and passenger’s side
temperature displays will be shown.
Automatic Operation
AUTO (Automatic):When automatic operation is
active the system will control the inside temperature, the
air delivery, and the fan speed.
Use the steps below to place the entire system in
automatic mode:
1. Press the AUTO button.
When AUTO is selected, the display will change to
show the current temperature(s) and AUTO will
be lit on the display. The current delivery mode and
fan speed will also be displayed for approximately
5 seconds.
When AUTO is selected, the air conditioning
operation and air inlet will be automatically
controlled. The air conditioning compressor will run
when the outside temperature is over about
40°F (4°C). The air inlet will normally be set to
outside air.If it is hot outside, the air inlet may automatically
switch to recirculate inside air to help quickly
cool down the vehicle. The light on the button will
illuminate in recirculation.
2. Set the driver’s and passenger’s temperature.
To �nd your comfort setting, start with a 74°F (23°C)
temperature setting and allow about 20 minutes
for the system to regulate. Use the driver’s or
passenger’s temperature buttons to adjust the
temperature setting as necessary. If you choose the
temperature setting of 60°F (15°C), the system
will remain at the maximum cooling setting. If you
choose the temperature setting of 90°F (32°C),
the system will remain at the maximum heat setting.
Choosing either maximum setting will not cause
the vehicle to heat or cool any faster.
Be careful not to cover the solar sensor located on the
top of the instrument panel near the windshield. This
sensor regulates air temperature based on sun load and
also turns on the headlamps. For more information on
the solar sensor, see “Sensors” later in this section.
To avoid blowing cold air in cold weather, the system will
delay turning on the fan until warm air is available.
The length of delay depends on the engine coolant
temperature. Pressing the fan switch will override this
delay and change the fan to a selected speed.
3-24
Page 187 of 502
O(On/Off):Press this button to turn off the climate
control system. Outside air will still enter the vehicle, and
will be directed to the �oor. This direction can be
changed by pressing the mode button. Recirculation
can be selected once vent or bi-level mode has
been selected. The temperature can also be adjusted
using either temperature button. If the air delivery mode
or temperature settings are adjusted with the system
off, the display will illuminate brie�y to show you
the settings and then return off. Press the on/off button
or the up down arrows on the fan switch, the defrost
button, AUTO button, or the air conditioning button
to turn the system on when it is off.
Manual Operation
You may manually adjust the air delivery mode or
fan speed.
y9 z(Fan):The buttons with the fan symbols
allow you to manually adjust the fan speed. Press the
up arrow to increase fan speed and the down arrow
to decrease fan speed.
Pressing one of these buttons when the system is off
will turn the system on. Pressing one of these buttons
when in automatic control will place the fan under
manual control. The fan setting will remain displayed
and the AUTO light will turn off. The air delivery
mode will remain under automatic control.
yNz(Mode):Press the mode up and down
buttons to manually change the direction of the air�ow
in the vehicle. Repeatedly press the button until the
desired mode appears on the display. Pressing one of
these buttons when the system is off will change air
delivery mode without turning the system on. Pressing
one of these buttons when in automatic control will place
the mode under manual control.
The air delivery mode setting will be displayed and the
AUTO light will turn off. The fan will remain under
automatic control.
H(Vent):This setting will deliver air to the instrument
panel outlets.
)(Bi-Level):This mode directs half of the air to the
instrument panel outlets and half to the �oor outlets.
The �ow can be divided between vent and �oor outlets
depending upon where the knob is placed between
the settings. A little air is directed towards the windshield
and side window outlets. Cooler air is directed to the
upper outlets and warmer air to the �oor outlets.
6(Floor):This mode directs most of the air to the
�oor outlets, with some of the air directed to the
windshield, side window outlets, and second row �oor
outlets. In this mode, the system automatically
selects outside air.
3-25
Page 189 of 502
Sensors
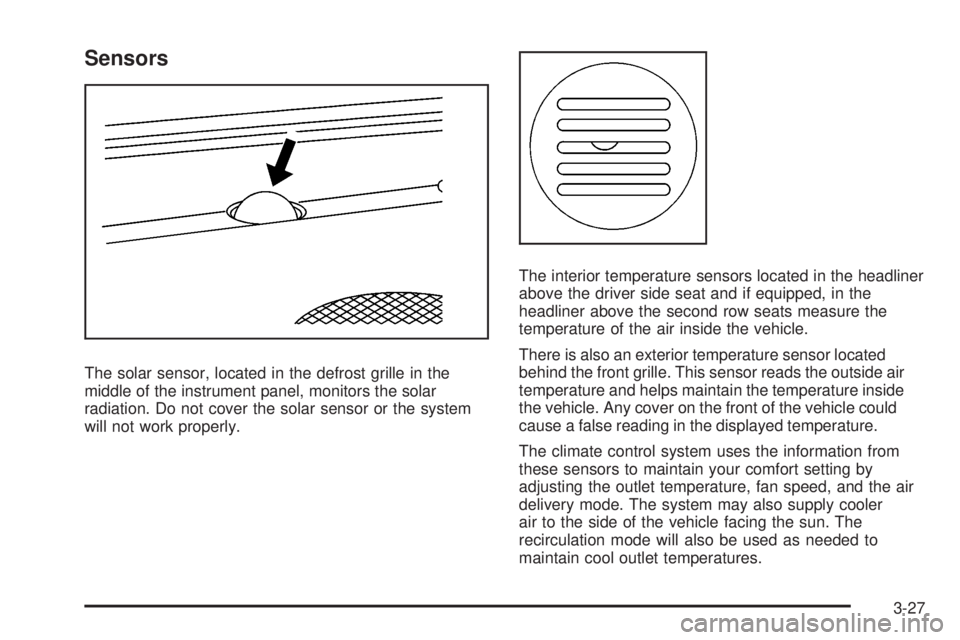
The solar sensor, located in the defrost grille in the
middle of the instrument panel, monitors the solar
radiation. Do not cover the solar sensor or the system
will not work properly.The interior temperature sensors located in the headliner
above the driver side seat and if equipped, in the
headliner above the second row seats measure the
temperature of the air inside the vehicle.
There is also an exterior temperature sensor located
behind the front grille. This sensor reads the outside air
temperature and helps maintain the temperature inside
the vehicle. Any cover on the front of the vehicle could
cause a false reading in the displayed temperature.
The climate control system uses the information from
these sensors to maintain your comfort setting by
adjusting the outlet temperature, fan speed, and the air
delivery mode. The system may also supply cooler
air to the side of the vehicle facing the sun. The
recirculation mode will also be used as needed to
maintain cool outlet temperatures.
3-27
Page 192 of 502
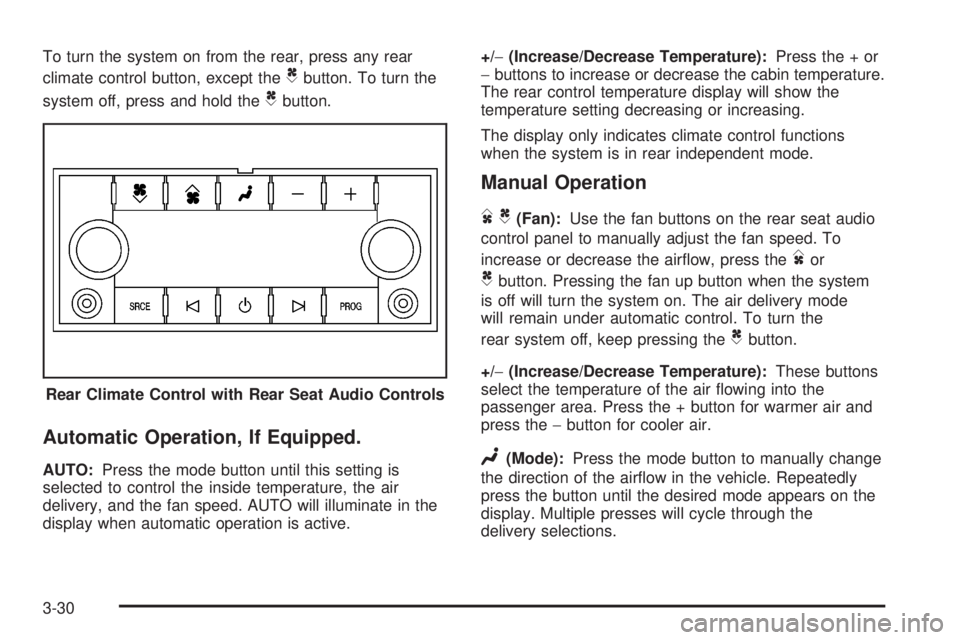
To turn the system on from the rear, press any rear
climate control button, except the
Cbutton. To turn the
system off, press and hold the
Cbutton.
Automatic Operation, If Equipped.
AUTO:Press the mode button until this setting is
selected to control the inside temperature, the air
delivery, and the fan speed. AUTO will illuminate in the
display when automatic operation is active.+/−(Increase/Decrease Temperature):Press the + or
−buttons to increase or decrease the cabin temperature.
The rear control temperature display will show the
temperature setting decreasing or increasing.
The display only indicates climate control functions
when the system is in rear independent mode.
Manual Operation
DC(Fan):Use the fan buttons on the rear seat audio
control panel to manually adjust the fan speed. To
increase or decrease the air�ow, press the
Dor
Cbutton. Pressing the fan up button when the system
is off will turn the system on. The air delivery mode
will remain under automatic control. To turn the
rear system off, keep pressing the
Cbutton.
+/−(Increase/Decrease Temperature):These buttons
select the temperature of the air �owing into the
passenger area. Press the + button for warmer air and
press the−button for cooler air.
N(Mode):Press the mode button to manually change
the direction of the air�ow in the vehicle. Repeatedly
press the button until the desired mode appears on the
display. Multiple presses will cycle through the
delivery selections. Rear Climate Control with Rear Seat Audio Controls
3-30