ECO mode GMC YUKON HYBRID 2010 Owners Manual
[x] Cancel search | Manufacturer: GMC, Model Year: 2010, Model line: YUKON HYBRID, Model: GMC YUKON HYBRID 2010Pages: 120, PDF Size: 1.03 MB
Page 8 of 120
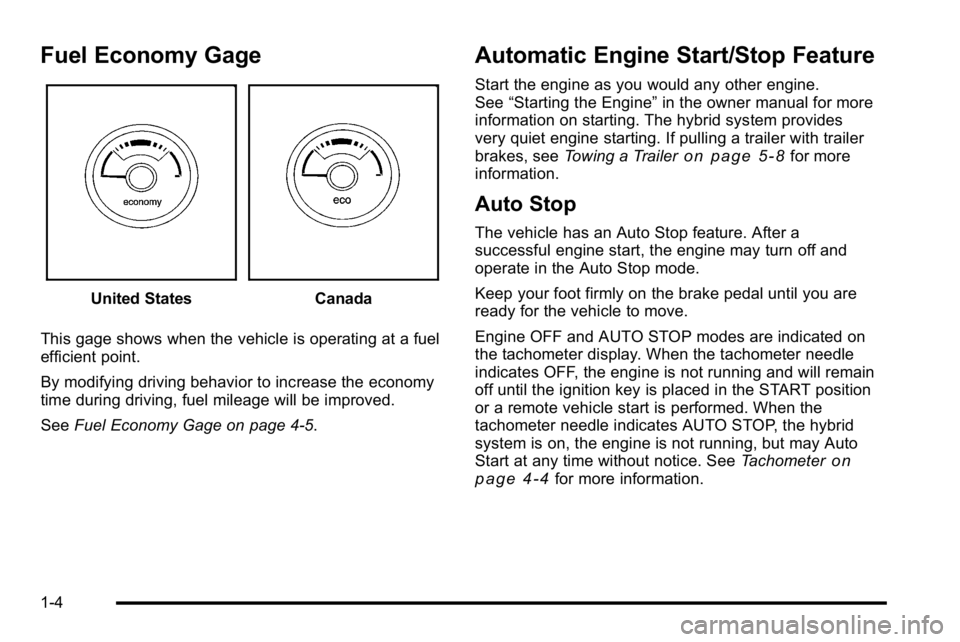
Fuel Economy Gage
United StatesCanada
This gage shows when the vehicle is operating at a fuel
efficient point.
By modifying driving behavior to increase the economy
time during driving, fuel mileage will be improved.
See Fuel Economy Gage on page 4‑5.
Automatic Engine Start/Stop Feature
Start the engine as you would any other engine.
See“Starting the Engine” in the owner manual for more
information on starting. The hybrid system provides
very quiet engine starting. If pulling a trailer with trailer
brakes, see Towing a Trailer
on page 5‑8for more
information.
Auto Stop
The vehicle has an Auto Stop feature. After a
successful engine start, the engine may turn off and
operate in the Auto Stop mode.
Keep your foot firmly on the brake pedal until you are
ready for the vehicle to move.
Engine OFF and AUTO STOP modes are indicated on
the tachometer display. When the tachometer needle
indicates OFF, the engine is not running and will remain
off until the ignition key is placed in the START position
or a remote vehicle start is performed. When the
tachometer needle indicates AUTO STOP, the hybrid
system is on, the engine is not running, but may Auto
Start at any time without notice. See Tachometer
on
page 4‑4for more information.
1-4
Page 13 of 120
Manual Reclining Seatbacks
(Tahoe and Yukon Two-Mode Hybrid)
To recline the seatback:1. Lift the reclining seatback lever (C).
2. Move the seatback to the desired position, then release the lever to lock the seatback in place.
3. Push and pull on the seatback to make sure it is locked.
To return the seatback to an upright position: 1. Lift the lever fully without applying pressure to the seatback and the seatback will return to the upright
position.
2. Release the lever to lock the seatback in place.
3. Push and pull on the seatback to make sure it is locked.
Restraint System Check
Replacing Restraint System Parts
After a Crash
If an airbag inflates or the vehicle has been in a
crash, the vehicle's sensing system may command
the automatic hybrid battery disconnect to open.
The battery will disconnect. The hybrid battery will be
off and the vehicle will not start. The airbag readiness
light and/or SERVICE HYBRID SYSTEM warning
message may come on in the driver information center.
See “Airbag Readiness Light” in the owner manual and
Driver Information Center (DIC)
on page 4‑12for more
information.
To operate the vehicle, the automatic hybrid battery
disconnect must be reconnected by a qualified service
technician and sensing system parts will need to be
replaced. Have the vehicle serviced right away.
2-3
Page 22 of 120
D (Drive) :This position is for normal driving. It provides
the best fuel economy. If you need more power for
passing, and you are:
.Going less than about 35 mph (55 km/h), push the
accelerator pedal about halfway down.
.Going about 35 mph (55 km/h) or more, push the
accelerator all the way down.
D (Drive) or M (Manual Mode) can be used when
towing a trailer, carrying a heavy load, driving on
steep hills, or for off-road driving. You may want to
shift the transmission to a lower gear selection if the
transmission shifts too often.
Downshifting the transmission in slippery road
conditions could result in skidding. See “Skidding”
under “Loss of Control” in the owner manual for more
information.
When temperatures are very cold, the transmission's
gear shifting may be delayed, providing more stable
shifts until the engine warms up. Shifts may be more
noticeable with a cold transmission. This difference in
shifting is normal. M (Manual Mode) :
This position lets drivers select
the range of gears appropriate for current driving
conditions. If the vehicle has this feature, see “Range
Selection Mode” later in this section.
Notice: Spinning the tires or holding the vehicle in
one place on a hill using only the accelerator pedal
may damage the transmission. The repair will not be
covered by the vehicle warranty. If you are stuck,
do not spin the tires. When stopping on a hill,
use the brakes to hold the vehicle in place.
The vehicle has a shift stabilization feature that
adjusts the transmission shifting to the current driving
conditions to reduce rapid upshifts and downshifts.
If the shift stabilization feature determines that a current
vehicle speed cannot be maintained, the transmission
does not upshift. In some cases, this may appear to be
a delayed shift, however the transmission is operating
normally.
3-8
Page 25 of 120
2m(Two-Wheel Drive High):This setting is used for
driving in most street and highway situations. The front
axle is not engaged in two-wheel drive. This setting also
provides the best fuel economy.
AUTO (Automatic Four-Wheel Drive) : This setting is
ideal for use when road surface traction conditions are
variable. When driving your vehicle in AUTO, the front
axle is engaged, but the vehicle's power is primarily
sent to the rear wheels. When the vehicle's software
determines a need for more traction, the system will
transfer more power to the front wheels. Driving in this
mode results in slightly lower fuel economy than
Two-Wheel Drive High.
4
m(Four-Wheel Drive High): Use the four-wheel high
position when you need extra traction, such as on
snowy or icy roads or in most off-road situations.
This setting also engages the front axle to help drive
the vehicle. This is the best setting to use when
plowing snow.
4
n(Four-Wheel Drive Low) : This setting also
engages the front axle and delivers extra torque.
You may never need this setting. It sends maximum
power to all four wheels. You might choose Four-Wheel
Drive Low if you are driving off-road in deep sand, deep
mud, deep snow, and while climbing or descending
steep hills. The vehicle has StabiliTrak
®. Shifting into
Four-Wheel-Drive Low will turn Traction Control and
StabiliTrak
®off. See StabiliTrak®System in the index
of the Owner Manual for more information.
{WARNING:
Shifting the transfer case to N (Neutral) can cause
the vehicle to roll even if the transmission is in
P (Park). You or someone else could be seriously
injured. Be sure to set the parking brake before
placing the transfer case in N (Neutral). See
Parking Brake in the index of the Owner Manual
for more information.
N (Neutral) : Shift the vehicle's transfer case to
N (Neutral) only when towing the vehicle. See
Recreational Vehicle Towing or Towing Your Vehicle in
the index of the Owner Manual.
If the SERVICE 4 WHEEL DRIVE message stays on,
you should take the vehicle to your dealer/retailer for
service. See DIC Warnings and Messages
on
page 4‑12for more information.
3-11
Page 26 of 120
Shifting Into Four-Wheel Drive High or
AUTO (Automatic Four-Wheel Drive)
Turn the knob to the Four-Wheel High or AUTO
position. This can be done at any speed, except when
shifting from Four-Wheel Drive Low. The indicator light
will flash while shifting. It will remain on when the shift is
completed.
Shifting Into Two-Wheel Drive High
Turn the knob to the Two-Wheel High position. This can
be done at any speed, except when shifting from
Four-Wheel Drive Low.
See“Shifting Out of Four-Wheel Drive Low” later in this
section for more information.
Shifting Into Four-Wheel Drive Low
When Four-Wheel Low is engaged, vehicle speed
should be kept below 40 mph (64 km/h). Extended
high-speed operation in 4L may damage or shorten the
life of the drivetrain.
To shift to the Four-Wheel Drive Low position, the
ignition must be in ON/RUN and the vehicle must be
stopped or moving less than 3 mph (5 km/h) with the
transmission in N (Neutral). The preferred method for shifting into Four-Wheel Drive Low is to have the
vehicle moving 1 to 2 mph (1.6 to 3.2 km/h). Turn the
knob to the Four-Wheel Drive Low position. You must
wait for the Four-Wheel Drive Low indicator light to stop
flashing and remain on before shifting the transmission
into gear.
Notice:
Shifting the transmission into gear before
the Four-Wheel Drive Low indicator light has
stopped flashing could damage the transfer case.
To help avoid damaging the vehicle, always wait for
the Four-Wheel Drive Low indicator light to stop
flashing before shifting the transmission into gear.
The vehicle may have significant engagement noise
and bump when shifting between Four-Wheel Drive Low
and Four-Wheel Drive High ranges or from N (Neutral)
while the engine is running.
If the knob is turned to the Four-Wheel Drive Low
position when the vehicle is in gear and/or moving,
the Four-Wheel Drive Low indicator light will flash for
30 seconds and not complete the shift unless the
vehicle is moving less than 3 mph (5 km/h) and the
transmission is in N (Neutral). After 30 seconds the
transfer case will shift to Four-Wheel Drive High mode.
3-12
Page 28 of 120
7. If the engine is running, verify that the transfercase is in N (Neutral) by shifting the transmission
to R (Reverse) for one second, then shift the
transmission to D (Drive) for one second.
8. Turn the ignition to ACC/ACCESSORY, which will turn the engine off.
9. Place the transmission shift lever in P (Park).
10. Release the parking brake prior to moving the vehicle.
11. Turn the ignition to LOCK/OFF.
Shifting Out of Neutral
To shift the transfer case out of N (Neutral): 1. Set the parking brake and apply the regular brake pedal.
2. Turn the ignition to ON/RUN with the engine off, and shift the transmission to N (Neutral).
3. Turn the transfer case dial to the desired transfer case shift position (Two-Wheel Drive High,
Four-Wheel Drive High, AUTO).
After the transfer case has shifted out of
N (Neutral), the N (Neutral) light will go out. 4. Release the parking brake prior to moving the
vehicle.
Notice: Shifting the transmission into gear before
the Four-Wheel Drive Low indicator light has
stopped flashing could damage the transfer case.
To help avoid damaging the vehicle, always wait for
the Four-Wheel Drive Low indicator light to stop
flashing before shifting the transmission into gear.
5. Start the engine and shift the transmission to the desired position.
Excessively shifting the transfer case into or out of the
different modes may cause the transfer case to enter
the shift protection mode. This will protect the transfer
case from possible damage and will only allow the
transfer case to respond to one shift per 10 seconds.
The transfer case may stay in this mode for up to
three minutes.
3-14
Page 34 of 120
Climate Controls
For more information on the vehicle's climate control
system, see“Climate Control System” in the owner
manual.
Electric Air Conditioning Compressor
This hybrid vehicle has a electrically powered air
conditioning compressor. This allows for continuous
air conditioning operation and passenger comfort,
even while the hybrid engine cycles on and off.
When operating the climate control system, select the
AUTO mode and the desired temperature setting.
The climate control system automatically adjusts the fan
speed and airflow direction. The climate control system
continues to adjust the climate control settings chosen
for best use of electrical power. At mild temperatures, select a warmer air conditioner
temperature or turn the air conditioner off to get
maximum fuel economy. Continuous air conditioner use
can cause the vehicle to Auto Start more frequently.
During hot weather, driving with the windows closed and
the air conditioner set to Auto mode, will result in better
Hybrid system performance.
Some noise may be heard occasionally from the
compressor, especially when air conditioning use is
high and the engine has turned off.
4-2
Page 44 of 120
Driver Information Center (DIC)
Trip/Fuel Menu Items
Press the trip/fuel button to display the Trip/Fuel Menu
items. For more items see“DIC Operation and
Displays” in the owner manual.
BATTERY VOLTAGE
This display shows the current battery voltage. If the
voltage is in the normal range, the value will display.
For example, the display may read BATTERY
VOLTAGE 13.2 VOLTS. If the voltage is high or low,
the display will read HIGH or LOW. Your vehicle's
charging system regulates voltage based on the state
of the battery. The battery voltage may fluctuate when
viewing this information on the DIC. This is normal.
See“Charging System Light” in the owner manual for
more information. If there is a problem with the battery
charging system, the DIC will display a message.
See DIC Warnings and Messages on page 4‑12.
INST ECON (Instantaneous Economy)
This display normally shows instantaneous fuel
economy. When the vehicle is in Auto Stop mode
AUTO STOP or INST ECON = 99 MPG (l/00km) will be
displayed. See Starting the Vehicle
on page 3‑3for
more information.
DIC Warnings and Messages
Warning messages are displayed on the DIC to notify
the driver that the status of the vehicle has changed
and that some action may be needed by the driver to
correct the condition. If there is more than one message
that needs to be displayed they will appear one after
another.
Some messages may not require immediate action, but
you can press any of the DIC buttons on the instrument
panel or the trip odometer reset stem to acknowledge
that you received the messages and to clear them from
the display.
Some messages cannot be cleared from the DIC
display because they are more urgent. These
messages require action before they can be cleared.
You should take any messages that appear on the
display seriously and remember that clearing the
messages will only make the messages disappear, not
correct the problem.
For information on other DIC messages, see “DIC
Warnings and Messages” in the owner manual Index.
HOOD OPEN
If the hood is not fully closed or there is a problem with
the hood switch, this message will be displayed. Close
the hood to clear the message. If the HOOD OPEN
message continues to be displayed after verifying the
4-12
Page 88 of 120
TPMS Sensor Matching Process
Each TPMS sensor has a unique identification code.
Any time you rotate your vehicle's tires or replace one
or more of the TPMS sensors, the identification codes
will need to be matched to the new tire/wheel position.
The sensors are matched to the tire/wheel positions in
the following order: driver side front tire, passenger
side front tire, passenger side rear tire, and driver side
rear tire using a TPMS diagnostic tool. See your
dealer/retailer for service.
The TPMS sensors can also be matched to each
tire/wheel position by increasing or decreasing the
tire's air pressure. If increasing the tire's air pressure,
do not exceed the maximum inflation pressure indicated
on the tire's sidewall.
To decrease air-pressure out of a tire you can use the
pointed end of the valve cap, a pencil-style air pressure
gage, or a key.
You have two minutes to match the first tire/wheel
position, and five minutes overall to match all four
tire/wheel positions. If it takes longer than two minutes,
to match the first tire and wheel, or more than
five minutes to match all four tire and wheel positions
the matching process stops and you need to start over.The TPMS sensor matching process is outlined below:
1. Set the parking brake.
2. Turn the ignition switch to ON/RUN with the engine off.
3. Press
QandKon the Remote Keyless Entry
(RKE) transmitter at the same time for
approximately five seconds. The horn sounds
twice to signal the receiver is in relearn mode and
TIRE LEARNING ACTIVE message displays on
the DIC screen.
4. Start with the driver side front tire.
5. Remove the valve cap from the valve cap stem. Activate the TPMS sensor by increasing or
decreasing the tire's air pressure for five seconds,
or until a horn chirp sounds. The horn chirp, which
may take up to 30 seconds to sound, confirms that
the sensor identification code has been matched to
this tire and wheel position.
6. Proceed to the passenger side front tire, and repeat the procedure in Step 5.
7. Proceed to the passenger side rear tire, and repeat the procedure in Step 5.
6-32