brake fluid GMC YUKON HYBRID 2010 Owners Manual
[x] Cancel search | Manufacturer: GMC, Model Year: 2010, Model line: YUKON HYBRID, Model: GMC YUKON HYBRID 2010Pages: 120, PDF Size: 1.03 MB
Page 38 of 120
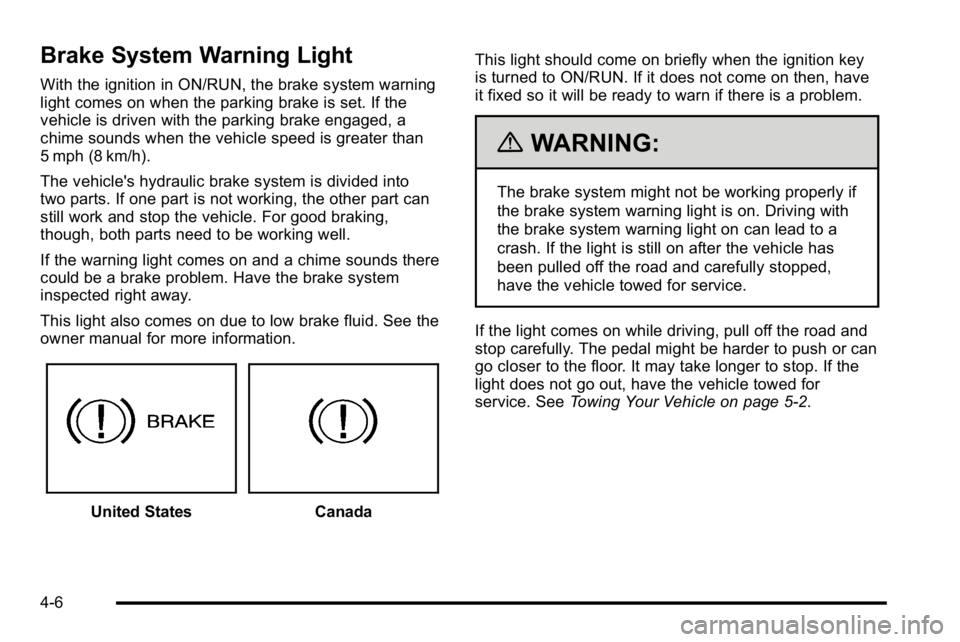
Brake System Warning Light
With the ignition in ON/RUN, the brake system warning
light comes on when the parking brake is set. If the
vehicle is driven with the parking brake engaged, a
chime sounds when the vehicle speed is greater than
5 mph (8 km/h).
The vehicle's hydraulic brake system is divided into
two parts. If one part is not working, the other part can
still work and stop the vehicle. For good braking,
though, both parts need to be working well.
If the warning light comes on and a chime sounds there
could be a brake problem. Have the brake system
inspected right away.
This light also comes on due to low brake fluid. See the
owner manual for more information.
United StatesCanadaThis light should come on briefly when the ignition key
is turned to ON/RUN. If it does not come on then, have
it fixed so it will be ready to warn if there is a problem.
{WARNING:
The brake system might not be working properly if
the brake system warning light is on. Driving with
the brake system warning light on can lead to a
crash. If the light is still on after the vehicle has
been pulled off the road and carefully stopped,
have the vehicle towed for service.
If the light comes on while driving, pull off the road and
stop carefully. The pedal might be harder to push or can
go closer to the floor. It may take longer to stop. If the
light does not go out, have the vehicle towed for
service. See Towing Your Vehicle on page 5‑2.
4-6
Page 57 of 120
Section 6 Service and Appearance Care
Service. . . . . . . . . . . . . . . . . . . . . . . . . . . . . . . . . . . . . . . . . . . . . 6-2
Doing Your Own Service Work . . . . . . . . . . . . . . . . . . 6-2
Checking Things Under the Hood . . . . . . . . . . . . . . . . .6-3
High Voltage Devices and Wiring . . . . . . . . . . . . . . . 6-3
Engine Compartment Overview . . . . . . . . . . . . . . . . . 6-4
Automatic Transmission Fluid . . . . . . . . . . . . . . . . . . . 6-5
Drive Motor/Generator Control Module (DMCM) Coolant Surge Tank Pressure Cap . . . . . . . . . . . . 6-8
Drive Motor/Generator Control Module (DMCM) Cooling System . . . . . . . . . . . . . . . . . . . . . . . . . . . . . . . 6-9
Power Steering Fluid . . . . . . . . . . . . . . . . . . . . . . . . . . 6-13
Brakes . . . . . . . . . . . . . . . . . . . . . . . . . . . . . . . . . . . . . . . . . 6-13
Battery . . . . . . . . . . . . . . . . . . . . . . . . . . . . . . . . . . . . . . . . . 6-16
Jump Starting . . . . . . . . . . . . . . . . . . . . . . . . . . . . . . . . . . 6-18
Bulb Replacement . . . . . . . . . . . . . . . . . . . . . . . . . . . . . . . . 6-24
Taillamps, Turn Signal, Stoplamps and Back-up Lamps . . . . . . . . . . . . . . . . . . . . . . . . . . . . . . 6-24
Replacement Bulbs . . . . . . . . . . . . . . . . . . . . . . . . . . . . 6-25 Electrical System
. . . . . . . . . . . . . . . . . . . . . . . . . . . . . . . . . 6-25
High Voltage Devices and Wiring . . . . . . . . . . . . . . 6-25
Fuses and Circuit Breakers . . . . . . . . . . . . . . . . . . . . 6-26
Underhood Fuse Block . . . . . . . . . . . . . . . . . . . . . . . . 6-26
Tires . . . . . . . . . . . . . . . . . . . . . . . . . . . . . . . . . . . . . . . . . . . . . . . 6-28
Inflation - Tire Pressure . . . . . . . . . . . . . . . . . . . . . . . . 6-28
Tire Pressure Monitor Operation . . . . . . . . . . . . . . . 6-29
Tire Inspection and Rotation . . . . . . . . . . . . . . . . . . . 6-33
Tire Chains . . . . . . . . . . . . . . . . . . . . . . . . . . . . . . . . . . . . 6-34
If a Tire Goes Flat . . . . . . . . . . . . . . . . . . . . . . . . . . . . . 6-34
Tire Sealant and Compressor Kit (Without Selector Switch) . . . . . . . . . . . . . . . . . . . . 6-35
Tire Sealant and Compressor Kit (With Selector Switch) . . . . . . . . . . . . . . . . . . . . . . . 6-45
Tire Sealant and Compressor Kit Storage . . . . . . 6-55
Appearance Care . . . . . . . . . . . . . . . . . . . . . . . . . . . . . . . . . 6-56
Vehicle Care/Appearance Materials . . . . . . . . . . . . 6-56
Capacities and Specifications . . . . . . . . . . . . . . . . . . .6-57
6-1
Page 61 of 120
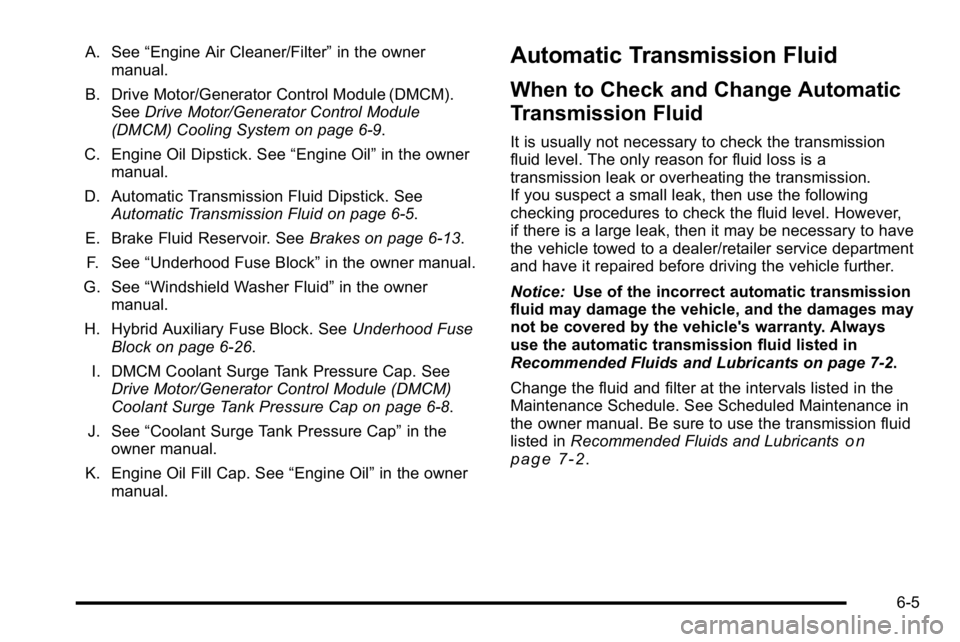
A. See“Engine Air Cleaner/Filter” in the owner
manual.
B. Drive Motor/Generator Control Module (DMCM). See Drive Motor/Generator Control Module
(DMCM) Cooling System on page 6‑9.
C. Engine Oil Dipstick. See “Engine Oil”in the owner
manual.
D. Automatic Transmission Fluid Dipstick. See Automatic Transmission Fluid on page 6‑5.
E. Brake Fluid Reservoir. See Brakes on page 6‑13.
F. See “Underhood Fuse Block” in the owner manual.
G. See “Windshield Washer Fluid” in the owner
manual.
H. Hybrid Auxiliary Fuse Block. See Underhood Fuse
Block on page 6‑26.
I. DMCM Coolant Surge Tank Pressure Cap. See Drive Motor/Generator Control Module (DMCM)
Coolant Surge Tank Pressure Cap on page 6‑8.
J. See “Coolant Surge Tank Pressure Cap” in the
owner manual.
K. Engine Oil Fill Cap. See “Engine Oil”in the owner
manual.Automatic Transmission Fluid
When to Check and Change Automatic
Transmission Fluid
It is usually not necessary to check the transmission
fluid level. The only reason for fluid loss is a
transmission leak or overheating the transmission.
If you suspect a small leak, then use the following
checking procedures to check the fluid level. However,
if there is a large leak, then it may be necessary to have
the vehicle towed to a dealer/retailer service department
and have it repaired before driving the vehicle further.
Notice: Use of the incorrect automatic transmission
fluid may damage the vehicle, and the damages may
not be covered by the vehicle's warranty. Always
use the automatic transmission fluid listed in
Recommended Fluids and Lubricants on page 7‑2.
Change the fluid and filter at the intervals listed in the
Maintenance Schedule. See Scheduled Maintenance in
the owner manual. Be sure to use the transmission fluid
listed in Recommended Fluids and Lubricants
on
page 7‑2.
6-5
Page 62 of 120
How to Check Automatic Transmission
Fluid
Notice:Too much or too little fluid can damage your
transmission. Too much can mean that some of the
fluid could come out and fall on hot engine parts or
exhaust system parts, starting a fire. Too little fluid
could cause the transmission to overheat. Be sure
to get an accurate reading if you check your
transmission fluid.
Before checking the fluid level, prepare the vehicle as
follows:
1. Start the engine and park the vehicle on a level surface. Keep the engine running.
2. Apply the parking brake and place the shift lever in P (Park).
3. With your foot on the brake pedal, move the shift lever through each gear range, pausing for about
three seconds in each range. Then, move the shift
lever back to P (Park).
4. Allow the engine to idle (500 –800 RPM) for at
least one minute. Slowly release the brake pedal.
5. Keep the engine running and press the Trip/Fuel button or trip odometer reset stem until TRANS
TEMP (Transmission Temperature) displays on the
Driver Information Center (DIC). 6. Using the TRANS TEMP reading, determine and
perform the appropriate check procedure. If the
TRANS TEMP reading is not within the required
temperature ranges, allow the vehicle to cool,
or operate the vehicle until the appropriate
transmission fluid temperature is reached.
Cold Check Procedure
Use this procedure only as a reference to determine if
the transmission has enough fluid to be operated safely
until a hot check procedure can be made. The hot
check procedure is the most accurate method to check
the fluid level. Perform the hot check procedure at the
first opportunity. Use this cold check procedure to check
fluid level when the transmission temperature is
between 24°C and 34°C (75°F and 93°F).
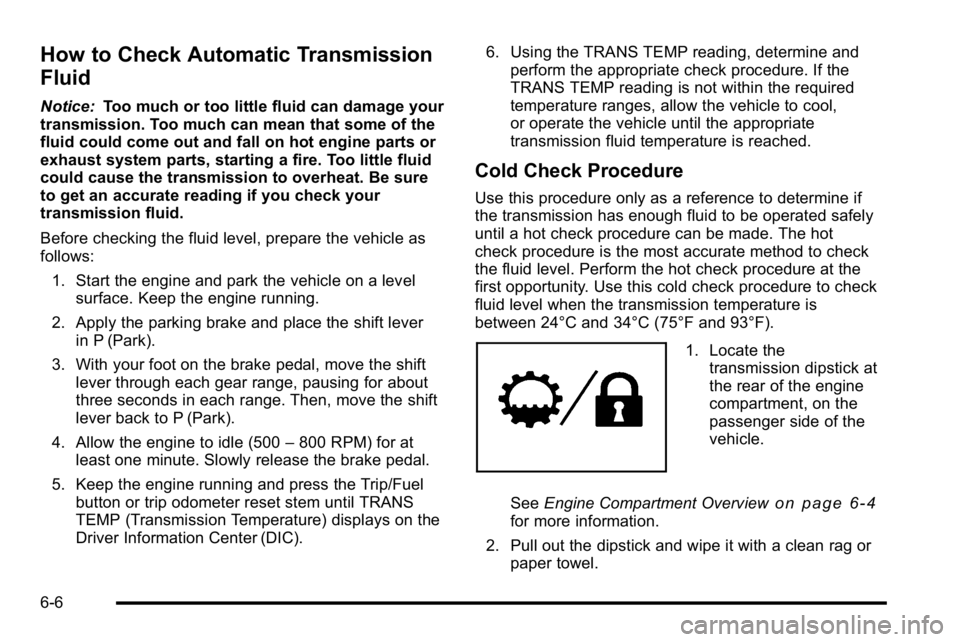
1. Locate the
transmission dipstick at
the rear of the engine
compartment, on the
passenger side of the
vehicle.
See Engine Compartment Overview
on page 6‑4for more information.
2. Pull out the dipstick and wipe it with a clean rag or paper towel.
6-6
Page 69 of 120
Power Steering Fluid
The vehicle has electric power steering and does not
use power steering fluid.
Brakes
Brake Fluid
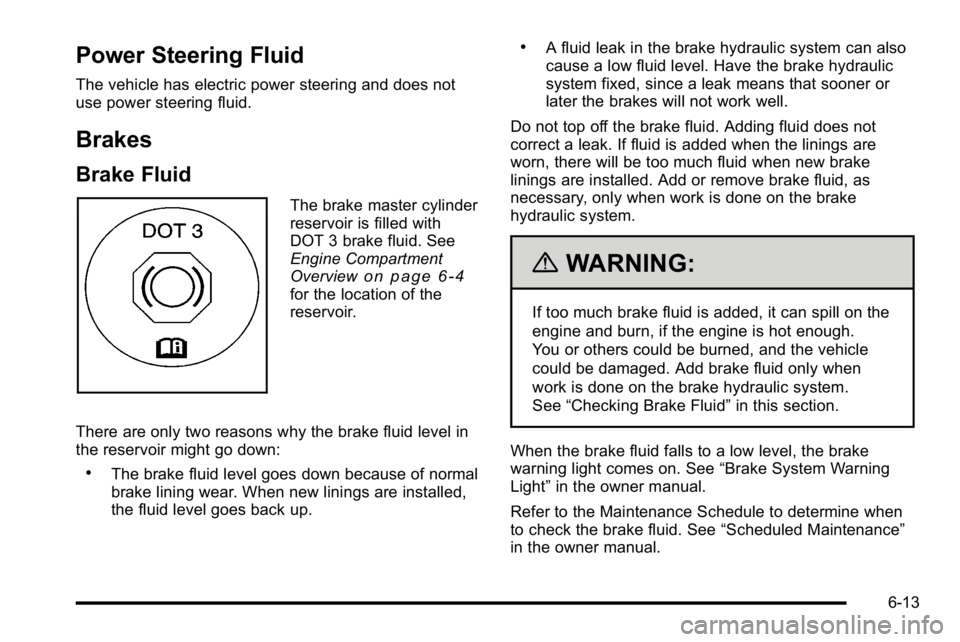
The brake master cylinder
reservoir is filled with
DOT 3 brake fluid. See
Engine Compartment
Overview
on page 6‑4for the location of the
reservoir.
There are only two reasons why the brake fluid level in
the reservoir might go down:
.The brake fluid level goes down because of normal
brake lining wear. When new linings are installed,
the fluid level goes back up.
.A fluid leak in the brake hydraulic system can also
cause a low fluid level. Have the brake hydraulic
system fixed, since a leak means that sooner or
later the brakes will not work well.
Do not top off the brake fluid. Adding fluid does not
correct a leak. If fluid is added when the linings are
worn, there will be too much fluid when new brake
linings are installed. Add or remove brake fluid, as
necessary, only when work is done on the brake
hydraulic system.
{WARNING:
If too much brake fluid is added, it can spill on the
engine and burn, if the engine is hot enough.
You or others could be burned, and the vehicle
could be damaged. Add brake fluid only when
work is done on the brake hydraulic system.
See “Checking Brake Fluid” in this section.
When the brake fluid falls to a low level, the brake
warning light comes on. See “Brake System Warning
Light” in the owner manual.
Refer to the Maintenance Schedule to determine when
to check the brake fluid. See “Scheduled Maintenance”
in the owner manual.
6-13
Page 70 of 120
Checking Brake Fluid
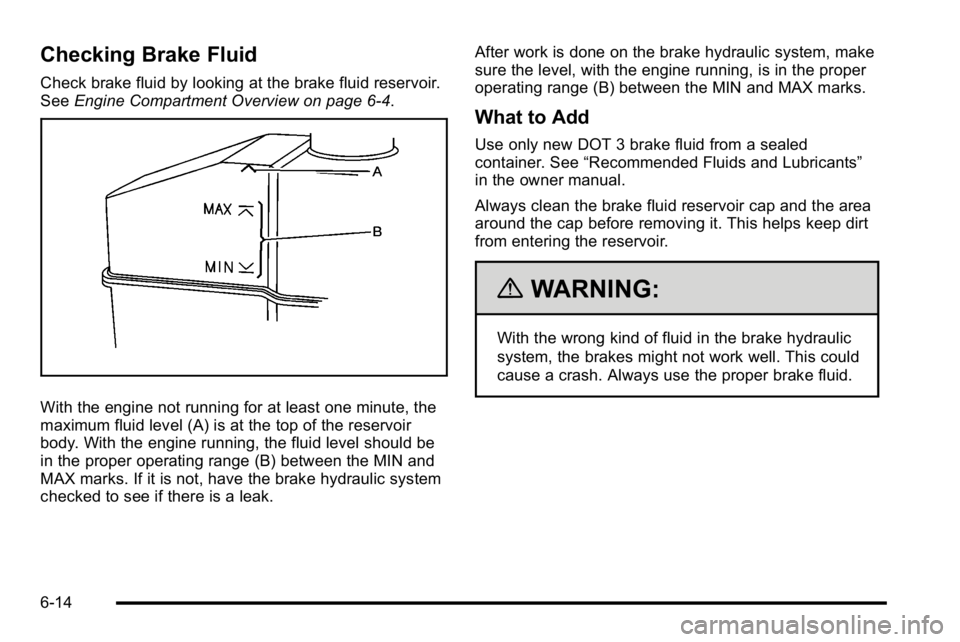
Check brake fluid by looking at the brake fluid reservoir.
SeeEngine Compartment Overview on page 6‑4.
With the engine not running for at least one minute, the
maximum fluid level (A) is at the top of the reservoir
body. With the engine running, the fluid level should be
in the proper operating range (B) between the MIN and
MAX marks. If it is not, have the brake hydraulic system
checked to see if there is a leak. After work is done on the brake hydraulic system, make
sure the level, with the engine running, is in the proper
operating range (B) between the MIN and MAX marks.
What to Add
Use only new DOT 3 brake fluid from a sealed
container. See
“Recommended Fluids and Lubricants”
in the owner manual.
Always clean the brake fluid reservoir cap and the area
around the cap before removing it. This helps keep dirt
from entering the reservoir.
{WARNING:
With the wrong kind of fluid in the brake hydraulic
system, the brakes might not work well. This could
cause a crash. Always use the proper brake fluid.
6-14
Page 71 of 120
Notice:
.Using the wrong fluid can badly damage
brake hydraulic system parts. For example,
just a few drops of mineral-based oil, such
as engine oil, in the brake hydraulic system
can damage brake hydraulic system parts
so badly that they will have to be replaced.
Do not let someone put in the wrong kind
of fluid.
.If brake fluid is spilled on the vehicle's
painted surfaces, the paint finish can be
damaged. Be careful not to spill brake fluid
on the vehicle. If you do, wash it off
immediately. See“Washing Your Vehicle”
in the owner manual.
Brake Wear
This vehicle has disc brakes. Disc brake pads have
built-in wear indicators that make a high-pitched
warning sound when the brake pads are worn and new
pads are needed. The sound can come and go or be
heard all the time the vehicle is moving, except when
applying the brake pedal firmly.
{WARNING:
The brake wear warning sound means that soon
the brakes will not work well. That could lead to
an accident. When the brake wear warning sound
is heard, have the vehicle serviced.
Notice: Continuing to drive with worn-out brake
pads could result in costly brake repair.
Some driving conditions or climates can cause a brake
squeal when the brakes are first applied or lightly
applied. This does not mean something is wrong with
the brakes.
6-15
Page 117 of 120

A
Alternating CurrentPower Outlet . . . . . . . . . . . . . . . . . . . . . . . . . . . . . . . . . . . . . . 3-2
Antilock Brake System (ABS) Warning Light . . . . . . . . . . . . . . . . . . . . . . . . . . . . . . . . . . . . . . 4-7
Audio System(s) Navigation/Radio System . . . . . . . . . . . . . . . . . . . . . . . . . 4-14
Automatic Transmission, Fluid . . . . . . . . . . . . . . . . . . . . . . .6-5
B
Battery . . . . . . . . . . . . . . . . . . . . . . . . . . . . . . . . . . . . . . . . . . . . 6-16
Belt Routing, Engine . . . . . . . . . . . . . . . . . . . . . . . . . . . . . . . . .7-2
Brakes . . . . . . . . . . . . . . . . . . . . . . . . . . . . . . . . . . . . . . . . . . . . . 6-13 Regenerative Braking . . . . . . . . . . . . . . . . . . . . . . . . . . . . . 3-18
System Warning Light . . . . . . . . . . . . . . . . . . . . . . . . . . . . . 4-6
Bulb Replacement Taillamps, Turn Signal, Stoplamps andBack-up Lamps . . . . . . . . . . . . . . . . . . . . . . . . . . . . . . . . . 6-24
C
Canadian Owners . . . . . . . . . . . . . . . . . . . . . . . . . . . . . . . . . . . . . ii
Capacities and Specifications . . . . . . . . . . . . . . . . . . . . . . 6-57
Chains, Tire . . . . . . . . . . . . . . . . . . . . . . . . . . . . . . . . . . . . . . . 6-34
Charging System Light . . . . . . . . . . . . . . . . . . . . . . . . . . . . . .4-4
Climate Controls . . . . . . . . . . . . . . . . . . . . . . . . . . . . . . . . . . . . .4-2
Compressor Kit, Tire Sealant . . . . . . . . . . . . . . . . 6-35, 6-45
Coolant
Engine Temperature Gage . . . . . . . . . . . . . . . . . . . . . . . . . 4-8
Coolant Surge Tank Pressure Cap, (DMCM) . . . . . . . . .6-8
Cooling System, (DMCM) . . . . . . . . . . . . . . . . . . . . . . . . . . . .6-9
D
Drive Motor/Generator Control Module (DMCM) Coolant Surge Tank Pressure Cap . . . . . . . . . . . . . . . . .6-8
Drive Motor/Generator Control Module (DMCM) Cooling System . . . . . . . . . . . . . . . . . . . . . . . . . . . . . . . . . . . .6-9
Driver Information Center (DIC) . . . . . . . . . . . . . . . . . . . . 4-12
Warnings and Messages . . . . . . . . . . . . . . . . . . . . . . . . . 4-12
i - 1
Page 118 of 120

E
EngineCompartment Overview . . . . . . . . . . . . . . . . . . . . . . . . . . . . 6-4
Coolant Temperature Gage . . . . . . . . . . . . . . . . . . . . . . . . 4-8
Drive Belt Routing . . . . . . . . . . . . . . . . . . . . . . . . . . . . . . . . . 7-2
Engine Coolant Heater . . . . . . . . . . . . . . . . . . . . . . . . . . . . 3-17
F
Flat Tire . . . . . . . . . . . . . . . . . . . . . . . . . . . . . . . . . . . . . . . . . . . 6-34
Fluid Power Steering . . . . . . . . . . . . . . . . . . . . . . . . . . . . . . . . . . . 6-13
Four-Wheel Drive . . . . . . . . . . . . . . . . . . . . . . . . . . . . . . . . . . 3-10
Fuel Gage . . . . . . . . . . . . . . . . . . . . . . . . . . . . . . . . . . . . . . . . . . . . . 4-11
Fuel Economy Gage . . . . . . . . . . . . . . . . . . . . . . . . . . . . . . . . .4-5
G
Gages Engine Coolant Temperature . . . . . . . . . . . . . . . . . . . . . . 4-8
Fuel . . . . . . . . . . . . . . . . . . . . . . . . . . . . . . . . . . . . . . . . . . . . . . 4-11
Fuel Economy . . . . . . . . . . . . . . . . . . . . . . . . . . . . . . . . . . . . . 4-5
Oil Pressure . . . . . . . . . . . . . . . . . . . . . . . . . . . . . . . . . . . . . . . 4-8
Tachometer . . . . . . . . . . . . . . . . . . . . . . . . . . . . . . . . . . . . . . . . 4-4
H
High Voltage Devices and Wiring . . . . . . . . . . . . . . . . . . . .6-3
I
Inflation - Tire Pressure . . . . . . . . . . . . . . . . . . . . . . . . . . . . 6-28
Instrument Panel Cluster . . . . . . . . . . . . . . . . . . . . . . . . . . . .4-3
Introduction . . . . . . . . . . . . . . . . . . . . . . . . . . . . . . . . . . . . . . . . . . . iii
J
Jump Starting . . . . . . . . . . . . . . . . . . . . . . . . . . . . . . . . . . . . . . 6-18
L
LightsAntilock Brake System (ABS) Warning . . . . . . . . . . . . . 4-7
Brake System Warning . . . . . . . . . . . . . . . . . . . . . . . . . . . . 4-6
Charging System . . . . . . . . . . . . . . . . . . . . . . . . . . . . . . . . . . 4-4
Oil Pressure . . . . . . . . . . . . . . . . . . . . . . . . . . . . . . . . . . . . . . 4-10
StabiliTrak
®Indicator . . . . . . . . . . . . . . . . . . . . . . . . . . . . . . 4-7
Lumbar Manual Controls . . . . . . . . . . . . . . . . . . . . . . . . . . . . . . . . . . . 2-2
i - 2