maintenance schedule GMC YUKON HYBRID 2010 Owners Manual
[x] Cancel search | Manufacturer: GMC, Model Year: 2010, Model line: YUKON HYBRID, Model: GMC YUKON HYBRID 2010Pages: 120, PDF Size: 1.03 MB
Page 1 of 120
2010 Chevrolet Tahoe and GMC Yukon/Yukon Denali Two-mode Hybrid M
In Brief. . . . . . . . . . . . . . . . . . . . . . . . . . . . . . . . . . . . . . . . . . . . 1-1
Initial Drive Information . . . . . . . . . . . . . . . . . . . . . . . . . . . 1-2
Hybrid Features . . . . . . . . . . . . . . . . . . . . . . . . . . . . . . . . . . 1-3
Performance and Maintenance . . . . . . . . . . . . . . . . . . . 1-6
Seats and Restraint System . . . . . . . . . . . . . . . . . . . . . . 2-1
Front Seats . . . . . . . . . . . . . . . . . . . . . . . . . . . . . . . . . . . . . . . 2-2
Restraint System Check . . . . . . . . . . . . . . . . . . . . . . . . . . 2-3
Features and Controls . . . . . . . . . . . . . . . . . . . . . . . . . . . . 3-1
Storage Areas . . . . . . . . . . . . . . . . . . . . . . . . . . . . . . . . . . . . 3-2
Starting and Operating Your Vehicle . . . . . . . . . . . . . . 3-3
Instrument Panel . . . . . . . . . . . . . . . . . . . . . . . . . . . . . . . . . 4-1
Climate Controls . . . . . . . . . . . . . . . . . . . . . . . . . . . . . . . . . . 4-2
Warning Lights, Gages, and Indicators . . . . . . . . . . . 4-3
Driver Information Center (DIC) . . . . . . . . . . . . . . . . . 4-12
Audio System(s) . . . . . . . . . . . . . . . . . . . . . . . . . . . . . . . . 4-14 Driving Your Vehicle
. . . . . . . . . . . . . . . . . . . . . . . . . . . . . . 5-1
Your Driving, the Road, and the Vehicle . . . . . . . . . . 5-2
Towing . . . . . . . . . . . . . . . . . . . . . . . . . . . . . . . . . . . . . . . . . . . 5-2
Service and Appearance Care . . . . . . . . . . . . . . . . . . . 6-1
Service . . . . . . . . . . . . . . . . . . . . . . . . . . . . . . . . . . . . . . . . . . . 6-2
Checking Things Under the Hood . . . . . . . . . . . . . . . . 6-3
Bulb Replacement . . . . . . . . . . . . . . . . . . . . . . . . . . . . . . 6-24
Electrical System . . . . . . . . . . . . . . . . . . . . . . . . . . . . . . . . 6-25
Tires . . . . . . . . . . . . . . . . . . . . . . . . . . . . . . . . . . . . . . . . . . . . 6-28
Appearance Care . . . . . . . . . . . . . . . . . . . . . . . . . . . . . . . 6-56
Capacities and Specifications . . . . . . . . . . . . . . . . . . . 6-57
Maintenance Schedule . . . . . . . . . . . . . . . . . . . . . . . . . . . 7-1
Maintenance Schedule . . . . . . . . . . . . . . . . . . . . . . . . . . . 7-2
Index . . . . . . . . . . . . . . . . . . . . . . . . . . . . . . . . . . . . i-1
Page 41 of 120
A reading in the low pressure zone may be caused by
a dangerously low oil level or some other problem
causing low oil pressure. Check the oil as soon as
possible.
{WARNING:
Do not keep driving if the oil pressure is low.
The engine can become so hot that it catches fire.
Someone could be burned. Check the oil as soon
as possible and have the vehicle serviced.
Notice: Lack of proper engine oil maintenance can
damage the engine. The repairs would not be
covered by the vehicle warranty. Always follow the
maintenance schedule in this manual for changing
engine oil.
AUTO STOP
When the engine goes into Automatic Engine Stop,
the oil pressure gage drops to zero when the
tachometer is at the AUTO STOP position. This is
normal and oil pressure returns to the normal operating
range once the engine starts.
See Starting the Vehicle
on page 3‑3for more
information.
AUTO STOP displays in the Driver Information
Center (DIC) when the vehicle speed is zero.
See DIC Warnings and Messages
on page 4‑12for more information.
4-9
Page 42 of 120
Oil Pressure Light
{WARNING:
Do not keep driving if the oil pressure is low.
The engine can become so hot that it catches fire.
Someone could be burned. Check the oil as soon
as possible and have the vehicle serviced.
Notice: Lack of proper engine oil maintenance can
damage the engine. The repairs would not be
covered by the vehicle warranty. Always follow the
maintenance schedule in this manual for changing
engine oil.
This light comes on
briefly as a check it
works, when the ignition
is in ON/RUN. If it does
not, have the vehicle
serviced.
If the light comes on and stays on, it means that oil is
not flowing through the engine properly. The vehicle
could be low on oil and might have some other system
problem.
During an AUTO STOP there is zero oil pressure, but
this light will not come on.
4-10
Page 61 of 120
A. See“Engine Air Cleaner/Filter” in the owner
manual.
B. Drive Motor/Generator Control Module (DMCM). See Drive Motor/Generator Control Module
(DMCM) Cooling System on page 6‑9.
C. Engine Oil Dipstick. See “Engine Oil”in the owner
manual.
D. Automatic Transmission Fluid Dipstick. See Automatic Transmission Fluid on page 6‑5.
E. Brake Fluid Reservoir. See Brakes on page 6‑13.
F. See “Underhood Fuse Block” in the owner manual.
G. See “Windshield Washer Fluid” in the owner
manual.
H. Hybrid Auxiliary Fuse Block. See Underhood Fuse
Block on page 6‑26.
I. DMCM Coolant Surge Tank Pressure Cap. See Drive Motor/Generator Control Module (DMCM)
Coolant Surge Tank Pressure Cap on page 6‑8.
J. See “Coolant Surge Tank Pressure Cap” in the
owner manual.
K. Engine Oil Fill Cap. See “Engine Oil”in the owner
manual.Automatic Transmission Fluid
When to Check and Change Automatic
Transmission Fluid
It is usually not necessary to check the transmission
fluid level. The only reason for fluid loss is a
transmission leak or overheating the transmission.
If you suspect a small leak, then use the following
checking procedures to check the fluid level. However,
if there is a large leak, then it may be necessary to have
the vehicle towed to a dealer/retailer service department
and have it repaired before driving the vehicle further.
Notice: Use of the incorrect automatic transmission
fluid may damage the vehicle, and the damages may
not be covered by the vehicle's warranty. Always
use the automatic transmission fluid listed in
Recommended Fluids and Lubricants on page 7‑2.
Change the fluid and filter at the intervals listed in the
Maintenance Schedule. See Scheduled Maintenance in
the owner manual. Be sure to use the transmission fluid
listed in Recommended Fluids and Lubricants
on
page 7‑2.
6-5
Page 69 of 120
Power Steering Fluid
The vehicle has electric power steering and does not
use power steering fluid.
Brakes
Brake Fluid
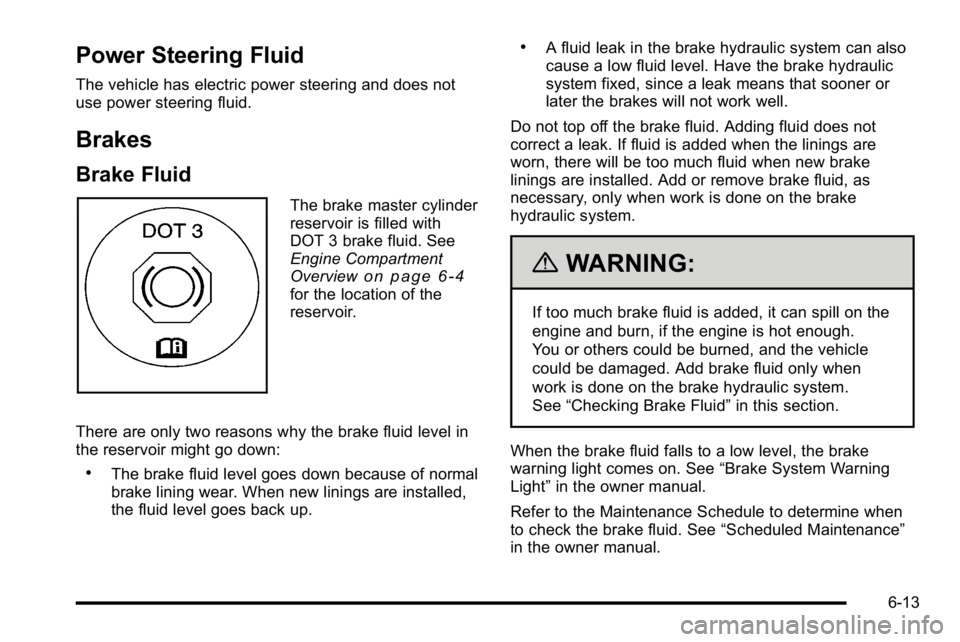
The brake master cylinder
reservoir is filled with
DOT 3 brake fluid. See
Engine Compartment
Overview
on page 6‑4for the location of the
reservoir.
There are only two reasons why the brake fluid level in
the reservoir might go down:
.The brake fluid level goes down because of normal
brake lining wear. When new linings are installed,
the fluid level goes back up.
.A fluid leak in the brake hydraulic system can also
cause a low fluid level. Have the brake hydraulic
system fixed, since a leak means that sooner or
later the brakes will not work well.
Do not top off the brake fluid. Adding fluid does not
correct a leak. If fluid is added when the linings are
worn, there will be too much fluid when new brake
linings are installed. Add or remove brake fluid, as
necessary, only when work is done on the brake
hydraulic system.
{WARNING:
If too much brake fluid is added, it can spill on the
engine and burn, if the engine is hot enough.
You or others could be burned, and the vehicle
could be damaged. Add brake fluid only when
work is done on the brake hydraulic system.
See “Checking Brake Fluid” in this section.
When the brake fluid falls to a low level, the brake
warning light comes on. See “Brake System Warning
Light” in the owner manual.
Refer to the Maintenance Schedule to determine when
to check the brake fluid. See “Scheduled Maintenance”
in the owner manual.
6-13
Page 89 of 120
8. Proceed to the driver side rear tire, and repeat theprocedure in Step 5. The horn sounds two times to
indicate the sensor identification code has been
matched to the driver side rear tire, and the TPMS
sensor matching process is no longer active.
The TIRE LEARNING ACTIVE message on the
DIC display screen goes off.
9. Turn the ignition switch to LOCK/OFF.
10. Set all four tires to the recommended air pressure level as indicated on the Tire and Loading
Information label.
11. Put the valve caps back on the valve stems.
Tire Inspection and Rotation
Tires should be rotated every 5,000 to 8,000 miles
(8 000 to 13 000 km).
Any time you notice unusual wear, rotate your tires as
soon as possible and check wheel alignment. Also
check for damaged tires or wheels. See “When It Is
Time for New Tires” and“Wheel Replacement” in the
Index of the owner manual for more information.
The purpose of regular rotation is to achieve more
uniform wear for all tires on the vehicle. The first
rotation is the most important. See “Scheduled
Maintenance” in the Index of the owner manual.
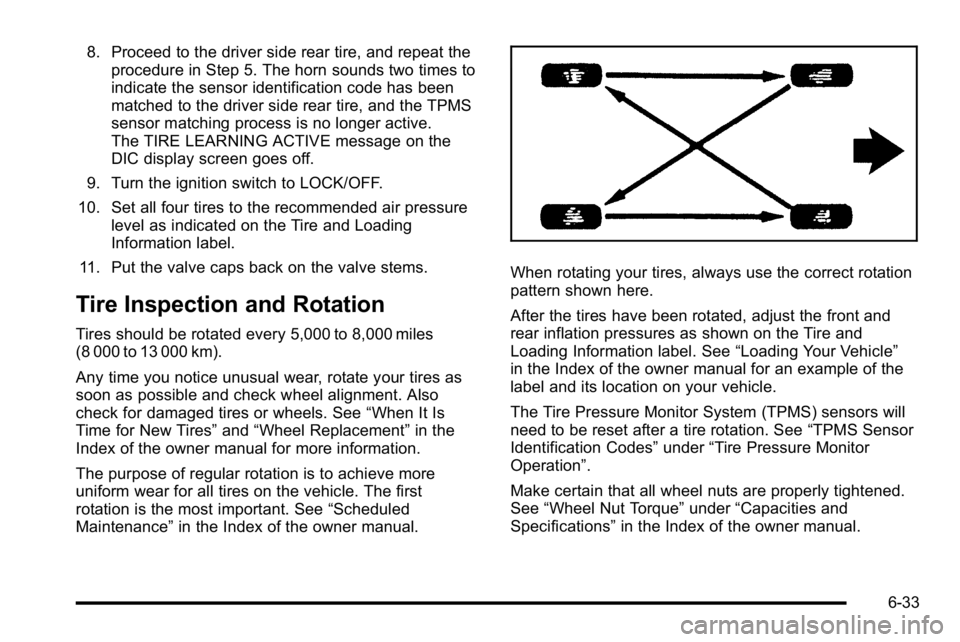
When rotating your tires, always use the correct rotation
pattern shown here.
After the tires have been rotated, adjust the front and
rear inflation pressures as shown on the Tire and
Loading Information label. See “Loading Your Vehicle”
in the Index of the owner manual for an example of the
label and its location on your vehicle.
The Tire Pressure Monitor System (TPMS) sensors will
need to be reset after a tire rotation. See “TPMS Sensor
Identification Codes” under“Tire Pressure Monitor
Operation”.
Make certain that all wheel nuts are properly tightened.
See “Wheel Nut Torque” under“Capacities and
Specifications” in the Index of the owner manual.
6-33
Page 115 of 120
Section 7 Maintenance Schedule
Maintenance Schedule. . . . . . . . . . . . . . . . . . . . . . . . . . . . 7-2
At Least Once a Year . . . . . . . . . . . . . . . . . . . . . . . . . . . 7-2
Recommended Fluids and Lubricants . . . . . . . . . . . 7-2
Engine Drive Belt Routing . . . . . . . . . . . . . . . . . . . . . . . 7-2
7-1
Page 116 of 120
Maintenance Schedule
At Least Once a Year
Tire Sealant and Compressor Kit
Check the sealant expiration date printed on the
instruction label of the Tire Sealant and Compressor Kit
at least once a year. See your dealer/retailer for a
replacement canister.
Recommended Fluids and
Lubricants
Fluids identified below are specific to the hybrid vehicle
and can be obtained from your dealer/retailer. See the
owner manual for the other fluids and lubricants
recommended for the vehicle.Usage Fluid/Lubricant
Drive Motor/Generator
Control Module
(DMCM) Cooling
System Always use the pre-mixed
50/50 mixture of de‐ionized water
and DEX-COOL®(silicate-free)
coolant available at your dealer/
retailer. See Drive Motor/Generator
Control Module (DMCM) Cooling
System on page 6‑9.
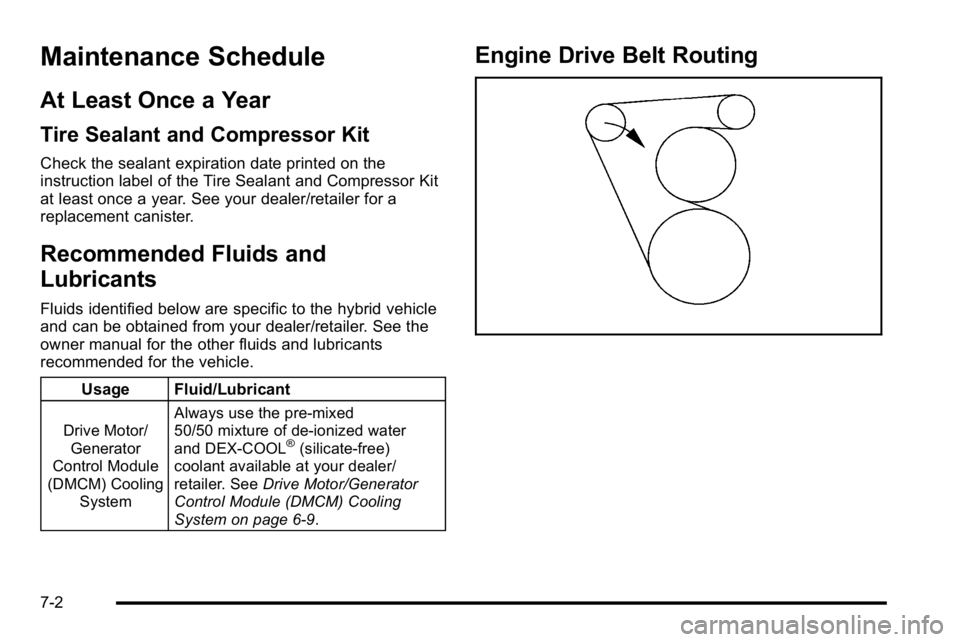
Engine Drive Belt Routing
7-2
Page 119 of 120

M
Maintenance ScheduleAt Least Once a Year . . . . . . . . . . . . . . . . . . . . . . . . . . . . . . 7-2
Recommended Fluids and Lubricants . . . . . . . . . . . . . 7-2
Manual Lumbar Controls . . . . . . . . . . . . . . . . . . . . . . . . . . . . .2-2
Manual Reclining Seatbacks . . . . . . . . . . . . . . . . . . . . . . . . .2-3
Manual, How to Use . . . . . . . . . . . . . . . . . . . . . . . . . . . . . . . . . . iii
N
Navigation/Radio System . . . . . . . . . . . . . . . . . . . . . . . . . . 4-14
O
Oil Pressure Light . . . . . . . . . . . . . . . . . . . . . . . . . . . . . . . . . . . . 4-10
Oil Pressure Gage . . . . . . . . . . . . . . . . . . . . . . . . . . . . . . . . . . .4-8
Owners, Canadian . . . . . . . . . . . . . . . . . . . . . . . . . . . . . . . . . . . . . ii
P
Power
Seat . . . . . . . . . . . . . . . . . . . . . . . . . . . . . . . . . . . . . . . . . . . . . . . 2-2
Steering Fluid . . . . . . . . . . . . . . . . . . . . . . . . . . . . . . . . . . . . . 6-13
Power Outlet Alternating Current . . . . . . . . . . . . . . . . . . . .3-2
R
Radios
Navigation/Radio System . . . . . . . . . . . . . . . . . . . . . . . . . 4-14
Reclining Seatbacks, Manual . . . . . . . . . . . . . . . . . . . . . . . .2-3
Recommended Fluids and Lubricants . . . . . . . . . . . . . . .7-2
Regenerative Braking . . . . . . . . . . . . . . . . . . . . . . . . . . . . . . 3-18
Restraint System Check Replacing Restraint System Parts After a Crash . . . 2-3
Running the Vehicle While Parked . . . . . . . . . . . . . . . . . 3-18
S
Sealant Kit, Tire . . . . . . . . . . . . . . . . . . . . . . . . . . . . . 6-35, 6-45
Seats Manual Lumbar . . . . . . . . . . . . . . . . . . . . . . . . . . . . . . . . . . . . 2-2
Manual Reclining Seatbacks . . . . . . . . . . . . . . . . . . . . . . . 2-3
Power Seats . . . . . . . . . . . . . . . . . . . . . . . . . . . . . . . . . . . . . . . 2-2
Service Doing Your Own Work . . . . . . . . . . . . . . . . . . . . . . . . . . . . . 6-2
Specifications and Capacities . . . . . . . . . . . . . . . . . . . . . . 6-57
StabiliTrak
®Indicator Light . . . . . . . . . . . . . . . . . . . . . . . . . .4-7
Starting Your Vehicle . . . . . . . . . . . . . . . . . . . . . . . . . . . . . . . .3-3
Steering Fluid, Power . . . . . . . . . . . . . . . . . . . . . . . . . . . . . . . . . . . . . . 6-13
Storing the Tire Sealant and Compressor Kit . . . . . . 6-55
i - 3