radio GMC YUKON XL 2005 Owners Manual
[x] Cancel search | Manufacturer: GMC, Model Year: 2005, Model line: YUKON XL, Model: GMC YUKON XL 2005Pages: 468, PDF Size: 2.67 MB
Page 97 of 468
Remote Keyless Entry System
Your keyless entry system operates on a radio
frequency subject to Federal Communications
Commission (FCC) Rules and with Industry Canada.
This device complies with Part 15 of the FCC Rules.
Operation is subject to the following two conditions:
1. This device may not cause interference, and
2. This device must accept any interference received,
including interference that may cause undesired
operation of the device.
This device complies with RSS-210 of Industry Canada.
Operation is subject to the following two conditions:
1. This device may not cause interference, and
2. This device must accept any interference received,
including interference that may cause undesired
operation of the device.
Changes or modi�cations to this system by other than
an authorized service facility could void authorization to
use this equipment.At times you may notice a decrease in range. This is
normal for any remote keyless entry system. If the
transmitter does not work or if you have to stand closer
to your vehicle for the transmitter to work, try this:
Check the distance. You may be too far from your
vehicle. You may need to stand closer during
rainy or snowy weather.
Check the location. Other vehicles or objects may
be blocking the signal. Take a few steps to the
left or right, hold the transmitter higher, and
try again.
Check to determine if battery replacement is
necessary. See “Battery Replacement” under
Remote Keyless Entry System Operation on
page 2-6.
If you are still having trouble, see your dealer or a
quali�ed technician for service.
2-5
Page 112 of 468
Ignition Positions
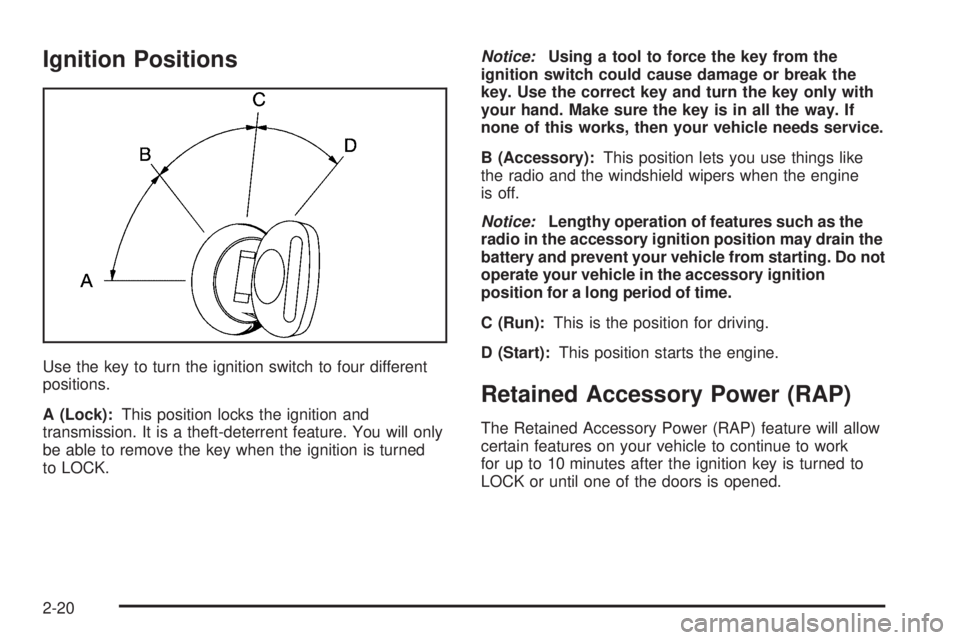
Use the key to turn the ignition switch to four different
positions.
A (Lock):This position locks the ignition and
transmission. It is a theft-deterrent feature. You will only
be able to remove the key when the ignition is turned
to LOCK.Notice:Using a tool to force the key from the
ignition switch could cause damage or break the
key. Use the correct key and turn the key only with
your hand. Make sure the key is in all the way. If
none of this works, then your vehicle needs service.
B (Accessory):This position lets you use things like
the radio and the windshield wipers when the engine
is off.
Notice:Lengthy operation of features such as the
radio in the accessory ignition position may drain the
battery and prevent your vehicle from starting. Do not
operate your vehicle in the accessory ignition
position for a long period of time.
C (Run):This is the position for driving.
D (Start):This position starts the engine.
Retained Accessory Power (RAP)
The Retained Accessory Power (RAP) feature will allow
certain features on your vehicle to continue to work
for up to 10 minutes after the ignition key is turned to
LOCK or until one of the doors is opened.
2-20
Page 132 of 468
Keep the original transmitter for use in other vehicles as
well as for future HomeLink®programming. It is also
recommended that upon the sale of the vehicle,
the programmed HomeLink
®buttons should be erased
for security purposes. Refer to “Erasing HomeLink®
Buttons” or, for assistance, contact HomeLink®on the
Internet at: www.homelink.com or by calling
1-800-355-3515.
Be sure that people and objects are clear of the garage
door or gate operator you are programming. When
programming a garage door, it is advised to park outside
of the garage.
It is recommended that a new battery be installed in
your hand-held transmitter for quicker and more
accurate transmission of the radio frequency.
Programming HomeLink®
Your vehicle’s engine should be turned off while
programming the transmitter. Follow these steps to
program up to three channels:
1. Press and hold down the two outside buttons,
releasing only when the indicator light begins to
�ash, after 20 seconds. Do not hold down the
buttons for longer than 30 seconds and do not
repeat this step to program a second and/or third
transmitter to the remaining two HomeLink
®buttons.2. Position the end of your hand-held transmitter
about 1 to 3 inches (3 to 8 cm) away from the
HomeLink
®buttons while keeping the indicator light
in view.
3. Simultaneously press and hold both the desired
button on HomeLink
®and the hand-held transmitter
button. Do not release the buttons until Step 4
has been completed.
Some entry gates and garage door openers may
require you to substitute Step 3 with the procedure
noted in “Gate Operator and Canadian
Programming” later in this section.
4. The indicator light will �ash slowly at �rst and then
rapidly after HomeLink
®successfully receives the
frequency signal from the hand-held transmitter.
Release both buttons.
5. Press and hold the newly-trained HomeLink
®button
and observe the indicator light.
If the indicator light stays on constantly, programming
is complete and your device should activate when the
HomeLink
®button is pressed and released.
To program the remaining two HomeLink®buttons,
begin with Step 2 under “Programming HomeLink®.”
Do not repeat Step 1 as this will erase all of the
programmed channels.
2-40
Page 133 of 468
If the indicator light blinks rapidly for two seconds
and then turns to a constant light, continue with
Steps 6 through 8 following to complete the
programming of a rolling-code equipped device
(most commonly, a garage door opener).
6. Locate in the garage, the garage door opener
receiver (motor-head unit). Locate the “Learn”
or “Smart” button. This can usually be found where
the hanging antenna wire is attached to the
motor-head unit.
7. Firmly press and release the “Learn” or “Smart”
button. The name and color of the button may
vary by manufacturer.
You will have 30 seconds to start Step 8.
8. Return to the vehicle. Firmly press and hold the
programmed HomeLink
®button for two seconds,
then release. Repeat the press/hold/release
sequence a second time, and depending on the
brand of the garage door opener (or other rolling
code device), repeat this sequence a third time
to complete the programming.
HomeLink
®should now activate your rolling-code
equipped device.
To program the remaining two HomeLink
®buttons,
begin with Step 2 of “Programming HomeLink®.” You do
not want to repeat Step 1, as this will erase all
previous programming.
Gate Operator and Canadian
Programming
Canadian radio-frequency laws require transmitter
signals to “time out” or quit after several seconds of
transmission. This may not be long enough for
HomeLink
®to pick up the signal during programming.
Similarly, some U.S. gate operators are manufactured to
“time out” in the same manner.
If you live in Canada, or you are having difficulty
programming a gate operator by using the “Programming
HomeLink
®” procedures (regardless of where you live),
replace Step 3 under “Programming HomeLink®” with
the following:
Continue to press and hold the HomeLink
®button while
you press and release every two seconds (cycle)
your hand-held transmitter until the frequency signal has
been successfully accepted by HomeLink
®. The
indicator light will �ash slowly at �rst and then rapidly.
Proceed with Step 4 under “Programming HomeLink
®”
to complete.
2-41
Page 144 of 468
Fuel Gage...................................................3-45
Low Fuel Warning Light.................................3-45
Driver Information Center (DIC).......................3-46
DIC Operation and Displays...........................3-47
DIC Warnings and Messages.........................3-50
DIC Vehicle Customization.............................3-61
Audio System(s).............................................3-67
Setting the Time...........................................3-68
Radio with Cassette and CD..........................3-68
Rear Seat Entertainment System....................3-83
Navigation/Radio System...............................3-94Rear Seat Audio (RSA).................................3-94
CD Changer................................................3-96
Theft-Deterrent Feature..................................3-99
Audio Steering Wheel Controls.......................3-99
Radio Reception.........................................3-100
Care of Your Cassette Tape Player...............3-100
Care of Your CDs and DVDs........................3-101
Care of Your CD Player...............................3-101
Care of Your CD and DVD Player.................3-102
Fixed Mast Antenna....................................3-102
XM™ Satellite Radio Antenna System............3-102
Chime Level Adjustment...............................3-102
Section 3 Instrument Panel
3-2
Page 147 of 468
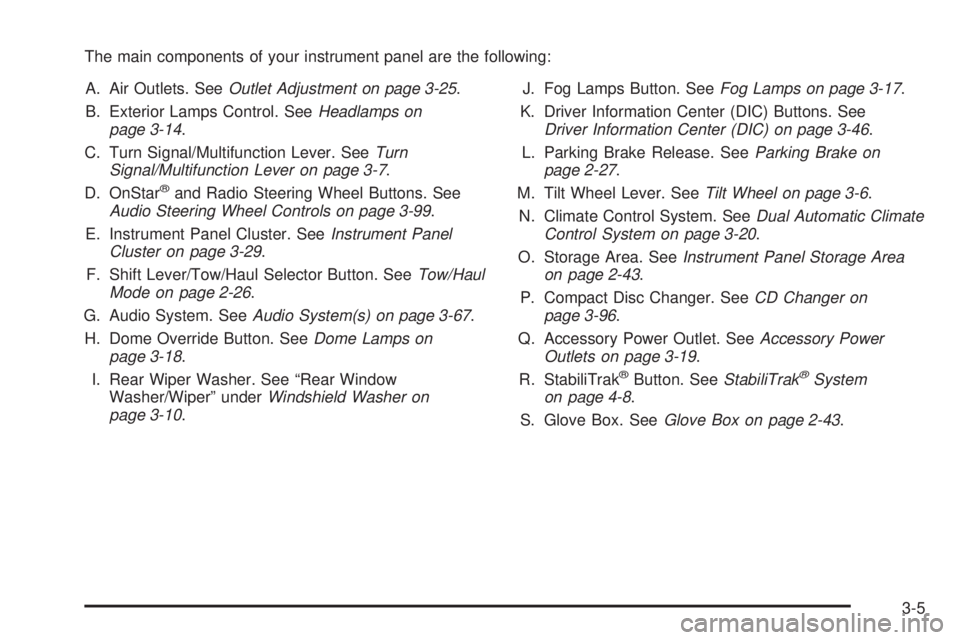
The main components of your instrument panel are the following:
A. Air Outlets. SeeOutlet Adjustment on page 3-25.
B. Exterior Lamps Control. SeeHeadlamps on
page 3-14.
C. Turn Signal/Multifunction Lever. SeeTurn
Signal/Multifunction Lever on page 3-7.
D. OnStar
®and Radio Steering Wheel Buttons. See
Audio Steering Wheel Controls on page 3-99.
E. Instrument Panel Cluster. SeeInstrument Panel
Cluster on page 3-29.
F. Shift Lever/Tow/Haul Selector Button. SeeTow/Haul
Mode on page 2-26.
G. Audio System. SeeAudio System(s) on page 3-67.
H. Dome Override Button. SeeDome Lamps on
page 3-18.
I. Rear Wiper Washer. See “Rear Window
Washer/Wiper” underWindshield Washer on
page 3-10.J. Fog Lamps Button. SeeFog Lamps on page 3-17.
K. Driver Information Center (DIC) Buttons. See
Driver Information Center (DIC) on page 3-46.
L. Parking Brake Release. SeeParking Brake on
page 2-27.
M. Tilt Wheel Lever. SeeTilt Wheel on page 3-6.
N. Climate Control System. SeeDual Automatic Climate
Control System on page 3-20.
O. Storage Area. SeeInstrument Panel Storage Area
on page 2-43.
P. Compact Disc Changer. SeeCD Changer on
page 3-96.
Q. Accessory Power Outlet. SeeAccessory Power
Outlets on page 3-19.
R. StabiliTrak
®Button. SeeStabiliTrak®System
on page 4-8.
S. Glove Box. SeeGlove Box on page 2-43.
3-5
Page 158 of 468
Automatic Headlamp System
When it is dark enough outside and the headlamp switch
is in AUTO, your automatic headlamp system will turn on
your headlamps at the normal brightness along with other
lamps such as the taillamps, sidemarker, parking lamps,
roof marker lamps and the instrument panel lights. The
radio lights will also be dim.
To turn off the automatic headlamp system, turn the
exterior lamps switch to the off position and then release.
Your vehicle has a light sensor located on the top of the
instrument panel. Be sure it is not covered, or the
system will be on whenever the ignition is on.
The system may also turn on your headlamps when
driving through a parking garage, heavy overcast
weather or a tunnel. This is normal.
There is a delay in the transition between the daytime and
nighttime operation of the Daytime Running Lamps (DRL)
and the automatic headlamp systems so that driving
under bridges or bright overhead street lights does not
affect the system. The DRL and automatic headlamp
system will only be affected when the light sensor sees a
change in lighting lasting longer than the delay.If you start your vehicle in a dark garage, the automatic
headlamp system will come on immediately. Once you
leave the garage, it will take approximately one minute for
the automatic headlamp system to change to DRL if it is
light outside. During that delay, your instrument panel
cluster may not be as bright as usual. Make sure your
instrument panel brightness control is in the full bright
position. SeeInstrument Panel Brightness on page 3-17.
Puddle Lamps
Your vehicle may be equipped with puddle lamps to
help you see the area near the base of the front doors
when it is dark out. The puddle lamps will illuminate
when a door is opened, or when you press the unlock
button on the keyless entry transmitter. The lamps
will time out or turn off once the engine is started.
3-16
Page 159 of 468

Fog Lamps
Use the fog lamps for better vision in foggy or misty
conditions. Your parking lamps and/or low-beam
headlamps must be on for your fog lamps to work.
The fog lamp button is
located on the left side of
your instrument panel.
Press the button to turn the fog lamps on while the
headlamps or parking lamps are on. Press the button
again to turn them off. An indicator light will glow
near the button when the fog lamps are on.
Remember, fog lamps alone will not give off as much
light as your headlamps. Never use your fog lamps
in the dark without turning on the headlamps.The fog lamps will go off whenever your high-beam
headlamps come on. When the high beams go off, the
fog lamps will come on again.
The fog lamps will be cancelled after the ignition is
turned off. If you still want to use the fog lamps after you
restart the vehicle, you will need to press the fog
lamp button again.
Instrument Panel Brightness
The thumbwheel for this feature is located next to the
exterior lamps control.
D(Instrument Panel Lights):Turn the thumbwheel,
located next to the exterior lamps control, up or down to
brighten or dim the instrument panel lights and the radio
display. This will only work if the headlamps or parking
lamps are on.
To turn on the dome lamps, with the vehicle doors
closed, turn the thumbwheel all the way up.
3-17
Page 161 of 468
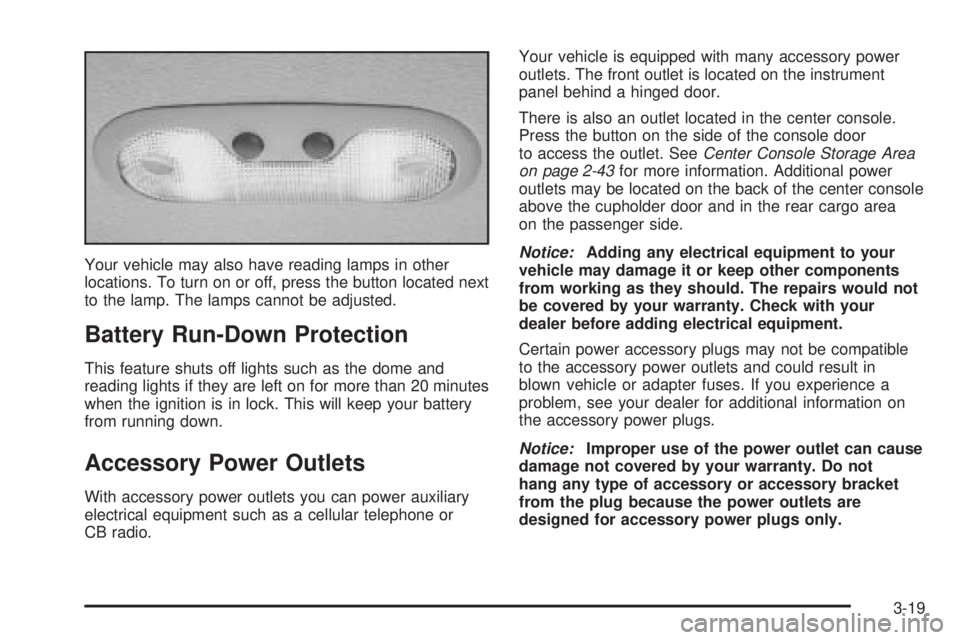
Your vehicle may also have reading lamps in other
locations. To turn on or off, press the button located next
to the lamp. The lamps cannot be adjusted.
Battery Run-Down Protection
This feature shuts off lights such as the dome and
reading lights if they are left on for more than 20 minutes
when the ignition is in lock. This will keep your battery
from running down.
Accessory Power Outlets
With accessory power outlets you can power auxiliary
electrical equipment such as a cellular telephone or
CB radio.Your vehicle is equipped with many accessory power
outlets. The front outlet is located on the instrument
panel behind a hinged door.
There is also an outlet located in the center console.
Press the button on the side of the console door
to access the outlet. SeeCenter Console Storage Area
on page 2-43for more information. Additional power
outlets may be located on the back of the center console
above the cupholder door and in the rear cargo area
on the passenger side.
Notice:Adding any electrical equipment to your
vehicle may damage it or keep other components
from working as they should. The repairs would not
be covered by your warranty. Check with your
dealer before adding electrical equipment.
Certain power accessory plugs may not be compatible
to the accessory power outlets and could result in
blown vehicle or adapter fuses. If you experience a
problem, see your dealer for additional information on
the accessory power plugs.
Notice:Improper use of the power outlet can cause
damage not covered by your warranty. Do not
hang any type of accessory or accessory bracket
from the plug because the power outlets are
designed for accessory power plugs only.
3-19
Page 175 of 468
If the word OFF or the off symbol is lit on the airbag
status indicator, it means that the passenger sensing
system has turned off the right front passenger’s frontal
airbag. SeePassenger Sensing System on page 1-79
for more on this, including important safety information.
If, after several seconds, all status indicator lights
remain on, or if there are no lights at all, there may be
a problem with the lights or the passenger sensing
system. See your dealer for service.
{CAUTION:
If the off indicator and the airbag readiness light
ever come on together, it means that something
may be wrong with the airbag system. If this
ever happens, have the vehicle serviced
promptly, because an adult-size person sitting
in the right front passenger seat may not have
the protection of the frontal airbag. SeeAirbag
Readiness Light on page 3-31.
Charging System Light
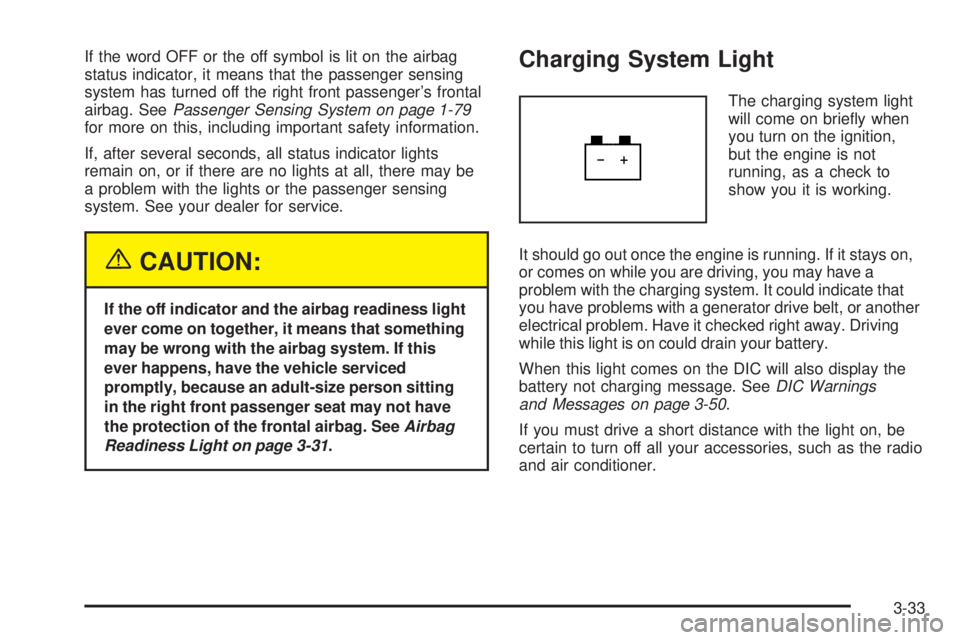
The charging system light
will come on brie�y when
you turn on the ignition,
but the engine is not
running, as a check to
show you it is working.
It should go out once the engine is running. If it stays on,
or comes on while you are driving, you may have a
problem with the charging system. It could indicate that
you have problems with a generator drive belt, or another
electrical problem. Have it checked right away. Driving
while this light is on could drain your battery.
When this light comes on the DIC will also display the
battery not charging message. SeeDIC Warnings
and Messages on page 3-50.
If you must drive a short distance with the light on, be
certain to turn off all your accessories, such as the radio
and air conditioner.
3-33