clock GMC YUKON XL 2007 User Guide
[x] Cancel search | Manufacturer: GMC, Model Year: 2007, Model line: YUKON XL, Model: GMC YUKON XL 2007Pages: 608, PDF Size: 3.01 MB
Page 294 of 608
Using the Auxiliary Input Jack
Your radio system has an auxiliary input jack
located on the lower right side of the faceplate.
This is not an audio output; do not plug the
headphone set into the front auxiliary input jack.
You can however, connect an external audio
device such as an iPod, laptop computer, MP3
player, CD player, or cassette tape player, etc. to
the auxiliary input jack for use as another source
for audio listening.
To use a portable audio player, connect a 3.5 mm
(1/8 inch) cable to the radio’s front auxiliary
input jack. When a device is connected, press the
radio CD/AUX button to begin playing audio
from the device over the car speakers.
O(Power/Volume):Turn this knob clockwise to
increase or counterclockwise to decrease the
volume of the portable player. You may need to
do additional volume adjustments from the portable
device if the volume does not go loud or soft
enough.
BAND:Press this button to listen to the radio
when a portable audio device is playing. The
portable audio device will continue playing, so you
may want to stop it or turn it off.
CD/AUX (CD/Auxiliary):Press this button to play
a CD when a portable audio device is playing.
Press this button again and the system will begin
playing audio from the connected portable
audio player. If a portable audio player is not
connected, “no input device found” will be
displayed.
294
Page 296 of 608
XM™ Satellite Radio Service
XM™ is a satellite radio service that is based in the
48 contiguous United States and in Canada (if
available). XM™ offers over 100 coast-to-coast
channels including music, news, sports, talk,
traffic/weather, and children’s programming. XM™
provides digital quality audio and text information
that includes song title and artist name. A service
fee is required in order to receive the XM™ service.
For more information, contact XM™ at
www.xmradio.com or call 1-800-852-XMXM (9696).
Playing the Radio
O
(Power/Volume):Press this knob to turn the
system on and off.
Turn this knob clockwise to increase or
counterclockwise to decrease the volume.Speed Compensated Volume (SCV):The radio
has Speed Compensated Volume (SCV). When
SCV is on, the radio volume automatically adjusts
to compensate for road and wind noise as you
speed up or slow down while driving. That way, the
volume level should sound about the same as
you drive. To activate SCV:
1. Set the radio volume to the desired level.
2. Press the MENU button to display the radio
setup menu.
3. Press the pushbutton under the AUTO
VOLUM label on the radio display.
4. Press the pushbutton under the desired SCV
setting (OFF, Low, Med, or High) to select the
level of radio volume compensation. The
display will time out after approximately
10 seconds. Each higher setting allows for
more radio volume compensation at
faster vehicle speeds.
296
Page 299 of 608
Setting the Tone (Bass/Treble)
BASS/MID/TREB (Bass, Midrange, or
Treble):To adjust bass, midrange, or treble,
press the tune knob until the tone control labels
appear on the display. Continue pressing to
highlight the desired label, or press the pushbutton
positioned under the desired label. Turn the
tune knob clockwise or counterclockwise to adjust
the highlighted setting. If a station’s frequency
is weak, or if there is static, decrease the treble.
To quickly adjust bass, midrange, or treble to the
middle position, press the pushbutton positioned
under the BASS, MID, or TREB label for more than
two seconds. You will hear a beep and the level will
be adjusted to the middle position.
To quickly adjust all tone and speaker controls to
the middle position, press the tune knob for more
than two seconds until you hear a beep.
EQ (Equalization):Press this button to choose
bass and treble equalization settings designed for
different types of music. Your choices are pop,
rock, country, talk, jazz, and classical. Selecting
MANUAL or changing bass or treble, returns
the EQ to the manual bass and treble settings.
Unique EQ settings can be saved for each source.If your radio is equipped with a Bose
®audio
system, your EQ settings are either MANUAL
or TALK.
Adjusting the Speakers (Balance/Fade)
BAL/FADE (Balance/Fade):To adjust balance
or fade, press the tune knob until the speaker
control labels appear on the display. Press
the pushbutton positioned under the desired label.
Turn the tune knob clockwise or counterclockwise
to adjust the highlighted setting. You can also
adjust the highlighted setting by pressing either the
SEEK, FWD, or REV button until the desired
levels are obtained.
To quickly adjust balance or fade to the middle
position, press the pushbutton positioned under the
BAL or FADE label for more than two seconds.
You will hear a beep and the level will be adjusted
to the middle position.
To quickly adjust both the balance and fade to the
middle position at one time, press the tune knob for
more than two seconds until you hear a beep.
If the rear seat audio (RSA) is turned on, the radio
will disable FADE and mute the rear speakers.
299
Page 313 of 608
O(Power):Press this knob to turn the radio on.
Turn this knob clockwise to increase the volume
or counterclockwise to decrease the volume.
A single press turns the radio off, a press and hold
for more than two seconds turns off the entire
radio and rear seat entertainment system
and starts the parental control feature which
prevents the rear seat occupant from operating
the Rear Seat Audio (RSA) system or remote
control.
A lock symbol will appear next to the clock display.
The parental control feature will remain on until a
subsequent press and hold of the power button is
performed (more than two seconds), or until the
driver turns the ignition off and exits the vehicle.
f(Tune):Turn this knob to change tracks on a
CD or DVD, to manually tune a radio station,
or to change clock or date settings, while in the
clock or date setting mode. See the information
given earlier in this section speci�c to the
radio, CD, and the DVD. Also, seeSetting the
Time (Radio with a Single CD Player) on page 276
orSetting the Time (Radio with a Six-Disc CD
Player) on page 277, for setting the clock and date.
©SEEK (Previous Track/Chapter):Press this
button to return to the start of the current track or
chapter. Press this button again to go to the
previous track or chapter. This button may not work
when the DVD is playing the copyright information
or the previews.
SEEK
¨(Next Track/Chapter):Press this
button to go to the next track or chapter. This
button may not work when the DVD is playing the
copyright information or the previews.
sREV (Reverse):Press this button to fast
reverse the CD or DVD, �ve times the normal
speed. The radio will display the elapsed
time while in fast reverse. To stop fast reversing,
press this button again. This button may not
work when the DVD is playing the copyright
information or the previews.
313
Page 318 of 608
O(Power/Volume):Turn this knob clockwise or
counterclockwise to increase or decrease the
volume of the portable player. You may need to do
additional volume adjustments from the portable
device if the volume does not go loud or soft
enough.
BAND:Press this button to listen to the radio
when a portable audio device is playing. The
portable audio device will continue playing, so you
may want to stop it or power it off.
DVD/CD AUX (CD/Auxiliary):Press this button to
cycle through DVD, CD, or Auxiliary when
listening to the radio. The DVD/CD text label and
a message showing track or chapter number
will appear on display when a disc is in either slot.
Press this button again and the system will
automatically search for an auxiliary input device,
such as a portable audio player.If a portable audio player is not connected, “no
aux input device” will be displayed. If a disc is in
both the DVD slot and the CD slot the DVD/CD
AUX button will cycle between the two sources and
not indicate “no aux input device”. If a front
auxiliary device is connected, the DVD/CD AUX
button will cycle through all available options, such
as: DVD slot, CD slot, Front AUX, and Rear
AUX (if available). See “Using the Auxiliary Input
Jack(s)” later in this section, orRear Seat
Entertainment System on page 321, “Audio/Video
(A/V) Jacks” for more information.
318
Page 348 of 608
StabiliTrak®System
Your vehicle may be equipped with the
StabiliTrak®system which combines antilock
brake, traction and stability control systems and
helps the driver maintain directional control of the
vehicle in most driving conditions.
When you �rst start your vehicle and begin to drive
away, the system performs several diagnostic
checks to ensure there are no problems. You may
hear or feel the system working. This is normal and
does not mean there is a problem with your vehicle.
The system should initialize before the vehicle
reaches 20 mph (32 km/h). In some cases, it may
take approximately two miles of driving before the
system initializes.
If the system fails to turn on or activate, the
StabiliTrak
®light along with one of the following
messages will be displayed on the Driver
Information Center (DIC) (TRACTION CONTROL
OFF, SERVICE TRACTION CONTROL,
STABILITRAK OFF, SERVICE STABILITRAK).
For 2500 series vehicles, if the vehicle has gone
through heavy acceleration or braking during
the �rst 2 miles (3.2 km) after starting your vehicle,
these messages may also appear.For 1500 series vehicles, if these DIC messages
appear, make sure the StabiliTrack
®system
has not been turned off, then turn the steering
wheel through either the ten or two o’clock
positions. If this does not clear the message(s),
take your vehicle to the dealer for service. If this is
the case, your vehicle does not need servicing.
Turn your vehicle off and back on again to
reset the system. If any of these messages appear
on the Driver Information Center (DIC), and your
vehicle hasn’t gone through hard acceleration
or braking in the �rst two miles, your vehicle
should be taken in for service. For more
information on the DIC messages, seeDriver
Information Center (DIC) on page 244.
The StabiliTrak
®light
will �ash on the
instrument panel cluster
when the system is
both on and activated.
You may also feel or hear the system working;
this is normal.
348
Page 352 of 608
Try to adjust your speed so you can “drive”
through the curve. Maintain a reasonable, steady
speed. Wait to accelerate until you are out of
the curve, and then accelerate gently into
the straightaway.
Adding non-GM accessories can affect your
vehicle’s performance. SeeAccessories and
Modi�cations on page 426.
Steering in Emergencies
There are times when steering can be more
effective than braking. For example, you come over
a hill and �nd a truck stopped in your lane, or a car
suddenly pulls out from nowhere, or a child darts
out from between parked cars and stops right in
front of you. You can avoid these problems by
braking — if you can stop in time. But sometimes
you cannot; there is not room. That is the time for
evasive action — steering around the problem.
Your vehicle can perform very well in emergencies
like these. First apply your brakes.
SeeBraking on page 344. It is better to remove as
much speed as you can from a possible collision.
Then steer around the problem, to the left or
right depending on the space available.An emergency like this requires close attention
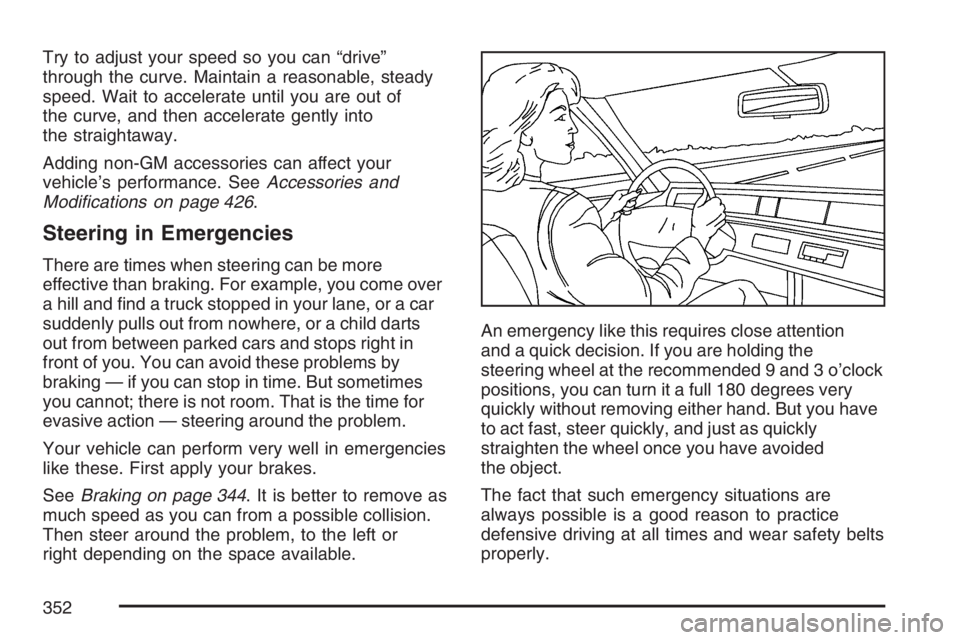
and a quick decision. If you are holding the
steering wheel at the recommended 9 and 3 o’clock
positions, you can turn it a full 180 degrees very
quickly without removing either hand. But you have
to act fast, steer quickly, and just as quickly
straighten the wheel once you have avoided
the object.
The fact that such emergency situations are
always possible is a good reason to practice
defensive driving at all times and wear safety belts
properly.
352
Page 365 of 608
Q:What should I do if my vehicle stalls, or is
about to stall, and I cannot make it up
the hill?
A:If this happens, there are some things you
should do, and there are some things you
must not do. First, here is what youshoulddo:
Push the brake pedal to stop the vehicle
and keep it from rolling backwards. Also, apply
the parking brake.
If your engine is still running, shift the
transmission to REVERSE (R), release the
parking brake, and slowly back down the hill in
REVERSE (R).
If your engine has stopped running, you will
need to restart it. With the brake pedal
pressed and the parking brake still applied,
shift the transmission to PARK (P) and restart
the engine. Then, shift to REVERSE (R),
release the parking brake, and slowly back
down the hill as straight as possible in
REVERSE (R).
As you are backing down the hill, put your left
hand on the steering wheel at the 12 o’clock
position. This way, you will be able to tell if your
wheels are straight and maneuver as you back
down. It is best that you back down the hill with
your wheels straight rather than in the left or
right direction. Turning the wheel too far to the
left or right will increase the possibility of a
rollover.
365
Page 432 of 608
Filling the Tank
{CAUTION:
Fuel vapor burns violently and a fuel �re
can cause bad injuries. To help avoid
injuries to you and others, read and follow
all the instructions on the pump island.
Turn off your engine when you are
refueling. Do not smoke if you are near
fuel or refueling your vehicle. Keep
sparks, �ames, and smoking materials
away from fuel. Do not leave the fuel
pump unattended when refueling your
vehicle — this is against the law in some
places. Keep children away from the fuel
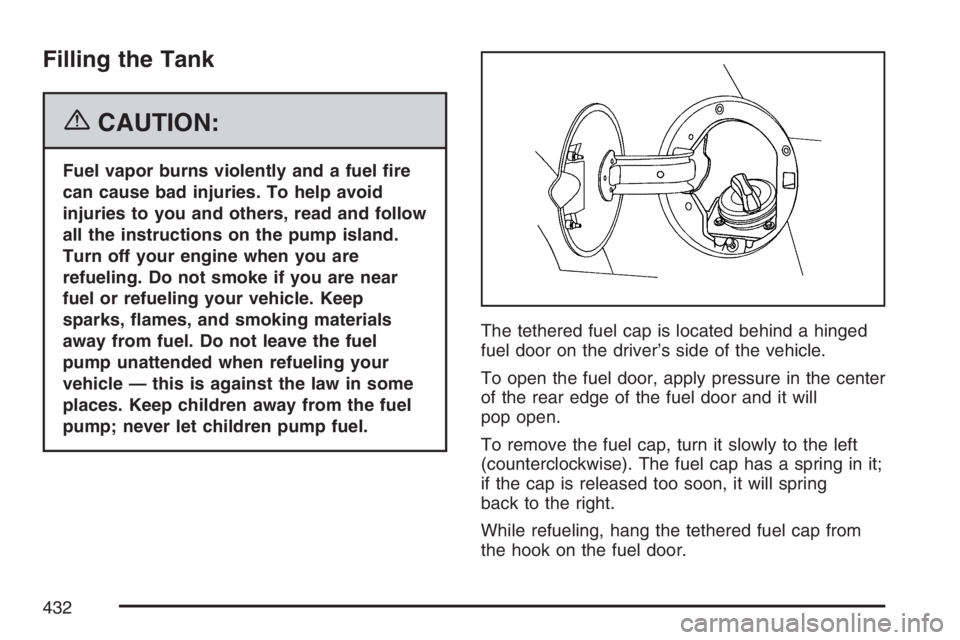
pump; never let children pump fuel.The tethered fuel cap is located behind a hinged
fuel door on the driver’s side of the vehicle.
To open the fuel door, apply pressure in the center
of the rear edge of the fuel door and it will
pop open.
To remove the fuel cap, turn it slowly to the left
(counterclockwise). The fuel cap has a spring in it;
if the cap is released too soon, it will spring
back to the right.
While refueling, hang the tethered fuel cap from
the hook on the fuel door.
432
Page 433 of 608
{CAUTION:
If you spill fuel and then something
ignites it, you could be badly burned. Fuel
can spray out on you if you open the fuel
cap too quickly. This spray can happen if
your tank is nearly full, and is more likely
in hot weather. Open the fuel cap slowly
and wait for any hiss noise to stop. Then
unscrew the cap all the way.
Be careful not to spill fuel. Do not top off or over�ll
the tank and wait a few seconds after you have
�nished pumping before removing the nozzle.
Clean fuel from painted surfaces as soon
as possible. SeeWashing Your Vehicle on
page 532.
When replacing the fuel cap, turn it to the right
(clockwise) until it clicks. Make sure the cap is fully
installed. The diagnostic system can determine
if the fuel cap has been left off or improperly
installed. This would allow fuel to evaporate into
the atmosphere. SeeMalfunction Indicator
Lamp on page 236.If your vehicle has a Driver Information Center
(DIC), the TIGHTEN GAS CAP message will be
displayed if the fuel cap is not properly installed.
{CAUTION:
If a �re starts while you are refueling, do
not remove the nozzle. Shut off the �ow of
fuel by shutting off the pump or by
notifying the station attendant. Leave the
area immediately.
Notice:If you need a new fuel cap, be sure to
get the right type. Your dealer can get one
for you. If you get the wrong type, it may not
�t properly. This may cause your malfunction
indicator lamp to light and may damage
your fuel tank and emissions system. See
Malfunction Indicator Lamp on page 236.
433