stop start GMC YUKON XL 2007 User Guide
[x] Cancel search | Manufacturer: GMC, Model Year: 2007, Model line: YUKON XL, Model: GMC YUKON XL 2007Pages: 608, PDF Size: 3.01 MB
Page 192 of 608
Headlamp High/Low-Beam Changer
53(Headlamp High/Low Beam Changer):
To change the headlamps from low to high beam,
push the lever toward the instrument panel. To
return to low-beam headlamps, pull the
multifunction lever toward you. Then release it.
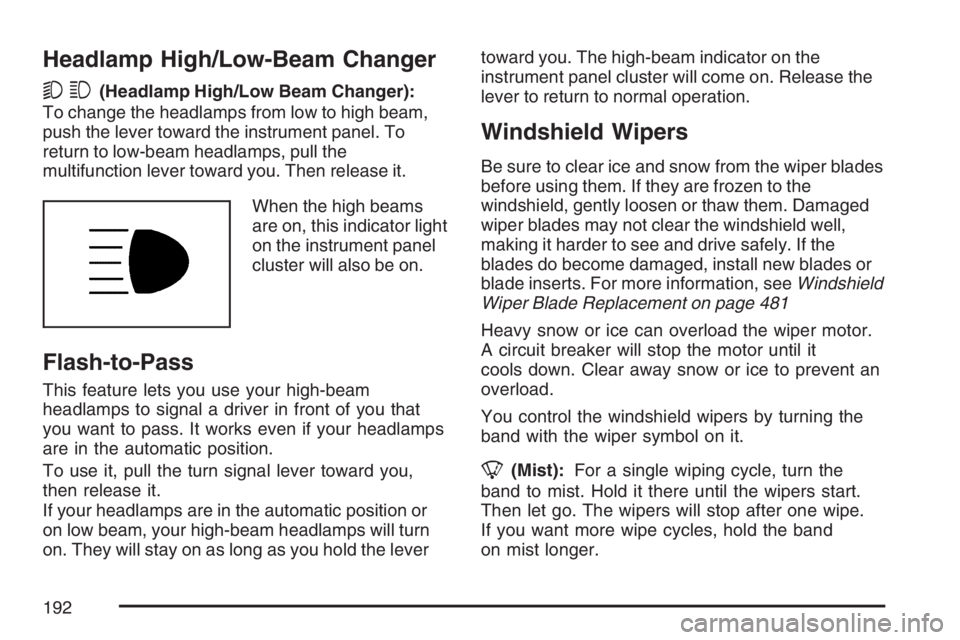
When the high beams
are on, this indicator light
on the instrument panel
cluster will also be on.
Flash-to-Pass
This feature lets you use your high-beam
headlamps to signal a driver in front of you that
you want to pass. It works even if your headlamps
are in the automatic position.
To use it, pull the turn signal lever toward you,
then release it.
If your headlamps are in the automatic position or
on low beam, your high-beam headlamps will turn
on. They will stay on as long as you hold the levertoward you. The high-beam indicator on the
instrument panel cluster will come on. Release the
lever to return to normal operation.
Windshield Wipers
Be sure to clear ice and snow from the wiper blades
before using them. If they are frozen to the
windshield, gently loosen or thaw them. Damaged
wiper blades may not clear the windshield well,
making it harder to see and drive safely. If the
blades do become damaged, install new blades or
blade inserts. For more information, seeWindshield
Wiper Blade Replacement on page 481
Heavy snow or ice can overload the wiper motor.
A circuit breaker will stop the motor until it
cools down. Clear away snow or ice to prevent an
overload.
You control the windshield wipers by turning the
band with the wiper symbol on it.
8(Mist):For a single wiping cycle, turn the
band to mist. Hold it there until the wipers start.
Then let go. The wipers will stop after one wipe.
If you want more wipe cycles, hold the band
on mist longer.
192
Page 237 of 608
This light should come on, as a check to show
you it is working, when the ignition is on and the
engine is not running. If the light does not
come on, have it repaired. This light will also
come on during a malfunction in one of two ways:
Light Flashing— A mis�re condition has
been detected. A mis�re increases vehicle
emissions and may damage the emission
control system on your vehicle. Diagnosis and
service may be required.
Light On Steady— An emission control
system malfunction has been detected on your
vehicle. Diagnosis and service may be
required.
If the Light is Flashing
The following may prevent more serious damage
to your vehicle:
Reducing vehicle speed
Avoiding hard accelerations
Avoiding steep uphill grades
If you are towing a trailer, reduce the amount
of cargo being hauled as soon as it is
possible
If the light stops �ashing and remains on steady,
see “If the Light Is On Steady” following.
If the light continues to �ash, when it is safe to do
so, stop the vehicle. Find a safe place to park
your vehicle. Turn the key off, wait at least
10 seconds and restart the engine. If the light
remains on steady, see “If the Light Is On Steady”
following. If the light is still �ashing, follow the
previous steps, and see your dealer for service as
soon as possible.
237
Page 248 of 608
Timer
Press the trip/fuel button until TIMER displays.
This display can be used as a timer.
To start the timer, press the set/reset button while
TIMER is displayed. The display will show the
amount of time that has passed since the timer was
last reset, not including time the ignition is off. Time
will continue to be counted as long as the ignition is
on, even if another display is being shown on the
DIC. The timer will record up to 99 hours,
59 minutes and 59 seconds (99:59:59) after which
the display will return to zero.
To stop the timer, press the set/reset button brie�y
while TIMER is displayed.
To reset the timer to zero, press and hold the
set/reset button while TIMER is displayed.
Transmission Temperature
Press the trip/fuel button until TRANS TEMP
displays. This display shows the temperature of
the automatic transmission �uid in either degrees
Fahrenheit (°F) or degrees Celsius (°C).
Instantaneous Economy and Displacement
on Demand™ (DoD™) Indicator
If your vehicle has this display, press the trip/fuel
button until INST ECONOMY V8 MODE
displays. This display shows the current fuel
economy at a particular moment and will change
frequently as driving conditions change. This
display shows the instantaneous fuel economy in
miles per gallon (mpg) or liters per 100 kilometers
(L/100 km). Unlike average economy, this
screen cannot be reset.
A Displacement on Demand™ (DoD™) indicator
will display on the right side of the DIC, while
INST ECONOMY displays on the left side.
DoD™ allows the engine to operate on either four
or eight cylinders, depending on your driving
demands. When DoD™ is active, V4 MODE will
display on the DIC. When DoD™ is inactive,
V8 MODE will display. SeeDisplacement
on Demand™ (DoD™) on page 141for more
information.
Blank Display
This display shows no information.
248
Page 258 of 608
LEFT REAR DOOR OPEN
If the driver’s side rear door is not fully closed and
the vehicle is in a drive gear, this message will
display and a chime will sound. Stop and turn off
the vehicle, check the door for obstructions,
and close the door again. Check to see if the
message still appears on the DIC.
OIL PRESSURE LOW STOP ENGINE
Notice:If you drive your vehicle while the
engine oil pressure is low, severe engine
damage may occur. If a low oil pressure
warning appears on the Driver Information
Center (DIC), stop the vehicle as soon as
possible. Do not drive the vehicle until the
cause of the low oil pressure is corrected.
SeeEngine Oil on page 438for more
information.
If low oil pressure levels occur, this message will
display. Stop the vehicle as soon as safely
possible and do not operate it until the cause of
the low oil pressure has been corrected. Check
your oil as soon as possible and have your vehicle
serviced by your GM dealer. SeeEngine Oil on
page 438.
PARK ASSIST OFF
If your vehicle has the Ultrasonic Rear Parking
Assist (URPA) system, after the vehicle has been
started, this message will display to remind the
driver that the URPA system has been turned off.
Press the set/reset button or the trip odometer
reset stem to acknowledge this message and clear
it from the DIC display. To turn the URPA
system back on, seeUltrasonic Rear Parking
Assist (URPA) on page 205.
PASSENGER DOOR OPEN
If the passenger’s door is not fully closed and the
vehicle is in a drive gear, this message will
display and a chime will sound. Stop and turn off
the vehicle, check the door for obstructions,
and close the door again. Check to see if the
message still appears on the DIC.
REAR ACCESS OPEN
If the liftgate or liftglass is open while the ignition
is in RUN, this message will display and a
chime will sound. Turn off the vehicle and check
the liftgate and liftglass. Restart the vehicle
and check for the message on the DIC display.
258
Page 259 of 608
REMOTE KEY LEARNING ACTIVE
This message will display while you are matching
a remote keyless entry transmitter to your
vehicle. See “Matching Transmitter(s) to Your
Vehicle” underRemote Keyless Entry System
Operation on page 113andDIC Operation
and Displays (With DIC Buttons) on page 244or
DIC Operation and Displays (Without DIC Buttons)
on page 251for more information.
REPLACE BATTERY IN REMOTE KEY
If a remote keyless entry transmitter battery is low,
this message will display. The battery needs to
be replaced in the transmitter. See “Battery
Replacement” underRemote Keyless Entry
System Operation on page 113.
RIGHT REAR DOOR OPEN
If the passenger’s side rear door is not fully closed
and the vehicle is in a drive gear, this message
will display and a chime will sound. Stop and turn
off the vehicle, check the door for obstructions,
and close the door again. Check to see if the
message still appears on the DIC.
SERVICE 4 WHEEL DRIVE
If a problem occurs with the four-wheel-drive
system, this message will display. If this message
appears, stop as soon as possible and turn off
the vehicle. Restart the vehicle and check for the
message on the DIC display. If the message
is still displayed or appears again when you begin
driving, the four-wheel-drive system needs
service. See your GM dealer.
SERVICE AIR BAG
If there is a problem with the airbag system, this
message will display. Have your GM dealer inspect
the system for problems. SeeAirbag Readiness
Light on page 227andAirbag System on page 90
for more information.
259
Page 260 of 608
SERVICE BATTERY CHARGING
SYSTEM
On some vehicles, if there is a problem with the
battery charging system, this message will display.
Under certain conditions, the battery warning
light may also turn on in the instrument panel
cluster. SeeCharging System Light on page 230.
Driving with this problem could drain the battery.
Turn off all unnecessary accessories. Have
the electrical system checked as soon as possible.
See your GM dealer.
SERVICE BRAKE SYSTEM
If there is a problem with the brake system, this
message will display along with the brake system
warning light. SeeBrake System Warning Light
on page 232. If this message appears, stop
as soon as possible and turn off the vehicle.
Restart the vehicle and check for the message on
the DIC display. If the message is still displayed
or appears again when you begin driving, the
brake system needs service as soon as possible.
See your GM dealer.
SERVICE BRAKES SOON
If there is a problem with the brake system, this
message will display. If this message appears,
stop as soon as possible and turn off the vehicle.
Restart the vehicle and check for the message
on the DIC display. If the message is still displayed
or appears again when you begin driving, the
brake system needs service. See your GM dealer.
SERVICE PARK ASSIST
If your vehicle has the Ultrasonic Rear Parking
Assist (URPA) system, this message will display
if there is a problem with the URPA system. Do not
use this system to help you park. SeeUltrasonic
Rear Parking Assist (URPA) on page 205for more
information. See your GM dealer for service.
260
Page 261 of 608
SERVICE STABILITRAK
If your vehicle has StabiliTrak®and this message
displays, it means there may be a problem with the
StabiliTrak
®system. If you see this message, try to
reset the system. Stop; turn off the engine for at
least 15 seconds; then start the engine again. If this
message still comes on, it means there is a
problem. You should see your GM dealer for
service. The vehicle is safe to drive, however, you
do not have the bene�t of StabiliTrak
®, so reduce
your speed and drive accordingly.
SERVICE SUSPENSION SYSTEM
If your vehicle has the Autoride®suspension
system, this message will display when the
Autoride
®suspension system is not operating
properly. Have your vehicle serviced by your
GM dealer.
SERVICE THEFT DETERRENT SYSTEM
This message will display when there is a
problem with the theft-deterrent system. The
vehicle may or may not restart so you may want
to take the vehicle to your GM dealer before
turning off the engine. SeePASS-Key
®III+
Operation on page 134for more information.
SERVICE TIRE MONITOR SYSTEM
If your vehicle has the Tire Pressure Monitor
(TPM) system, this message will display if a part
on the system is not working properly. If you
drive your vehicle while any of the four sensors
are missing or inoperable, the warning will
come on in about 20 minutes. A sensor would be
missing, for example, if you put different wheels
on your vehicle without transferring the sensors.
If the warning comes on and stays on, there
may be a problem with the TPM. See your
GM dealer.
261
Page 285 of 608
If the ignition or radio is turned off, with a CD in
the player, it will stay in the player. When the
ignition or radio is turned on, the CD will
start playing where it stopped, if it was the last
selected audio source.
When a CD is inserted, the CD symbol will appear
on the CD. As each new track starts to play, the
track number will appear on the display.
The CD player can play the smaller 3 inch (8 cm)
single CDs with an adapter ring. Full-size CDs
and the smaller CDs are loaded in the same
manner.
If playing a CD-R, the sound quality may be
reduced due to CD-R quality, the method of
recording, the quality of the music that has been
recorded, and the way the CD-R has been
handled. There may be an increase in skipping,
difficulty in �nding tracks, and/or difficulty in loading
and ejecting. If these problems occur, check the
bottom surface of the CD. If the surface of the CD
is damaged, such as cracked, broken, or
scratched, the CD will not play properly. If the
surface of the CD is soiled, seeCare of Your CDs
and DVDs on page 336for more information.
If there is no apparent damage, try a known
good CD.Notice:If you add any label to a CD, insert
more than one CD into the slot at a time, or
attempt to play scratched or damaged CDs, you
could damage the CD player. When using the
CD player, use only CDs in good condition
without any label, load one CD at a time, and
keep the CD player and the loading slot free of
foreign materials, liquids, and debris.
Do not add any label to a CD, it could get caught
in the CD player. If a CD is recorded on a
personal computer and a description label is
needed, try labeling the top of the recorded CD
with a soft marker instead.
If an error appears on the display, see “CD
Messages” later in this section.
ZEJECT:Press the CD eject button to eject
CD(s). To eject the CD that is currently playing,
press and release this button. You will hear a beep
and Ejecting Disc will be displayed. Once the disc is
ejected, Remove Disc will appear on display. The
CD can be removed. If the CD is not removed, after
several seconds, the CD will be automatically
pulled back into the player and begin playing.
For the Six-Disc CD player, press and hold the eject
button for two seconds to eject all discs.
285
Page 290 of 608
File System and Naming
Preprogrammed Playlists
You can access preprogrammed playlists that
were created using WinAmp™, MusicMatch™, or
Real Jukebox™ software, however, you will
not have playlist editing capability using the radio.
These playlists will be treated as special folders
containing compressed audio song �les.
Playing an MP3
Insert a CD-R partway into the slot (Single CD
Player), or press the load button and wait for the
message to insert disc (Six-Disc CD Player),
label side up. The player will pull it in, and the
CD-R should begin playing.
If you turn off the ignition or radio with a CD-R in
the player it will stay in the player. When you
turn on the ignition or radio, the CD-R will start to
play where it stopped, if it was the last selected
audio source.
As each new track starts to play, the track number
and song title will appear on the display.The CD player can play the smaller 3 inch (8 cm)
single CD-Rs with an adapter ring. Full-size
CD-Rs and the smaller CD-Rs are loaded in the
same manner.
If playing a CD-R, the sound quality may be
reduced due to CD-R quality, the method of
recording, the quality of the music that has been
recorded, and the way the CD-R has been
handled. There may be an increase in skipping,
difficulty in �nding tracks, and/or difficulty in loading
and ejecting. If these problems occur, check the
bottom surface of the CD. If the surface of the CD
is damaged, such as cracked, broken, or
scratched, the CD will not play properly. If the
surface of the CD is soiled, seeCare of Your CDs
and DVDs on page 336for more information.
If there is no apparent damage, try a known
good CD.
290
Page 301 of 608
Radio Messages
Calibration Error:The audio system has been
calibrated for your vehicle from the factory. If
Calibration Error appears on the display, it means
that the radio has not been con�gured properly
for your vehicle and it must be returned to
your dealer for service.
Locked:This message is displayed when the
THEFTLOCK
®system has locked up the
radio. Take the vehicle to your dealer for service.
If any error occurs repeatedly or if an error
cannot be corrected, contact your dealer.
Radio Messages for XM™ Only
SeeXM Radio Messages on page 319later in this
section for further detail.
Playing a CD (In Either the DVD
or CD Slot)
Insert a CD partway into the slot, label side up.
The player will pull it in and the CD should begin
playing (loading a disc into the system, depending
on media type and format ranges from
5 to 20 seconds for a CD, and up to 30 seconds
for a DVD to begin playing).
If the ignition or radio is turned off, with a CD in
the player, it will stay in the player. When the
ignition or radio is turned on, the CD will
start playing where it stopped, if it was the last
selected audio source. The CD is controlled by the
buttons on the radio faceplate or by the RSA
unit. SeeRear Seat Audio (RSA) on page 332for
more information. The DVD/CD decks, (upper
slot is the DVD deck and the lower slot is the CD
deck) of the radio are compatible with most
audio CDs, CD-R, CD-RW, and MP3s.
When a CD is inserted, the text label DVD or CD
symbol will appear on the left side of the radio
display. As each new track starts to play, the track
number will appear on the display.
301