Spare hoist GMC YUKON XL 2007 Owners Manual
[x] Cancel search | Manufacturer: GMC, Model Year: 2007, Model line: YUKON XL, Model: GMC YUKON XL 2007Pages: 608, PDF Size: 3.01 MB
Page 112 of 608
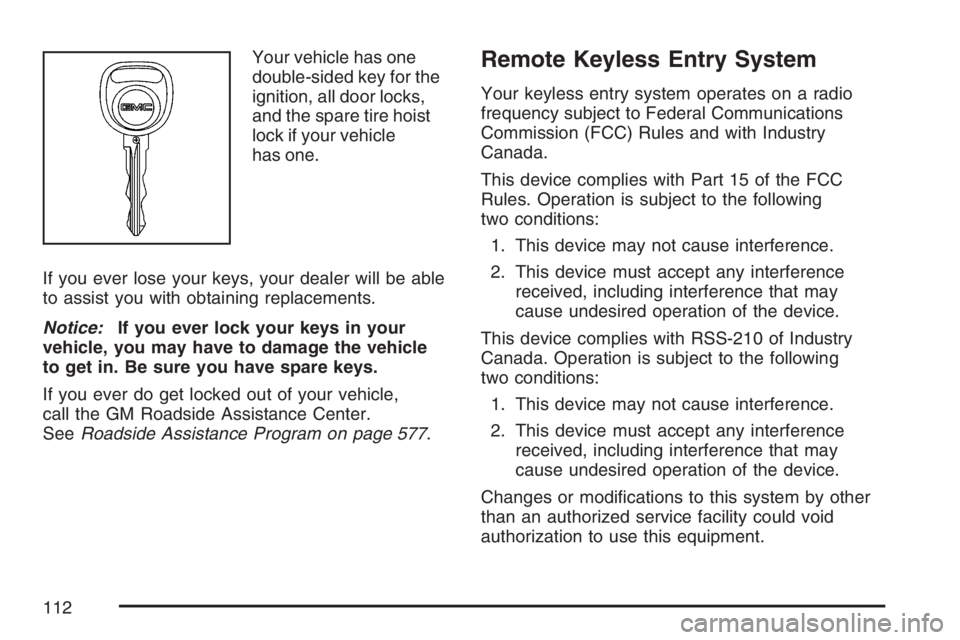
Your vehicle has one
double-sided key for the
ignition, all door locks,
and the spare tire hoist
lock if your vehicle
has one.
If you ever lose your keys, your dealer will be able
to assist you with obtaining replacements.
Notice:If you ever lock your keys in your
vehicle, you may have to damage the vehicle
to get in. Be sure you have spare keys.
If you ever do get locked out of your vehicle,
call the GM Roadside Assistance Center.
SeeRoadside Assistance Program on page 577.Remote Keyless Entry System
Your keyless entry system operates on a radio
frequency subject to Federal Communications
Commission (FCC) Rules and with Industry
Canada.
This device complies with Part 15 of the FCC
Rules. Operation is subject to the following
two conditions:
1. This device may not cause interference.
2. This device must accept any interference
received, including interference that may
cause undesired operation of the device.
This device complies with RSS-210 of Industry
Canada. Operation is subject to the following
two conditions:
1. This device may not cause interference.
2. This device must accept any interference
received, including interference that may
cause undesired operation of the device.
Changes or modications to this system by other
than an authorized service facility could void
authorization to use this equipment.
112
Page 511 of 608
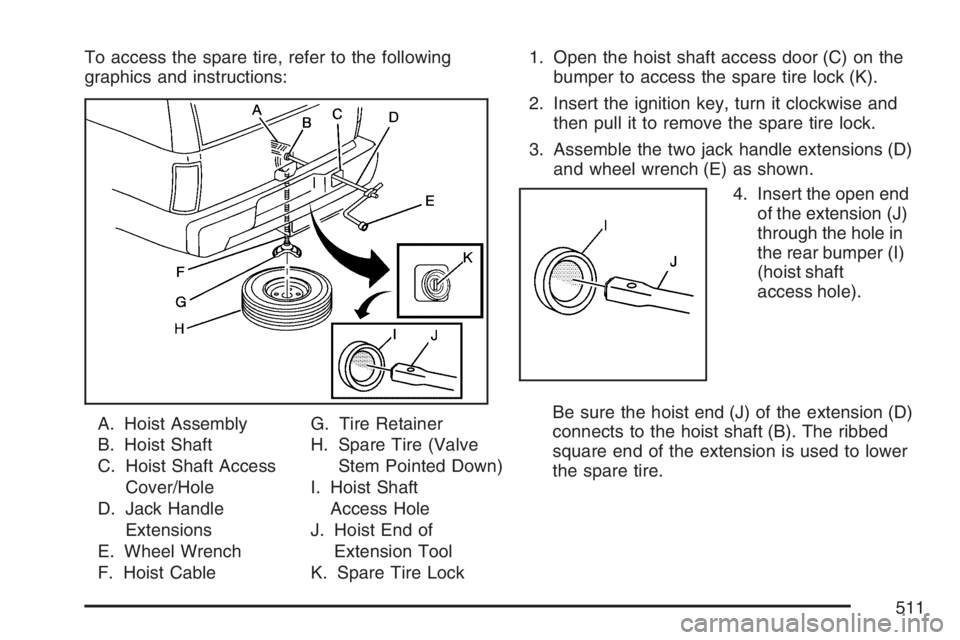
To access the spare tire, refer to the following
graphics and instructions:
A. Hoist Assembly
B. Hoist Shaft
C. Hoist Shaft Access
Cover/Hole
D. Jack Handle
Extensions
E. Wheel Wrench
F. Hoist CableG. Tire Retainer
H. Spare Tire (Valve
Stem Pointed Down)
I. Hoist Shaft
Access Hole
J. Hoist End of
Extension Tool
K. Spare Tire Lock1. Open the hoist shaft access door (C) on the
bumper to access the spare tire lock (K).
2. Insert the ignition key, turn it clockwise and
then pull it to remove the spare tire lock.
3. Assemble the two jack handle extensions (D)
and wheel wrench (E) as shown.
4. Insert the open end
of the extension (J)
through the hole in
the rear bumper (I)
(hoist shaft
access hole).
Be sure the hoist end (J) of the extension (D)
connects to the hoist shaft (B). The ribbed
square end of the extension is used to lower
the spare tire.
511
Page 512 of 608
5. Turn the wheel wrench (E) counterclockwise
to lower the spare tire (H) to the ground.
Continue to turn the wheel wrench until the
spare tire can be pulled out from under
the vehicle.
If the spare tire does not lower to the ground,
the secondary latch is engaged causing
the tire not to lower. SeeSecondary Latch
System on page 519for more information.
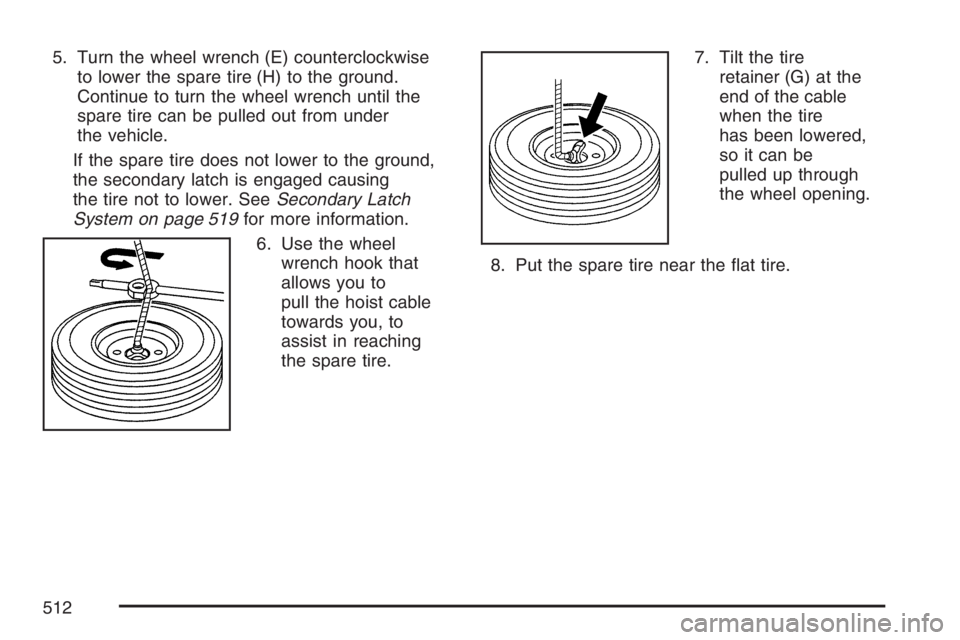
6. Use the wheel
wrench hook that
allows you to
pull the hoist cable
towards you, to
assist in reaching
the spare tire.7. Tilt the tire
retainer (G) at the
end of the cable
when the tire
has been lowered,
so it can be
pulled up through
the wheel opening.
8. Put the spare tire near the at tire.
512
Page 519 of 608
Secondary Latch System
Your vehicle has an underbody-mounted tire hoist
assembly which has a secondary latch system.
It is designed to stop the spare tire from suddenly
falling off your vehicle. For the secondary latch
to work, the spare tire must be installed with
the valve stem pointing down. SeeStoring a Flat
or Spare Tire and Tools on page 522.
{CAUTION:
Before beginning this procedure read all
the instructions. Failure to read and follow
the instructions could damage the hoist
assembly and you and others could get
hurt. Read and follow the instructions
listed below.To release the spare tire from the secondary latch,
do the following:
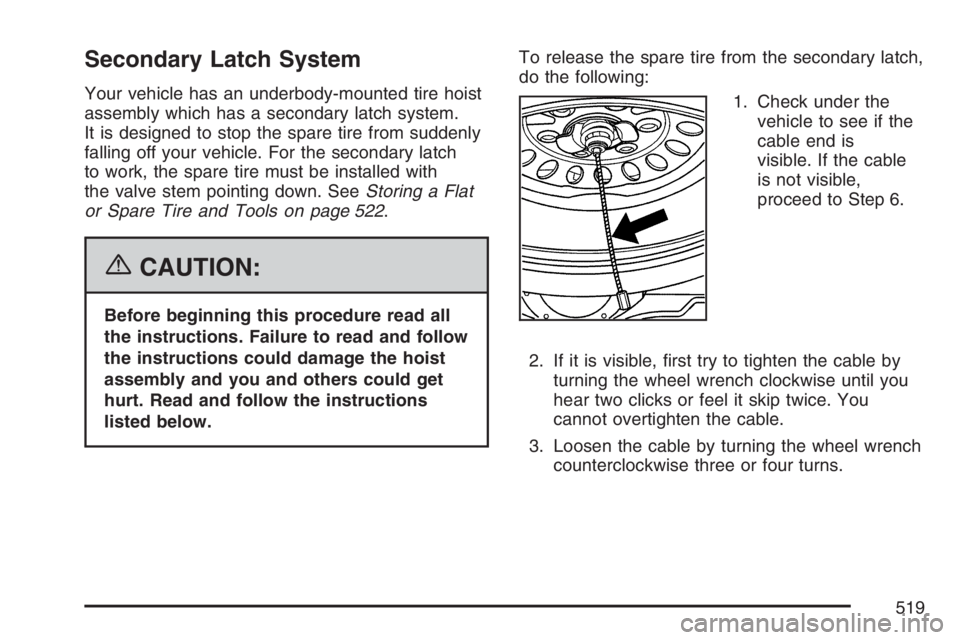
1. Check under the
vehicle to see if the
cable end is
visible. If the cable
is not visible,
proceed to Step 6.
2. If it is visible, rst try to tighten the cable by
turning the wheel wrench clockwise until you
hear two clicks or feel it skip twice. You
cannot overtighten the cable.
3. Loosen the cable by turning the wheel wrench
counterclockwise three or four turns.
519
Page 521 of 608
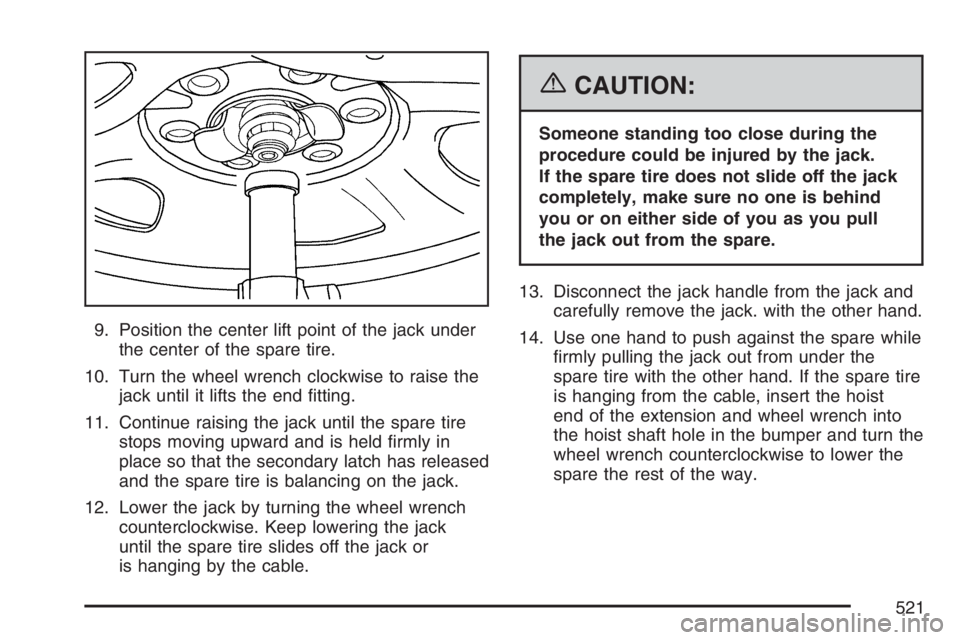
9. Position the center lift point of the jack under
the center of the spare tire.
10. Turn the wheel wrench clockwise to raise the
jack until it lifts the end tting.
11. Continue raising the jack until the spare tire
stops moving upward and is held rmly in
place so that the secondary latch has released
and the spare tire is balancing on the jack.
12. Lower the jack by turning the wheel wrench
counterclockwise. Keep lowering the jack
until the spare tire slides off the jack or
is hanging by the cable.
{CAUTION:
Someone standing too close during the
procedure could be injured by the jack.
If the spare tire does not slide off the jack
completely, make sure no one is behind
you or on either side of you as you pull
the jack out from the spare.
13. Disconnect the jack handle from the jack and
carefully remove the jack. with the other hand.
14. Use one hand to push against the spare while
rmly pulling the jack out from under the
spare tire with the other hand. If the spare tire
is hanging from the cable, insert the hoist
end of the extension and wheel wrench into
the hoist shaft hole in the bumper and turn the
wheel wrench counterclockwise to lower the
spare the rest of the way.
521
Page 522 of 608
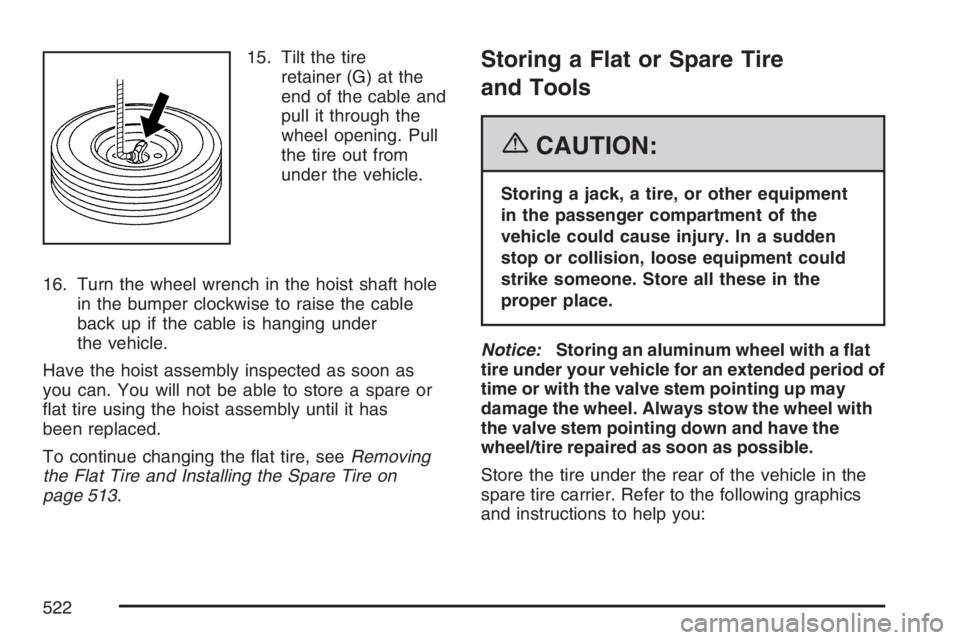
15. Tilt the tire
retainer (G) at the
end of the cable and
pull it through the
wheel opening. Pull
the tire out from
under the vehicle.
16. Turn the wheel wrench in the hoist shaft hole
in the bumper clockwise to raise the cable
back up if the cable is hanging under
the vehicle.
Have the hoist assembly inspected as soon as
you can. You will not be able to store a spare or
at tire using the hoist assembly until it has
been replaced.
To continue changing the at tire, seeRemoving
the Flat Tire and Installing the Spare Tire on
page 513.Storing a Flat or Spare Tire
and Tools
{CAUTION:
Storing a jack, a tire, or other equipment
in the passenger compartment of the
vehicle could cause injury. In a sudden
stop or collision, loose equipment could
strike someone. Store all these in the
proper place.
Notice:Storing an aluminum wheel with a at
tire under your vehicle for an extended period of
time or with the valve stem pointing up may
damage the wheel. Always stow the wheel with
the valve stem pointing down and have the
wheel/tire repaired as soon as possible.
Store the tire under the rear of the vehicle in the
spare tire carrier. Refer to the following graphics
and instructions to help you:
522
Page 523 of 608
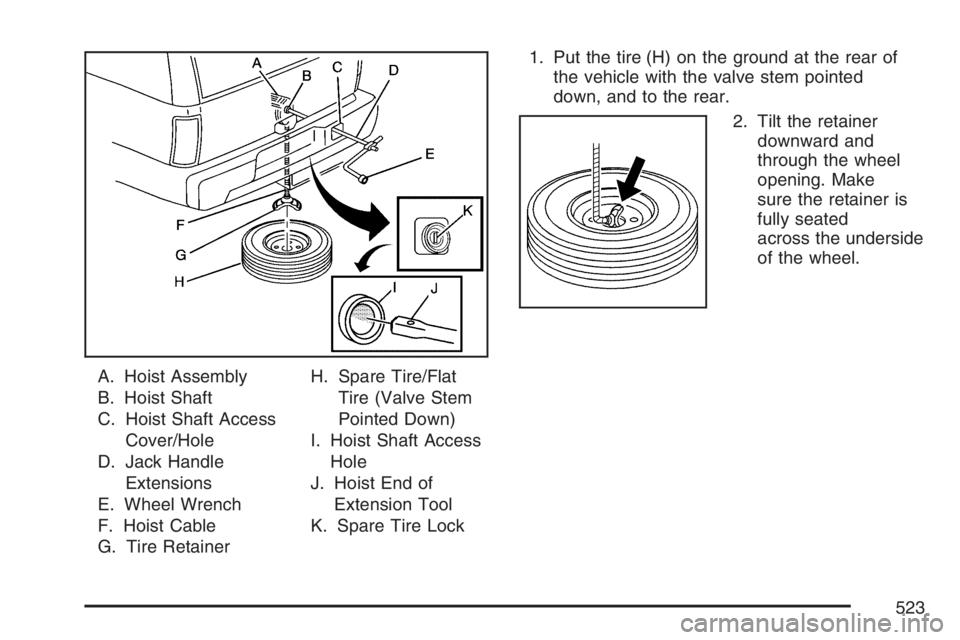
A. Hoist Assembly
B. Hoist Shaft
C. Hoist Shaft Access
Cover/Hole
D. Jack Handle
Extensions
E. Wheel Wrench
F. Hoist Cable
G. Tire RetainerH. Spare Tire/Flat
Tire (Valve Stem
Pointed Down)
I. Hoist Shaft Access
Hole
J. Hoist End of
Extension Tool
K. Spare Tire Lock1. Put the tire (H) on the ground at the rear of
the vehicle with the valve stem pointed
down, and to the rear.
2. Tilt the retainer
downward and
through the wheel
opening. Make
sure the retainer is
fully seated
across the underside
of the wheel.
523
Page 524 of 608
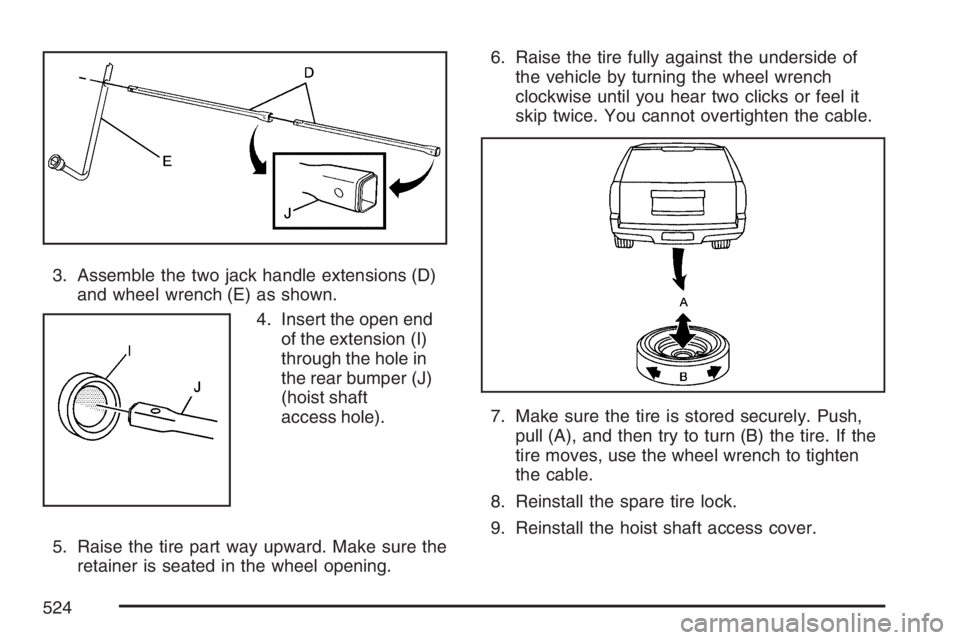
3. Assemble the two jack handle extensions (D)
and wheel wrench (E) as shown.
4. Insert the open end
of the extension (I)
through the hole in
the rear bumper (J)
(hoist shaft
access hole).
5. Raise the tire part way upward. Make sure the
retainer is seated in the wheel opening.6. Raise the tire fully against the underside of
the vehicle by turning the wheel wrench
clockwise until you hear two clicks or feel it
skip twice. You cannot overtighten the cable.
7. Make sure the tire is stored securely. Push,
pull (A), and then try to turn (B) the tire. If the
tire moves, use the wheel wrench to tighten
the cable.
8. Reinstall the spare tire lock.
9. Reinstall the hoist shaft access cover.
524