set clock GMC YUKON XL 2010 Owners Manual
[x] Cancel search | Manufacturer: GMC, Model Year: 2010, Model line: YUKON XL, Model: GMC YUKON XL 2010Pages: 614, PDF Size: 4.64 MB
Page 28 of 614
Setting the Clock
To set the time and date for the radio with CD, DVD,
and USB Port:1. Turn the ignition key to ACC/ACCESSORY or ON/RUN, then press
O, to turn the radio on.
2. Press
Hto display HR, MIN, MM, DD, YYYY
(hour, minute, month, day, and year).
3. Press the softkey located under any one of the labels to be changed.
4. To increase or decrease the time or date, turn
fclockwise or counter‐clockwise.
For detailed instructions on setting the clock for the
vehicle's specific audio system, see Setting the Clock
on page 4‑81.
Satellite Radio
XM is a satellite radio service that is based in the
48 contiguous United States and 10 Canadian
provinces. XM satellite radio has a wide variety
of programming and commercial-free music,
coast-to-coast, and in digital-quality sound. A fee is required to receive the XM service.
For more information, refer to:
.www.xmradio.com or call 1-800-929-2100 (U.S.)
.www.xmradio.ca or call 1-877-438-9677 (Canada)
See “XM Satellite Radio Service” underRadio(s)
on
page 4‑82.
Portable Audio Devices
This vehicle may have an auxilliary input, located
on the audio faceplate, and a USB port located on the
instrument panel or in the center console. External
devices such as iPod
®, laptop computers, MP3 players,
CD changers, USB storage device, etc. can be
connected to the auxiliary port using a 3.5 mm (1/8 in.)
input jack or the USB port depending on the audio
system.
See “Using the Auxiliary Input Jack” and“Using the
USB Port” underRadio(s) on page 4‑82.
1-22
Page 187 of 614

Shifting into Neutral
To shift the transfer case to N (Neutral) do the following:1. Make sure the vehicle is parked so that it will not roll.
2. Set the parking brake and apply the regular brake pedal. See Parking Brake
on page 3‑48for more
information.
3. Start the vehicle or turn the ignition to ON/RUN.
4. Put the transmission in N (Neutral).
5. Shift the transfer case to Two-Wheel Drive High.
6. Turn the transfer case dial clockwise to N (Neutral) until it stops and hold it there until the N (Neutral)
light starts blinking. This will take at least
10 seconds. Then slowly release the dial to the
Four‐Wheel Drive Low position. The N (Neutral)
light will come on when the transfer case shift to
N (Neutral) is complete.
7. If the engine is running, verify that the transfer case is in N (Neutral) by shifting the transmission
to R (Reverse) for one second, then shift the
transmission to D (Drive) for one second. 8. Turn the ignition to ACC/ACCESSORY, which will
turn the engine off.
9. Place the transmission shift lever in P (Park).
10. Release the parking brake prior to moving the vehicle.
11. Turn the ignition to LOCK/OFF.
Shifting Out of Neutral
To shift out of N Neutral do the following: 1. Set the parking brake and apply the regular brake pedal.
2. Turn the ignition to ON/RUN with the engine off, and shift the transmission to N (Neutral).
3. Turn the transfer case dial to the desired transfer case shift position (Two-Wheel Drive High,
Four-Wheel Drive High, AUTO).
After the transfer case has shifted out of
N (Neutral), the N (Neutral) light will go out.
3-45
Page 224 of 614
Section 4 Instrument Panel
Tire Pressure Light . . . . . . . . . . . . . . . . . . . . . . . . . . . . 4-39
Malfunction Indicator Lamp . . . . . . . . . . . . . . . . . . . . 4-39
Oil Pressure Gauge . . . . . . . . . . . . . . . . . . . . . . . . . . . . 4-43
Oil Pressure Light . . . . . . . . . . . . . . . . . . . . . . . . . . . . . 4-44
Security Light . . . . . . . . . . . . . . . . . . . . . . . . . . . . . . . . . . 4-44
Fog Lamp Light . . . . . . . . . . . . . . . . . . . . . . . . . . . . . . . . 4-45
Cruise Control Light . . . . . . . . . . . . . . . . . . . . . . . . . . . 4-45
Highbeam On Light . . . . . . . . . . . . . . . . . . . . . . . . . . . . 4-45
Tow/Haul Mode Light . . . . . . . . . . . . . . . . . . . . . . . . . . 4-45
Fuel Gauge . . . . . . . . . . . . . . . . . . . . . . . . . . . . . . . . . . . . 4-46
Low Fuel Warning Light . . . . . . . . . . . . . . . . . . . . . . . . 4-47
Driver Information Center (DIC) . . . . . . . . . . . . . . . . . .4-47
DIC Operation and Displays (With DIC Buttons) . . . . . . . . . . . . . . . . . . . . . . . . . . . . . . . . . . . . . 4-48
DIC Operation and Displays (Without DIC Buttons) . . . . . . . . . . . . . . . . . . . . . . . . . . . . . . . . . . . . . 4-55
DIC Compass . . . . . . . . . . . . . . . . . . . . . . . . . . . . . . . . . . 4-58
DIC Warnings and Messages . . . . . . . . . . . . . . . . . . 4-61
DIC Vehicle Customization (With DIC Buttons) . . . . . . . . . . . . . . . . . . . . . . . . . . . . . . . . . . . . . 4-72 Audio System(s)
. . . . . . . . . . . . . . . . . . . . . . . . . . . . . . . . . . 4-80
Setting the Clock . . . . . . . . . . . . . . . . . . . . . . . . . . . . . . 4-81
Radio(s) . . . . . . . . . . . . . . . . . . . . . . . . . . . . . . . . . . . . . . . 4-82
Using an MP3 (Radios with CD) . . . . . . . . . . . . . . . 4-99
Using an MP3 (Radios with CD and DVD) . . . . 4-106
XM Radio Messages . . . . . . . . . . . . . . . . . . . . . . . . . 4-113
Navigation/Radio System . . . . . . . . . . . . . . . . . . . . . 4-114
Bluetooth
®. . . . . . . . . . . . . . . . . . . . . . . . . . . . . . . . . . . . 4-114
Rear Seat Entertainment (RSE) System . . . . . . 4-125
Rear Seat Audio (RSA) . . . . . . . . . . . . . . . . . . . . . . . 4-134
Theft-Deterrent Feature . . . . . . . . . . . . . . . . . . . . . . 4-136
Audio Steering Wheel Controls . . . . . . . . . . . . . . . 4-136
Radio Reception . . . . . . . . . . . . . . . . . . . . . . . . . . . . . . 4-139
Rear Side Window Antenna . . . . . . . . . . . . . . . . . . 4-140
XM™ Satellite Radio Antenna System . . . . . . . . 4-140
4-2
Page 249 of 614
Rear Air Conditioning and Heating
System
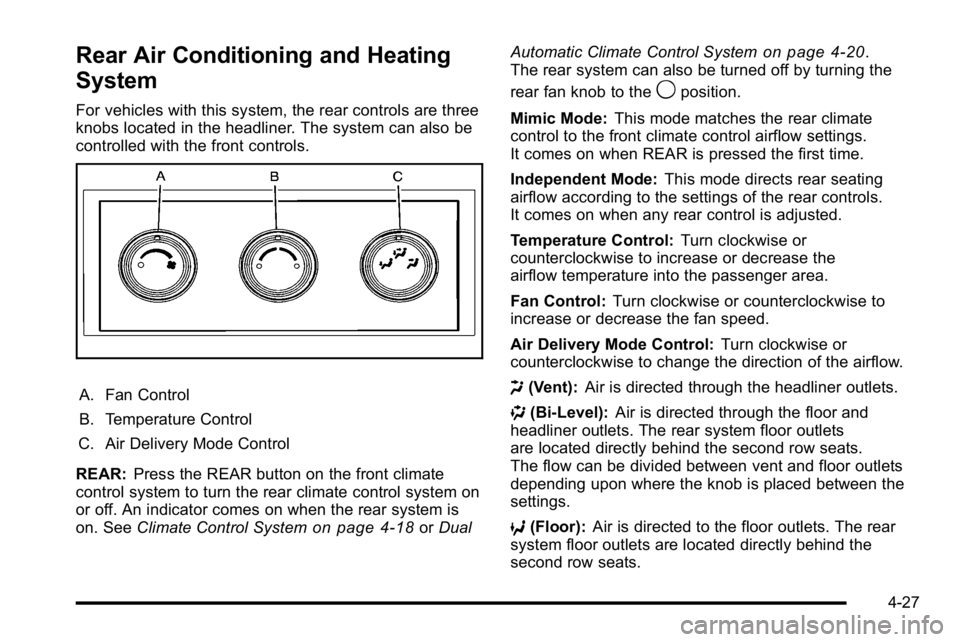
For vehicles with this system, the rear controls are three
knobs located in the headliner. The system can also be
controlled with the front controls.
A. Fan Control
B. Temperature Control
C. Air Delivery Mode Control
REAR: Press the REAR button on the front climate
control system to turn the rear climate control system on
or off. An indicator comes on when the rear system is
on. See Climate Control System
on page 4‑18orDual Automatic Climate Control System
on page 4‑20.
The rear system can also be turned off by turning the
rear fan knob to the
9position.
Mimic Mode: This mode matches the rear climate
control to the front climate control airflow settings.
It comes on when REAR is pressed the first time.
Independent Mode: This mode directs rear seating
airflow according to the settings of the rear controls.
It comes on when any rear control is adjusted.
Temperature Control: Turn clockwise or
counterclockwise to increase or decrease the
airflow temperature into the passenger area.
Fan Control: Turn clockwise or counterclockwise to
increase or decrease the fan speed.
Air Delivery Mode Control: Turn clockwise or
counterclockwise to change the direction of the airflow.
H (Vent): Air is directed through the headliner outlets.
) (Bi-Level): Air is directed through the floor and
headliner outlets. The rear system floor outlets
are located directly behind the second row seats.
The flow can be divided between vent and floor outlets
depending upon where the knob is placed between the
settings.
6 (Floor): Air is directed to the floor outlets. The rear
system floor outlets are located directly behind the
second row seats.
4-27
Page 303 of 614
To minimize taking your eyes off the road while driving,
do the following while the vehicle is parked:
.Become familiar with the operation and controls of
the audio system.
.Set up the tone, speaker adjustments, and preset
radio stations.
For more information, see Defensive Driving
on
page 5‑2.
Notice: Contact your dealer before adding any
equipment.
Adding audio or communication equipment could
interfere with the operation of the vehicle's engine,
radio, or other systems, and could damage them.
Follow federal rules covering mobile radio and
telephone equipment.
The vehicle has Retained Accessory Power (RAP).
With RAP, the audio system can be played even after
the ignition is turned off. See Retained Accessory
Power (RAP)
on page 3‑29for more information.
Setting the Clock
To set the time and date:
1. Turn the ignition key to ACC/ACCESSORY or ON/RUN, then press the
Obutton to turn the
radio on.
2. Press the
Hbutton to display HR, MIN, MM, DD,
YYYY (hour, minute, month, day, and year).
3. Press the softkey located under any one of the tabs to change that setting.
4. To increase the time or date, do one of the following:
.Press the softkey below the selected tab.
.Press the¨SEEK button.
.Press the\FWD button.
.Turn thefknob clockwise.
4-81
Page 304 of 614
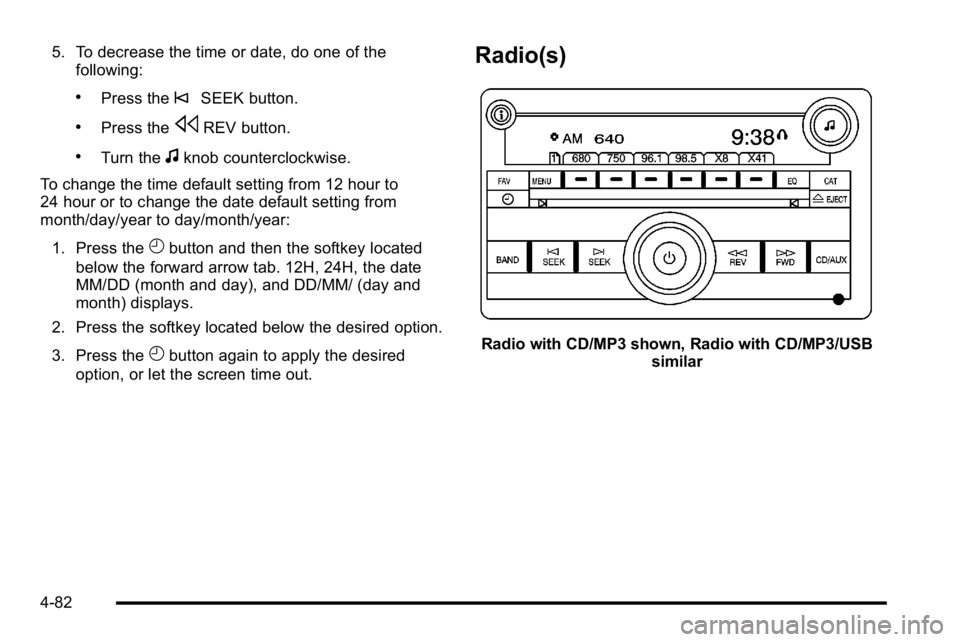
5. To decrease the time or date, do one of thefollowing:
.Press the©SEEK button.
.Press thesREV button.
.Turn thefknob counterclockwise.
To change the time default setting from 12 hour to
24 hour or to change the date default setting from
month/day/year to day/month/year:
1. Press the
Hbutton and then the softkey located
below the forward arrow tab. 12H, 24H, the date
MM/DD (month and day), and DD/MM/ (day and
month) displays.
2. Press the softkey located below the desired option.
3. Press the
Hbutton again to apply the desired
option, or let the screen time out.
Radio(s)
Radio with CD/MP3 shown, Radio with CD/MP3/USB similar
4-82
Page 306 of 614
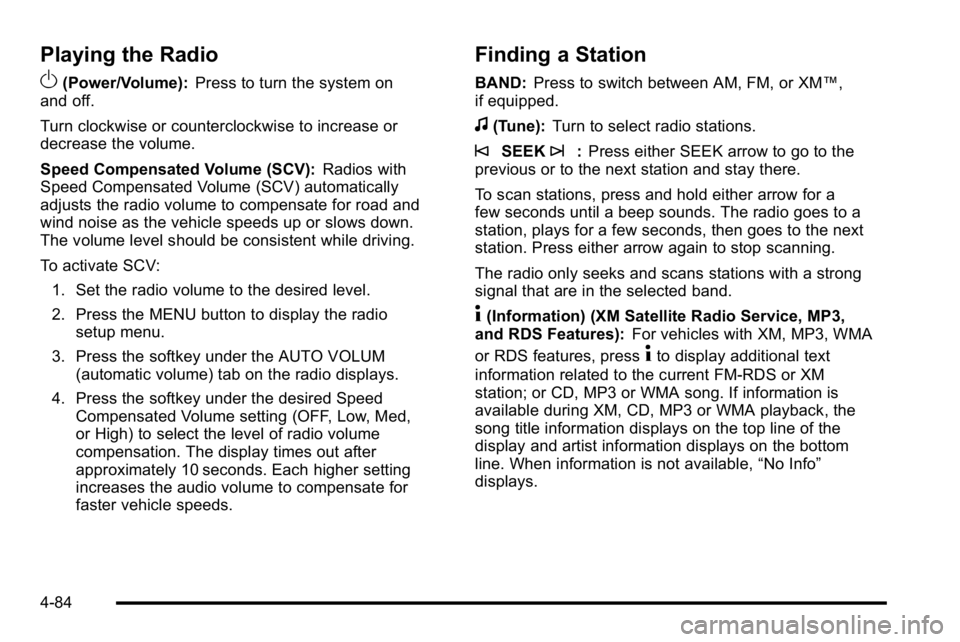
Playing the Radio
O
(Power/Volume):Press to turn the system on
and off.
Turn clockwise or counterclockwise to increase or
decrease the volume.
Speed Compensated Volume (SCV): Radios with
Speed Compensated Volume (SCV) automatically
adjusts the radio volume to compensate for road and
wind noise as the vehicle speeds up or slows down.
The volume level should be consistent while driving.
To activate SCV:
1. Set the radio volume to the desired level.
2. Press the MENU button to display the radio setup menu.
3. Press the softkey under the AUTO VOLUM (automatic volume) tab on the radio displays.
4. Press the softkey under the desired Speed Compensated Volume setting (OFF, Low, Med,
or High) to select the level of radio volume
compensation. The display times out after
approximately 10 seconds. Each higher setting
increases the audio volume to compensate for
faster vehicle speeds.
Finding a Station
BAND: Press to switch between AM, FM, or XM™,
if equipped.
f(Tune): Turn to select radio stations.
©SEEK¨:Press either SEEK arrow to go to the
previous or to the next station and stay there.
To scan stations, press and hold either arrow for a
few seconds until a beep sounds. The radio goes to a
station, plays for a few seconds, then goes to the next
station. Press either arrow again to stop scanning.
The radio only seeks and scans stations with a strong
signal that are in the selected band.
4(Information) (XM Satellite Radio Service, MP3,
and RDS Features): For vehicles with XM, MP3, WMA
or RDS features, press
4to display additional text
information related to the current FM-RDS or XM
station; or CD, MP3 or WMA song. If information is
available during XM, CD, MP3 or WMA playback, the
song title information displays on the top line of the
display and artist information displays on the bottom
line. When information is not available, “No Info”
displays.
4-84
Page 308 of 614
Setting the Tone (Bass/Midrange/Treble)
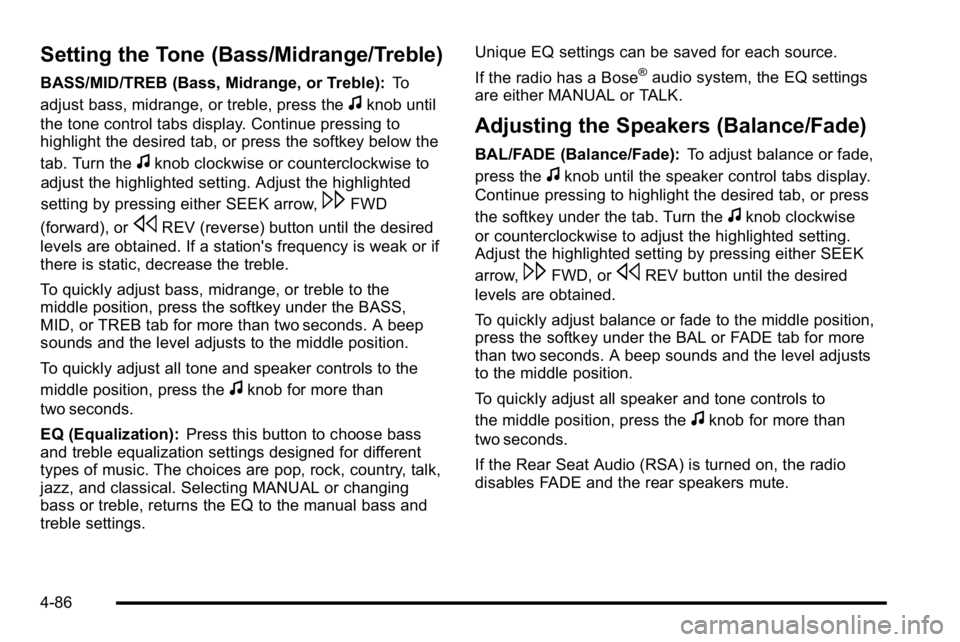
BASS/MID/TREB (Bass, Midrange, or Treble):To
adjust bass, midrange, or treble, press the
fknob until
the tone control tabs display. Continue pressing to
highlight the desired tab, or press the softkey below the
tab. Turn the
fknob clockwise or counterclockwise to
adjust the highlighted setting. Adjust the highlighted
setting by pressing either SEEK arrow,
\FWD
(forward), or
sREV (reverse) button until the desired
levels are obtained. If a station's frequency is weak or if
there is static, decrease the treble.
To quickly adjust bass, midrange, or treble to the
middle position, press the softkey under the BASS,
MID, or TREB tab for more than two seconds. A beep
sounds and the level adjusts to the middle position.
To quickly adjust all tone and speaker controls to the
middle position, press the
fknob for more than
two seconds.
EQ (Equalization): Press this button to choose bass
and treble equalization settings designed for different
types of music. The choices are pop, rock, country, talk,
jazz, and classical. Selecting MANUAL or changing
bass or treble, returns the EQ to the manual bass and
treble settings. Unique EQ settings can be saved for each source.
If the radio has a Bose
®audio system, the EQ settings
are either MANUAL or TALK.
Adjusting the Speakers (Balance/Fade)
BAL/FADE (Balance/Fade): To adjust balance or fade,
press the
fknob until the speaker control tabs display.
Continue pressing to highlight the desired tab, or press
the softkey under the tab. Turn the
fknob clockwise
or counterclockwise to adjust the highlighted setting.
Adjust the highlighted setting by pressing either SEEK
arrow,
\FWD, orsREV button until the desired
levels are obtained.
To quickly adjust balance or fade to the middle position,
press the softkey under the BAL or FADE tab for more
than two seconds. A beep sounds and the level adjusts
to the middle position.
To quickly adjust all speaker and tone controls to
the middle position, press the
fknob for more than
two seconds.
If the Rear Seat Audio (RSA) is turned on, the radio
disables FADE and the rear speakers mute.
4-86
Page 320 of 614
Using the Auxiliary Input Jack
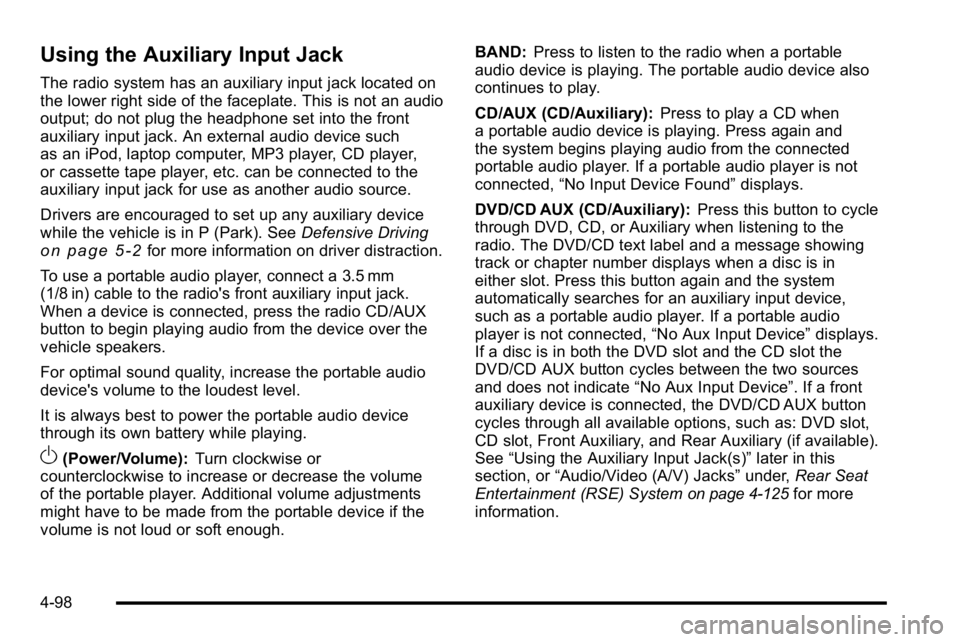
The radio system has an auxiliary input jack located on
the lower right side of the faceplate. This is not an audio
output; do not plug the headphone set into the front
auxiliary input jack. An external audio device such
as an iPod, laptop computer, MP3 player, CD player,
or cassette tape player, etc. can be connected to the
auxiliary input jack for use as another audio source.
Drivers are encouraged to set up any auxiliary device
while the vehicle is in P (Park). SeeDefensive Driving
on page 5‑2for more information on driver distraction.
To use a portable audio player, connect a 3.5 mm
(1/8 in) cable to the radio's front auxiliary input jack.
When a device is connected, press the radio CD/AUX
button to begin playing audio from the device over the
vehicle speakers.
For optimal sound quality, increase the portable audio
device's volume to the loudest level.
It is always best to power the portable audio device
through its own battery while playing.
O(Power/Volume): Turn clockwise or
counterclockwise to increase or decrease the volume
of the portable player. Additional volume adjustments
might have to be made from the portable device if the
volume is not loud or soft enough. BAND:
Press to listen to the radio when a portable
audio device is playing. The portable audio device also
continues to play.
CD/AUX (CD/Auxiliary): Press to play a CD when
a portable audio device is playing. Press again and
the system begins playing audio from the connected
portable audio player. If a portable audio player is not
connected, “No Input Device Found” displays.
DVD/CD AUX (CD/Auxiliary): Press this button to cycle
through DVD, CD, or Auxiliary when listening to the
radio. The DVD/CD text label and a message showing
track or chapter number displays when a disc is in
either slot. Press this button again and the system
automatically searches for an auxiliary input device,
such as a portable audio player. If a portable audio
player is not connected, “No Aux Input Device”displays.
If a disc is in both the DVD slot and the CD slot the
DVD/CD AUX button cycles between the two sources
and does not indicate “No Aux Input Device”. If a front
auxiliary device is connected, the DVD/CD AUX button
cycles through all available options, such as: DVD slot,
CD slot, Front Auxiliary, and Rear Auxiliary (if available).
See “Using the Auxiliary Input Jack(s)” later in this
section, or “Audio/Video (A/V) Jacks” under,Rear Seat
Entertainment (RSE) System
on page 4‑125for more
information.
4-98
Page 368 of 614
StabiliTrak®System
The vehicle has a vehicle stability enhancement system
called StabiliTrak. It is an advanced computer controlled
system that assists the driver with directional control of
the vehicle in difficult driving conditions.
StabiliTrak activates when the computer senses a
discrepancy between the intended path and the
direction the vehicle is actually traveling. StabiliTrak
selectively applies braking pressure at any one of the
vehicle's brakes to assist the driver with keeping the
vehicle on the intended path.
When the vehicle is started and begins to move, the
system performs several diagnostic checks to insure
there are no problems. The system may be heard or felt
while it is working. This is normal and does not mean
there is a problem with the vehicle. The system should
initialize before the vehicle reaches 20 mph (32 km/h).
In some cases, it may take approximately two miles of
driving before the system initializes.If cruise control is being used when StabiliTrak
activates, the cruise control automatically disengages.
The cruise control can be re-engaged when road
conditions allow. See
Cruise Control on page 4‑7.
If the system fails to turn on or activate, the
StabiliTrak light along with one of the following
messages will be displayed on the Driver Information
Center (DIC): TRACTION CONTROL OFF, SERVICE
TRACTION CONTROL, STABILITRAK OFF, SERVICE
STABILITRAK. If these DIC messages appear, make
sure the StabiliTrak system has not been turned off
using the StabiliTrak on/off button. Then turn the
steering wheel clockwise from the nine o'clock
position to the three o'clock position. If this clears the
message(s), the vehicle does not need servicing. If this
does not clear the message(s), then turn the vehicle off,
wait 15 seconds, and then turn it back on again to reset
the system. If any of these messages still appear on the
Driver Information Center (DIC), the vehicle should be
taken in for service. For more information on the DIC
messages, see Driver Information Center (DIC)
on
page 4‑47.
5-6