GMC YUKON XL 2010 Owners Manual
Manufacturer: GMC, Model Year: 2010, Model line: YUKON XL, Model: GMC YUKON XL 2010Pages: 614, PDF Size: 4.64 MB
Page 221 of 614
Sunroof
Your vehicle may be equipped with a power sliding
sunroof. To open or close the sunroof, the ignition
needs to be turned to ON/RUN, or Retained Accessory
Power (RAP) must be active. When RAP is active,
the sunroof will work for 10 minutes after the ignition is
turned off, or until a front door is opened. SeeRetained
Accessory Power (RAP)
on page 3‑29for more
information.
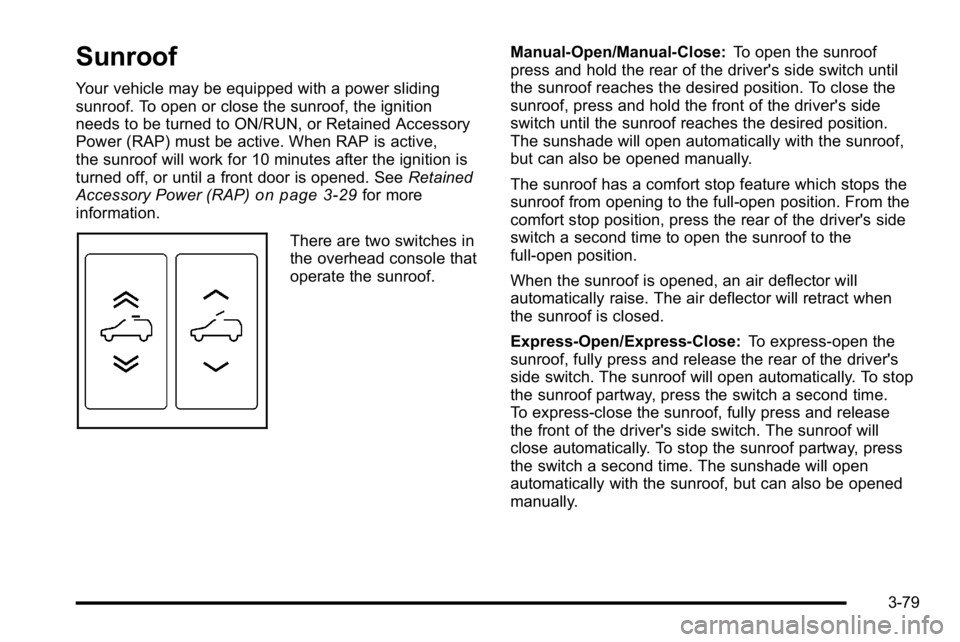
There are two switches in
the overhead console that
operate the sunroof. Manual-Open/Manual-Close:
To open the sunroof
press and hold the rear of the driver's side switch until
the sunroof reaches the desired position. To close the
sunroof, press and hold the front of the driver's side
switch until the sunroof reaches the desired position.
The sunshade will open automatically with the sunroof,
but can also be opened manually.
The sunroof has a comfort stop feature which stops the
sunroof from opening to the full-open position. From the
comfort stop position, press the rear of the driver's side
switch a second time to open the sunroof to the
full-open position.
When the sunroof is opened, an air deflector will
automatically raise. The air deflector will retract when
the sunroof is closed.
Express-Open/Express-Close: To express-open the
sunroof, fully press and release the rear of the driver's
side switch. The sunroof will open automatically. To stop
the sunroof partway, press the switch a second time.
To express-close the sunroof, fully press and release
the front of the driver's side switch. The sunroof will
close automatically. To stop the sunroof partway, press
the switch a second time. The sunshade will open
automatically with the sunroof, but can also be opened
manually.
3-79
Page 222 of 614
The sunroof has a comfort stop feature which stops the
sunroof from opening to the full-open position. From the
comfort stop position, press the rear of the driver's side
switch a second time to open the sunroof to the
full-open position.
When the sunroof is opened, an air deflector will
automatically raise. The air deflector will retract when
the sunroof is closed.
Vent:The sunroof has an express-vent open feature.
From the closed position, press the rear of the
passenger's side switch to vent the sunroof. To stop
the sunroof partway, press the switch a second time.
To close the sunroof, press and hold the front of the
passenger's side switch. To stop the sunroof partway,
release the switch. Anti-Pinch Feature:
If an object is in the path
of the sunroof while it is closing, the anti-pinch feature
will detect the object and stop the sunroof from closing
at the point of the obstruction. The sunroof will then
open halfway, and the air deflector will raise. To close
the sunroof once it has re-opened, refer to the
“Express-Close” or“Manual-Close” functions described
previously. If the sunroof is in the vent position, and
there is an object in the path of the sunroof when it
closing, the anti-pinch feature will detect the object
and stop the sunroof. To close the sunroof once
it has re-opened, refer to the “Manual-Close”or
“Express-Close” functions described previously.
Dirt and debris may collect on the sunroof seal or in the
tracks that could cause an issue with sunroof operation,
noise or plug the water drainage system. Periodically
open the sunroof and remove any obstacles or loose
debris. Wipe the sunroof seal and roof sealing area
using a clean cloth, mild soap, and water. Do not
remove grease from sunroof.
3-80
Page 223 of 614
Section 4 Instrument Panel
Instrument Panel Overview. . . . . . . . . . . . . . . . . . . . . . . .4-3
Hazard Warning Flashers . . . . . . . . . . . . . . . . . . . . . . . 4-3
Horn . . . . . . . . . . . . . . . . . . . . . . . . . . . . . . . . . . . . . . . . . . . . 4-3
Tilt Wheel . . . . . . . . . . . . . . . . . . . . . . . . . . . . . . . . . . . . . . . 4-3
Turn Signal/Multifunction Lever . . . . . . . . . . . . . . . . . . 4-4
Turn and Lane-Change Signals . . . . . . . . . . . . . . . . . 4-4
Headlamp High/Low-Beam Changer . . . . . . . . . . . . 4-5
Flash-to-Pass . . . . . . . . . . . . . . . . . . . . . . . . . . . . . . . . . . . 4-5
Windshield Wipers . . . . . . . . . . . . . . . . . . . . . . . . . . . . . . 4-6
Windshield Washer . . . . . . . . . . . . . . . . . . . . . . . . . . . . . 4-6
Rear Window Wiper/Washer . . . . . . . . . . . . . . . . . . . . 4-7
Cruise Control . . . . . . . . . . . . . . . . . . . . . . . . . . . . . . . . . . 4-7
Exterior Lamps . . . . . . . . . . . . . . . . . . . . . . . . . . . . . . . . 4-10
Headlamps on Reminder . . . . . . . . . . . . . . . . . . . . . . . 4-11
Daytime Running Lamps (DRL) . . . . . . . . . . . . . . . . 4-11
Automatic Headlamp System . . . . . . . . . . . . . . . . . . 4-12
Fog Lamps . . . . . . . . . . . . . . . . . . . . . . . . . . . . . . . . . . . . 4-13
Auxiliary Roof-Mounted Lamp . . . . . . . . . . . . . . . . . 4-13
Instrument Panel Brightness . . . . . . . . . . . . . . . . . . . 4-14
Dome Lamps . . . . . . . . . . . . . . . . . . . . . . . . . . . . . . . . . . 4-14
Dome Lamp Override . . . . . . . . . . . . . . . . . . . . . . . . . . 4-14
Entry Lighting . . . . . . . . . . . . . . . . . . . . . . . . . . . . . . . . . . 4-15
Exit Lighting . . . . . . . . . . . . . . . . . . . . . . . . . . . . . . . . . . . 4-15
Reading Lamps . . . . . . . . . . . . . . . . . . . . . . . . . . . . . . . . 4-15
Electric Power Management . . . . . . . . . . . . . . . . . . . 4-15 Battery Run-Down Protection . . . . . . . . . . . . . . . . . . 4-16
Accessory Power Outlet(s) . . . . . . . . . . . . . . . . . . . . . 4-16
Ashtray(s) and Cigarette Lighter . . . . . . . . . . . . . . . 4-17
Climate Controls . . . . . . . . . . . . . . . . . . . . . . . . . . . . . . . . . . 4-18
Climate Control System . . . . . . . . . . . . . . . . . . . . . . . . 4-18
Dual Automatic Climate Control System . . . . . . . 4-20
Outlet Adjustment . . . . . . . . . . . . . . . . . . . . . . . . . . . . . . 4-26
Rear Air Conditioning and Heating System . . . . 4-27
Rear Air Conditioning and Heating System and
Electronic Climate Controls . . . . . . . . . . . . . . . . . . 4-28
Warning Lights, Gauges, and Indicators . . . . . . . .4-29
Instrument Panel Cluster . . . . . . . . . . . . . . . . . . . . . . . 4-30
Speedometer and Odometer . . . . . . . . . . . . . . . . . . . 4-31
Trip Odometer . . . . . . . . . . . . . . . . . . . . . . . . . . . . . . . . . 4-31
Tachometer . . . . . . . . . . . . . . . . . . . . . . . . . . . . . . . . . . . . 4-31
Safety Belt Reminders . . . . . . . . . . . . . . . . . . . . . . . . . 4-31
Airbag Readiness Light . . . . . . . . . . . . . . . . . . . . . . . . 4-32
Passenger Airbag Status Indicator . . . . . . . . . . . . . 4-33
Charging System Light . . . . . . . . . . . . . . . . . . . . . . . . 4-34
Voltmeter Gauge . . . . . . . . . . . . . . . . . . . . . . . . . . . . . . . 4-35
Brake System Warning Light . . . . . . . . . . . . . . . . . . . 4-36
Antilock Brake System (ABS) Warning Light . . . 4-37
StabiliTrak
®Indicator Light . . . . . . . . . . . . . . . . . . . . . 4-38
Engine Coolant Temperature Gauge . . . . . . . . . . . 4-38
4-1
Page 224 of 614
Section 4 Instrument Panel
Tire Pressure Light . . . . . . . . . . . . . . . . . . . . . . . . . . . . 4-39
Malfunction Indicator Lamp . . . . . . . . . . . . . . . . . . . . 4-39
Oil Pressure Gauge . . . . . . . . . . . . . . . . . . . . . . . . . . . . 4-43
Oil Pressure Light . . . . . . . . . . . . . . . . . . . . . . . . . . . . . 4-44
Security Light . . . . . . . . . . . . . . . . . . . . . . . . . . . . . . . . . . 4-44
Fog Lamp Light . . . . . . . . . . . . . . . . . . . . . . . . . . . . . . . . 4-45
Cruise Control Light . . . . . . . . . . . . . . . . . . . . . . . . . . . 4-45
Highbeam On Light . . . . . . . . . . . . . . . . . . . . . . . . . . . . 4-45
Tow/Haul Mode Light . . . . . . . . . . . . . . . . . . . . . . . . . . 4-45
Fuel Gauge . . . . . . . . . . . . . . . . . . . . . . . . . . . . . . . . . . . . 4-46
Low Fuel Warning Light . . . . . . . . . . . . . . . . . . . . . . . . 4-47
Driver Information Center (DIC) . . . . . . . . . . . . . . . . . .4-47
DIC Operation and Displays (With DIC Buttons) . . . . . . . . . . . . . . . . . . . . . . . . . . . . . . . . . . . . . 4-48
DIC Operation and Displays (Without DIC Buttons) . . . . . . . . . . . . . . . . . . . . . . . . . . . . . . . . . . . . . 4-55
DIC Compass . . . . . . . . . . . . . . . . . . . . . . . . . . . . . . . . . . 4-58
DIC Warnings and Messages . . . . . . . . . . . . . . . . . . 4-61
DIC Vehicle Customization (With DIC Buttons) . . . . . . . . . . . . . . . . . . . . . . . . . . . . . . . . . . . . . 4-72 Audio System(s)
. . . . . . . . . . . . . . . . . . . . . . . . . . . . . . . . . . 4-80
Setting the Clock . . . . . . . . . . . . . . . . . . . . . . . . . . . . . . 4-81
Radio(s) . . . . . . . . . . . . . . . . . . . . . . . . . . . . . . . . . . . . . . . 4-82
Using an MP3 (Radios with CD) . . . . . . . . . . . . . . . 4-99
Using an MP3 (Radios with CD and DVD) . . . . 4-106
XM Radio Messages . . . . . . . . . . . . . . . . . . . . . . . . . 4-113
Navigation/Radio System . . . . . . . . . . . . . . . . . . . . . 4-114
Bluetooth
®. . . . . . . . . . . . . . . . . . . . . . . . . . . . . . . . . . . . 4-114
Rear Seat Entertainment (RSE) System . . . . . . 4-125
Rear Seat Audio (RSA) . . . . . . . . . . . . . . . . . . . . . . . 4-134
Theft-Deterrent Feature . . . . . . . . . . . . . . . . . . . . . . 4-136
Audio Steering Wheel Controls . . . . . . . . . . . . . . . 4-136
Radio Reception . . . . . . . . . . . . . . . . . . . . . . . . . . . . . . 4-139
Rear Side Window Antenna . . . . . . . . . . . . . . . . . . 4-140
XM™ Satellite Radio Antenna System . . . . . . . . 4-140
4-2
Page 225 of 614
Instrument Panel Overview
Hazard Warning Flashers
|(Hazard Warning Flasher):Press this button
located on top of the steering column, to make the front
and rear turn signal lamps flash on and off. This warns
others that you are having trouble. Press again to turn
the flashers off.
When the hazard warning flashers are on, the vehicle's
turn signals will not work.
Horn
To sound the horn, press the center pad on the steering
wheel.
Tilt Wheel
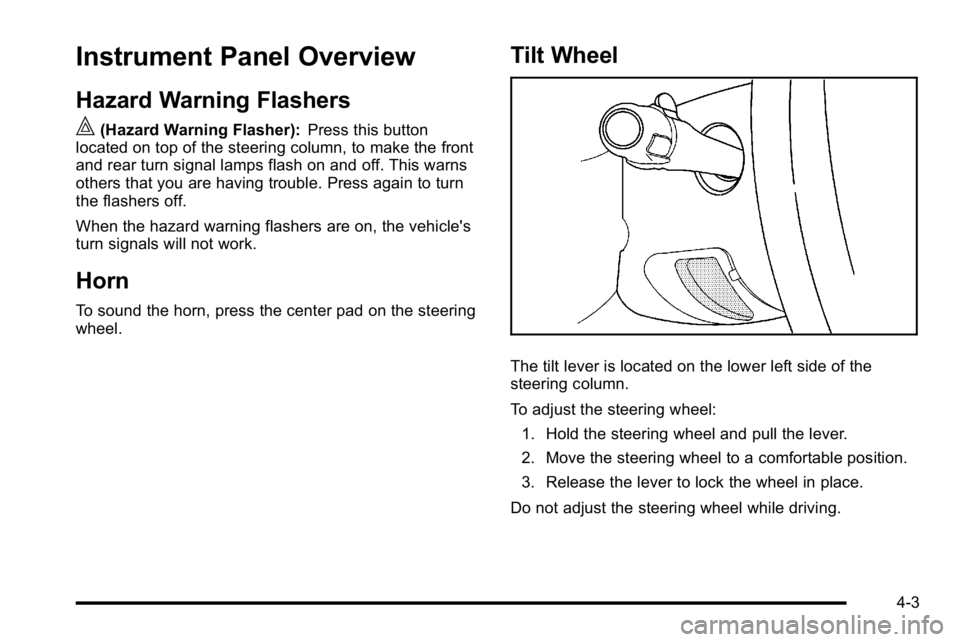
The tilt lever is located on the lower left side of the
steering column.
To adjust the steering wheel:
1. Hold the steering wheel and pull the lever.
2. Move the steering wheel to a comfortable position.
3. Release the lever to lock the wheel in place.
Do not adjust the steering wheel while driving.
4-3
Page 226 of 614

Turn Signal/Multifunction Lever
The lever on the left side of the steering column
includes the following:
G:Turn and Lane Change Signals
5 3:Headlamp High/Low-Beam Changer
N:Windshield Wipers
L:Windshield Washer
5:Rear Wiper Delay
Z:Rear Wiper
=:Rear Wiper Wash
Flash-to-Pass.
Information for these features is on the pages following.
Turn and Lane-Change Signals
An arrow on the
instrument panel cluster
flashes in the direction of
the turn or lane change.
Move the lever all the way up or down to signal a turn.
Raise or lower the lever for less than one second until
the arrow starts to flash to signal a lane change. This
causes the turn signals to automatically flash three
times. It will flash six times if tow-haul mode is active.
Holding the turn signal lever for more than one second
will cause the turn signals to flash until you release the
lever.
The lever returns to its starting position whenever it is
released.
If after signaling a turn or a lane change the arrows
flash rapidly or do not come on, a signal bulb could be
burned out.
Have the bulbs replaced. If the bulb is not burned out,
check the fuse. See Fuses and Circuit Breakers
on
page 6‑118.
4-4
Page 227 of 614
Turn Signal On Chime
If the turn signal is left on for more than 3/4 of a mile
(1.2 km), a chime will sound at each flash of the turn
signal and the message TURN SIGNAL ON will also
appear in the Driver Information Control (DIC). To turn
the chime and message off, move the turn signal lever
to the off position.
Headlamp High/Low-Beam Changer
53(Headlamp High/Low Beam Changer): To
change the headlamps from low to high beam, push
the lever toward the instrument panel. To return to
low-beam headlamps, pull the multifunction lever toward
you. Then release it.
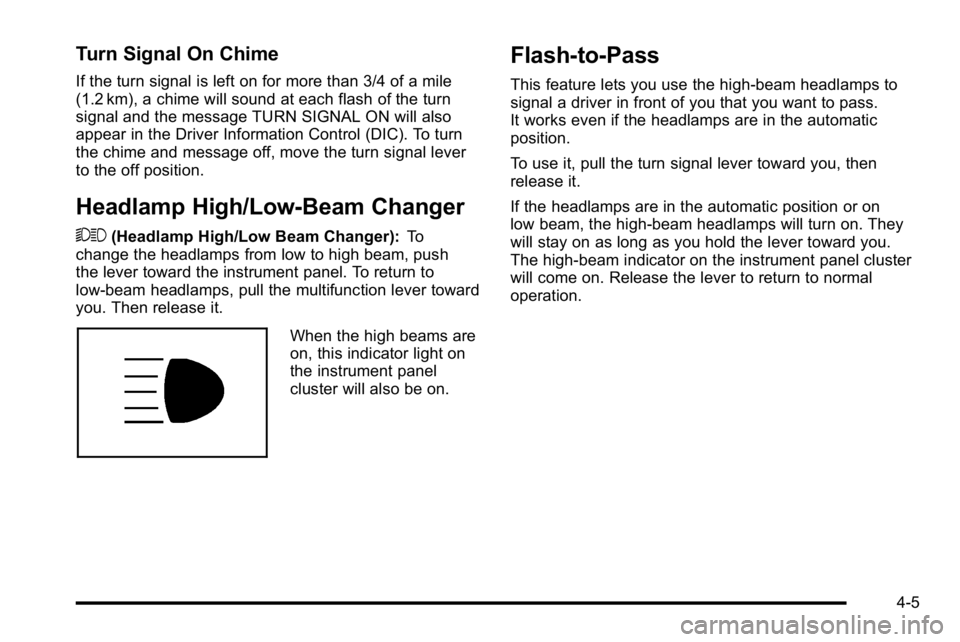
When the high beams are
on, this indicator light on
the instrument panel
cluster will also be on.
Flash-to-Pass
This feature lets you use the high-beam headlamps to
signal a driver in front of you that you want to pass.
It works even if the headlamps are in the automatic
position.
To use it, pull the turn signal lever toward you, then
release it.
If the headlamps are in the automatic position or on
low beam, the high-beam headlamps will turn on. They
will stay on as long as you hold the lever toward you.
The high-beam indicator on the instrument panel cluster
will come on. Release the lever to return to normal
operation.
4-5
Page 228 of 614
Windshield Wipers
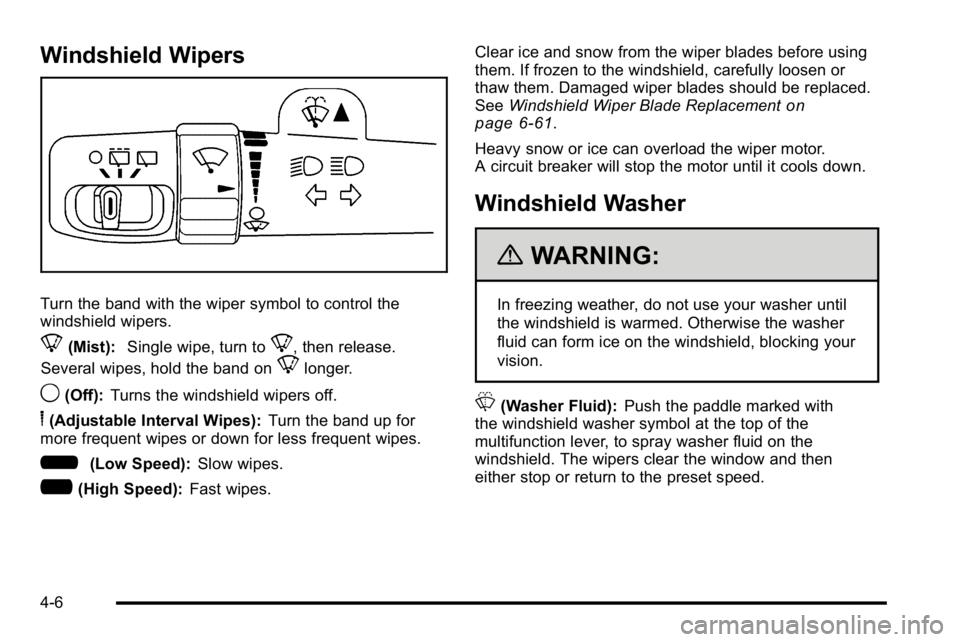
Turn the band with the wiper symbol to control the
windshield wipers.
8(Mist):Single wipe, turn to8, then release.
Several wipes, hold the band on
8longer.
9(Off): Turns the windshield wipers off.
6(Adjustable Interval Wipes): Turn the band up for
more frequent wipes or down for less frequent wipes.
6(Low Speed): Slow wipes.
?(High Speed): Fast wipes. Clear ice and snow from the wiper blades before using
them. If frozen to the windshield, carefully loosen or
thaw them. Damaged wiper blades should be replaced.
See
Windshield Wiper Blade Replacement
on
page 6‑61.
Heavy snow or ice can overload the wiper motor.
A circuit breaker will stop the motor until it cools down.
Windshield Washer
{WARNING:
In freezing weather, do not use your washer until
the windshield is warmed. Otherwise the washer
fluid can form ice on the windshield, blocking your
vision.
L(Washer Fluid): Push the paddle marked with
the windshield washer symbol at the top of the
multifunction lever, to spray washer fluid on the
windshield. The wipers clear the window and then
either stop or return to the preset speed.
4-6
Page 229 of 614
Rear Window Wiper/Washer
{WARNING:
In freezing weather, do not use your washer until
the windshield is warmed. Otherwise the washer
fluid can form ice on the windshield, blocking your
vision.
The rear wiper control is located on the turn signal/
multifunction lever.
To turn the rear wiper on, slide the lever to a wiper
position.
9(Off): Turns the wiper off.
5(Rear Wiper Delay): Turns on the rear wiper delay.
Z(Rear Wiper):Turns on the rear wiper.
=(Rear Wiper Wash): To turn on the rear wiper
wash, push the button on the end of the turn signal/
multifunction lever to spray washer fluid on the rear
window. The wipers will clear the rear window and
either stop or return to your preset speed. For more
washer cycles, press and hold the button. The rear window wiper/washer will not operate if the
liftgate or liftglass is open or ajar. If the liftgate or
liftglass is opened while the rear wiper is on, the
wiper will return to the parked position and stop.
Cruise Control
{WARNING:
Cruise control can be dangerous where you
cannot drive safely at a steady speed. So, do
not use the cruise control on winding roads or in
heavy traffic.
Cruise control can be dangerous on slippery
roads. On such roads, fast changes in tire traction
can cause excessive wheel slip, and you could
lose control. Do not use cruise control on slippery
roads.
With cruise control, a speed of about 40 km/h (25 mph)
or more can be maintained without keeping your foot on
the accelerator. Cruise control does not work at speeds
below about 40 km/h (25 mph).
When the brakes are applied, cruise control is
turned off.
4-7
Page 230 of 614
If the vehicle has StabiliTrak®, and the system begins
to limit wheel spin, cruise control will automatically
disengage. See StabiliTrak
®Systemon page 5‑6.
When road conditions allow the cruise control to be
safely used again, it can be turned back on.
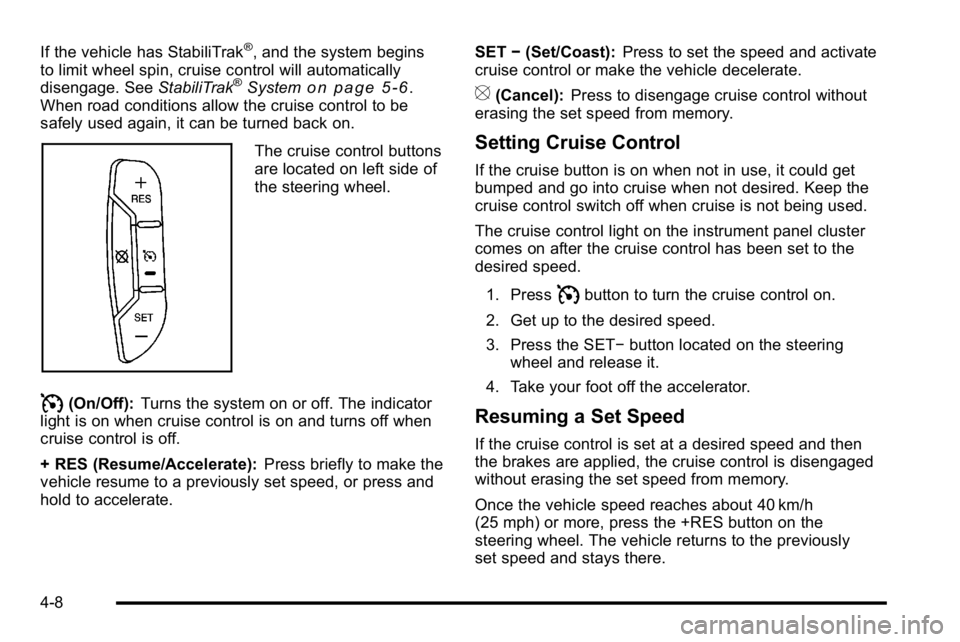
The cruise control buttons
are located on left side of
the steering wheel.
I(On/Off): Turns the system on or off. The indicator
light is on when cruise control is on and turns off when
cruise control is off.
+ RES (Resume/Accelerate): Press briefly to make the
vehicle resume to a previously set speed, or press and
hold to accelerate. SET
−(Set/Coast): Press to set the speed and activate
cruise control or make the vehicle decelerate.
[(Cancel): Press to disengage cruise control without
erasing the set speed from memory.
Setting Cruise Control
If the cruise button is on when not in use, it could get
bumped and go into cruise when not desired. Keep the
cruise control switch off when cruise is not being used.
The cruise control light on the instrument panel cluster
comes on after the cruise control has been set to the
desired speed.
1. Press
Ibutton to turn the cruise control on.
2. Get up to the desired speed.
3. Press the SET− button located on the steering
wheel and release it.
4. Take your foot off the accelerator.
Resuming a Set Speed
If the cruise control is set at a desired speed and then
the brakes are applied, the cruise control is disengaged
without erasing the set speed from memory.
Once the vehicle speed reaches about 40 km/h
(25 mph) or more, press the +RES button on the
steering wheel. The vehicle returns to the previously
set speed and stays there.
4-8