wiring GMC YUKON XL 2011 Owners Manual
[x] Cancel search | Manufacturer: GMC, Model Year: 2011, Model line: YUKON XL, Model: GMC YUKON XL 2011Pages: 528, PDF Size: 7.64 MB
Page 46 of 528

Black plate (10,1)GMC Yukon/Yukon XL Owner Manual - 2011
2-10 Keys, Doors and Windows
Doors
Liftgate (Manual)
{WARNING
It can be dangerous to drive
with the liftglass or liftgate open
because carbon monoxide (CO)
gas can come into your vehicle.
You cannot see or smell CO.
It can cause unconsciousness
and even death.
If you must drive with the
liftglass or liftgate open, or if
electrical wiring or other cable
connections must pass through
the seal between the body and
the liftglass or liftgate:
.Make sure all other windows
are shut.
.Turn the fan on your heating
or cooling system to its
highest speed with the(Continued)
WARNING (Continued)
recirculation mode off. That
will force outside air into your
vehicle. SeeClimate Control
Systems on page 8‑1 orDual
Automatic Climate Control
System on page 8‑4.
.If you have air outlets on or
under the instrument panel,
open them all the way.
.If your vehicle has a power
liftgate, disable the power
liftgate function.
See Engine Exhaust on
page 9‑36.
Press
Kon the Remote Keyless
Entry (RKE) transmitter or use the
power door lock switches to unlock
the liftgate. See Remote Keyless
Entry (RKE) System Operation on
page 2‑3.
On vehicles with a liftglass, press
the button on the underside of the
license pocket applique (A) to open
it. The liftglass can also be opened
by pressing
mon the RKE
transmitter.
To open the entire liftgate, press the
touchpad on the underside of the
liftgate handle (B). The vehicle must
be in PARK (P) to open the liftgate.
To close the liftgate, use the pull
cup or pull strap.
Page 112 of 528
Black plate (52,1)GMC Yukon/Yukon XL Owner Manual - 2011
3-52 Seats and Restraints
Adding Equipment to the
Airbag-Equipped Vehicle
Q: Is there anything I might addto or change about the vehicle
that could keep the airbags
from working properly?
A: Yes. If you add things that
change your vehicle's frame,
bumper system, height, front end
or side sheet metal, they may
keep the airbag system from
working properly. Changing or
moving any parts of the front
seats, safety belts, the airbag
sensing and diagnostic module,
steering wheel, instrument
panel, roof-rail airbag modules,
ceiling headliner or pillar garnish
trim, overhead console, front
sensors, side impact sensors,
or airbag wiring can affect the
operation of the airbag system.
In addition, the vehicle may have
a passenger sensing system
for the right front passenger's
position, which includes sensors
that are part of the passenger's seat. The passenger sensing
system may not operate
properly if the original seat
trim is replaced with non-GM
covers, upholstery or trim,
or with GM covers, upholstery
or trim designed for a different
vehicle. Any object, such as
an aftermarket seat heater or
a comfort enhancing pad or
device, installed under or on
top of the seat fabric, could also
interfere with the operation of
the passenger sensing system.
This could either prevent proper
deployment of the passenger
airbag(s) or prevent the
passenger sensing system
from properly turning off the
passenger airbag(s). See
Passenger Sensing System on
page 3‑47.
If you have any questions
about this, you should contact
Customer Assistance before
you modify your vehicle. The
phone numbers and addresses
for Customer Assistance are in
Step Two of the Customer
Satisfaction Procedure in
this manual. See
Customer
Satisfaction Procedure on
page 13‑1.
If the vehicle has rollover
roof-rail airbags, see Different
Size Tires and Wheels on
page 10‑66 for additional
important information.
Q: What if I added a snow plow? Will it keep the airbags from
working properly?
A: We have designed our airbag
systems to work properly under
a wide range of conditions,
including snow plowing with
vehicles that have the optional
Snow Plow Prep Package
(RPO VYU). But do not change
or defeat the snow plow's
“tripping mechanism.” If you do,
it can damage your snow plow
and your vehicle, and it may
cause an airbag inflation.
Page 113 of 528
Black plate (53,1)GMC Yukon/Yukon XL Owner Manual - 2011
Seats and Restraints 3-53
Q: Because I have a disability,I have to get my vehicle
modified. How can I find out
whether this will affect my
airbag system?
A: If you have questions, call
Customer Assistance. The
phone numbers and addresses
for Customer Assistance are
in Step Two of the Customer
Satisfaction Procedure in
this manual. See Customer
Satisfaction Procedure on
page 13‑1.
In addition, your dealer and the
service manual have information
about the location of the airbag
sensors, sensing and diagnostic
module and airbag wiring.
Airbag System Check
The airbag system does not need
regularly scheduled maintenance
or replacement. Make sure the
airbag readiness light is working. See
Airbag Readiness Light on
page 5‑18 for more information.
Notice: If an airbag covering is
damaged, opened, or broken, the
airbag may not work properly.
Do not open or break the airbag
coverings. If there are any
opened or broken airbag covers,
have the airbag covering and/or
airbag module replaced. For the
location of the airbag modules,
see What Makes an Airbag
Inflate? on page 3‑44. See your
dealer for service.
Replacing Airbag System
Parts After a Crash
{WARNING
A crash can damage the
airbag systems in the vehicle.
A damaged airbag system
may not work properly and
may not protect you and your
passenger(s) in a crash, resulting
(Continued)
WARNING (Continued)
in serious injury or even death.
To help make sure the airbag
systems are working properly
after a crash, have them
inspected and any necessary
replacements made as soon as
possible.
If an airbag inflates, you will need to
replace airbag system parts. See
your dealer for service.
If the airbag readiness light stays
on after the vehicle is started or
comes on when you are driving,
the airbag system may not work
properly. Have the vehicle serviced
right away. See Airbag Readiness
Light on page 5‑18 for more
information.
Page 158 of 528

Black plate (18,1)GMC Yukon/Yukon XL Owner Manual - 2011
5-18 Instruments and Controls
This chime and light are repeated if
the driver remains unbuckled and
the vehicle is in motion. If the driver
safety belt is already buckled,
neither the chime nor the light
comes on.
Passenger Safety Belt
Reminder Light
For vehicles equipped with the
passenger safety belt reminder
light, several seconds after the
engine is started, a chime sounds
for several seconds to remind the
front passenger to buckle their
safety belt. The passenger safety
belt light, located on the instrument
panel, comes on and stays on for
several seconds and then flashes
for several more.
This chime and light are repeated if
the passenger remains unbuckled
and the vehicle is in motion.
If the passenger safety belt is
buckled, neither the chime nor the
light comes on.
The front passenger safety belt
warning light and chime may turn on
if an object is put on the seat such
as a briefcase, handbag, grocery
bag, laptop or other electronic
device. To turn off the warning light
and or chime, remove the object
from the seat or buckle the
safety belt.
Airbag Readiness Light
The system checks the airbag's
electrical system for possible
malfunctions. If the light stays on
it indicates there is an electrical
problem. The system check
includes the airbag sensor, the
pretensioners, the airbag modules,
the wiring, and the crash sensing
and diagnostic module. For more
information on the airbag system,
seeAirbag System on page 3‑39.
The airbag readiness light comes on
solid for a few seconds when the
engine is started. If the light does
not come on then, have it fixed
immediately.
Page 179 of 528

Black plate (39,1)GMC Yukon/Yukon XL Owner Manual - 2011
Instruments and Controls 5-39
As soon as it is safe to do so,
carefully pull your vehicle over to
the side of the road and turn the
ignition off. Check the wiring
connection to the trailer and turn
the ignition back on. If this message
still displays, either your vehicle or
the trailer needs service. See your
dealer.
See“Integrated Trailer Brake
Control System” underTowing
Equipment on page 9‑84 for more
information.
Door Ajar Messages
DRIVER DOOR OPEN
This message displays and a
chime sounds if the driver door is
not fully closed and the vehicle is
shifted out of P (Park). Stop and turn
off the vehicle, check the door for
obstructions, and close the door
again. Check to see if the message
still appears on the DIC.
HOOD OPEN
This message displays and a
chime sounds if the hood is not
fully closed. Stop and turn off
the vehicle, check the hood for
obstructions, and close the hood
again. Check to see if the message
still appears on the DIC.
LEFT REAR DOOR OPEN
This message displays and a chime
sounds if the driver side rear door is
not fully closed and the vehicle is
shifted out of P (Park). Stop and turn
off the vehicle, check the door for
obstructions, and close the door
again. Check to see if the message
still appears on the DIC.
PASSENGER DOOR OPEN
This message displays and a chime
sounds if the front passenger door
is not fully closed and the vehicle is
shifted out of P (Park). Stop and turn
off the vehicle, check the door for
obstructions, and close the door
again. Check to see if the message
still appears on the DIC.
REAR ACCESS OPEN
This message displays and a
chime sounds if the liftgate or
liftglass is open while the ignition
is in ON/RUN. Turn off the vehicle
and check the liftgate and liftglass.
Restart the vehicle and check for
the message on the DIC display.
RIGHT REAR DOOR OPEN
This message displays and a chime
sounds if the passenger side rear
door is not fully closed and the
vehicle is shifted out of P (Park).
Stop and turn off the vehicle, check
the door for obstructions, and close
the door again. Check to see if the
message still appears on the DIC.
Page 186 of 528
Black plate (46,1)GMC Yukon/Yukon XL Owner Manual - 2011
5-46 Instruments and Controls
Have the tire pressures checked
and set to those shown on the Tire
Loading Information label. SeeTires
on page 10‑48, Vehicle Load Limits
on page 9‑23, and Tire Pressure on
page 10‑56. The DIC also shows
the tire pressure values. See “DIC
Operation and Displays (With DIC
Buttons)” earlier in this section.
Transmission Messages
SERVICE 4 WHEEL DRIVE
This message displays if a problem
occurs with the four-wheel-drive
system. If this message appears,
stop as soon as possible and turn
off the vehicle. Make sure the key is
in the LOCK/OFF position for at
least one minute and then restart
the vehicle and check for the
message on the DIC display. If
the message is still displayed or
appears again when you begin
driving, the four-wheel-drive system
needs service. See your dealer.
TRANSMISSION HOT IDLE
ENGINE
Notice:If you drive the vehicle
while the transmission fluid is
overheating and the transmission
temperature warning is displayed
on the instrument panel cluster
and/or DIC, you can damage the
transmission. This could lead to
costly repairs that would not be
covered by the warranty. Do not
drive the vehicle with overheated
transmission fluid or while the
transmission temperature
warning is displayed.
This message displays along with a
sound if the transmission fluid in the
vehicle gets hot. Driving with the
transmission fluid temperature high
can cause damage to the vehicle.
Stop the vehicle and let it idle to
allow the transmission to cool. This
message clears and the chime
stops when the fluid temperature
reaches a safe level.
Vehicle Reminder
Messages
CHECK TRAILER WIRING
On vehicles with the Integrated
Trailer Brake Control (ITBC) system,
this message may display and a
chime may sound when one of the
following conditions exists:
.A trailer with electric brakes
becomes disconnected from the
vehicle.
‐ If the disconnect occurs while
the vehicle is stopped, this
message clears itself after a
short time.
‐ If the disconnect occurs while
the vehicle is moving, this
message stays on until the
ignition is turned off.
.There is a short in the wiring to
the electric trailer brakes.
When this message displays, power
is no longer available to the trailer
brakes.
Page 187 of 528
Black plate (47,1)GMC Yukon/Yukon XL Owner Manual - 2011
Instruments and Controls 5-47
As soon as it is safe to do so,
carefully pull the vehicle over to the
side of the road and turn the ignition
off. Check the wiring connection to
the trailer and turn the ignition back
on. This message clears if the trailer
is reconnected. This message also
clears if you acknowledge it. If this
message still displays, either the
vehicle or the trailer needs service.
See your dealer.
See“Integrated Trailer Brake
Control System” underTowing
Equipment on page 9‑84 for more
information.
ICE POSSIBLE DRIVE
WITH CARE
This message displays when ice
conditions are possible.
TRAILER CONNECTED
On vehicles with the Integrated
Trailer Brake Control (ITBC) system,
this message displays briefly when
a trailer with electric brakes is first
connected to the vehicle. This message clears itself after
several seconds. This message also
clears if you acknowledge it. After
this message clears, the TRAILER
GAIN/OUTPUT display appears in
the DIC.
See
“TRAILER GAIN/OUTPUT”
under Driver Information Center
(DIC) on page 5‑28 and“Integrated
Trailer Brake Control System” under
Towing Equipment on page 9‑84 for
more information.
Washer Fluid Messages
WASHER FLUID LOW ADD
FLUID
This message displays when
the windshield washer fluid is low.
Fill the windshield washer fluid
reservoir as soon as possible.
See Engine Compartment Overview
on page 10‑6 for the location of the
windshield washer fluid reservoir.
Also, see Washer Fluid on
page 10‑25 for more information.
Vehicle
Personalization
Vehicle Personalization
(With DIC Buttons)
Your vehicle may have
customization capabilities that
allow you to program certain
features to one preferred setting.
Customization features can only
be programmed to one setting
on the vehicle and cannot be
programmed to a preferred setting
for two different drivers.
All of the customization options may
not be available on your vehicle.
Only the options available will be
displayed on the DIC.
The default settings for the
customization features were set
when your vehicle left the factory,
but may have been changed from
their default state since then.
The customization preferences are
automatically recalled.
Page 208 of 528
Black plate (6,1)GMC Yukon/Yukon XL Owner Manual - 2011
6-6 Lighting
The lever returns to its starting
position whenever it is released.
If after signaling a turn or a lane
change the arrows flash rapidly or
do not come on, a signal bulb could
be burned out.
Have the bulbs replaced. If the bulb
is not burned out, check the fuse.
SeeFuses and Circuit Breakers on
page 10‑40.
Turn Signal On Chime
If the turn signal is left on for more
than 1.2 km (3/4 of a mile), a chime
will sound at each flash of the turn
signal and the message TURN
SIGNAL ON will also appear in the
Driver Information Control (DIC).
To turn the chime and message off,
move the turn signal lever to the off
position.Fog Lamps
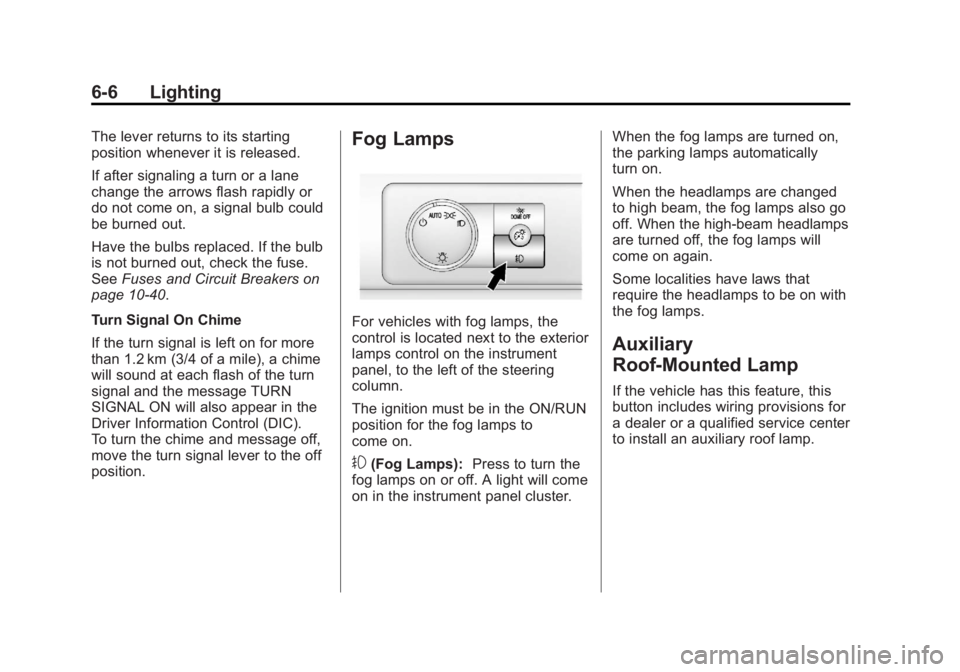
For vehicles with fog lamps, the
control is located next to the exterior
lamps control on the instrument
panel, to the left of the steering
column.
The ignition must be in the ON/RUN
position for the fog lamps to
come on.
#(Fog Lamps): Press to turn the
fog lamps on or off. A light will come
on in the instrument panel cluster. When the fog lamps are turned on,
the parking lamps automatically
turn on.
When the headlamps are changed
to high beam, the fog lamps also go
off. When the high-beam headlamps
are turned off, the fog lamps will
come on again.
Some localities have laws that
require the headlamps to be on with
the fog lamps.
Auxiliary
Roof-Mounted Lamp
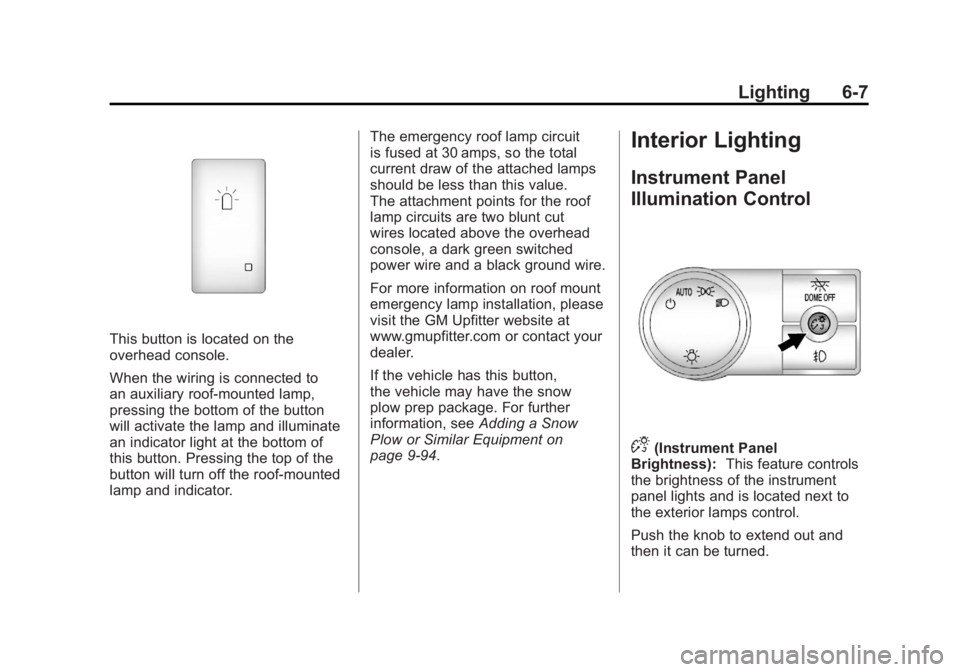
If the vehicle has this feature, this
button includes wiring provisions for
a dealer or a qualified service center
to install an auxiliary roof lamp.
Page 209 of 528
Black plate (7,1)GMC Yukon/Yukon XL Owner Manual - 2011
Lighting 6-7
This button is located on the
overhead console.
When the wiring is connected to
an auxiliary roof‐mounted lamp,
pressing the bottom of the button
will activate the lamp and illuminate
an indicator light at the bottom of
this button. Pressing the top of the
button will turn off the roof‐mounted
lamp and indicator.The emergency roof lamp circuit
is fused at 30 amps, so the total
current draw of the attached lamps
should be less than this value.
The attachment points for the roof
lamp circuits are two blunt cut
wires located above the overhead
console, a dark green switched
power wire and a black ground wire.
For more information on roof mount
emergency lamp installation, please
visit the GM Upfitter website at
www.gmupfitter.com or contact your
dealer.
If the vehicle has this button,
the vehicle may have the snow
plow prep package. For further
information, see
Adding a Snow
Plow or Similar Equipment on
page 9‑94.
Interior Lighting
Instrument Panel
Illumination Control
D(Instrument Panel
Brightness): This feature controls
the brightness of the instrument
panel lights and is located next to
the exterior lamps control.
Push the knob to extend out and
then it can be turned.
Page 365 of 528
Black plate (85,1)GMC Yukon/Yukon XL Owner Manual - 2011
Driving and Operating 9-85
Safety Chains
Always attach chains between the
vehicle and the trailer. Cross the
safety chains under the tongue
of the trailer to help prevent the
tongue from contacting the road if it
becomes separated from the hitch.
Instructions about safety chains
may be provided by the hitch
manufacturer or by the trailer
manufacturer. If the trailer being
towed weighs up to 2 271 kg
(5,000 lbs) with a factory-installed
step bumper, safety chains may
be attached to the attaching points
on the bumper, otherwise, safety
chains should be attached to holes
on the trailer hitch platform. Always
leave just enough slack so the
combination can turn. Never allow
safety chains to drag on the ground.
Trailer Brakes
A loaded trailer that weighs more
than 900 kg (2,000 lbs) needs to
have its own brake system that is
adequate for the weight of the
trailer. Be sure to read and follow
the instructions for the trailer brakes
so they are installed, adjusted and
maintained properly.
Since the vehicle is equipped with
StabiliTrak
®, the trailer brakes
cannot tap into the vehicle's
hydraulic system.
Trailer Wiring Harness
The vehicle is equipped with the
following wiring harnesses for
towing a trailer.
Basic Trailer Wiring
The trailer wiring harness, with a
seven-pin connector, is located at
the rear of the vehicle and is tied to
the vehicle's frame. The harness
connector can be plugged into a
seven-pin universal heavy-duty
trailer connector available through
your dealer. The seven-wire harness contains
the following trailer circuits:
.Yellow: Left Stop/Turn Signal
.Dark Green: Right Stop/Turn
Signal
.Brown: Taillamps
.White: Ground
.Light Green: Back-up Lamps
.Red: Battery Feed*
.Dark Blue: Trailer Brake*
*The fuses for these two circuits
are installed in the underhood
electrical center, but the wires are
not connected. They should be
connected by your dealer or a
qualified service center.