headlamp GMC YUKON XL 2013 Owners Manual
[x] Cancel search | Manufacturer: GMC, Model Year: 2013, Model line: YUKON XL, Model: GMC YUKON XL 2013Pages: 510, PDF Size: 7.71 MB
Page 2 of 510
Black plate (2,1)GMC Yukon/Yukon XL Owner Manual - 2013 - CRC 2nd edition - 8/15/12
2013 GMC Yukon/Yukon XL Owner ManualM
Vehicle Care. . . . . . . . . . . . . . . . . 10-1
General Information . . . . . . . . . . 10-2
Vehicle Checks . . . . . . . . . . . . . . . 10-3
Headlamp Aiming . . . . . . . . . . . 10-31
Bulb Replacement . . . . . . . . . . 10-31
Electrical System . . . . . . . . . . . . 10-33
Wheels and Tires . . . . . . . . . . . 10-41
Jump Starting . . . . . . . . . . . . . . . 10-79
Towing . . . . . . . . . . . . . . . . . . . . . . 10-83
Appearance Care . . . . . . . . . . . 10-89
Service and Maintenance . . . 11-1
General Information . . . . . . . . . . 11-1
Maintenance Schedule . . . . . . . 11-2
Special Application
Services . . . . . . . . . . . . . . . . . . . . 11-8
Additional Maintenance
and Care . . . . . . . . . . . . . . . . . . . . 11-8
Recommended Fluids, Lubricants, and Parts . . . . . . 11-11
Maintenance Records . . . . . . . 11-14 Technical Data
. . . . . . . . . . . . . . . 12-1
Vehicle Identification . . . . . . . . . 12-1
Vehicle Data . . . . . . . . . . . . . . . . . . 12-2
Customer Information . . . . . . . 13-1
Customer Information . . . . . . . . 13-2
Reporting Safety Defects . . . . 13-18
Vehicle Data Recording and
Privacy . . . . . . . . . . . . . . . . . . . . 13-19 OnStar
. . . . . . . . . . . . . . . . . . . . . . . 14-1
OnStar Overview . . . . . . . . . . . . . 14-1
OnStar Services . . . . . . . . . . . . . . 14-2
OnStar Additional
Information . . . . . . . . . . . . . . . . . . 14-5
Index . . . . . . . . . . . . . . . . . . . . . i-1
Page 5 of 510
Black plate (5,1)GMC Yukon/Yukon XL Owner Manual - 2013 - CRC 2nd edition - 8/15/12
Introduction v
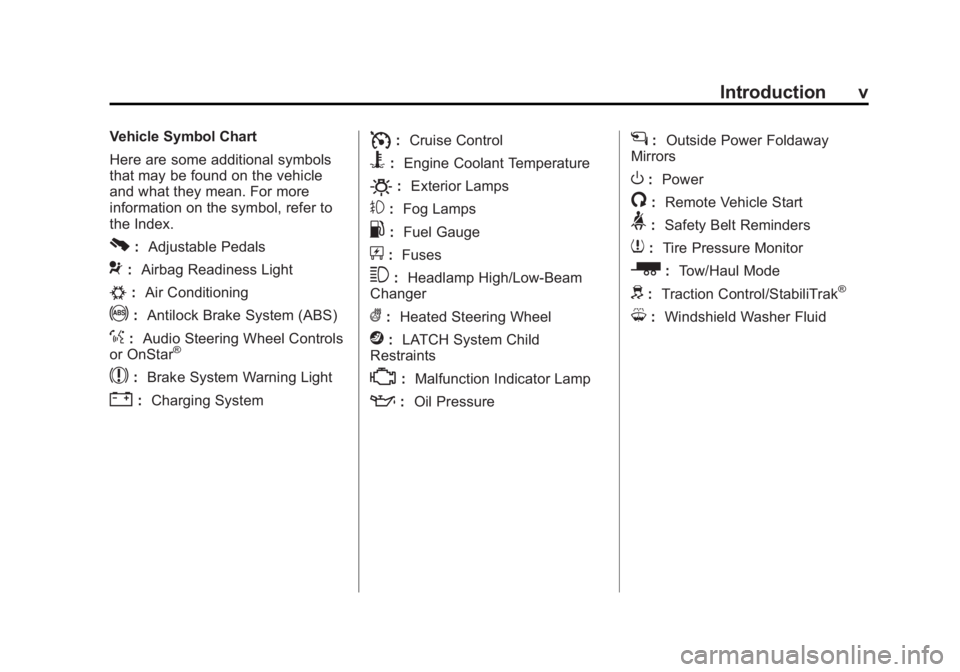
Vehicle Symbol Chart
Here are some additional symbols
that may be found on the vehicle
and what they mean. For more
information on the symbol, refer to
the Index.
0:Adjustable Pedals
9:Airbag Readiness Light
#:Air Conditioning
!:Antilock Brake System (ABS)
%:Audio Steering Wheel Controls
or OnStar®
$: Brake System Warning Light
":Charging System
I:Cruise Control
B: Engine Coolant Temperature
O:Exterior Lamps
#:Fog Lamps
.: Fuel Gauge
+:Fuses
3: Headlamp High/Low-Beam
Changer
(: Heated Steering Wheel
j:LATCH System Child
Restraints
*: Malfunction Indicator Lamp
::Oil Pressure
g:Outside Power Foldaway
Mirrors
O: Power
/:Remote Vehicle Start
>:Safety Belt Reminders
7:Tire Pressure Monitor
_: Tow/Haul Mode
d:Traction Control/StabiliTrak®
M:Windshield Washer Fluid
Page 19 of 510
Black plate (13,1)GMC Yukon/Yukon XL Owner Manual - 2013 - CRC 2nd edition - 8/15/12
In Brief 1-13
3. Adjust the outside mirror so thatthe side of the vehicle and the
area behind are seen.
See Power Mirrors on page 2‑17.
Keep the selector switch in the
center position when not adjusting
either outside mirror.
To manual fold the mirrors:
Fold the mirrors inward to prevent
damage when going through an
automatic car wash. To fold, pull the
mirror toward the vehicle. Push the
mirror outward, to return to its
original position.
Heated Mirrors
Press
1to heat the mirrors.
See “Rear Window Defogger” under
Dual Automatic Climate Control
System on page 8‑4 orClimate
Control Systems on page 8‑1.
Park Tilt Mirrors
If the vehicle has the memory
package, the exterior mirrors tilt to a
preselected position when the vehicle is in R (Reverse). This
feature lets the driver view the curb
when parallel parking. The mirrors
return to the original position when
the vehicle is shifted out of
R (Reverse), or the ignition is turned
off or to OFF/LOCK.
This feature can be programed
through the Driver Information
Center (DIC). See
Vehicle
Personalization (With DIC Buttons)
on page 5‑45.
Trailer-Tow Mirrors
For vehicle with towing mirrors, they
can be extended for a clearer view
of the objects behind the vehicle.
Manually pull out the mirror head to
extend it for better visibility when
towing a trailer. See Trailer-Tow
Mirrors on page 2‑16.
Interior Mirror
Adjustment
Hold the rearview mirror in the
center and move it to view the area
behind the vehicle. Manual Rearview Mirror
For vehicles with a manual rearview
mirror, push the tab forward for
daytime use and pull it for nighttime
use to avoid glare from the
headlamps from behind. See
Manual Rearview Mirror on
page 2‑19.
Automatic Dimming Rearview
Mirror
For vehicles with an automatic
dimming rearview mirror. The mirror
will automatically reduce the glare
from the headlamps from behind.
The dimming feature comes on and
the indicator light illuminates each
time the ignition is turned to start.
See
Automatic Dimming Rearview
Mirror on page 2‑20.
Page 21 of 510
Black plate (15,1)GMC Yukon/Yukon XL Owner Manual - 2013 - CRC 2nd edition - 8/15/12
In Brief 1-15
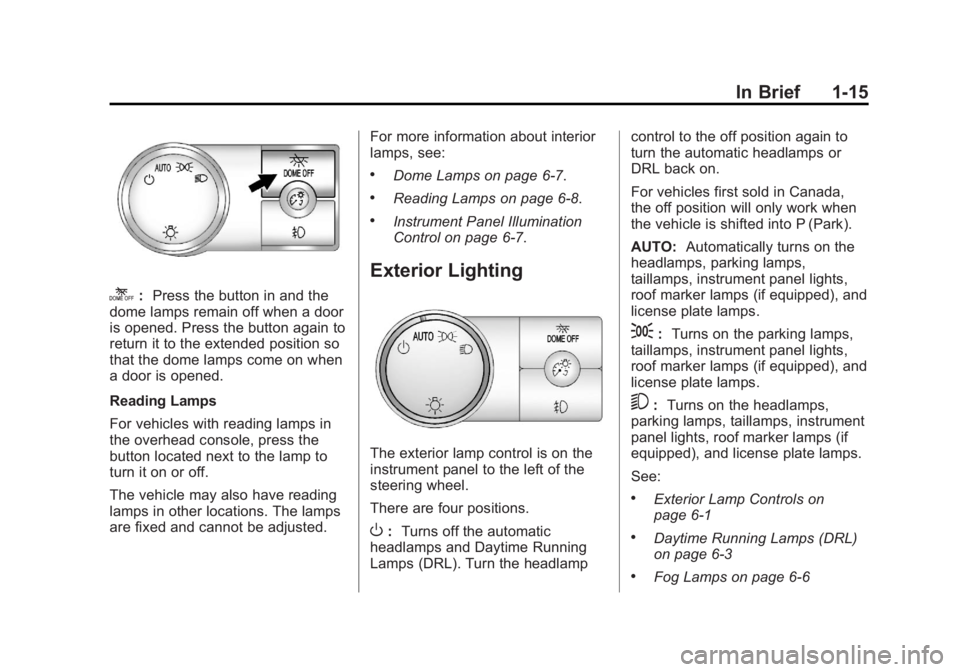
k:Press the button in and the
dome lamps remain off when a door
is opened. Press the button again to
return it to the extended position so
that the dome lamps come on when
a door is opened.
Reading Lamps
For vehicles with reading lamps in
the overhead console, press the
button located next to the lamp to
turn it on or off.
The vehicle may also have reading
lamps in other locations. The lamps
are fixed and cannot be adjusted. For more information about interior
lamps, see:
.Dome Lamps on page 6‑7.
.Reading Lamps on page 6‑8.
.Instrument Panel Illumination
Control on page 6‑7.
Exterior Lighting
The exterior lamp control is on the
instrument panel to the left of the
steering wheel.
There are four positions.
O:
Turns off the automatic
headlamps and Daytime Running
Lamps (DRL). Turn the headlamp control to the off position again to
turn the automatic headlamps or
DRL back on.
For vehicles first sold in Canada,
the off position will only work when
the vehicle is shifted into P (Park).
AUTO:
Automatically turns on the
headlamps, parking lamps,
taillamps, instrument panel lights,
roof marker lamps (if equipped), and
license plate lamps.
;: Turns on the parking lamps,
taillamps, instrument panel lights,
roof marker lamps (if equipped), and
license plate lamps.
5: Turns on the headlamps,
parking lamps, taillamps, instrument
panel lights, roof marker lamps (if
equipped), and license plate lamps.
See:
.Exterior Lamp Controls on
page 6‑1
.Daytime Running Lamps (DRL)
on page 6‑3
.Fog Lamps on page 6‑6
Page 48 of 510
Black plate (14,1)GMC Yukon/Yukon XL Owner Manual - 2013 - CRC 2nd edition - 8/15/12
2-14 Keys, Doors, and Windows
unlock button on the RKE
transmitter during the 10-second
pre-alarm, the alarm will go off. Your
vehicle's headlamps will flash and
the horn will sound for about
30 seconds, then will turn off to save
the battery power.
The theft-deterrent system will not
activate if the doors are locked with
the vehicle's key or the manual door
lock. It activates only if you use the
power door lock switch with the door
open or the RKE transmitter. You
should also remember that you can
start your vehicle with the correct
ignition key if the alarm has been
set off.
To avoid setting off the alarm by
accident:
.If you do not want to activate the
theft-deterrent system, the
vehicle should be locked with
the door key after the doors are
closed.
.Always unlock the doors with the
RKE transmitter. Unlocking a
door any other way will set off
the alarm if it is armed.
If you set off the alarm by accident,
press unlock on the RKE transmitter
or place the key in the ignition and
turn it to START to turn off the
alarm. The alarm will not stop if you
try to unlock a door any other way.
Testing the Alarm
To test the alarm:
1. From inside the vehicle, lower the driver window and open the
driver door.
2. Activate the system by locking the doors with the power door
lock switch while the door is
open, or with the RKE
transmitter.
3. Get out of the vehicle, close the door and wait for the security
light to go out. 4. Then reach in through the
window, unlock the door with the
manual door lock and open the
door. This should set off the
alarm.
While the alarm is set, the power
door unlock switch will not work.
If the alarm does not sound when it
should but the headlamps flash,
check to see if the horn works. The
horn fuse may be blown. To replace
the fuse, see Fuses and Circuit
Breakers on page 10‑34.
If the alarm does not sound or the
headlamps do not flash, the vehicle
should be serviced by your dealer.
Immobilizer
See Radio Frequency Statement on
page 13‑21 for information
regarding Part 15 of the Federal
Communications Commission (FCC)
rules and Industry Canada
Standards RSS-GEN/210/220/310.
Page 52 of 510
Black plate (18,1)GMC Yukon/Yukon XL Owner Manual - 2013 - CRC 2nd edition - 8/15/12
2-18 Keys, Doors, and Windows
Keep the selector switch in the
center position when not adjusting
either outside mirror.
Exterior Automatic Dimming
Mirror
If the vehicle has the exterior
automatic dimming mirror, the driver
outside mirror automatically adjusts
for the glare of headlamps behind.
This feature is controlled by the on
and off setting on the inside
automatic dimming rearview mirror.
SeeAutomatic Dimming Rearview
Mirror on page 2‑20.
Side Blind Zone Alert (SBZA)
If the vehicle has the Side Blind
Zone Alert (SBZA) system. See Side
Blind Zone Alert (SBZA) on
page 9‑51.
Turn Signal Indicator
The vehicle may also have a turn
signal indicator on the mirror. An
arrow on the mirror flashes in the
direction of the turn or lane change.
Folding Mirrors
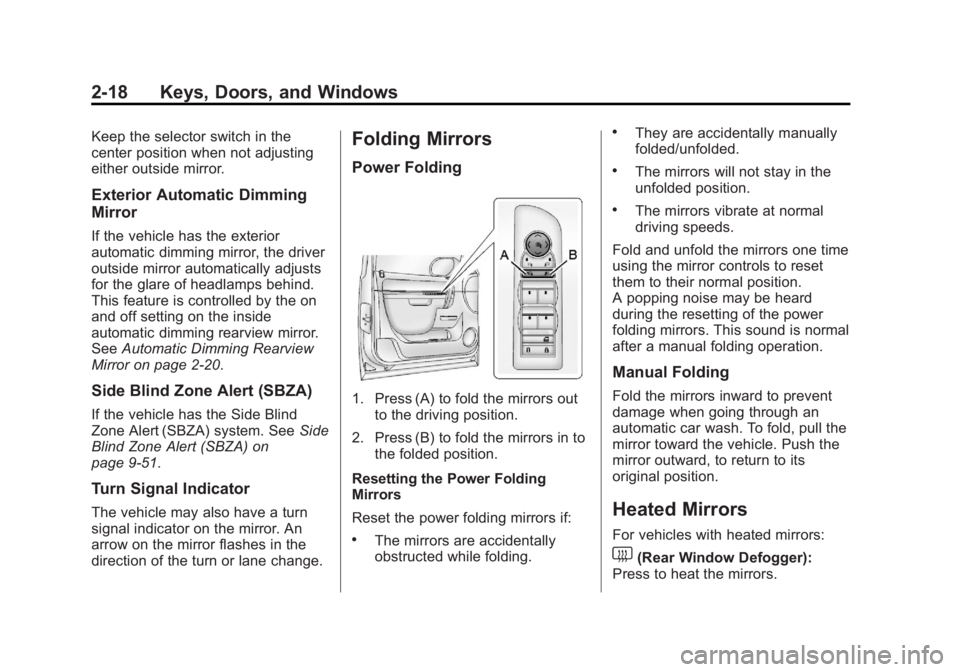
Power Folding
1. Press (A) to fold the mirrors out to the driving position.
2. Press (B) to fold the mirrors in to the folded position.
Resetting the Power Folding
Mirrors
Reset the power folding mirrors if:
.The mirrors are accidentally
obstructed while folding.
.They are accidentally manually
folded/unfolded.
.The mirrors will not stay in the
unfolded position.
.The mirrors vibrate at normal
driving speeds.
Fold and unfold the mirrors one time
using the mirror controls to reset
them to their normal position.
A popping noise may be heard
during the resetting of the power
folding mirrors. This sound is normal
after a manual folding operation.
Manual Folding
Fold the mirrors inward to prevent
damage when going through an
automatic car wash. To fold, pull the
mirror toward the vehicle. Push the
mirror outward, to return to its
original position.
Heated Mirrors
For vehicles with heated mirrors:
1(Rear Window Defogger):
Press to heat the mirrors.
Page 53 of 510
Black plate (19,1)GMC Yukon/Yukon XL Owner Manual - 2013 - CRC 2nd edition - 8/15/12
Keys, Doors, and Windows 2-19
See“Rear Window Defogger” under
Dual Automatic Climate Control
System on page 8‑4 orClimate
Control Systems on page 8‑1 for
more information.
Automatic Dimming
Mirror
If the vehicle has the automatic
dimming mirror, the driver outside
mirror automatically adjusts for the
glare of the headlamps from behind.
This feature is controlled by the on
and off setting on the inside
rearview mirror. See Automatic
Dimming Rearview Mirror on
page 2‑20.
Park Tilt Mirrors
If the vehicle has the memory
package, the exterior mirrors tilt to a
preselected position when the
vehicle is in R (Reverse). This
feature lets the driver view the curb
when parallel parking. The mirrors
return to the original position when
the vehicle is shifted out of
R (Reverse), or the ignition is turned
off or to OFF/LOCK.
This feature can be programed
through the Driver Information
Center (DIC). See Vehicle
Personalization (With DIC Buttons)
on page 5‑45 for more information.
Interior Mirrors
Manual Rearview Mirror
To adjust the inside rearview mirror,
hold the rearview mirror in the
center and move it to view the area
behind the vehicle.
For vehicles with a manual rearview
mirror, push the tab forward for
daytime use and pull it rearward for
nighttime use to avoid glare from
the headlamps from behind.
Vehicles with OnStar
®have three
control buttons at the bottom of the
mirror. See a dealer for more
information about OnStar and how
to subscribe to it. See OnStar
Overview on page 14‑1.
Page 54 of 510
Black plate (20,1)GMC Yukon/Yukon XL Owner Manual - 2013 - CRC 2nd edition - 8/15/12
2-20 Keys, Doors, and Windows
Automatic Dimming
Rearview Mirror
Adjustment
Hold the rearview mirror in the
center and move it to view the area
behind the vehicle.
Operation
For vehicles with an automatic
dimming rearview mirror, the mirror
will automatically reduce the glare of
the headlamps from behind. The
dimming feature comes on each
time the vehicle is started.
O(On/Off):Press to turn the
dimming feature on or off. The vehicle may also have a Rear
Vision Camera (RVC). See
Rear
Vision Camera (RVC) on page 9‑53
If the vehicle has a RVC, the
O
button for turning the dimming
feature on or off will not be
available.
Vehicles with OnStar have three
additional control buttons located at
the bottom of the mirror. See a
dealer for more information about
OnStar and how to subscribe to it.
See OnStar Overview on page 14‑1.
Cleaning the Mirror
Do not spray glass cleaner directly
on the mirror. Use a soft towel
dampened with water.
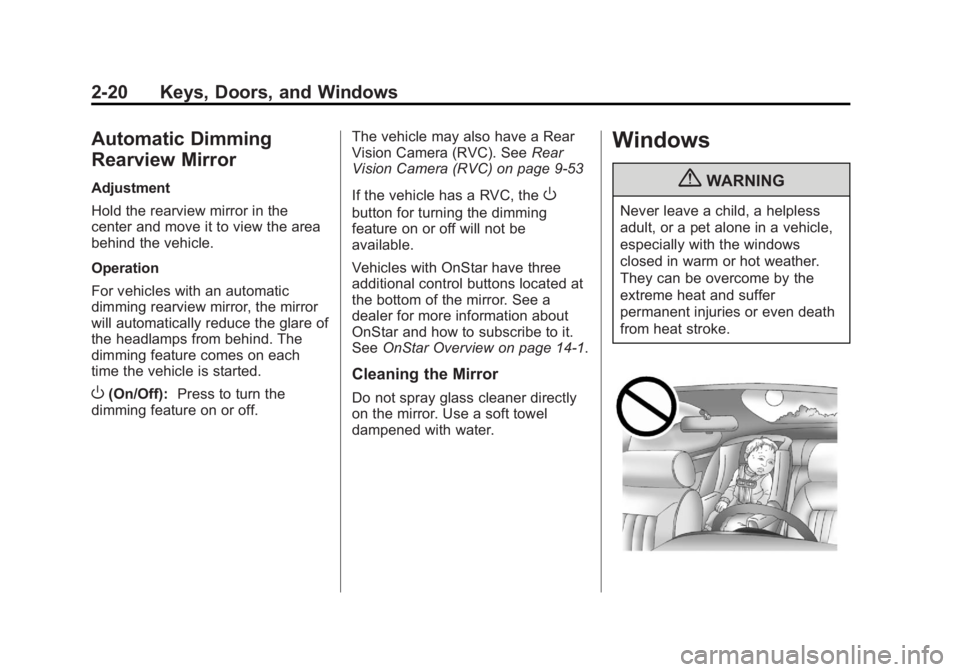
Windows
{WARNING
Never leave a child, a helpless
adult, or a pet alone in a vehicle,
especially with the windows
closed in warm or hot weather.
They can be overcome by the
extreme heat and suffer
permanent injuries or even death
from heat stroke.
Page 151 of 510
Black plate (25,1)GMC Yukon/Yukon XL Owner Manual - 2013 - CRC 2nd edition - 8/15/12
Instruments and Controls 5-25
light and message should go off.
If they do not, have the vehicle
serviced by your dealer.
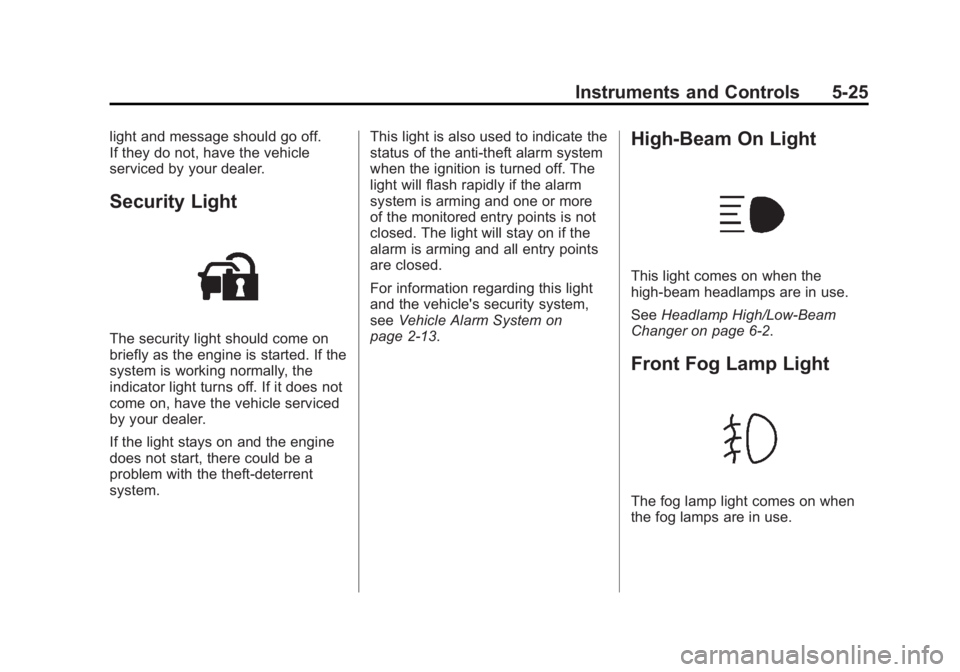
Security Light
The security light should come on
briefly as the engine is started. If the
system is working normally, the
indicator light turns off. If it does not
come on, have the vehicle serviced
by your dealer.
If the light stays on and the engine
does not start, there could be a
problem with the theft-deterrent
system.This light is also used to indicate the
status of the anti-theft alarm system
when the ignition is turned off. The
light will flash rapidly if the alarm
system is arming and one or more
of the monitored entry points is not
closed. The light will stay on if the
alarm is arming and all entry points
are closed.
For information regarding this light
and the vehicle's security system,
see
Vehicle Alarm System on
page 2‑13.
High-Beam On Light
This light comes on when the
high-beam headlamps are in use.
See Headlamp High/Low-Beam
Changer on page 6‑2.
Front Fog Lamp Light
The fog lamp light comes on when
the fog lamps are in use.
Page 171 of 510
Black plate (45,1)GMC Yukon/Yukon XL Owner Manual - 2013 - CRC 2nd edition - 8/15/12
Instruments and Controls 5-45
Vehicle
Personalization
Vehicle Personalization
(With DIC Buttons)
Your vehicle may have
customization capabilities that allow
you to program certain features to
one preferred setting. Customization
features can only be programmed to
one setting on the vehicle and
cannot be programmed to a
preferred setting for two different
drivers.
All of the customization options may
not be available on your vehicle.
Only the options available will be
displayed on the DIC.
The default settings for the
customization features were set
when your vehicle left the factory,
but may have been changed from
their default state since then.
The customization preferences are
automatically recalled.To change customization
preferences, use the following
procedure.
Entering the Feature
Settings Menu
1. Turn the ignition on and place
the vehicle in P (Park).
To avoid excessive drain on the
battery, it is recommended that
the headlamps are turned off.
2. Press the customization button to scroll through the available
customizable options.
Feature Settings Menu Items
The following are customization
features that allow you to program
settings to the vehicle:
DISPLAY IN ENGLISH
This feature will only display if a
language other than English has
been set. This feature allows you to
change the language in which the
DIC messages appear to English. Press the customization button until
the PRESS
VTO DISPLAY IN
ENGLISH screen appears on the
DIC display. Press the set/reset
button once to display all DIC
messages in English.
DISPLAY LANGUAGE
This feature allows you to select the
language in which the DIC
messages will appear.
Press the customization button until
the DISPLAY LANGUAGE screen
appears on the DIC display. Press
the set/reset button once to access
the settings for this feature. Then
press the customization button to
scroll through the following settings:
ENGLISH (default): All messages
will appear in English.
FRANCAIS: All messages will
appear in French.
ESPANOL: All messages will
appear in Spanish.