set GMC YUKON XL 2014 User Guide
[x] Cancel search | Manufacturer: GMC, Model Year: 2014, Model line: YUKON XL, Model: GMC YUKON XL 2014Pages: 490, PDF Size: 7.49 MB
Page 47 of 490
Black plate (13,1)GMC Yukon/Yukon XL Owner Manual (GMNA-Localizing-U.S./Canada-
6081505) - 2014 - crc - 4/23/13
Keys, Doors, and Windows 2-13
2. Lock the door with the RemoteKeyless Entry (RKE) transmitter
or the power door lock switch.
The security light will come on to
inform the driver the system is
arming. If a door is open when
the doors are locked, the
security light will flash.
If the delayed locking feature is
turned on, the theft-deterrent
system will not start the arming
process until the last door is
closed and the delay timer has
expired. See Delayed Locking
on page 2-8.
3. Close all doors. The security light should go off after about
30 seconds. The alarm is not
armed until the security light
goes off.
If a locked driver door is opened
without using the RKE transmitter, a
10-second pre-alarm will occur. The
horn will chirp and the lights will
flash. If the key is not placed in the
ignition and turned to START or the
door is not unlocked by pressing the unlock button on the RKE
transmitter during the 10-second
pre-alarm, the alarm will go off. Your
vehicle's headlamps will flash and
the horn will sound for about
30 seconds, then will turn off to save
the battery power.
The theft-deterrent system will not
activate if the doors are locked with
the vehicle's key or the manual door
lock. It activates only if you use the
power door lock switch with the door
open or the RKE transmitter. You
should also remember that you can
start your vehicle with the correct
ignition key if the alarm has been
set off.
To avoid setting off the alarm by
accident:
.If you do not want to activate the
theft-deterrent system, the
vehicle should be locked with
the door key after the doors are
closed.
.Always unlock the doors with the
RKE transmitter. Unlocking a
door any other way will set off
the alarm if it is armed.
If you set off the alarm by accident,
press unlock on the RKE transmitter
or place the key in the ignition and
turn it to START to turn off the
alarm. The alarm will not stop if you
try to unlock a door any other way.
Testing the Alarm
To test the alarm:
1. From inside the vehicle, lower the driver window and open the
driver door.
2. Activate the system by locking the doors with the power door
lock switch while the door is
open, or with the RKE
transmitter.
3. Get out of the vehicle, close the door and wait for the security
light to go out.
Page 48 of 490

Black plate (14,1)GMC Yukon/Yukon XL Owner Manual (GMNA-Localizing-U.S./Canada-
6081505) - 2014 - crc - 4/23/13
2-14 Keys, Doors, and Windows
4. Then reach in through thewindow, unlock the door with the
manual door lock and open the
door. This should set off the
alarm.
While the alarm is set, the power
door unlock switch will not work.
If the alarm does not sound when it
should but the headlamps flash,
check to see if the horn works. The
horn fuse may be blown. To replace
the fuse, see Fuses and Circuit
Breakers on page 10-32.
If the alarm does not sound or the
headlamps do not flash, the vehicle
should be serviced by your dealer.
Immobilizer
See Radio Frequency Statement on
page 13-15.
Immobilizer Operation
This vehicle has PASS-Key®III+
(Personalized Automotive Security
System) theft-deterrent system.
PASS-Key III+ is a passive
theft-deterrent system.
The system is automatically armed
when the key is removed from the
ignition.
The system is automatically
disarmed when the key is turned to
ON/RUN, ACC/ACCESSORY,
or START from the LOCK/OFF
position.
You do not have to manually arm or
disarm the system.
The security light will come on if
there is a problem with arming or
disarming the theft-deterrent
system.
When the PASS-Key III+ system
senses that someone is using the
wrong key, it prevents the vehicle
from starting. Anyone using a
trial-and-error method to start the vehicle will be discouraged because
of the high number of electrical key
codes.
If the engine does not start and the
security light on the instrument
panel cluster comes on when trying
to start the vehicle, there may be a
problem with the theft-deterrent
system. Turn the ignition off and try
again.
If the engine still does not start, and
the key appears to be undamaged,
try another ignition key. At this time,
you may also want to check the
fuse. See
Fuses and Circuit
Breakers on page 10-32. If the
engine still does not start with the
other key, the vehicle needs service.
If the vehicle does start, the first key
may be faulty. See your dealer who
can service the PASS-Key III+ to
have a new key made.
It is possible for the PASS-Key III+
decoder to learn the transponder
value of a new or replacement key.
Up to 10 keys may be programmed
for the vehicle. The following
Page 51 of 490
Black plate (17,1)GMC Yukon/Yukon XL Owner Manual (GMNA-Localizing-U.S./Canada-
6081505) - 2014 - crc - 4/23/13
Keys, Doors, and Windows 2-17
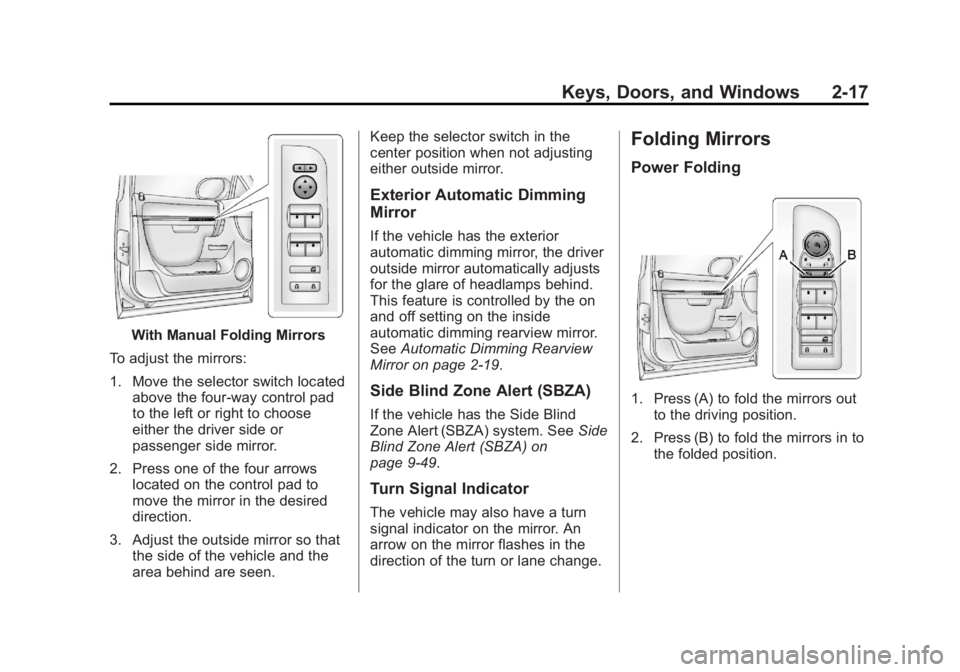
With Manual Folding Mirrors
To adjust the mirrors:
1. Move the selector switch located above the four-way control pad
to the left or right to choose
either the driver side or
passenger side mirror.
2. Press one of the four arrows located on the control pad to
move the mirror in the desired
direction.
3. Adjust the outside mirror so that the side of the vehicle and the
area behind are seen. Keep the selector switch in the
center position when not adjusting
either outside mirror.
Exterior Automatic Dimming
Mirror
If the vehicle has the exterior
automatic dimming mirror, the driver
outside mirror automatically adjusts
for the glare of headlamps behind.
This feature is controlled by the on
and off setting on the inside
automatic dimming rearview mirror.
See
Automatic Dimming Rearview
Mirror on page 2-19.
Side Blind Zone Alert (SBZA)
If the vehicle has the Side Blind
Zone Alert (SBZA) system. See Side
Blind Zone Alert (SBZA) on
page 9-49.
Turn Signal Indicator
The vehicle may also have a turn
signal indicator on the mirror. An
arrow on the mirror flashes in the
direction of the turn or lane change.
Folding Mirrors
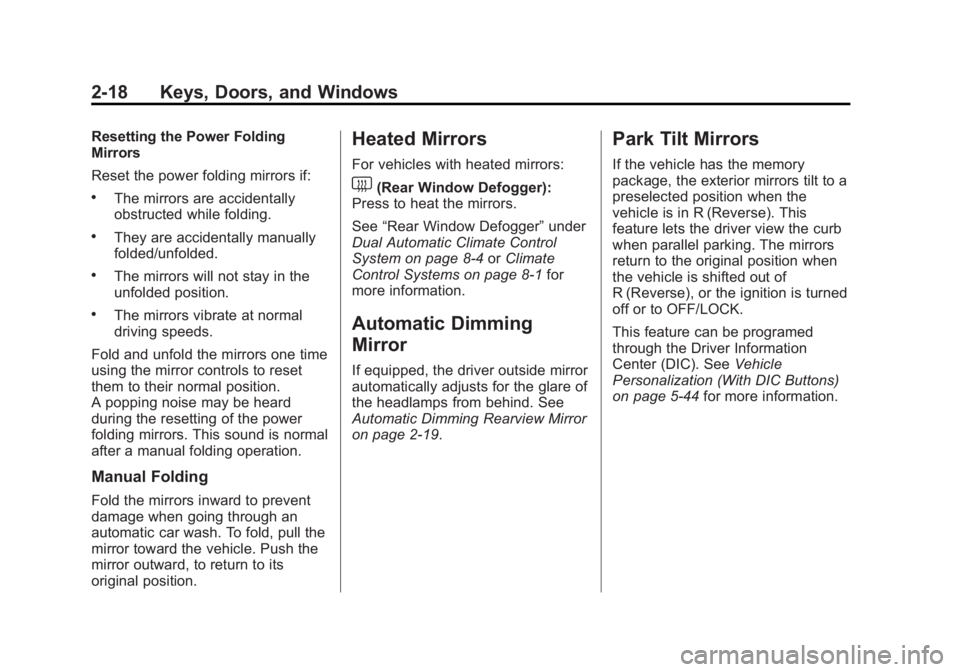
Power Folding
1. Press (A) to fold the mirrors out to the driving position.
2. Press (B) to fold the mirrors in to the folded position.
Page 52 of 490
Black plate (18,1)GMC Yukon/Yukon XL Owner Manual (GMNA-Localizing-U.S./Canada-
6081505) - 2014 - crc - 4/23/13
2-18 Keys, Doors, and Windows
Resetting the Power Folding
Mirrors
Reset the power folding mirrors if:
.The mirrors are accidentally
obstructed while folding.
.They are accidentally manually
folded/unfolded.
.The mirrors will not stay in the
unfolded position.
.The mirrors vibrate at normal
driving speeds.
Fold and unfold the mirrors one time
using the mirror controls to reset
them to their normal position.
A popping noise may be heard
during the resetting of the power
folding mirrors. This sound is normal
after a manual folding operation.
Manual Folding
Fold the mirrors inward to prevent
damage when going through an
automatic car wash. To fold, pull the
mirror toward the vehicle. Push the
mirror outward, to return to its
original position.
Heated Mirrors
For vehicles with heated mirrors:
1(Rear Window Defogger):
Press to heat the mirrors.
See “Rear Window Defogger” under
Dual Automatic Climate Control
System on page 8-4 orClimate
Control Systems on page 8-1 for
more information.
Automatic Dimming
Mirror
If equipped, the driver outside mirror
automatically adjusts for the glare of
the headlamps from behind. See
Automatic Dimming Rearview Mirror
on page 2-19.
Park Tilt Mirrors
If the vehicle has the memory
package, the exterior mirrors tilt to a
preselected position when the
vehicle is in R (Reverse). This
feature lets the driver view the curb
when parallel parking. The mirrors
return to the original position when
the vehicle is shifted out of
R (Reverse), or the ignition is turned
off or to OFF/LOCK.
This feature can be programed
through the Driver Information
Center (DIC). See Vehicle
Personalization (With DIC Buttons)
on page 5-44 for more information.
Page 62 of 490
Black plate (6,1)GMC Yukon/Yukon XL Owner Manual (GMNA-Localizing-U.S./Canada-
6081505) - 2014 - crc - 4/23/13
3-6 Seats and Restraints
Power Reclining Seatbacks
To recline a power seatback,
if equipped:
.Tilt the top of the control
rearward to recline.
.Tilt the top of the control forward
to raise.
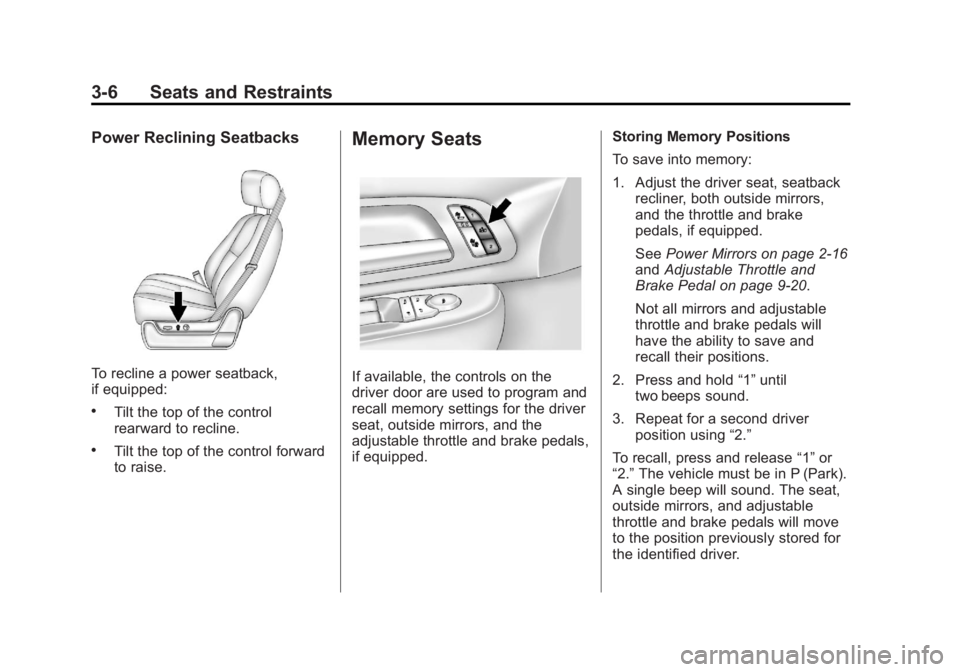
Memory Seats
If available, the controls on the
driver door are used to program and
recall memory settings for the driver
seat, outside mirrors, and the
adjustable throttle and brake pedals,
if equipped.Storing Memory Positions
To save into memory:
1. Adjust the driver seat, seatback
recliner, both outside mirrors,
and the throttle and brake
pedals, if equipped.
See Power Mirrors on page 2-16
and Adjustable Throttle and
Brake Pedal on page 9-20.
Not all mirrors and adjustable
throttle and brake pedals will
have the ability to save and
recall their positions.
2. Press and hold “1”until
two beeps sound.
3. Repeat for a second driver position using “2.”
To recall, press and release “1”or
“2.” The vehicle must be in P (Park).
A single beep will sound. The seat,
outside mirrors, and adjustable
throttle and brake pedals will move
to the position previously stored for
the identified driver.
Page 64 of 490
Black plate (8,1)GMC Yukon/Yukon XL Owner Manual (GMNA-Localizing-U.S./Canada-
6081505) - 2014 - crc - 4/23/13
3-8 Seats and Restraints
Heated and Ventilated
Front Seats
{Warning
If you cannot feel temperature
change or pain to the skin, the
seat heater may cause burns. To
reduce the risk of burns, people
with such a condition should use
care when using the seat heater,
especially for long periods of
time. Do not place anything on
the seat that insulates against
heat, such as a blanket, cushion,
cover, or similar item. This may
cause the seat heater to
overheat. An overheated seat
heater may cause a burn or may
damage the seat.
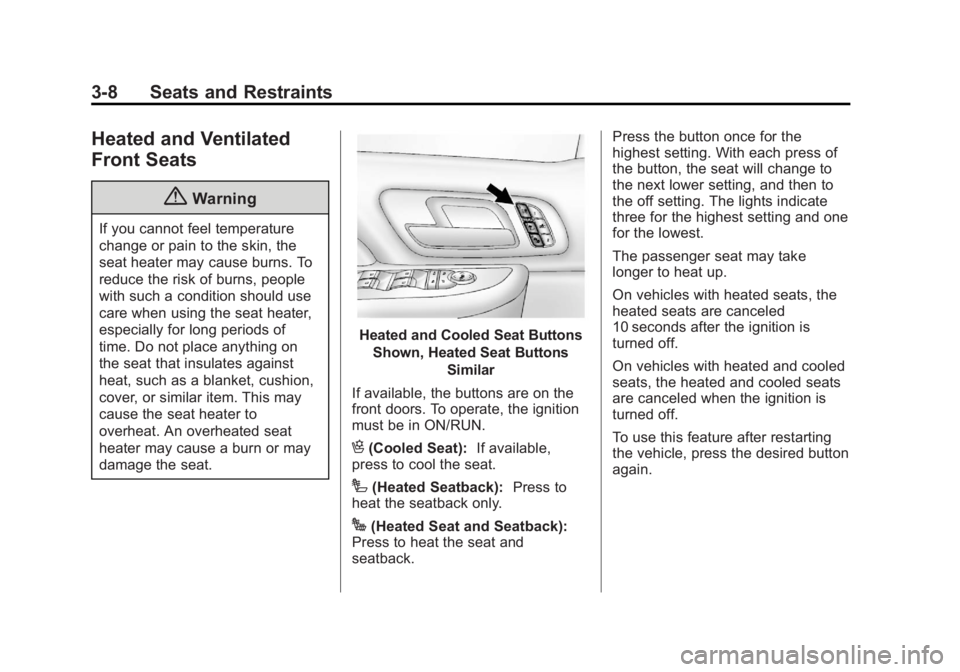
Heated and Cooled Seat ButtonsShown, Heated Seat Buttons Similar
If available, the buttons are on the
front doors. To operate, the ignition
must be in ON/RUN.
H(Cooled Seat): If available,
press to cool the seat.
I(Heated Seatback): Press to
heat the seatback only.
J(Heated Seat and Seatback):
Press to heat the seat and
seatback. Press the button once for the
highest setting. With each press of
the button, the seat will change to
the next lower setting, and then to
the off setting. The lights indicate
three for the highest setting and one
for the lowest.
The passenger seat may take
longer to heat up.
On vehicles with heated seats, the
heated seats are canceled
10 seconds after the ignition is
turned off.
On vehicles with heated and cooled
seats, the heated and cooled seats
are canceled when the ignition is
turned off.
To use this feature after restarting
the vehicle, press the desired button
again.
Page 65 of 490
Black plate (9,1)GMC Yukon/Yukon XL Owner Manual (GMNA-Localizing-U.S./Canada-
6081505) - 2014 - crc - 4/23/13
Seats and Restraints 3-9
Remote Start Heated Seats
When it is cold outside, the heated
seats may turn on automatically
during a remote vehicle start. The
heated seats will be canceled when
the ignition is turned on. Press the
desired button to use the heated
seats after the vehicle is started.
The lights on the heated seat
buttons do not turn on during a
remote start.
The temperature performance of an
unoccupied seat may be reduced.
This is normal.
SeeRemote Vehicle Start on
page 2-5.Rear Seats
Heated Rear Seats
{Warning
If you cannot feel temperature
change or pain to the skin, the
seat heater may cause burns.
See the Warning under Heated
and Ventilated Front Seats on
page 3-8.
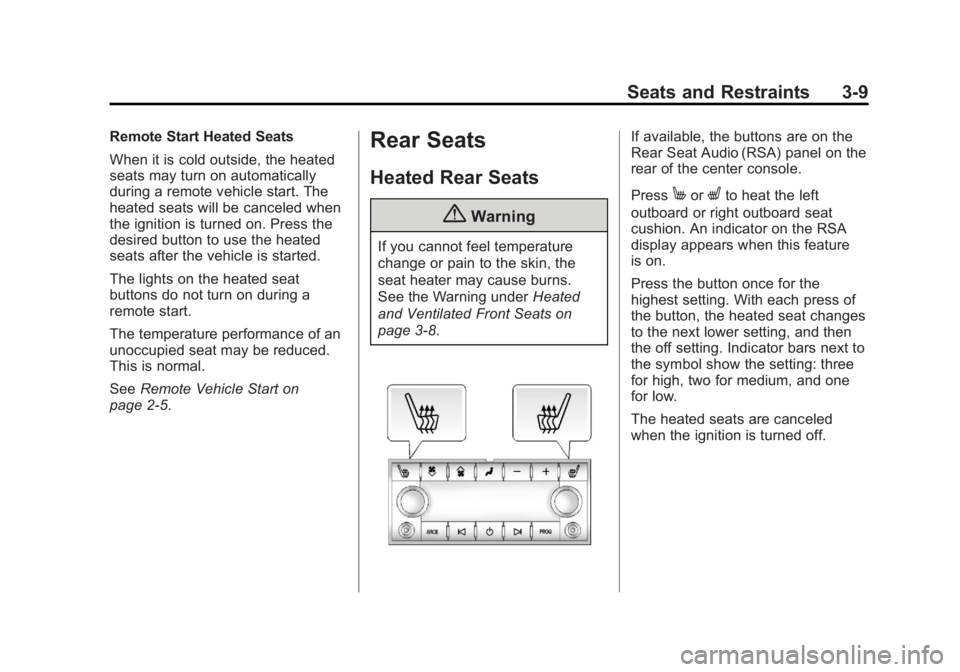
If available, the buttons are on the
Rear Seat Audio (RSA) panel on the
rear of the center console.
Press
MorLto heat the left
outboard or right outboard seat
cushion. An indicator on the RSA
display appears when this feature
is on.
Press the button once for the
highest setting. With each press of
the button, the heated seat changes
to the next lower setting, and then
the off setting. Indicator bars next to
the symbol show the setting: three
for high, two for medium, and one
for low.
The heated seats are canceled
when the ignition is turned off.
Page 78 of 490
Black plate (22,1)GMC Yukon/Yukon XL Owner Manual (GMNA-Localizing-U.S./Canada-
6081505) - 2014 - crc - 4/23/13
3-22 Seats and Restraints
Adjust the height so the shoulder
portion of the belt is on the shoulder
and not falling off of it. The belt
should be close to, but not
contacting, the neck. Improper
shoulder belt height adjustment
could reduce the effectiveness of
the safety belt in a crash. SeeHow
to Wear Safety Belts Properly on
page 3-18.
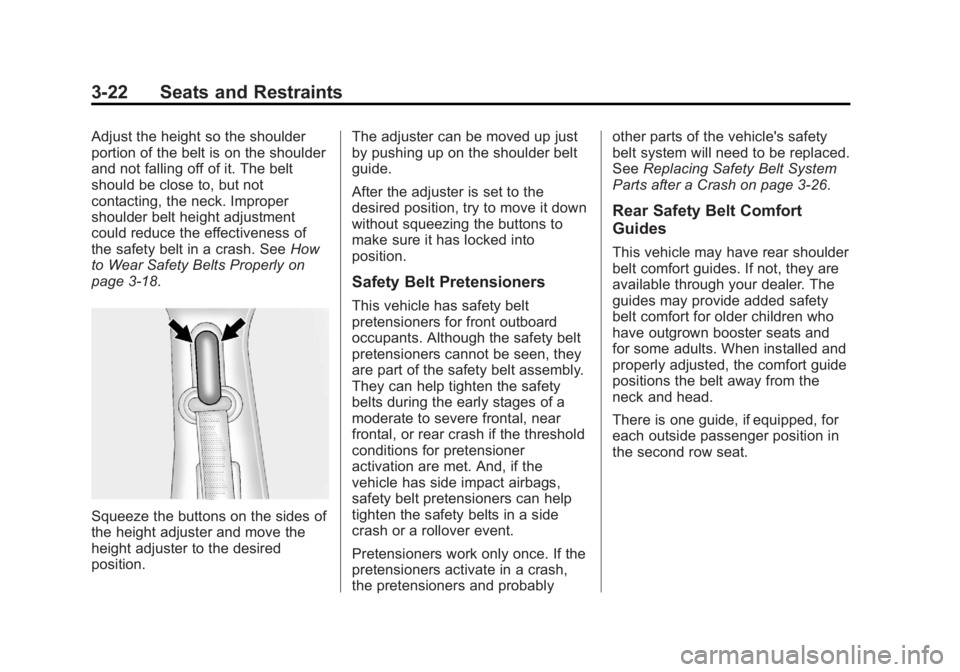
Squeeze the buttons on the sides of
the height adjuster and move the
height adjuster to the desired
position. The adjuster can be moved up just
by pushing up on the shoulder belt
guide.
After the adjuster is set to the
desired position, try to move it down
without squeezing the buttons to
make sure it has locked into
position.
Safety Belt Pretensioners
This vehicle has safety belt
pretensioners for front outboard
occupants. Although the safety belt
pretensioners cannot be seen, they
are part of the safety belt assembly.
They can help tighten the safety
belts during the early stages of a
moderate to severe frontal, near
frontal, or rear crash if the threshold
conditions for pretensioner
activation are met. And, if the
vehicle has side impact airbags,
safety belt pretensioners can help
tighten the safety belts in a side
crash or a rollover event.
Pretensioners work only once. If the
pretensioners activate in a crash,
the pretensioners and probablyother parts of the vehicle's safety
belt system will need to be replaced.
See
Replacing Safety Belt System
Parts after a Crash on page 3-26.
Rear Safety Belt Comfort
Guides
This vehicle may have rear shoulder
belt comfort guides. If not, they are
available through your dealer. The
guides may provide added safety
belt comfort for older children who
have outgrown booster seats and
for some adults. When installed and
properly adjusted, the comfort guide
positions the belt away from the
neck and head.
There is one guide, if equipped, for
each outside passenger position in
the second row seat.
Page 100 of 490
Black plate (44,1)GMC Yukon/Yukon XL Owner Manual (GMNA-Localizing-U.S./Canada-
6081505) - 2014 - crc - 4/23/13
3-44 Seats and Restraints
{Warning
A young child's hip bones are still
so small that the vehicle's regular
safety belt may not remain low on
the hip bones, as it should.
Instead, it may settle up around
the child's abdomen. In a crash,
the belt would apply force on a
body area that is unprotected by
any bony structure. This alone
could cause serious or fatal
injuries. To reduce the risk of
serious or fatal injuries during a
crash, young children should
always be secured in appropriate
child restraints.
Child Restraint Systems
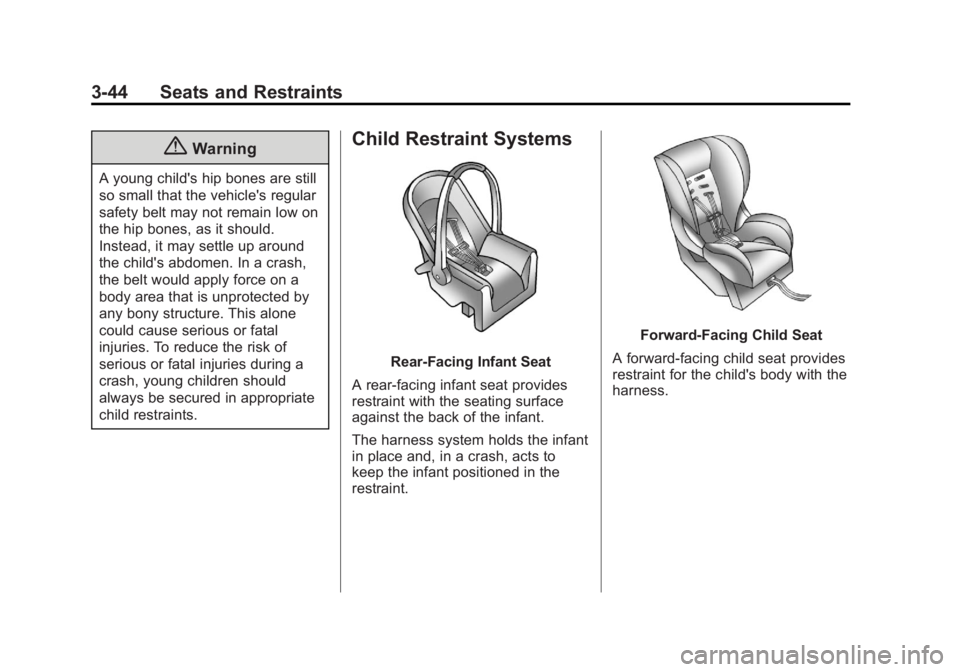
Rear-Facing Infant Seat
A rear-facing infant seat provides
restraint with the seating surface
against the back of the infant.
The harness system holds the infant
in place and, in a crash, acts to
keep the infant positioned in the
restraint.
Forward-Facing Child Seat
A forward-facing child seat provides
restraint for the child's body with the
harness.
Page 108 of 490
Black plate (52,1)GMC Yukon/Yukon XL Owner Manual (GMNA-Localizing-U.S./Canada-
6081505) - 2014 - crc - 4/23/13
3-52 Seats and Restraints
{Warning
Children can be seriously injured
or strangled if a shoulder belt is
wrapped around their neck and
the safety belt continues to
tighten. Buckle any unused safety
belts behind the child restraint so
children cannot reach them. Pull
the shoulder belt all the way out
of the retractor to set the lock,
if the vehicle has one, after the
child restraint has been installed.
Notice: Do not let the LATCH
attachments rub against the
vehicle’ s safety belts. This may
damage these parts. If necessary,
move buckled safety belts to
avoid rubbing the LATCH
attachments.
Do not fold the empty rear seat
with a safety belt buckled. This
could damage the safety belt or
the seat. Unbuckle and return the
safety belt to its stowed position,
before folding the seat. If you need to secure more than one
child restraint in the rear seat, see
Where to Put the Restraint on
page 3-46.
This system is designed to make
installation of child restraints easier.
When using lower anchors, do not
use the vehicle's safety belts.
Instead use the vehicle's anchors
and child restraint attachments to
secure the restraints. Some
restraints also use another vehicle
anchor to secure a top tether.
1. Attach and tighten the lower
attachments to the lower
anchors. If the child restraint
does not have lower
attachments or the desired
seating position does not have
lower anchors, secure the child
restraint with the top tether and
the safety belts. Refer to your
child restraint manufacturer
instructions and the instructions
in this manual. 1.1. Find the lower anchors for
the desired seating
position.
1.2. Put the child restraint on the seat.
1.3. Attach and tighten the lower attachments on the child
restraint to the lower
anchors.
2. If the child restraint manufacturer recommends that the top tether
be attached, attach and tighten
the top tether to the top tether
anchor, if equipped. Refer to the
child restraint instructions and
the following steps:
2.1. Find the top tether anchor.