tow GMC YUKON XL 2017 Owners Manual
[x] Cancel search | Manufacturer: GMC, Model Year: 2017, Model line: YUKON XL, Model: GMC YUKON XL 2017Pages: 427, PDF Size: 7.04 MB
Page 5 of 427
GMC Yukon/Yukon XL/Denali Owner Manual (GMNA-Localizing-U.S./
Canada/Mexico-9955936) - 2017 - crc - 7/5/16
4 Introduction
g:Outside Power Foldaway
Mirrors
O: Power
/:Remote Vehicle Start
>:Safety Belt Reminders
7: Tire Pressure Monitor
_:Tow/Haul Mode
d:Traction Control/StabiliTrak®
a:Under Pressure
M: Windshield Washer Fluid
Page 8 of 427

GMC Yukon/Yukon XL/Denali Owner Manual (GMNA-Localizing-U.S./
Canada/Mexico-9955936) - 2017 - crc - 7/5/16
In Brief 7
1.Air Vents 0196.
2. Head-Up Display (HUD) 0155
(If Equipped).
3.
gTraction Control/Electronic
Stability Control 0239.
jPower Assist Steps 049 (If
Equipped).
XParking Assist Button (If
Equipped). See Assistance
Systems for Parking or
Backing 0252.
ALane Departure Warning
(LDW) 0261 (If Equipped).
0Pedal Adjust Switch (If
Equipped). See Adjustable
Throttle and Brake
Pedal 0216.
4. Turn Signal Lever. See Turn
and Lane-Change
Signals 0185.
Windshield Wiper/
Washer 0126. 5. Favorite Switches (Out of
View). See “Steering Wheel
Controls” in the infotainment
manual.
Volume Switches (Out of View).
See “Steering Wheel Controls”
in the infotainment manual.
6. Hazard Warning
Flashers 0185.
7. Instrument Cluster 0134.
8. Shift Lever. See Automatic
Transmission 0227.
Tow/Haul Selector Button. See
Tow/Haul Mode 0232.
Range Selection Mode (If
Equipped). See Manual
Mode 0230.
9. Light Sensor. See Automatic
Headlamp System 0184.
10. Infotainment 0190.
11. Dual Automatic Climate Control
System 0191.
12. Heated and Ventilated Front
Seats 068. 13. Rear Climate Control Buttons.
SeeRear Climate Control
System 0195.
14. Ignition Positions (Keyless
Access) 0219 orIgnition
Positions (Key Access) 0217.
15. Steering Wheel Controls. See the infotainment manual.
16. Horn 0126.
17. Steering Wheel
Adjustment 0125.
18. Hood Release. See Hood 0286.
19. Cruise Control 0242.
Adaptive Cruise Control 0244
(If Equipped).
Forward Collision Alert (FCA)
System 0255 (If Equipped).
20. Trailer Brake Control Panel (If Equipped). See Towing
Equipment 0274.
21. Data Link Connector (DLC) (Out of View). See Malfunction
Indicator Lamp (Check Engine
Light) 0144.
Page 16 of 427
GMC Yukon/Yukon XL/Denali Owner Manual (GMNA-Localizing-U.S./
Canada/Mexico-9955936) - 2017 - crc - 7/5/16
In Brief 15
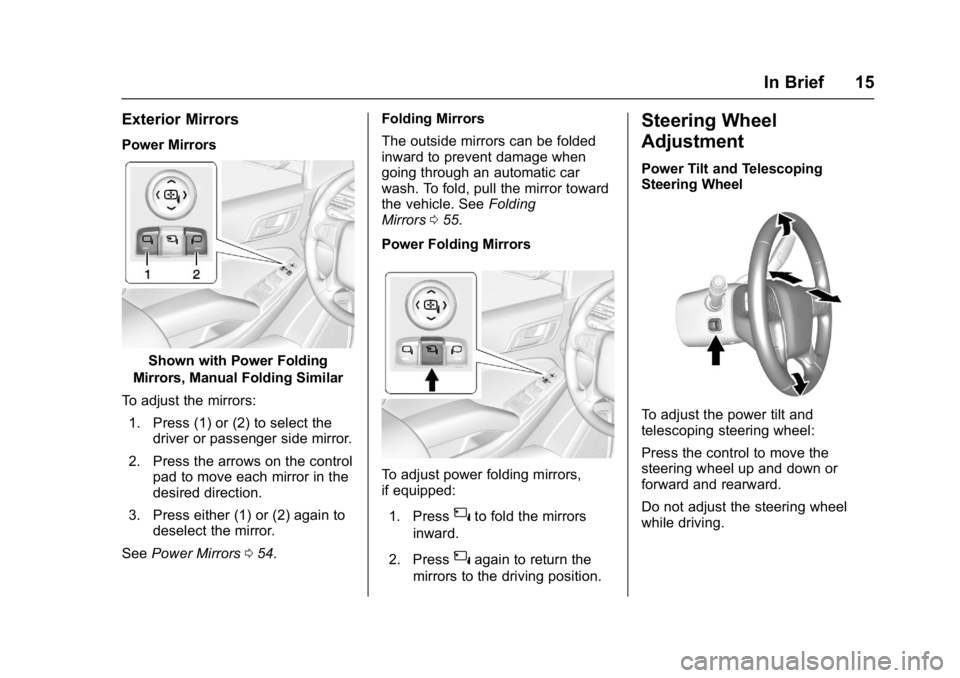
Exterior Mirrors
Power Mirrors
Shown with Power Folding
Mirrors, Manual Folding Similar
To adjust the mirrors: 1. Press (1) or (2) to select the driver or passenger side mirror.
2. Press the arrows on the control pad to move each mirror in the
desired direction.
3. Press either (1) or (2) again to deselect the mirror.
See Power Mirrors 054. Folding Mirrors
The outside mirrors can be folded
inward to prevent damage when
going through an automatic car
wash. To fold, pull the mirror toward
the vehicle. See
Folding
Mirrors 055.
Power Folding Mirrors
To adjust power folding mirrors,
if equipped:
1. Press
{to fold the mirrors
inward.
2. Press
{again to return the
mirrors to the driving position.
Steering Wheel
Adjustment
Power Tilt and Telescoping
Steering Wheel
To adjust the power tilt and
telescoping steering wheel:
Press the control to move the
steering wheel up and down or
forward and rearward.
Do not adjust the steering wheel
while driving.
Page 20 of 427
GMC Yukon/Yukon XL/Denali Owner Manual (GMNA-Localizing-U.S./
Canada/Mexico-9955936) - 2017 - crc - 7/5/16
In Brief 19
Transmission
Range Selection Mode
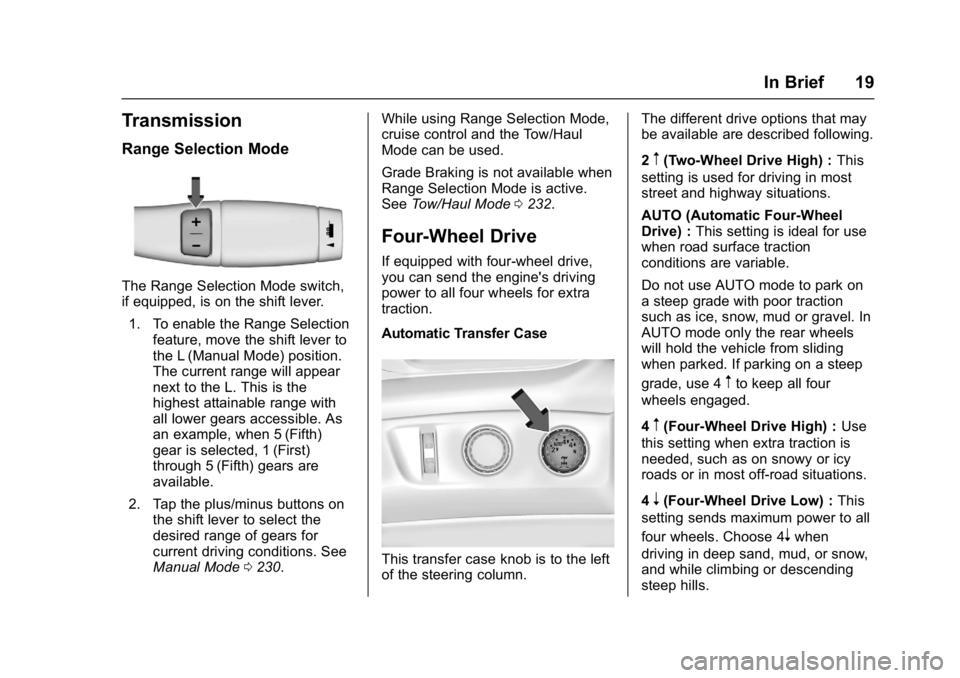
The Range Selection Mode switch,
if equipped, is on the shift lever.1. To enable the Range Selection feature, move the shift lever to
the L (Manual Mode) position.
The current range will appear
next to the L. This is the
highest attainable range with
all lower gears accessible. As
an example, when 5 (Fifth)
gear is selected, 1 (First)
through 5 (Fifth) gears are
available.
2. Tap the plus/minus buttons on the shift lever to select the
desired range of gears for
current driving conditions. See
Manual Mode 0230. While using Range Selection Mode,
cruise control and the Tow/Haul
Mode can be used.
Grade Braking is not available when
Range Selection Mode is active.
See
Tow/Haul Mode 0232.
Four-Wheel Drive
If equipped with four-wheel drive,
you can send the engine's driving
power to all four wheels for extra
traction.
Automatic Transfer Case
This transfer case knob is to the left
of the steering column. The different drive options that may
be available are described following.
2
m(Two-Wheel Drive High) :
This
setting is used for driving in most
street and highway situations.
AUTO (Automatic Four-Wheel
Drive) : This setting is ideal for use
when road surface traction
conditions are variable.
Do not use AUTO mode to park on
a steep grade with poor traction
such as ice, snow, mud or gravel. In
AUTO mode only the rear wheels
will hold the vehicle from sliding
when parked. If parking on a steep
grade, use 4
mto keep all four
wheels engaged.
4
m(Four-Wheel Drive High) : Use
this setting when extra traction is
needed, such as on snowy or icy
roads or in most off-road situations.
4
n(Four-Wheel Drive Low) : This
setting sends maximum power to all
four wheels. Choose 4
nwhen
driving in deep sand, mud, or snow,
and while climbing or descending
steep hills.
Page 21 of 427
GMC Yukon/Yukon XL/Denali Owner Manual (GMNA-Localizing-U.S./
Canada/Mexico-9955936) - 2017 - crc - 7/5/16
20 In Brief
N (Neutral) :Shift to this setting
only when towing the vehicle. See
Recreational Vehicle Towing 0361
or Trailer Towing 0271.
See Four-Wheel Drive 0233.Vehicle Features
Infotainment System
See the infotainment manual for
information on the radio, audio
players, phone, navigation system,
and voice or speech recognition.
It also includes information on
settings.
Steering Wheel Controls
The infotainment system can be
operated by using the steering
wheel controls. See "Steering
Wheel Controls" in the infotainment
manual.
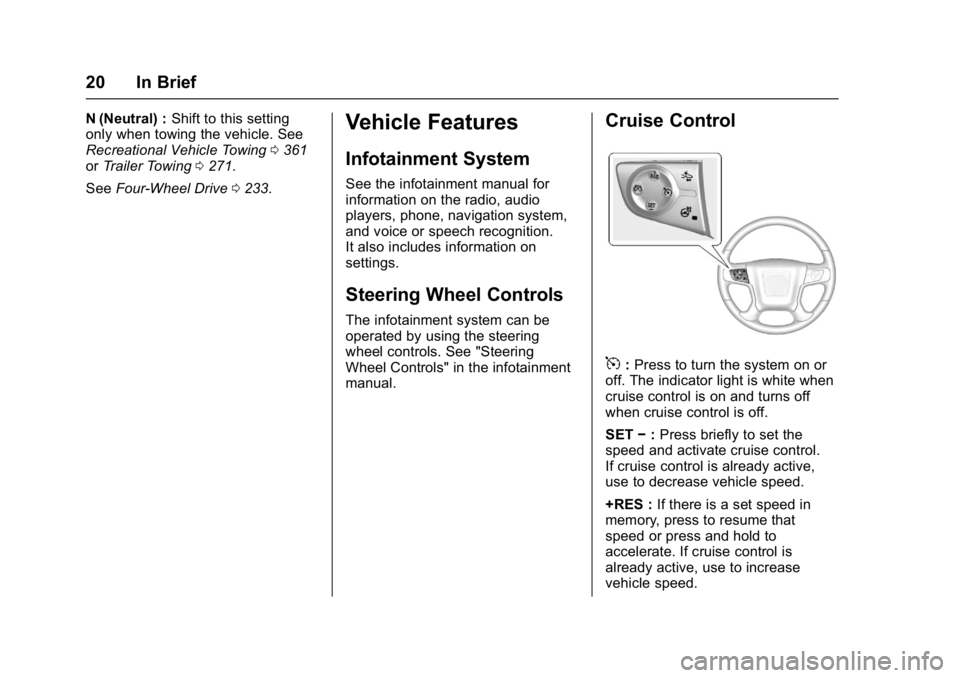
Cruise Control
5:Press to turn the system on or
off. The indicator light is white when
cruise control is on and turns off
when cruise control is off.
SET −:Press briefly to set the
speed and activate cruise control.
If cruise control is already active,
use to decrease vehicle speed.
+RES : If there is a set speed in
memory, press to resume that
speed or press and hold to
accelerate. If cruise control is
already active, use to increase
vehicle speed.
Page 35 of 427

GMC Yukon/Yukon XL/Denali Owner Manual (GMNA-Localizing-U.S./
Canada/Mexico-9955936) - 2017 - crc - 7/5/16
34 Keys, Doors, and Windows
Battery Replacement
Replace the battery in the
transmitter soon if the REPLACE
BATTERY IN REMOTE KEY
message displays in the DIC.
Caution
When replacing the battery, do
not touch any of the circuitry on
the transmitter. Static from your
body could damage the
transmitter.
To replace the battery:
1. Separate and remove the back cover of the transmitter with a
flat, thin object, such as a coin.
2. Press and slide the battery
down toward the pocket of the
transmitter in the direction of
the key ring. Do not use a
metal object
3. Remove the battery.
4. Insert the new battery, positive side facing up. Replace with a
CR2032 or equivalent battery.
5. Push together the transmitter back cover top side first, and
then the bottom toward the
key ring.
Remote Keyless Entry
(RKE) System Operation
(Keyless Access)
The Keyless Access system allows
for vehicle entry when the
transmitter is within 1 m (3 ft). See
“Keyless Access Operation” later in
this section.
The RKE transmitter functions may
work up to 60 m (197 ft) away from
the vehicle.
Other conditions can affect the
performance of the transmitter. See
Remote Keyless Entry (RKE)
System 032.
Page 41 of 427

GMC Yukon/Yukon XL/Denali Owner Manual (GMNA-Localizing-U.S./
Canada/Mexico-9955936) - 2017 - crc - 7/5/16
40 Keys, Doors, and Windows
Battery Replacement
Replace the battery in the
transmitter soon if the REPLACE
BATTERY IN REMOTE KEY
message displays in the DIC.
Caution
When replacing the battery, do
not touch any of the circuitry on
the transmitter. Static from your
body could damage the
transmitter.
To replace the battery:
1. With the key removed, insert a flat, thin object in the center of
the transmitter to separate and
remove the back cover.
2. Lift the battery with a flat
object.
3. Remove the battery.
4. Insert the new battery, positive side toward the back cover.
Replace with a CR2032 or
equivalent battery.
5. Push together the transmitter.
Remote Vehicle Start
The climate control system will
come on when the vehicle is started
remotely depending on the outside
temperature.
The rear defog and heated and
ventilated seats, if equipped, may
also come on. See Heated and
Ventilated Front Seats 068 and
Vehicle Personalization 0170.
Laws in some communities may
restrict the use of remote starters.
Check local regulations for any
requirements on remote starting of
vehicles.
Do not use remote start if the
vehicle is low on fuel.
The vehicle cannot be remote
started if:
. The key is in the ignition (Key
Access) or the transmitter is in
the vehicle (Keyless Access).
. The hood is not closed.
. There is an emission control
system malfunction and the
malfunction indicator lamp is on.
Page 56 of 427
GMC Yukon/Yukon XL/Denali Owner Manual (GMNA-Localizing-U.S./
Canada/Mexico-9955936) - 2017 - crc - 7/5/16
Keys, Doors, and Windows 55
Folding Mirrors
Power Folding
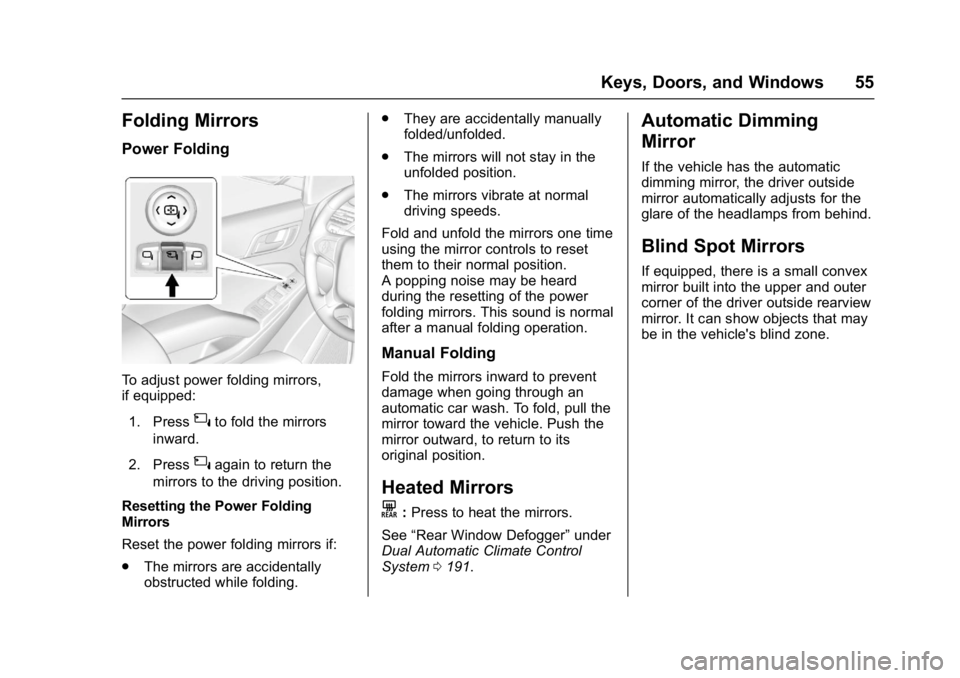
To adjust power folding mirrors,
if equipped:1. Press
{to fold the mirrors
inward.
2. Press
{again to return the
mirrors to the driving position.
Resetting the Power Folding
Mirrors
Reset the power folding mirrors if:
. The mirrors are accidentally
obstructed while folding. .
They are accidentally manually
folded/unfolded.
. The mirrors will not stay in the
unfolded position.
. The mirrors vibrate at normal
driving speeds.
Fold and unfold the mirrors one time
using the mirror controls to reset
them to their normal position.
A popping noise may be heard
during the resetting of the power
folding mirrors. This sound is normal
after a manual folding operation.
Manual Folding
Fold the mirrors inward to prevent
damage when going through an
automatic car wash. To fold, pull the
mirror toward the vehicle. Push the
mirror outward, to return to its
original position.
Heated Mirrors
K
: Press to heat the mirrors.
See “Rear Window Defogger” under
Dual Automatic Climate Control
System 0191.
Automatic Dimming
Mirror
If the vehicle has the automatic
dimming mirror, the driver outside
mirror automatically adjusts for the
glare of the headlamps from behind.
Blind Spot Mirrors
If equipped, there is a small convex
mirror built into the upper and outer
corner of the driver outside rearview
mirror. It can show objects that may
be in the vehicle's blind zone.
Page 58 of 427
GMC Yukon/Yukon XL/Denali Owner Manual (GMNA-Localizing-U.S./
Canada/Mexico-9955936) - 2017 - crc - 7/5/16
Keys, Doors, and Windows 57
Interior Mirrors
Interior Rearview Mirrors
Adjust the rearview mirror for a clear
view of the area behind your
vehicle.
If equipped with OnStar, the vehicle
may have three control buttons at
the bottom of the mirror. See your
dealer for more information about
OnStar and how to subscribe to it.
SeeOnStar Overview 0405.
Do not spray glass cleaner directly
on the mirror. Use a soft towel
dampened with water.
Manual Rearview Mirror
If equipped with a manual rearview
mirror, push the tab forward for
daytime use and pull it for nighttime
use to avoid glare from the
headlamps from behind.
Automatic Dimming
Rearview Mirror
If equipped, automatic dimming
reduces the glare of headlamps
from behind. The dimming feature
comes on when the vehicle is
started.
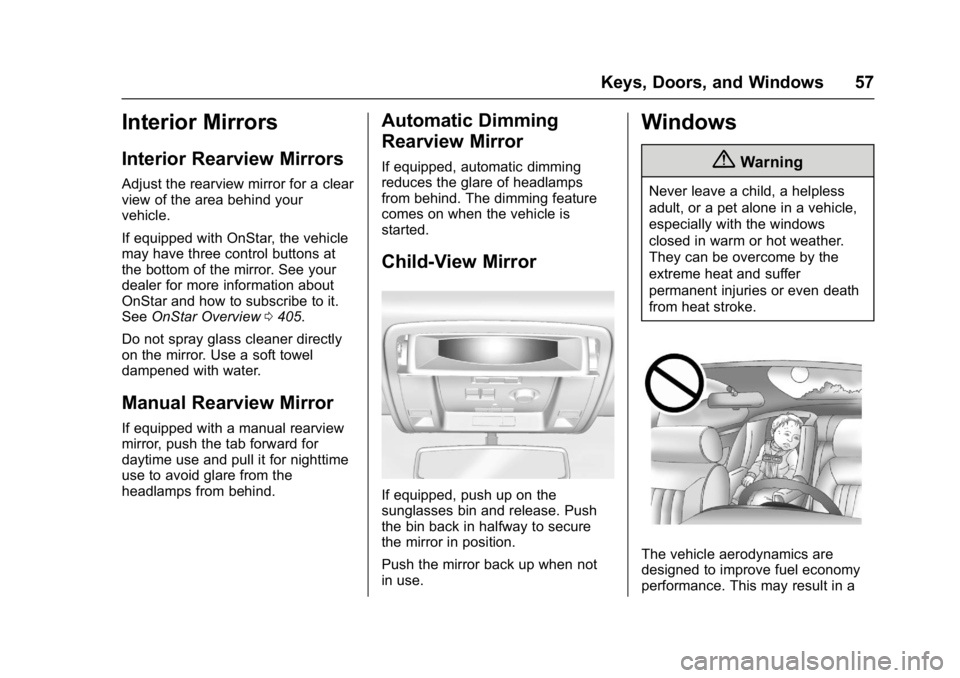
Child-View Mirror
If equipped, push up on the
sunglasses bin and release. Push
the bin back in halfway to secure
the mirror in position.
Push the mirror back up when not
in use.
Windows
{Warning
Never leave a child, a helpless
adult, or a pet alone in a vehicle,
especially with the windows
closed in warm or hot weather.
They can be overcome by the
extreme heat and suffer
permanent injuries or even death
from heat stroke.
The vehicle aerodynamics are
designed to improve fuel economy
performance. This may result in a
Page 72 of 427
GMC Yukon/Yukon XL/Denali Owner Manual (GMNA-Localizing-U.S./
Canada/Mexico-9955936) - 2017 - crc - 7/5/16
Seats and Restraints 71
{Warning
If either seatback is not locked, it
could move forward in a sudden
stop or crash. That could cause
injury to the person sitting there.
Always push and pull on the
seatbacks to be sure they are
locked.
To return the seatback to the upright
position: 1. Lift the lever fully while applying pressure to the
seatback, and the seatback will
return to the upright position.
If the lever is lifted without
applying pressure, the seat will
release to a folded position.
2. Push and pull on the seatback to make sure it is locked.
The second row seats can be folded
for additional cargo space or folded
and tumbled for easy entry and exit
to the third row seat.
Manual Fold and Tumble
Feature
{Warning
Do not leave the second row seat
in a tumbled position while the
vehicle is in motion. A tumbled
seat is not locked. It can move
when the vehicle is in motion.
People in the vehicle could be
injured in a sudden stop or crash.
Be sure to return the seat to the
passenger seating position before
driving the vehicle. Push and pull
on the seat to make sure it is
locked into place.
Caution
Folding a rear seat with the safety
belts still fastened may cause
damage to the seat or the safety
belts. Always unbuckle the safety
belts and return them to their
normal stowed position before
folding a rear seat. Folding and Tumbling the Seat
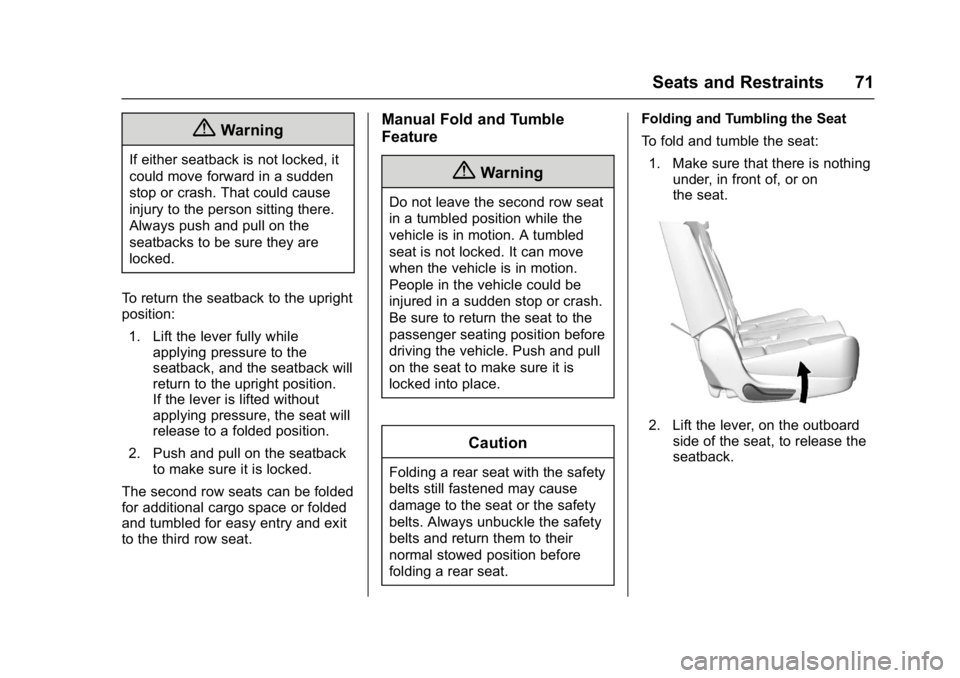
To fold and tumble the seat:
1. Make sure that there is nothing under, in front of, or on
the seat.
2. Lift the lever, on the outboard
side of the seat, to release the
seatback.