remove seats GMC YUKON XL 2018 Owners Manual
[x] Cancel search | Manufacturer: GMC, Model Year: 2018, Model line: YUKON XL, Model: GMC YUKON XL 2018Pages: 425, PDF Size: 7.37 MB
Page 29 of 425
GMC Yukon/Yukon XL/Denali Owner Manual (GMNA-Localizing-U.S./
Canada/Mexico-11349262) - 2018 - crc - 6/20/17
28 Keys, Doors, and Windows
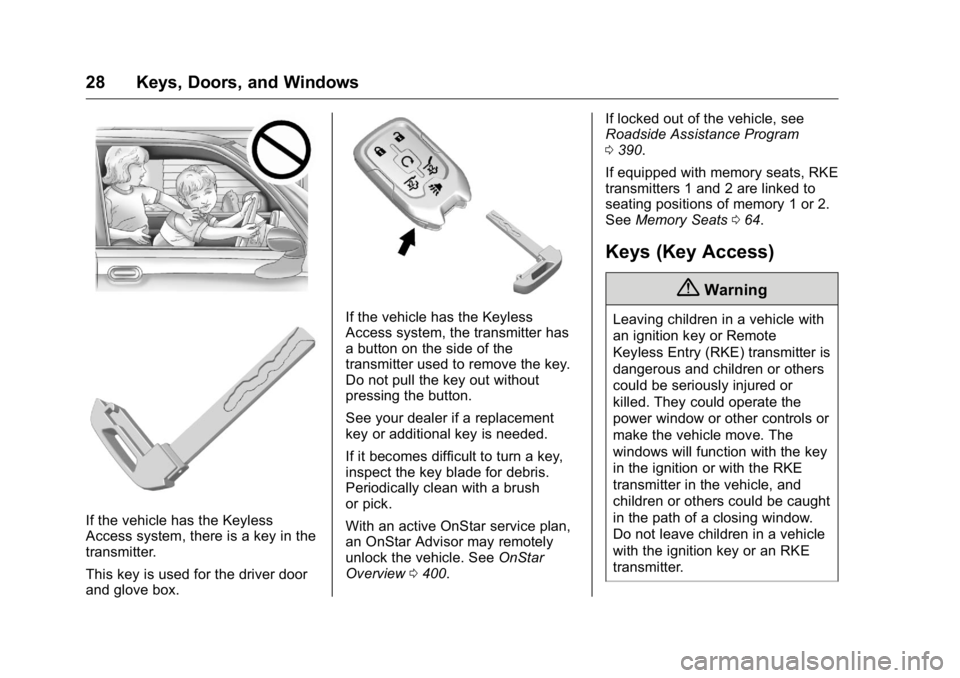
If the vehicle has the Keyless
Access system, there is a key in the
transmitter.
This key is used for the driver door
and glove box. If the vehicle has the Keyless
Access system, the transmitter has
a button on the side of the
transmitter used to remove the key.
Do not pull the key out without
pressing the button.
See your dealer if a replacement
key or additional key is needed.
If it becomes difficult to turn a key,
inspect the key blade for debris.
Periodically clean with a brush
or pick.
With an active OnStar service plan,
an OnStar Advisor may remotely
unlock the vehicle. See OnStar
Overview 0 400 . If locked out of the vehicle, see
Roadside Assistance Program
0 390 .
If equipped with memory seats, RKE
transmitters 1 and 2 are linked to
seating positions of memory 1 or 2.
See Memory Seats 0 64 .
Keys (Key Access)
{ WarningLeaving children in a vehicle with
an ignition key or Remote
Keyless Entry (RKE) transmitter is
dangerous and children or others
could be seriously injured or
killed. They could operate the
power window or other controls or
make the vehicle move. The
windows will function with the key
in the ignition or with the RKE
transmitter in the vehicle, and
children or others could be caught
in the path of a closing window.
Do not leave children in a vehicle
with the ignition key or an RKE
transmitter.
Page 31 of 425
GMC Yukon/Yukon XL/Denali Owner Manual (GMNA-Localizing-U.S./
Canada/Mexico-11349262) - 2018 - crc - 6/20/17
30 Keys, Doors, and Windows
Interference from radio-frequency
identification (RFID) tags may
prevent the key from starting the
vehicle. Keep RFID tags away from
the key when starting the vehicle.
The key is used for the driver door,
ignition, and glove box.
If equipped with memory seats,
keys 1 and 2 are linked to seating
positions of memory 1 or 2. See
Memory Seats 0 64 .
Programming Keys to the
Vehicle
Follow these procedures to program
up to eight keys to the vehicle. Programming with Two
Recognized Keys (Key
Vehicles Only)
To program a new key:
1. Insert the original, already
programmed key in the ignition
and turn the ignition on without
starting the engine.
2. Turn the ignition off and
remove the key.
3. Quickly, within five seconds,
insert the second original
already programmed key in the
ignition and turn the ignition on
without starting the engine.
4. Turn the ignition off and
remove the key.
5. Insert the new key to be
programmed, and within
five seconds, turn the ignition
on without starting the engine.
The security light will turn off
once the key has been
programmed.
6. Repeat Steps 1 – 5 if additional
keys are to be programmed. If a key is lost or damaged, see your
dealer to have a new key made.
Programming without Recognized
Keys (Key Vehicles Only)
Program a new key to the vehicle
when a recognized key is not
available. Canadian regulations
require that Canadian owners see
their dealer.
If two currently recognized keys are
not available, follow this procedure
to program the first key.
This procedure will take
approximately 30 minutes to
complete for the first key. The
vehicle must be off and all of the
keys must be with you.
1. Insert the new vehicle key into
the ignition.
2. Turn the ignition on without
starting the engine. The
security light will come on.
3. Wait 10 minutes until the
security light turns off.
4. Turn the ignition off.
Page 36 of 425
GMC Yukon/Yukon XL/Denali Owner Manual (GMNA-Localizing-U.S./
Canada/Mexico-11349262) - 2018 - crc - 6/20/17
Keys, Doors, and Windows 35of the liftgate or door being opened.
If the vehicle has this feature, there
will be a button on the outside door
handles.
Keyless Access can be
programmed to unlock all doors on
the first lock/unlock press from the
driver door. See Vehicle
Personalization 0 158 .
If equipped with memory seats, RKE
transmitters 1 and 2 are linked to
seating positions of memory 1 or 2.
See Memory Seats 0 64 .
Keyless Unlocking/Locking from
the Driver Door
When the doors are locked and the
RKE transmitter is within 1 m (3 ft)
of the door handle, pressing the
lock/unlock button on the driver door
handle will unlock the driver door.
If the lock/unlock button is pressed
again within five seconds, all
passenger doors and the liftgate will
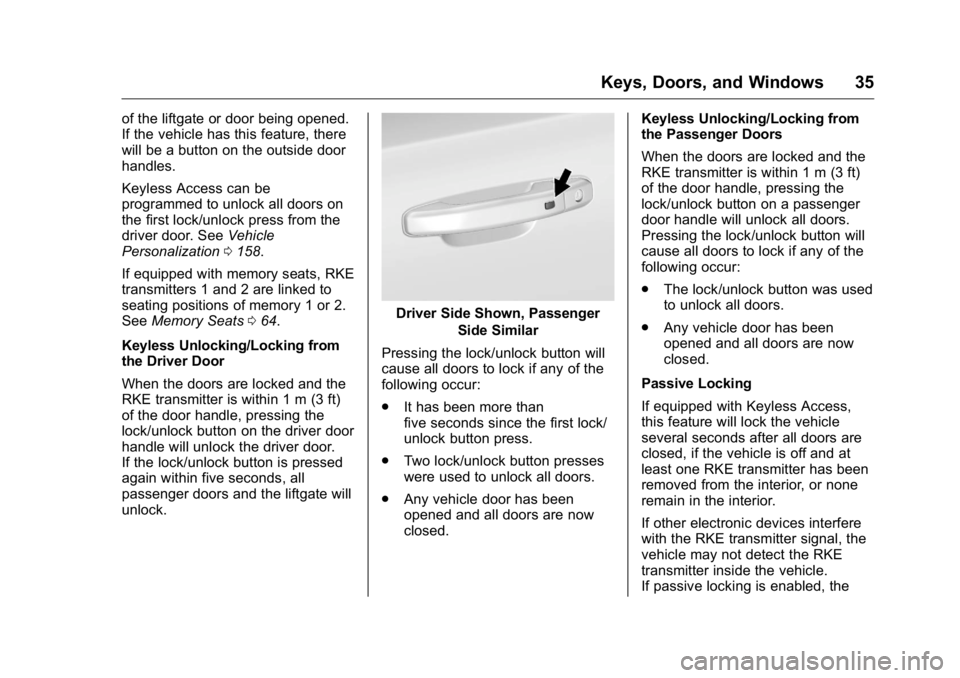
unlock. Driver Side Shown, Passenger
Side Similar
Pressing the lock/unlock button will
cause all doors to lock if any of the
following occur:
.
It has been more than
five seconds since the first lock/
unlock button press.
.
Two lock/unlock button presses
were used to unlock all doors.
.
Any vehicle door has been
opened and all doors are now
closed. Keyless Unlocking/Locking from
the Passenger Doors
When the doors are locked and the
RKE transmitter is within 1 m (3 ft)
of the door handle, pressing the
lock/unlock button on a passenger
door handle will unlock all doors.
Pressing the lock/unlock button will
cause all doors to lock if any of the
following occur:
.
The lock/unlock button was used
to unlock all doors.
.
Any vehicle door has been
opened and all doors are now
closed.
Passive Locking
If equipped with Keyless Access,
this feature will lock the vehicle
several seconds after all doors are
closed, if the vehicle is off and at
least one RKE transmitter has been
removed from the interior, or none
remain in the interior.
If other electronic devices interfere
with the RKE transmitter signal, the
vehicle may not detect the RKE
transmitter inside the vehicle.
If passive locking is enabled, the
Page 38 of 425
GMC Yukon/Yukon XL/Denali Owner Manual (GMNA-Localizing-U.S./
Canada/Mexico-11349262) - 2018 - crc - 6/20/17
Keys, Doors, and Windows 371. Remove the key from the
recognized transmitter.
2. Place the two recognized
transmitters in the cupholder or
on the passenger seat.
3. Insert the vehicle key into the
key lock cylinder on the driver
door handle. Then turn the key
counterclockwise, to the unlock
position, five times within
10 seconds.
The Driver Information Center
(DIC) displays READY FOR
REMOTE#2, 3, 4, ETC.
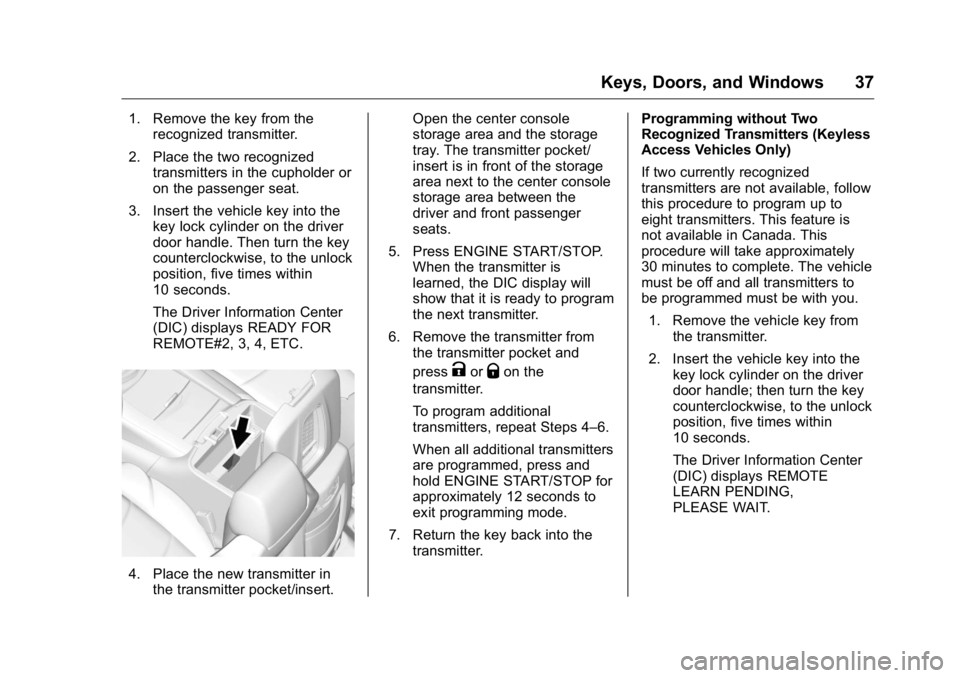
4. Place the new transmitter in
the transmitter pocket/insert. Open the center console
storage area and the storage
tray. The transmitter pocket/
insert is in front of the storage
area next to the center console
storage area between the
driver and front passenger
seats.
5. Press ENGINE START/STOP.
When the transmitter is
learned, the DIC display will
show that it is ready to program
the next transmitter.
6. Remove the transmitter from
the transmitter pocket and
press
K or
Q on the
transmitter.
To program additional
transmitters, repeat Steps 4 – 6.
When all additional transmitters
are programmed, press and
hold ENGINE START/STOP for
approximately 12 seconds to
exit programming mode.
7. Return the key back into the
transmitter. Programming without Two
Recognized Transmitters (Keyless
Access Vehicles Only)
If two currently recognized
transmitters are not available, follow
this procedure to program up to
eight transmitters. This feature is
not available in Canada. This
procedure will take approximately
30 minutes to complete. The vehicle
must be off and all transmitters to
be programmed must be with you.
1. Remove the vehicle key from
the transmitter.
2. Insert the vehicle key into the
key lock cylinder on the driver
door handle; then turn the key
counterclockwise, to the unlock
position, five times within
10 seconds.
The Driver Information Center
(DIC) displays REMOTE
LEARN PENDING,
PLEASE WAIT.
Page 39 of 425
GMC Yukon/Yukon XL/Denali Owner Manual (GMNA-Localizing-U.S./
Canada/Mexico-11349262) - 2018 - crc - 6/20/17
38 Keys, Doors, and Windows 3. Wait for 10 minutes until the
DIC displays PRESS ENGINE
START BUTTON TO LEARN,
then press ENGINE
START/STOP.
The DIC will again display
REMOTE LEARN PENDING,
PLEASE WAIT.
4. Repeat Step 3 two additional
times. After the third time all
previously known transmitters
will no longer work with the
vehicle. Remaining transmitters
can be relearned during the
next steps.
The DIC display should now
show READY FOR REMOTE
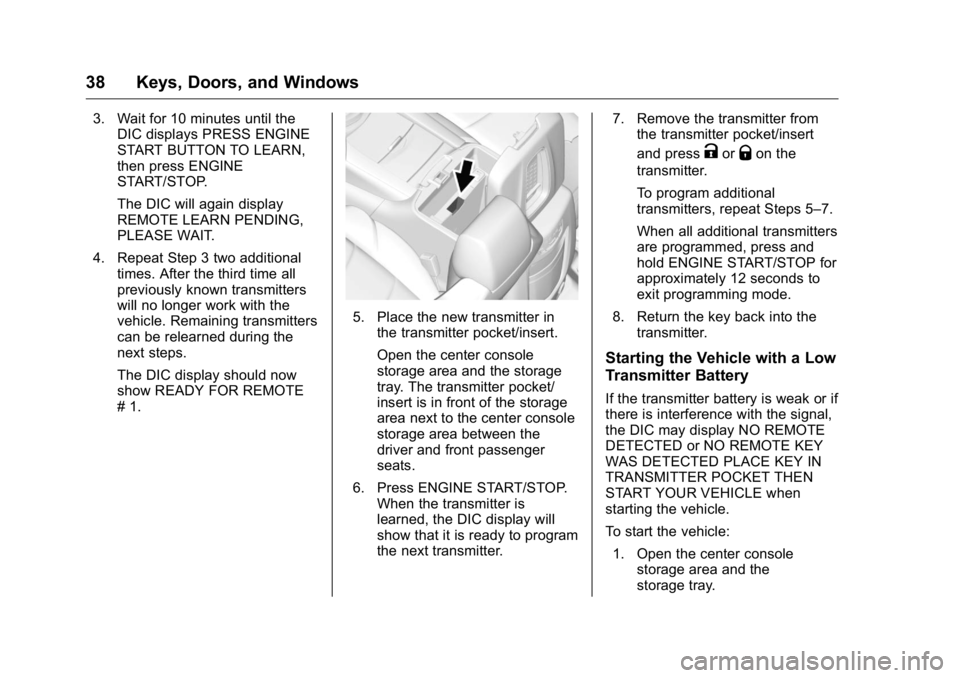
# 1. 5. Place the new transmitter in
the transmitter pocket/insert.
Open the center console
storage area and the storage
tray. The transmitter pocket/
insert is in front of the storage
area next to the center console
storage area between the
driver and front passenger
seats.
6. Press ENGINE START/STOP.
When the transmitter is
learned, the DIC display will
show that it is ready to program
the next transmitter. 7. Remove the transmitter from
the transmitter pocket/insert
and press
K or
Q on the
transmitter.
To program additional
transmitters, repeat Steps 5 – 7.
When all additional transmitters
are programmed, press and
hold ENGINE START/STOP for
approximately 12 seconds to
exit programming mode.
8. Return the key back into the
transmitter.
Starting the Vehicle with a Low
Transmitter Battery If the transmitter battery is weak or if
there is interference with the signal,
the DIC may display NO REMOTE
DETECTED or NO REMOTE KEY
WAS DETECTED PLACE KEY IN
TRANSMITTER POCKET THEN
START YOUR VEHICLE when
starting the vehicle.
To start the vehicle:
1. Open the center console
storage area and the
storage tray.
Page 66 of 425
GMC Yukon/Yukon XL/Denali Owner Manual (GMNA-Localizing-U.S./
Canada/Mexico-11349262) - 2018 - crc - 6/20/17
Seats and Restraints 65See Remote Keyless Entry (RKE)
System Operation (Key Access)
0 31 or Remote Keyless Entry
(RKE) System Operation (Keyless
Access) 0 33 . Only RKE
transmitters 1 and 2 can be used for
automatic memory recalls. A Driver
Information Center (DIC) welcome
message indicating the transmitter
number may display for the first few
ignition cycles following a
transmitter change. For Auto
Memory Recall to work properly,
save the positions to the memory
button (1 or 2) matching the RKE
transmitter number displayed in the
DIC welcome message. Carry the
linked RKE transmitter when
entering the vehicle.
Vehicle Personalization Settings
.
To have the Auto Memory Recall
movement begin when the
vehicle is started, select the
Settings menu, then Vehicle,
then Comfort and Convenience,
and then Auto Memory Recall.
Select On or Off. See “ Auto
Memory Recall ” later in this
section. .
To begin Easy Exit Recall
movement when the ignition is
turned off and the driver door is
opened, or when the ignition is
turned off with the driver door
already opened, select the
Settings menu, then Vehicle,
then Comfort and Convenience,
and then Easy Exit Options.
Select On or Off. See “ Easy Exit
Recall ” later in this section.
.
See Vehicle Personalization
0 158 for additional setting
information.
Identifying Driver Number
To identify the driver number:
1. Start the vehicle with the other
key or RKE transmitter. The
DIC should display the driver
number; 1 or 2. Turn the
ignition off and remove the key
or RKE transmitter from the
vehicle.
2. Start the vehicle with the initial
key or RKE transmitter. The
DIC should display the other
driver number not shown in
step 1. Saving Memory Positions
Read these instructions completely
before saving memory positions.
To save preferred driving positions
1 and 2:
1. Turn the ignition on or to ACC/
ACCESSORY.
A DIC welcome message may
be displayed indicating number
1 or 2 for memory recalls.
2. Adjust all available memory
features to the desired driving
position.
3. Press and release SET; a beep
will sound.
4. Immediately press and hold the
1 or 2 memory button matching
the above DIC welcome
message until two beeps
sound.
If too much time passes
between releasing SET and
pressing 1, the memory
position will not be saved and
two beeps will not sound.
Repeat Steps 3 and 4.
Page 68 of 425
GMC Yukon/Yukon XL/Denali Owner Manual (GMNA-Localizing-U.S./
Canada/Mexico-11349262) - 2018 - crc - 6/20/17
Seats and Restraints 67"Vehicle Personalization Settings"
previously in this section and
Vehicle Personalization 0 158 .
If turned on, the positions saved to
B are automatically recalled when
one of the following occurs:
.
The vehicle is turned off and the
driver door is opened within a
short time.
.
The vehicle is turned off with the
driver door open.
To stop Easy Exit Recall movement,
press any of the following memory
controls:
.
Power seat
.
Memory SET, 1, 2, or
B.
Power mirror, with the driver or
passenger side mirror selected
.
Power steering wheel,
if equipped
.
Adjustable pedals, if equipped
Obstructions
If something has blocked the driver
seat and/or power steering wheel
while recalling a memory position, the recall may stop. Remove the
obstruction and try the recall again.
If the memory position still does not
recall, see your dealer for service.
Heated and Ventilated
Front Seats
{ WarningIf temperature change or pain to
the skin cannot be felt, the seat
heater may cause burns. To
reduce the risk of burns, use care
when using the seat heater,
especially for long periods of
time. Do not place anything on
the seat that insulates against
heat, such as a blanket, cushion,
cover, or similar item. This may
cause the seat heater to
overheat. An overheated seat
heater may cause a burn or may
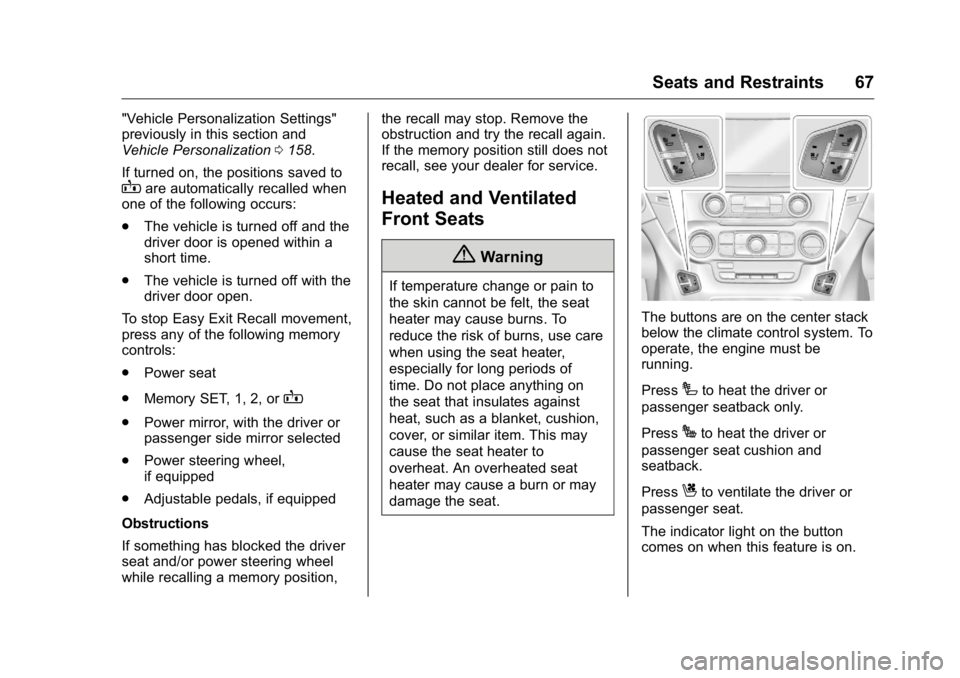
damage the seat. The buttons are on the center stack
below the climate control system. To
operate, the engine must be
running.
Press
I to heat the driver or
passenger seatback only.
Press
J to heat the driver or
passenger seat cushion and
seatback.
Press
C to ventilate the driver or
passenger seat.
The indicator light on the button
comes on when this feature is on.
Page 82 of 425
GMC Yukon/Yukon XL/Denali Owner Manual (GMNA-Localizing-U.S./
Canada/Mexico-11349262) - 2018 - crc - 6/20/17
Seats and Restraints 81Rear Seat Belt Comfort Guides
{ WarningA seat belt that is not properly
worn may not provide the
protection needed in a crash. The
person wearing the belt could be
seriously injured. The shoulder
belt should go over the shoulder
and across the chest. These parts
of the body are best able to take
belt restraining forces.
Rear seat belt comfort guides may
provide added seat belt comfort for
older children who have outgrown
booster seats and for some adults.
When installed on a shoulder belt,
the comfort guide positions the
shoulder belt away from the neck
and head. Second Row Outboard Seating
Positions
The vehicle has comfort guides for
the second row outboard seating
positions. The comfort guides are
stored on a clip on the interior trim
next to the outboard seatback.
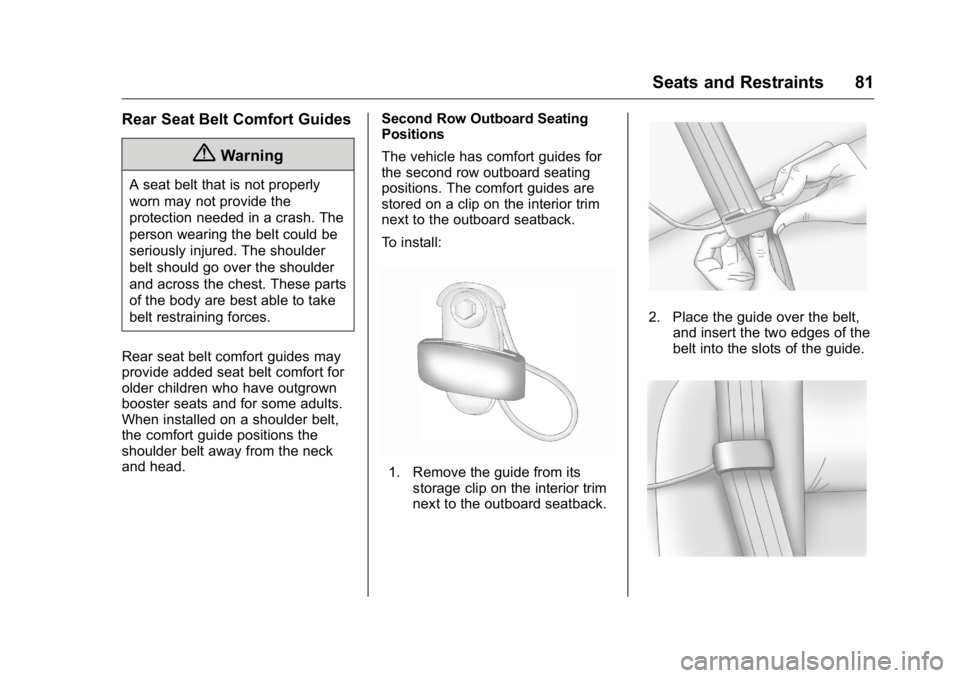
To install:
1. Remove the guide from its
storage clip on the interior trim
next to the outboard seatback. 2. Place the guide over the belt,
and insert the two edges of the
belt into the slots of the guide.
Page 83 of 425
GMC Yukon/Yukon XL/Denali Owner Manual (GMNA-Localizing-U.S./
Canada/Mexico-11349262) - 2018 - crc - 6/20/17
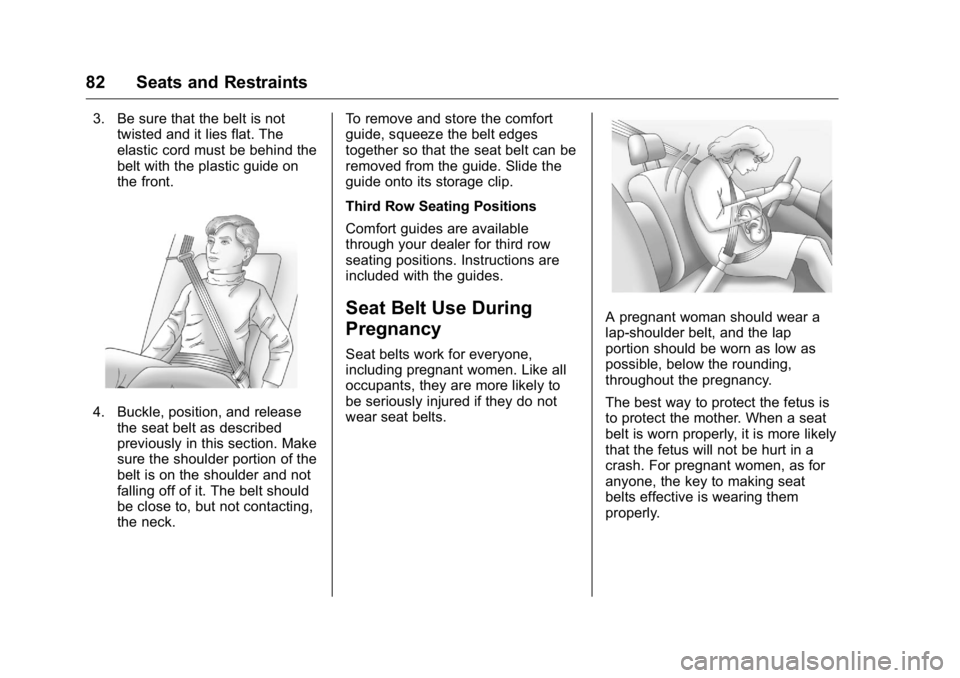
82 Seats and Restraints 3. Be sure that the belt is not
twisted and it lies flat. The
elastic cord must be behind the
belt with the plastic guide on
the front.
4. Buckle, position, and release
the seat belt as described
previously in this section. Make
sure the shoulder portion of the
belt is on the shoulder and not
falling off of it. The belt should
be close to, but not contacting,
the neck. To remove and store the comfort
guide, squeeze the belt edges
together so that the seat belt can be
removed from the guide. Slide the
guide onto its storage clip.
Third Row Seating Positions
Comfort guides are available
through your dealer for third row
seating positions. Instructions are
included with the guides.
Seat Belt Use During
Pregnancy Seat belts work for everyone,
including pregnant women. Like all
occupants, they are more likely to
be seriously injured if they do not
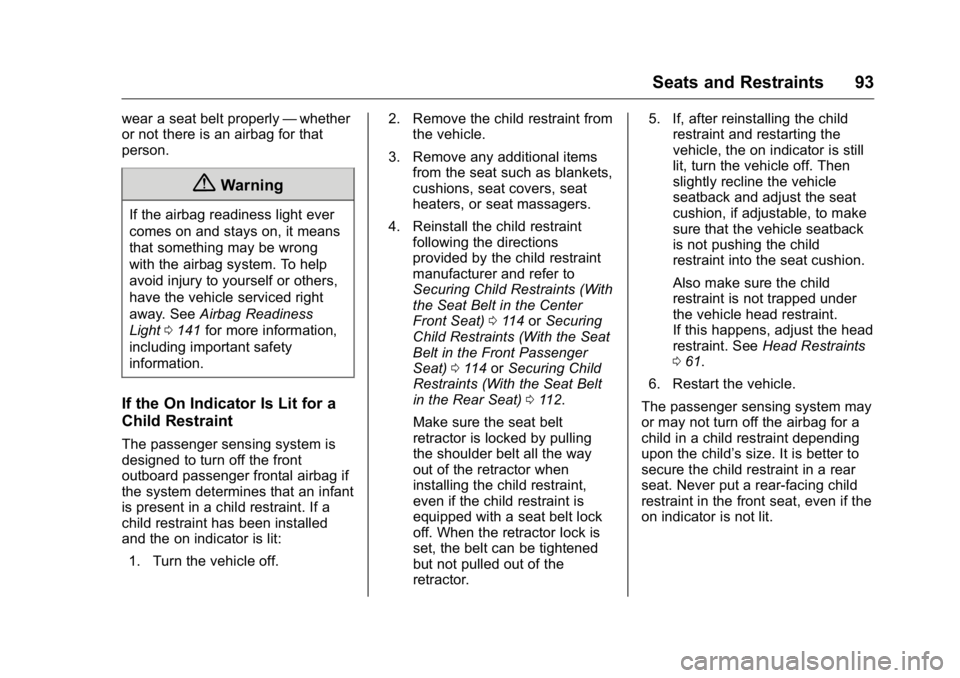
wear seat belts. A pregnant woman should wear a
lap-shoulder belt, and the lap
portion should be worn as low as
possible, below the rounding,
throughout the pregnancy.
The best way to protect the fetus is
to protect the mother. When a seat
belt is worn properly, it is more likely
that the fetus will not be hurt in a
crash. For pregnant women, as for
anyone, the key to making seat
belts effective is wearing them
properly.
Page 94 of 425
GMC Yukon/Yukon XL/Denali Owner Manual (GMNA-Localizing-U.S./
Canada/Mexico-11349262) - 2018 - crc - 6/20/17
Seats and Restraints 93wear a seat belt properly — whether
or not there is an airbag for that
person.
{ WarningIf the airbag readiness light ever
comes on and stays on, it means
that something may be wrong
with the airbag system. To help
avoid injury to yourself or others,
have the vehicle serviced right
away. See Airbag Readiness
Light 0 141 for more information,
including important safety
information.
If the On Indicator Is Lit for a
Child Restraint The passenger sensing system is
designed to turn off the front
outboard passenger frontal airbag if
the system determines that an infant
is present in a child restraint. If a
child restraint has been installed
and the on indicator is lit:
1. Turn the vehicle off. 2. Remove the child restraint from
the vehicle.
3. Remove any additional items
from the seat such as blankets,
cushions, seat covers, seat
heaters, or seat massagers.
4. Reinstall the child restraint
following the directions
provided by the child restraint
manufacturer and refer to
Securing Child Restraints (With
the Seat Belt in the Center
Front Seat) 0 114 or Securing
Child Restraints (With the Seat
Belt in the Front Passenger
Seat) 0 114 or Securing Child
Restraints (With the Seat Belt
in the Rear Seat) 0 112 .
Make sure the seat belt
retractor is locked by pulling
the shoulder belt all the way
out of the retractor when
installing the child restraint,
even if the child restraint is
equipped with a seat belt lock
off. When the retractor lock is
set, the belt can be tightened
but not pulled out of the
retractor. 5. If, after reinstalling the child
restraint and restarting the
vehicle, the on indicator is still
lit, turn the vehicle off. Then
slightly recline the vehicle
seatback and adjust the seat
cushion, if adjustable, to make
sure that the vehicle seatback
is not pushing the child
restraint into the seat cushion.
Also make sure the child
restraint is not trapped under
the vehicle head restraint.
If this happens, adjust the head
restraint. See Head Restraints
0 61 .
6. Restart the vehicle.
The passenger sensing system may
or may not turn off the airbag for a
child in a child restraint depending
upon the child ’ s size. It is better to
secure the child restraint in a rear
seat. Never put a rear-facing child
restraint in the front seat, even if the
on indicator is not lit.