door lock GMC YUKON XL DENALI 2004 Owner's Manual
[x] Cancel search | Manufacturer: GMC, Model Year: 2004, Model line: YUKON XL DENALI, Model: GMC YUKON XL DENALI 2004Pages: 468, PDF Size: 3.18 MB
Page 142 of 468
If a hand, arm, or other object is blocking the sunroof
glass panel as it is closing, the glass panel will stop
at the obstruction. After the obstruction is removed, the
glass panel can be closed or opened.
Use care not to leave the sunroof open for long periods
of time as debris may collect in the tracks.
If the battery has been recharged, disconnected or is
not working, you may need to reprogram the sunroof. To
do this, start the vehicle and press the forward side of
the sunroof button until the glass panel moves to a fully
closed position. Release, and press again to move to
the vent position which occurs when the sunroof is fully
tilted rearward. This will reset the memory and enable
the sunroof to function properly.Vehicle Personalization
Memory Seat
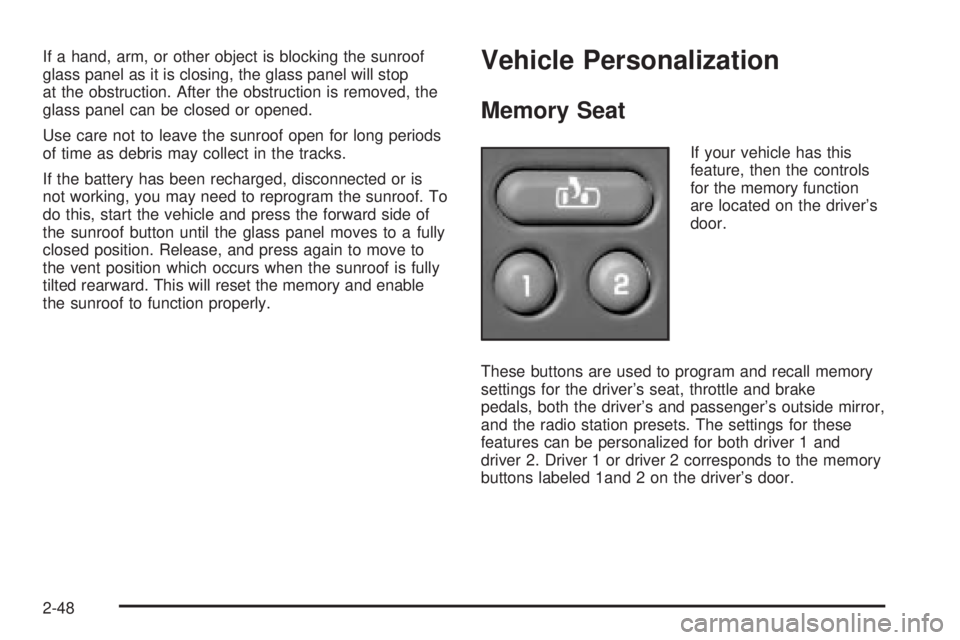
If your vehicle has this
feature, then the controls
for the memory function
are located on the driver's
door.
These buttons are used to program and recall memory
settings for the driver's seat, throttle and brake
pedals, both the driver's and passenger's outside mirror,
and the radio station presets. The settings for these
features can be personalized for both driver 1 and
driver 2. Driver 1 or driver 2 corresponds to the memory
buttons labeled 1and 2 on the driver's door.
2-48
Page 159 of 468
Automatic Headlamp System
When it is dark enough outside and the headlamp
switch is in AUTO, your automatic headlamp system will
turn on your headlamps at the normal brightness
along with other lamps such as the taillamps,
sidemarker, parking lamps, roof marker lamps and the
instrument panel lights. The radio lights will also be dim.
To turn off the automatic headlamp system, turn the
exterior lamps switch to the off position and then
release.
Your vehicle has a light sensor located on the top of the
instrument panel. Be sure it is not covered, or the
system will be on whenever the ignition is on.
The system may also turn on your headlamps when
driving through a parking garage, heavy overcast
weather or a tunnel. This is normal.
There is a delay in the transition between the daytime
and nighttime operation of the Daytime Running
Lamps (DRL) and the automatic headlamp systems so
that driving under bridges or bright overhead street
lights does not affect the system. The DRL and
automatic headlamp system will only be affected when
the light sensor sees a change in lighting lasting
longer than the delay.If you start your vehicle in a dark garage, the automatic
headlamp system will come on immediately. Once
you leave the garage, it will take approximately
one minute for the automatic headlamp system to
change to DRL if it is light outside. During that delay,
your instrument panel cluster may not be as bright
as usual. Make sure your instrument panel brightness
control is in the full bright position. See ªInstrument
Panel Brightnessº under
Interior Lamps on page 3-17.
Lamps On Reminder
If a door is open, a reminder chime will sound when
your headlamps or parking lamps are manually turned
on and your key is out of the ignition. To turn off
the chime, turn the headlamp switch to off or AUTO and
then back on. In the automatic mode, the headlamps
turn off once the ignition is in LOCK and the headlamps
on at exit delay ends (if enabled in the DIC).
3-15
Page 162 of 468
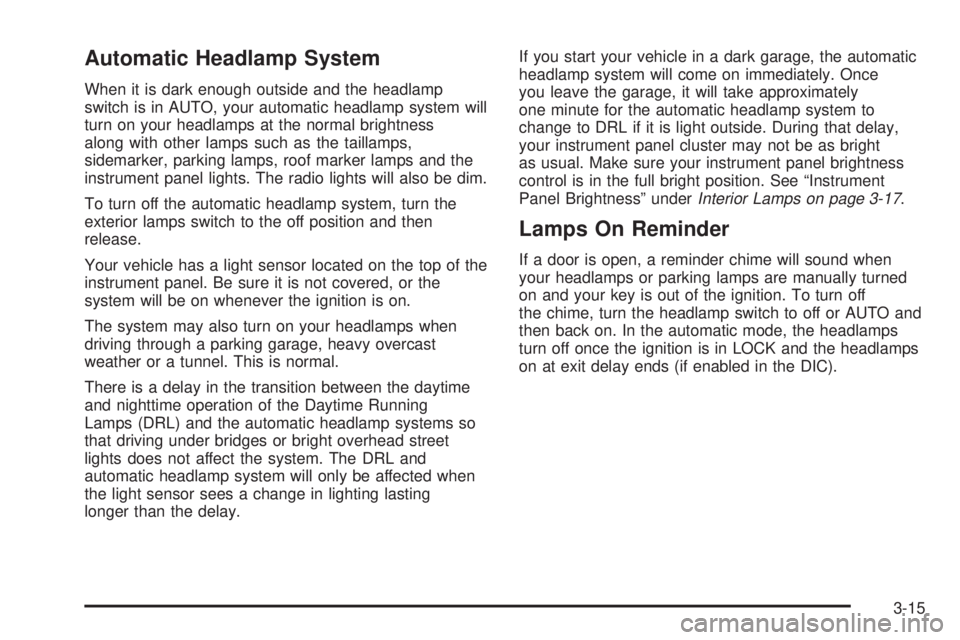
Reading Lamps
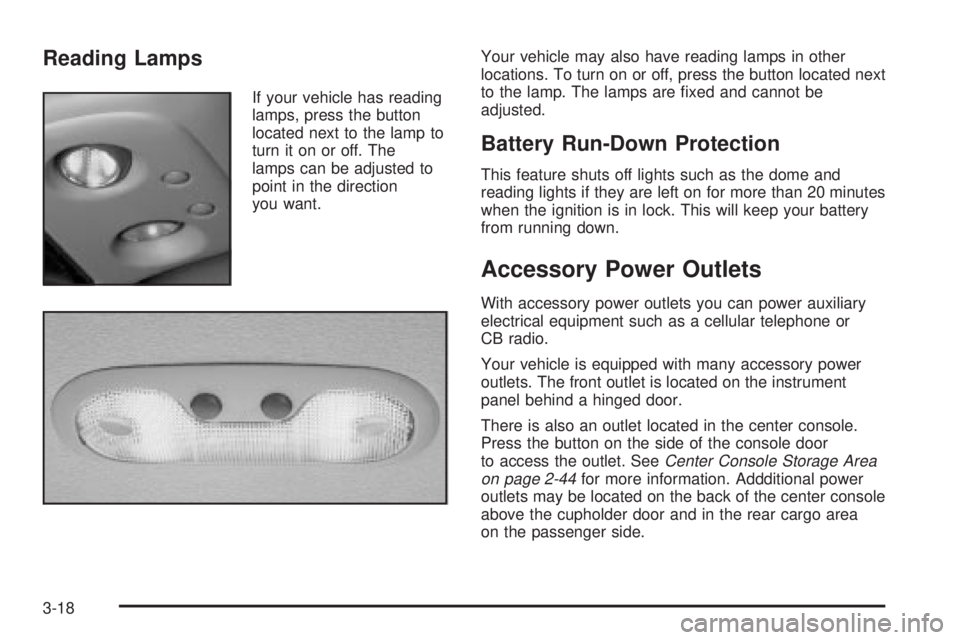
If your vehicle has reading
lamps, press the button
located next to the lamp to
turn it on or off. The
lamps can be adjusted to
point in the direction
you want.Your vehicle may also have reading lamps in other
locations. To turn on or off, press the button located next
to the lamp. The lamps are ®xed and cannot be
adjusted.
Battery Run-Down Protection
This feature shuts off lights such as the dome and
reading lights if they are left on for more than 20 minutes
when the ignition is in lock. This will keep your battery
from running down.
Accessory Power Outlets
With accessory power outlets you can power auxiliary
electrical equipment such as a cellular telephone or
CB radio.
Your vehicle is equipped with many accessory power
outlets. The front outlet is located on the instrument
panel behind a hinged door.
There is also an outlet located in the center console.
Press the button on the side of the console door
to access the outlet. See
Center Console Storage Area
on page 2-44for more information. Addditional power
outlets may be located on the back of the center console
above the cupholder door and in the rear cargo area
on the passenger side.
3-18
Page 173 of 468
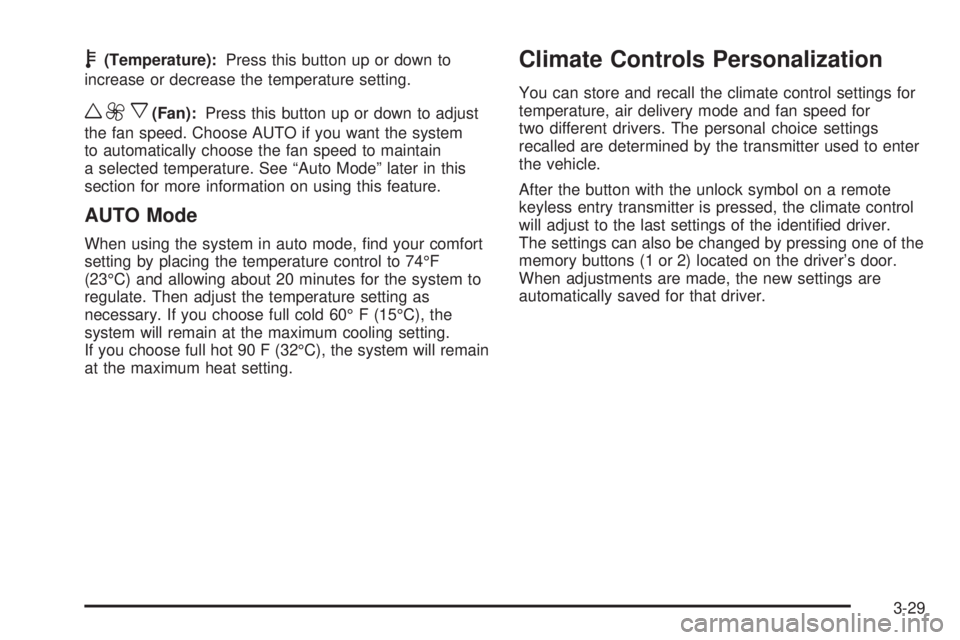
b(Temperature):Press this button up or down to
increase or decrease the temperature setting.
w9x(Fan):Press this button up or down to adjust
the fan speed. Choose AUTO if you want the system
to automatically choose the fan speed to maintain
a selected temperature. See ªAuto Modeº later in this
section for more information on using this feature.
AUTO Mode
When using the system in auto mode, ®nd your comfort
setting by placing the temperature control to 74ÉF
(23ÉC) and allowing about 20 minutes for the system to
regulate. Then adjust the temperature setting as
necessary. If you choose full cold 60É F (15ÉC), the
system will remain at the maximum cooling setting.
If you choose full hot 90 F (32ÉC), the system will remain
at the maximum heat setting.
Climate Controls Personalization
You can store and recall the climate control settings for
temperature, air delivery mode and fan speed for
two different drivers. The personal choice settings
recalled are determined by the transmitter used to enter
the vehicle.
After the button with the unlock symbol on a remote
keyless entry transmitter is pressed, the climate control
will adjust to the last settings of the identi®ed driver.
The settings can also be changed by pressing one of the
memory buttons (1 or 2) located on the driver's door.
When adjustments are made, the new settings are
automatically saved for that driver.
3-29
Page 194 of 468
The DIC does not replace the need to maintain your
vehicle as recommended in the Maintenance Schedule
in this manual. Also, the oil change reminder will not
detect dusty conditions or engine malfunctions that may
affect the oil. Also, the oil change reminder does not
measure how much oil you have in your engine. So, be
sure to check your oil level often. See
Engine Oil on
page 5-13.
Personalization Button
You can program certain features to a preferred setting
for up to two people. Press the personalization button
to scroll through the following personalization features.
All of the personalization options may not be available
on your vehicle. Only the options available will be
displayed on your DIC.
If your vehicle is not equipped with the DIC steering
wheel buttons you will not have any of the following
personalization options except for DISPLAY
LANGUAGE. See DISPLAY LANGUAGE later in this
section for more information.
·AUTOMATIC LOCKING
·AUTOMATIC UNLOCKING
·DELAYED LOCKING
·REMOTE LOCK FEEDBACK
·ALARM WARNING TYPE
·REMOTE UNLOCK FEEDBACK
·HEADLAMPS ON AT EXIT
·PERIMETER LIGHTING
·SEAT POSITION RECALL
·EASY EXIT DRIVER SEAT
·CURB VIEW ASSIST
·DISPLAY LANGUAGE
·DISPLAY UNITS (ENG/MET)
The default options for the above features were set
when your vehicle left the factory. The default options
are noted in the text following, but may have been
changed from their default state since then.
The driver's preferences can be recalled by pressing the
unlock button on the remote keyless entry transmitter
labeled 1 or 2 or by pressing the appropriate memory
button 1 or 2 located on the driver's door.
3-50
Page 195 of 468
Alarm Warning Type
Press the personalization button until ALARM
WARNING TYPE appears in the display. To select your
personalization for alarm warning type, press the
select button while ALARM WARNING TYPE is
displayed on the DIC. Pressing the select button will
scroll through the following choices:
ALARM WARNING: BOTH (default):The headlamps
will ¯ash and the horn will chirp when the alarm is
active.
ALARM WARNING: OFF:There will be no alarm
warning on activation.
ALARM WARNING: HORN:The horn will chirp when
the alarm is active.
ALARM WARNING: LAMPS:The headlamps will ¯ash
when the alarm is active.
Choose one of the four options and press the
personalization button while your choice is displayed on
the DIC to select it and move on to the next feature.
For more information on alarm warning type see
Content
Theft-Deterrent on page 2-16.
Automatic Locking
Press the personalization button until AUTOMATIC
LOCKING appears in the display. To select your
personalization for automatic locking, press the select
button while AUTOMATIC LOCKING is displayed on the
DIC. Pressing the select button will scroll through the
following choices:
LOCK DOORS MANUALLY:The doors will not be
locked automatically.
LOCK DOORS WITH SPEED:The doors will lock
when the vehicle speed is above 8 mph (13 km/h) for
three seconds.
LOCK DOORS OUT OF PARK (default):The doors
will lock when the vehicle is shifted out of PARK (P).
Choose one of the three options and press the
personalization button while it is displayed on the DIC to
select it and move on to the next feature. For more
information on automatic door locks see
Programmable
Automatic Door Locks on page 2-10.
3-51
Page 196 of 468
Automatic Unlocking
Press the personalization button until AUTOMATIC
UNLOCKING appears in the display. To select
your personalization for automatic unlocking, press the
select button while AUTOMATIC UNLOCKING is
displayed on the DIC. Pressing the select button will
scroll through the following choices:
UNLOCK ALL IN PARK (default):All of the doors will
unlock when the vehicle is shifted into PARK (P).
UNLOCK ALL AT KEY OUT:All of the doors will
unlock when the key is taken out of the ignition.
UNLOCK DOORS MANUALLY:The doors will not be
unlocked automatically.
UNLOCK DRIVER IN PARK:The driver's door will be
unlocked when the vehicle is shifted into PARK (P).
Choose one of the four options and press the
personalization button while it is displayed on the DIC to
select it and move on to the next feature. For more
information on automatic door locks see
Programmable
Automatic Door Locks on page 2-10.
Delayed Locking
If your DIC does not have this feature, you can still
program the delayed locking feature. SeeDelayed
Locking on page 2-9for more information.
When locking the doors with the power lock switch or
the keyless entry transmitter and a door or the liftgate is
open, the delayed locking feature will delay locking
the doors and tailgate until ®ve seconds after the last
door is closed.
Press the personalization button until DELAYED
LOCKING appears in the display. To select your
personalization for delayed locking, press the select
button while DELAYED LOCKING is displayed on the
DIC. Pressing the select button will scroll through
the following choices:
DELAYED LOCKING ON:The doors will not lock until
®ve seconds after the last door or the liftgate is
closed. You will hear three chimes to signal that the
delayed locking feature is in use. You can temporarily
override delayed locking by pressing the lock button
on the door or keyless entry transmitter a second time.
3-52
Page 197 of 468
DELAYED LOCKING OFF:The doors will lock
immediately when pressing the power lock switch or the
lock button on the keyless entry transmitter.
Choose one of the two options and press the
personalization button while it is displayed on the DIC to
select it and move on to the next feature. For more
information on automatic door locks see
Programmable
Automatic Door Locks on page 2-10.
This feature will not operate if the key is in the ignition.
Seat Position Recall
Press the personalization button until SEAT POSITION
RECALL appears in the display. To select your
personalization for seat position recall, press the select
button while SEAT POSITION RECALL is displayed
on the DIC. Pressing the select button will scroll through
the following choices:
SEAT POSITION RECALL OFF (default):The memory
seat position you saved will only be recalled when the
memory button 1 or 2 is pressed.
SEAT POSITION RECALL AT KEY IN:The memory
seat position you saved will be recalled when you
put the key in the ignition.SEAT POSITION RECALL ON REMOTE:The memory
seat position you saved will be recalled when you
unlock the vehicle with the remote keyless entry
transmitter.
Choose one of the three options and press the
personalization button while it is displayed on the DIC to
select it and move on to the next feature. For more
information on seat position recall see
Memory Seat on
page 2-48.
Perimeter Lighting
Press the personalization button until PERIMETER
LIGHTING appears in the display. To select your
personalization for perimeter lighting, press the select
button while PERIMETER LIGHTING is displayed on the
DIC. Pressing the select button will scroll through the
following choices:
PERIMETER LIGHTING ON (default):The headlamps
and back-up lamps will come on for 40 seconds, if it
is dark enough outside, when you unlock the vehicle
with the remote keyless entry transmitter.
PERIMETER LIGHTING OFF:The perimeter lights will
not come on when you unlock the vehicle with the
remote keyless entry transmitter.
Choose one of the two options and press the
personalization button while it is displayed on the DIC to
select it and move on to the next feature.
3-53
Page 204 of 468
OIL PRESSURE LOW
If low oil pressure levels occur, this message will be
displayed on the DIC and a chime will sound. Stop the
vehicle as soon as safely possible and do not operate
it until the cause of the low oil pressure has been
corrected. Check your oil as soon as possible and have
your vehicle serviced.
PASSENGER DOOR AJAR
If the passenger's door is not fully closed and the
vehicle is in a drive gear, this message will appear on
the display and you will hear a chime. Stop and turn off
the vehicle, check the door for obstacles, and close
the door again. Check to see if the message still
appears on the DIC. Pressing the select button will
acknowledge this message and clear it from the DIC
display.
RIGHT REAR DOOR AJAR
If the passenger's side rear door is not fully closed and
the vehicle is in a drive gear, this message will
appear on the display and you will hear a chime. Stop
and turn off the vehicle, check the door for obstacles,
and close the door again. Check to see if the message
still appears on the DIC. Pressing the select button
will acknowledge this message and clear it from the DIC
display.
REAR ACCESS OPEN
If the liftgate is open while the ignition is in RUN, this
message will appear on the DIC and you will hear
a chime. Turn off the vehicle and check the liftgate.
Restart the vehicle and check for the message on the
DIC display. Pressing the select button will acknowledge
this message and clear it from the DIC display.
REDUCED ENGINE POWER
This message is displayed and you will hear a chime
when the cooling system temperature gets too hot and
the engine further enters the engine coolant
protection mode.
See
Engine Overheating on page 5-25for further
information.
REPLACE LIFTGATE FUSE
This message will be displayed if the liftgate lock
malfunctions and/or the liftgate fuse blows. For more
information on fuses, see
Fuses and Circuit Breakers on
page 5-103
If the message returns after replacing the fuse, see you
dealer for service.
3-60
Page 384 of 468
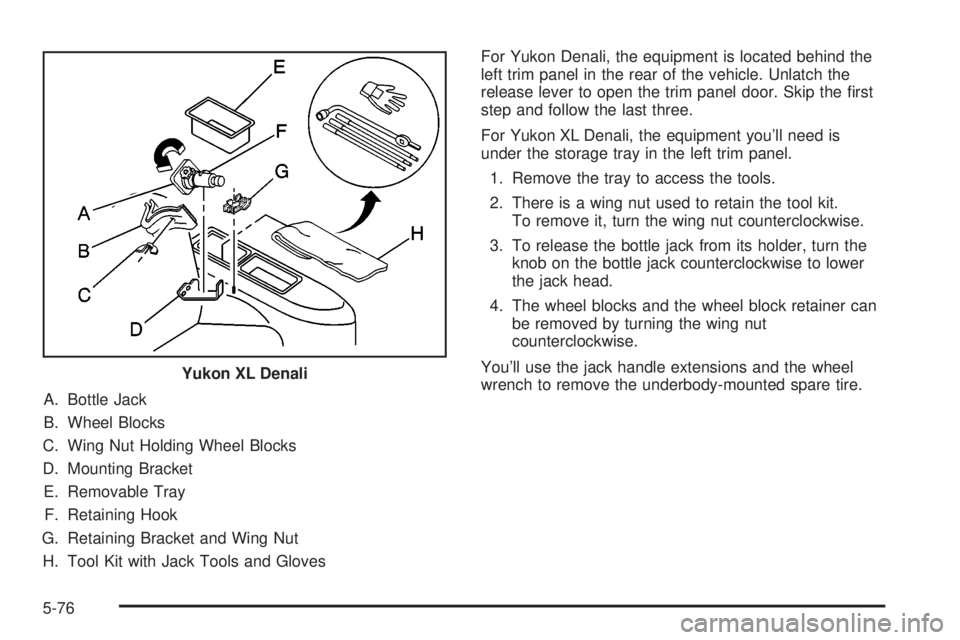
A. Bottle Jack
B. Wheel Blocks
C. Wing Nut Holding Wheel Blocks
D. Mounting Bracket
E. Removable Tray
F. Retaining Hook
G. Retaining Bracket and Wing Nut
H. Tool Kit with Jack Tools and GlovesFor Yukon Denali, the equipment is located behind the
left trim panel in the rear of the vehicle. Unlatch the
release lever to open the trim panel door. Skip the ®rst
step and follow the last three.
For Yukon XL Denali, the equipment you'll need is
under the storage tray in the left trim panel.
1. Remove the tray to access the tools.
2. There is a wing nut used to retain the tool kit.
To remove it, turn the wing nut counterclockwise.
3. To release the bottle jack from its holder, turn the
knob on the bottle jack counterclockwise to lower
the jack head.
4. The wheel blocks and the wheel block retainer can
be removed by turning the wing nut
counterclockwise.
You'll use the jack handle extensions and the wheel
wrench to remove the underbody-mounted spare tire. Yukon XL Denali
5-76