heater HONDA ACCORD 2002 CL7 / 7.G Owners Manual
[x] Cancel search | Manufacturer: HONDA, Model Year: 2002, Model line: ACCORD, Model: HONDA ACCORD 2002 CL7 / 7.GPages: 223, PDF Size: 3.8 MB
Page 35 of 223

This section gives inf ormation about
the controls and displays that
contribute to the daily operation of
your Honda. All the essential
controls are within easy reach............................
Control Locations . 54
...............................
Indicator Lights . 55
.............................................
Gauges . 60
...............................
Speedometer . 60
.................................
Tachometer . 60
.....................................
Odometer . 60
...................................
Trip Meter . 61
...................
Temperature Gauge . 61
..................................
Fuel Gauge . 61
Maintenance Required
...................................
Indicator . 62
Controls Near the Steering .......................................
Wheel . 63
...................................
Headlights . 64 Automatic Lighting Off
.....................................
Feature . 65
............
Daytime Running Lights . 65
....
Instrument Panel Brightness . 65
................................
Turn Signals . 66
.....................
Windshield Wipers . 66
..................
Windshield Washers . 68
..........................
Hazard Warning . 68
.............
Rear Window Def ogger . 68
......
Steering Wheel Adjustment . 69
...............................
Keys and Locks . 70
..............................................
Keys . 70
....................
Immobilizer System . 71
............................
Ignition Switch . 72
..................................
Door Locks . 73
......................
Power Door Locks . 74
...................
Remote Transmitter . 75
..............
Childproof Door Locks . 79
...........................................
Trunk . 79
........
Emergency Trunk Opener . 80
....................................
Glove Box . 81
............................
Seat Adjustments . 82
.............
Front Seat Adjustments . 82
Driver’s Seat Manual Height
..............................
Adjustment . 83 Driver’s Seat Power Height
..............................
Adjustment . 83
Driver’s Seat Full Power ............................
Adjustments . 84
...........
Driver’s Lumbar Support . 85
Front Passenger’s Seat
............................
Adjustments . 86
..........................
Head Restraints . 86
.......................
Folding Rear Seat . 87
......................
Rear Seat Armrest . 88
....................................
Seat Heaters . 90
..............................
Power Windows . 91
.........................................
Moonroof . 92
.............................................
Mirrors . 93
....
Adjusting the Power Mirrors . 94
.................................
Parking Brake . 95
....................................
Digital Clock . 96
...................
Console Compartment . 97
..........................................
Coin Box . 97
.............................
Beverage Holder . 98
..........................................
Sun Visor . 99
..................................
Vanity Mirror . 99
........................
Sunglasses Holder . 100
.............
Accessory Power Socket . 100
...............................
Interior Lights . 101
Instruments and Controls
Inst rument s and Cont rols53
Page 63 of 223
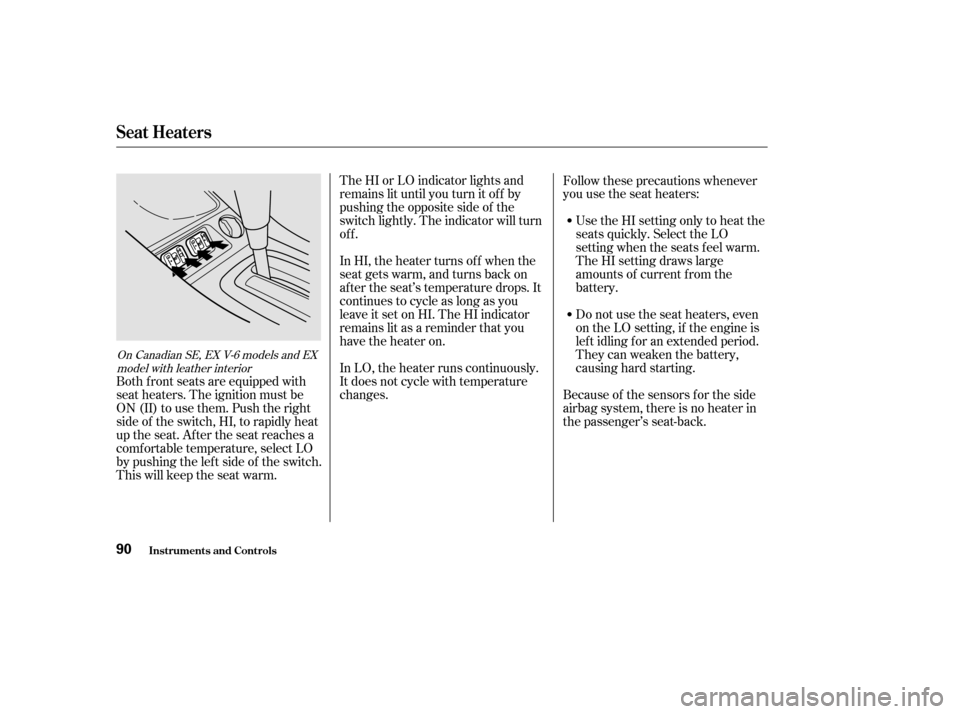
Both f ront seats are equipped with
seat heaters. The ignition must be
ON (II) to use them. Push the right
side of the switch, HI, to rapidly heat
up the seat. After the seat reaches a
comf ortable temperature, select LO
by pushing the lef t side of the switch.
This will keep the seat warm.The HI or LO indicator lights and
remains lit until you turn it of f by
pushing the opposite side of the
switch lightly. The indicator will turn
off.
In HI, the heater turns of f when the
seat gets warm, and turns back on
after the seat’s temperature drops. It
continues to cycle as long as you
leave it set on HI. The HI indicator
remains lit as a reminder that you
have the heater on.
In LO, the heater runs continuously.
It does not cycle with temperature
changes.
Do not use the seat heaters, even
on the LO setting, if the engine is
lef t idling f or an extended period.
They can weaken the battery,
causing hard starting.
Use the HI setting only to heat the
seats quickly. Select the LO
setting when the seats f eel warm.
The HI setting draws large
amounts of current f rom the
battery.
Follow these precautions whenever
you use the seat heaters:
Because of the sensors f or the side
airbag system, there is no heater in
the passenger’s seat-back.
On Canadian SE, EX V-6 models and EX
model with leather interior
Seat Heaters
Inst rument s and Cont rols90
Page 68 of 223
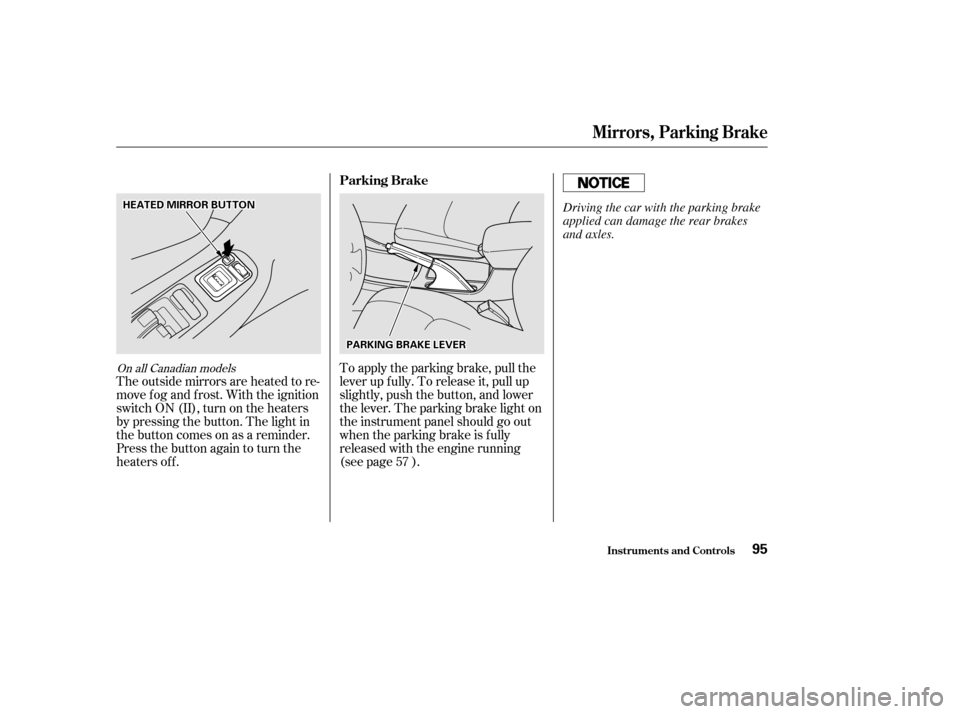
To apply the parking brake, pull the
lever up f ully. To release it, pull up
slightly, push the button, and lower
the lever. The parking brake light on
the instrument panel should go out
when the parking brake is f ully
released with the engine running
(see page ).
The outside mirrors are heated to re-
move fog and frost. With the ignition
switchON(II),turnontheheaters
by pressing the button. The light in
the button comes on as a reminder.
Press the button again to turn the
heaters of f .
57On all Canadian models
Inst rument s and Cont rols
Mirrors, Parking Brake
Parking Brake
95
PPAARRKKIINNGGBBRRAAKKEELLEEVVEERR
HHEEAATTEEDDMMIIRRRROORRBBUUTTTTOONNDriving the car with the parking brake
applied can damage the rear brakes
and axles.
Page 77 of 223
CONT INUED
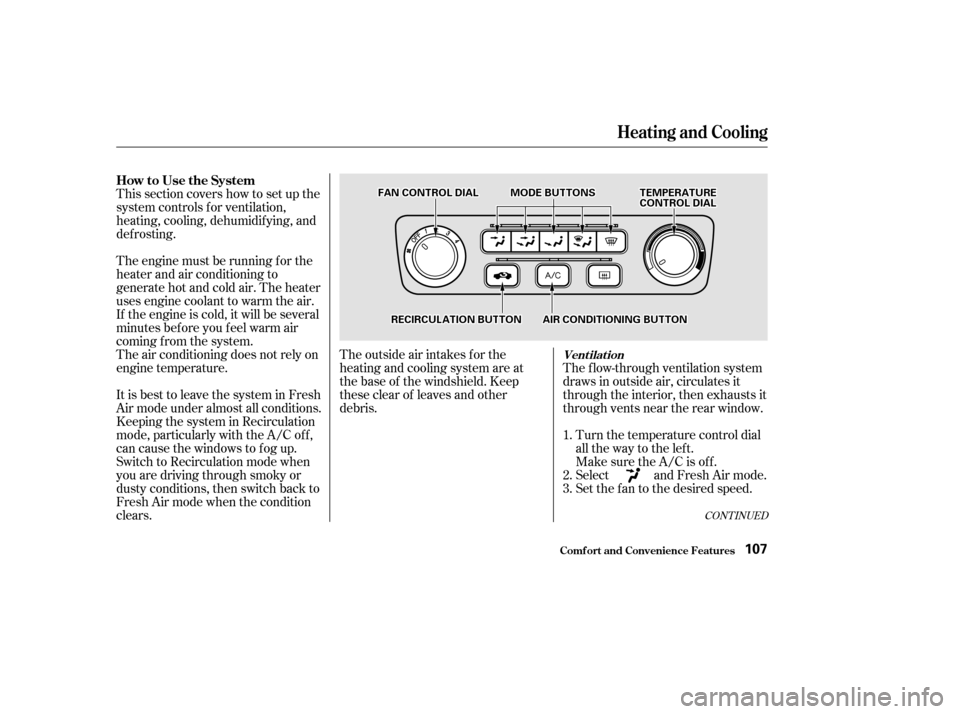
The f low-through ventilation system
draws in outside air, circulates it
through the interior, then exhausts it
through vents near the rear window.Turn the temperature control dial
all the way to the lef t.
Make sure the A/C is of f .
Select and Fresh Air mode.
Set the f an to the desired speed.
The outside air intakes f or the
heating and cooling system are at
the base of the windshield. Keep
these clear of leaves and other
debris.
This section covers how to set up the
system controls f or ventilation,
heating, cooling, dehumidif ying, and
def rosting.
The engine must be running f or the
heater and air conditioning to
generate hot and cold air. The heater
uses engine coolant to warm the air.
If the engine is cold, it will be several
minutes bef ore you f eel warm air
coming from the system.
It is best to leave the system in Fresh
Air mode under almost all conditions.
Keeping the system in Recirculation
mode, particularly with the A/C of f ,
can cause the windows to fog up.
Switch to Recirculation mode when
you are driving through smoky or
dusty conditions, then switch back to
Fresh Air mode when the condition
clears.
The air conditioning does not rely on
engine temperature.
1. 2. 3.
Heating and Cooling
Comf ort and Convenience Feat ures
Vent ilat ion
How to Use the System
107
TTEEMMPPEERRAATTUURREECCOONNTTRROOLLDDIIAALLFFAANNCCOONNTTRROOLLDDIIAALL
AAIIRRCCOONNDDIITTIIOONNIINNGGBBUUTTTTOONN
MMOODDEEBBUUTTTTOONNSS
RREECCIIRRCCUULLAATTIIOONNBBUUTTTTOONN
Page 78 of 223

For saf ety, make sure you have a
clear view through all the windows
bef ore driving away.To shut of f the system temporarily,
turn the fan speed and temperature
control dials all the way to the lef t.
You should shut the system
completely of f only f or the f irst f ew
minutes of driving in cold weather,
until the engine coolant warms up
enough to operate the heater. Keep
the fan on at all other times so stale
air does not build up in the interior.
Start the engine.
Select .
When you select , the
system automatically switches to
Fresh Air mode and turns on the
A/C.
Switch the fan and temperature
controls to maximum.
To rapidly remove exterior f rost or
ice f rom the windshield (on very cold
days), f irst select the Recirculation
mode. Once the windshield is clear,
select the Fresh Air mode to avoid
f ogging the windows. These settings direct all the air f low
to the defroster vents at the base of
the windshield and the side window
def roster vents. The air f low will get
warmer and clear the windows faster
as the engine warms up. You can
close the side vents with the dial
underneath each vent. This will send
more warm air to the windshield
defroster vents.
To remove exterior f rost or ice f rom
the windshield and side windows
after the car has been sitting out in
cold weather: 1. 2. 3.
Heating and Cooling
Comf ort and Convenience Feat ures
To Turn Everything Of f
110
Page 80 of 223
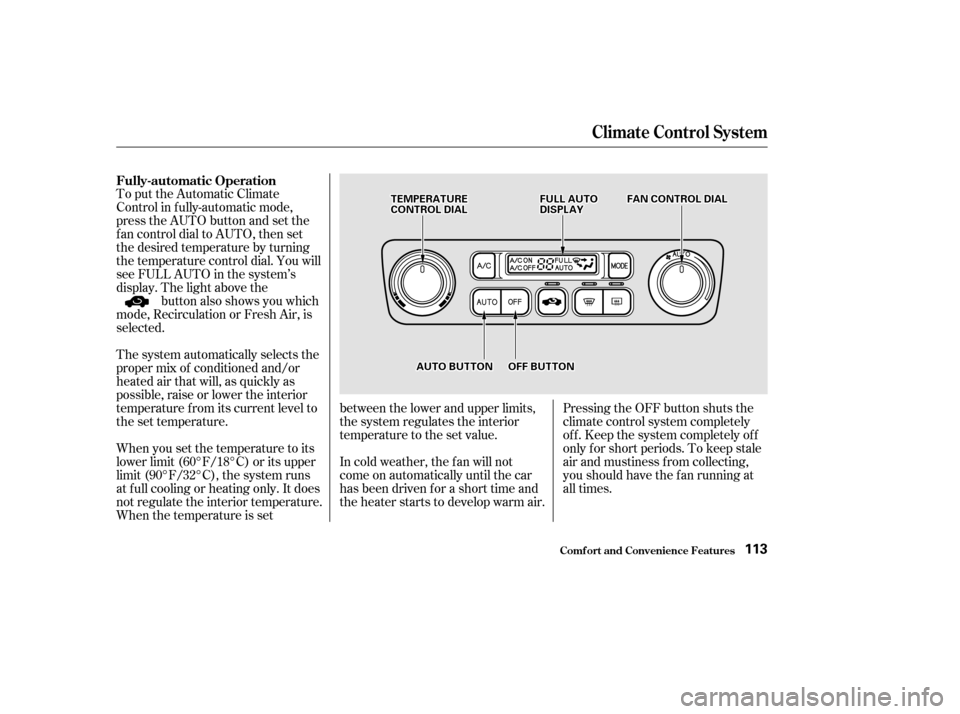
Pressing the OFF button shuts the
climate control system completely
of f . Keep the system completely of f
only f or short periods. To keep stale
air and mustiness f rom collecting,
you should have the f an running at
all times.
When you set the temperature to its
lower limit (60°F/18°C) or its upper
limit (90°F/32°C), the system runs
at f ull cooling or heating only. It does
not regulate the interior temperature.
When the temperature is set between the lower and upper limits,
the system regulates the interior
temperature to the set value.
The system automatically selects the
proper mix of conditioned and/or
heated air that will, as quickly as
possible, raise or lower the interior
temperature f rom its current level to
the set temperature.
In cold weather, the f an will not
come on automatically until the car
has been driven f or a short time and
the heater starts to develop warm air.
To put the Automatic Climate
Control in f ully-automatic mode,
press the AUTO button and set the
f an control dial to AUTO, then set
the desired temperature by turning
the temperature control dial. You will
see FULL AUTO in the system’s
display. The light above the
buttonalsoshowsyouwhich
mode, Recirculation or Fresh Air, is
selected.
Fully-automatic Operation
Climat e Cont rol Syst em
Comf ort and Convenience Feat ures113
TTEEMMPPEERRAATTUURREECCOONNTTRROOLLDDIIAALL
AAUUTTOOBBUUTTTTOONN
FFUULLLLAAUUTTOODDIISSPPLLAAYYFFAANNCCOONNTTRROOLLDDIIAALL
OOFFFFBBUUTTTTOONN
Page 198 of 223
By eliminating as much of the
electrical load as possible, you can
drive several miles (kilometers)
before the battery is too discharged
to keep the engine running. Drive to
a service station or garage where
you can get technical assistance.
Immediately turn of f all electrical
accessories: radio, heater, A/C, rear
def ogger, cruise control, etc. Try not
to use other electrically-operated
controls such as the power windows.
Keep the engine running and take
extra care not to stall it. Starting the
engine will discharge the battery
rapidly.
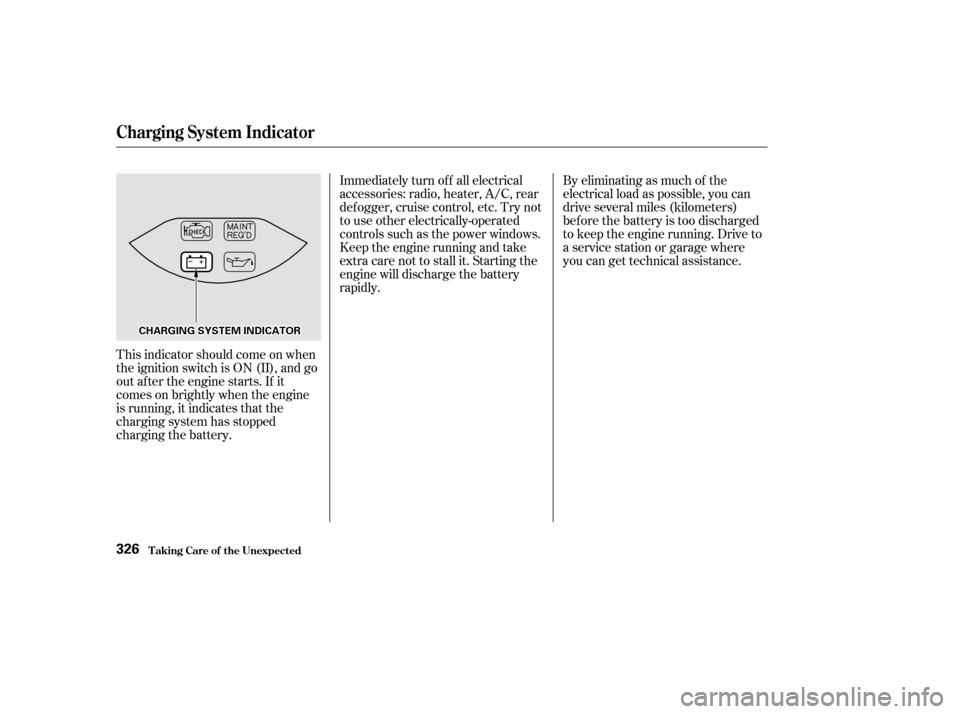
This indicator should come on when
the ignition switch is ON (II), and go
out af ter the engine starts. If it
comes on brightly when the engine
is running, it indicates that the
charging system has stopped
charging the battery.
T aking Care of t he Unexpect ed
Charging System Indicator
326
CCHHAARRGGIINNGGSSYYSSTTEEMMIINNDDIICCAATTOORR