manual transmission HONDA ACCORD 2015 9.G User Guide
[x] Cancel search | Manufacturer: HONDA, Model Year: 2015, Model line: ACCORD, Model: HONDA ACCORD 2015 9.GPages: 593
Page 430 of 593
429
uuWhen Driving uStarting the Engine
Continued
Driving
You can turn the engine off when the vehicle is completely stopped.
1. Shift to
(P
.
2. Press the ENGINE START/STOP button.
• If the shift lever is in
(N
, press the ENGINE START/STOP button.
• If the shift lever is in any gear other than
(N
, depress the clutch pedal, then press
the ENGINE START/STOP button.
1. Keeping your right foot on the brake pedal, release the parking brake. Check that
the parking brake indicator has gone off.
2 Parking Brake P. 472
2.Put the shift lever in
(D
. Select
(R
when reversing.
3. Gradually release the brake pedal and gently depress the accelerator pedal to pull
away.
■
Stopping the Engine
■
Starting to DriveAutomatic transmission/CVT modelsManual transmission modelsAutomatic transmission/CVT models
Page 431 of 593
uuWhen Driving uStarting the Engine
430Driving
■Hill start assist system
Hill start assist keeps the brake engaged briefly to help prevent the vehicle from
rolling on inclines as you move your foot from the brake pedal to the accelerator.
Depress the clutch pedal, and shift to one of the forward gears when facing uphill,
or (R
when facing downhill, then release the brake pedal.
Move the shift lever to
(D
, (S
, or
(L
when facing uphill, or
(R
when facing
downhill, then release the brake pedal.
Move the shift lever to
(D
or
(S
when facing uphill, or
(R
when facing downhill,
then release the brake pedal.
Manual transmission modelsContinuously variable transmission (CVT) modelsAutomatic transmission models
1 Hill start assist system
Hill start assist may not prevent the vehicle from
rolling downhill on a very steep or slippery slope, and
does not operate on small inclines.
Hill start assist is not a replacement for the parking
brake.
Page 436 of 593
435
uuWhen Driving uShifting
Continued
Driving
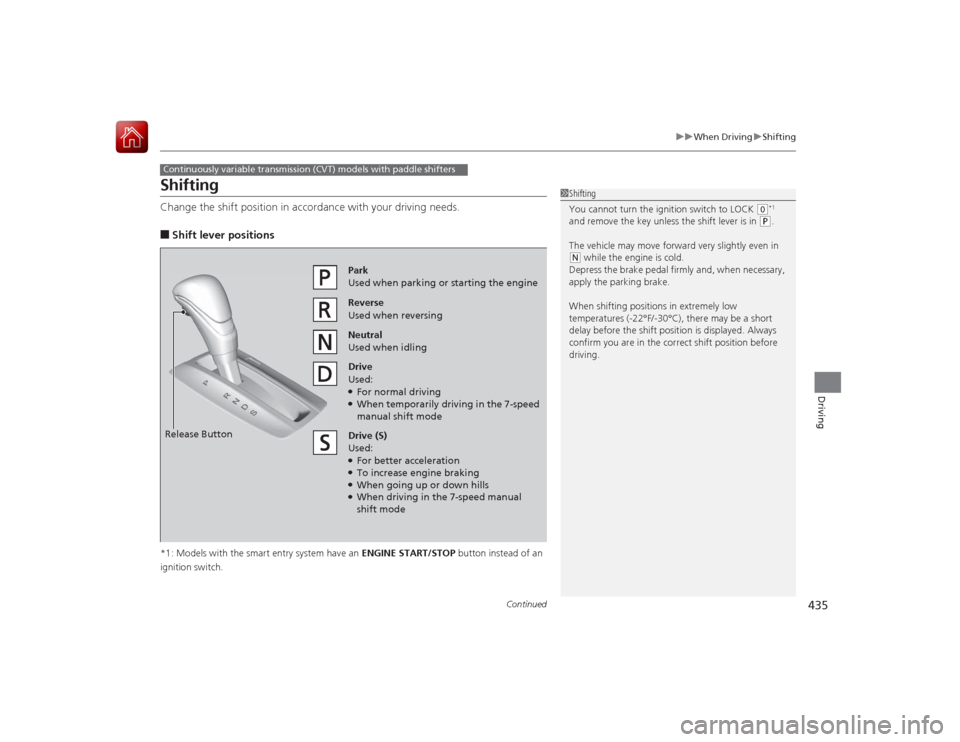
ShiftingChange the shift position in acco rdance with your driving needs.■Shift lever positions*1: Models with the smart entry system have an ENGINE START/STOP button instead of an
ignition switch.Continuously variable transmission (CVT) models with paddle shifters
1 Shifting
You cannot turn the ignition switch to LOCK
(0*1
and remove the key unless the shift lever is in
( P.
The vehicle may move forward very slightly even in
( N while the engine is cold.
Depress the brake pedal firmly and, when necessary,
apply the parking brake.
When shifting positions in extremely low
temperatures (-22°F/-30°C), there may be a short
delay before the shift position is displayed. Always
confirm you are in the correct shift position before
driving.
Reverse
Used when reversingDrive
Used:●For normal driving●When temporarily driving in the 7-speed
manual shift modePark
Used when parking or starting the engine
Neutral
Used when idling
Release ButtonDrive (S)
Used:●For better acceleration●To increase engine braking●When going up or down hills●When driving in the 7-speed manual
shift mode
Page 437 of 593
uuWhen Driving uShifting
436Driving
■
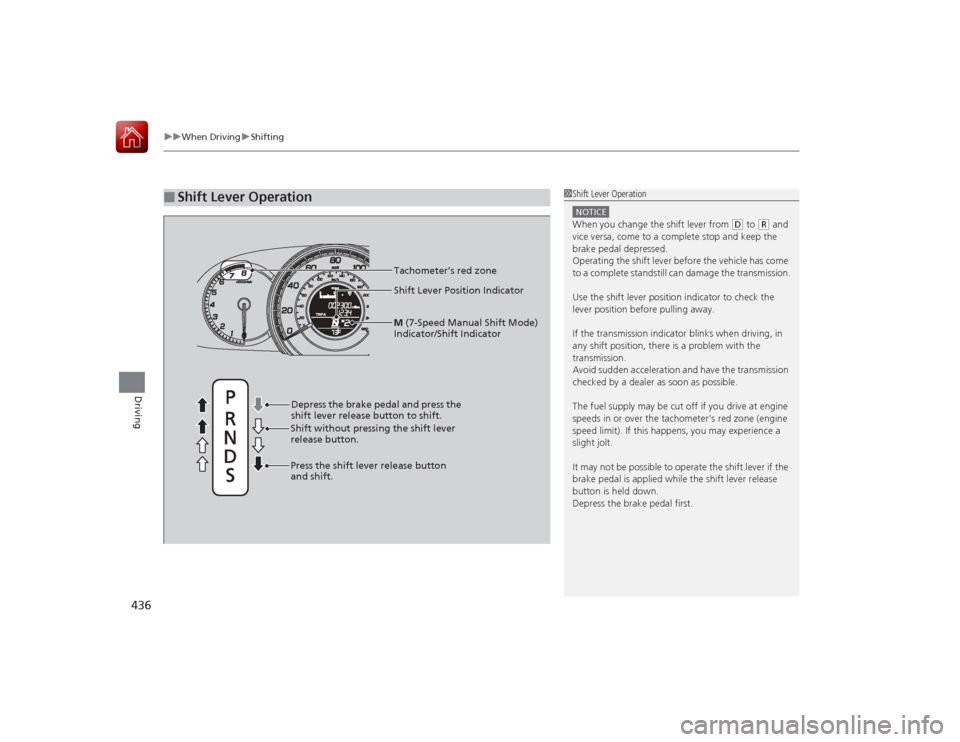
Shift Lever Operation
1Shift Lever OperationNOTICEWhen you change the shift lever from
(D to
(R and
vice versa, come to a complete stop and keep the
brake pedal depressed.
Operating the shift lever before the vehicle has come
to a complete standstill can damage the transmission.
Use the shift lever position indicator to check the
lever position before pulling away.
If the transmission i ndicator blinks when driving, in
any shift position, there is a problem with the
transmission.
Avoid sudden acceleration and have the transmission
checked by a dealer as soon as possible.
The fuel supply may be cut off if you drive at engine
speeds in or over the tachometer's red zone (engine
speed limit). If this happens, you may experience a
slight jolt.
It may not be possible to operate the shift lever if the
brake pedal is applied while the shift lever release
button is held down.
Depress the brake pedal first.
Shift Lever Position Indicator
Depress the brake pedal and press the
shift lever release button to shift.
Shift without pressing the shift lever
release button.
Press the shift lever release button
and shift. Tachometer’s red zoneM
(7-Speed Manual Shift Mode)
Indicator/Shift Indicator
Page 438 of 593
Continued
437
uuWhen Driving uShifting
Driving
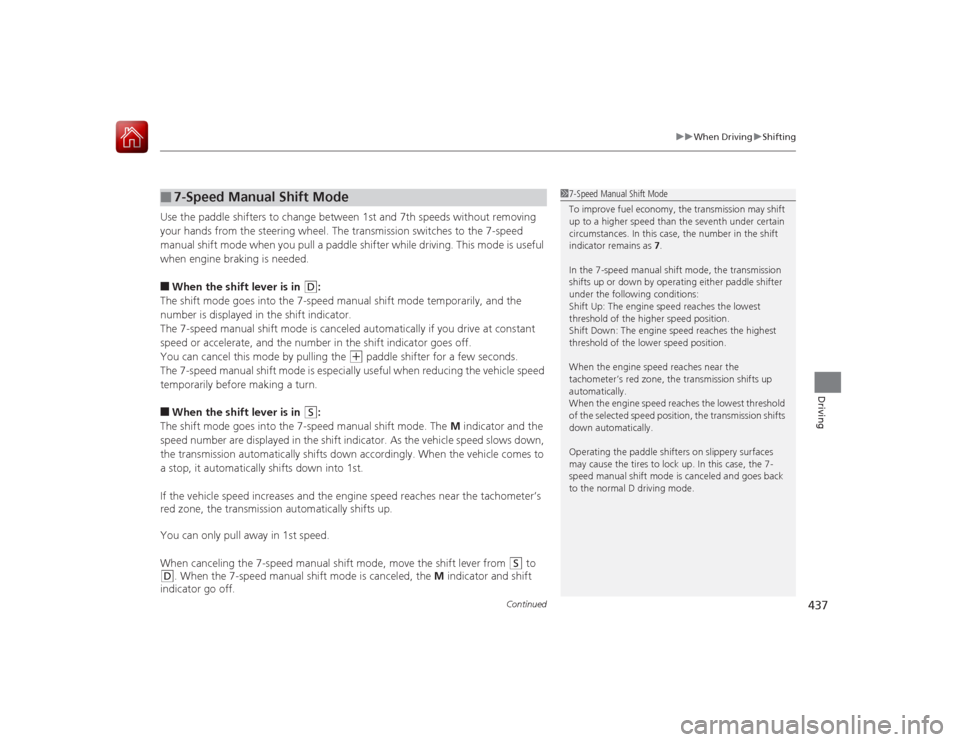
Use the paddle shifters to change between 1st and 7th speeds without removing
your hands from the steering wheel. The transmission switches to the 7-speed
manual shift mode when you pull a paddle shifter while driving. This mode is useful
when engine braking is needed.■When the shift lever is in
(D
:
The shift mode goes into the 7-speed manual shift mode temporarily, and the
number is displayed in the shift indicator.
The 7-speed manual shift mode is canceled automatically if you drive at constant
speed or accelerate, and the number in the shift indicator goes off.
You can cancel this mode by pulling the
(+
paddle shifter for a few seconds.
The 7-speed manual shift mode is especially useful when reducing the vehicle speed
temporarily before making a turn.
■When the shift lever is in
(S
:
The shift mode goes into the 7-speed manual shift mode. The M indicator and the
speed number are displayed in the shift indicat or. As the vehicle speed slows down,
the transmission automatically shifts down accordingly. When the vehicle comes to
a stop, it automatically shifts down into 1st.
If the vehicle speed increases and the engine speed reaches near the tachometer’s
red zone, the transmission automatically shifts up.
You can only pull away in 1st speed.
When canceling the 7-speed manual shift mode, move the shift lever from
(S
to
(D
. When the 7-speed manual shift mode is canceled, the M indicator and shift
indicator go off.
■
7-Speed Manual Shift Mode
1 7-Speed Manual Shift Mode
To improve fuel economy, the transmission may shift
up to a higher speed than the seventh under certain
circumstances. In this case, the number in the shift
indicator remains as 7.
In the 7-speed manual shift mode, the transmission
shifts up or down by operating either paddle shifter
under the following conditions:
Shift Up: The engine speed reaches the lowest
threshold of the higher speed position.
Shift Down: The engine speed reaches the highest
threshold of the lower speed position.
When the engine speed reaches near the
tachometer’s red zone, the transmission shifts up
automatically.
When the engine speed reaches the lowest threshold
of the selected speed position, the transmission shifts
down automatically.
Operating the paddle shifters on slippery surfaces
may cause the tires to lock up. In this case, the 7-
speed manual shift mode is canceled and goes back
to the normal D driving mode.
Page 442 of 593
441
uuWhen Driving uShifting
Continued
Driving
ShiftingFully depress the clutch pedal to operate the shift lever and change gears, then
slowly release the pedal.
Depress the clutch pedal, and pause for a few seconds before shifting into
(R
, or
shift into one of the forward gears for a moment. This stops the gears so they do not
“grind.”
■
Shift Lever OperationManual transmission models
1 ShiftingNOTICEDo not shift to
(R before the vehicle comes to a
complete stop.
Shifting to
( R before stopping can damage the
transmission.
NOTICEBefore downshifting, make sure the engine will not
go into the tachometer's red zone. Should this occur,
it can severely damage your engine.
There is a metallic part on the shift lever. If you leave
the vehicle park ed outside for a long time on a hot
day, be careful before moving the shift lever. Because
of heat, the shift lever may be extremely hot. If the
outside temperature is low, the shift lever may feel
cold.
Page 444 of 593
443
uuWhen Driving uShifting
Driving
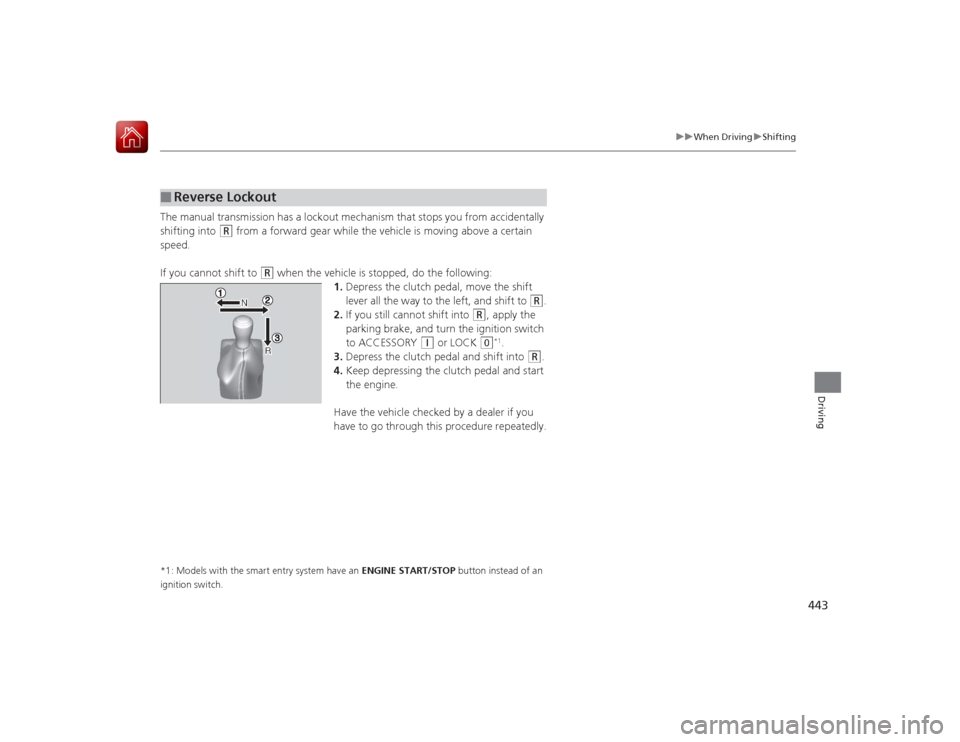
The manual transmission has a lockout mechanism that stops you from accidentally
shifting into
(R
from a forward gear while the vehicle is moving above a certain
speed.
If you cannot shift to
(R
when the vehicle is stopped, do the following: 1.Depress the clutch pedal, move the shift
lever all the way to the left, and shift to
(R
.
2. If you still cannot shift into
(R
, apply the
parking brake, and turn the ignition switch
to ACCESSORY
(q
or LOCK
(0
*1.
3. Depress the clutch pedal and shift into
(R
.
4. Keep depressing the clutch pedal and start
the engine.
Have the vehicle checked by a dealer if you
have to go through this procedure repeatedly.
*1: Models with the smart entry system have an ENGINE START/STOP button instead of an
ignition switch.■
Reverse Lockout
Page 446 of 593
445
uuWhen Driving uCruise Control
*
Continued
Driving
Cruise Control
*
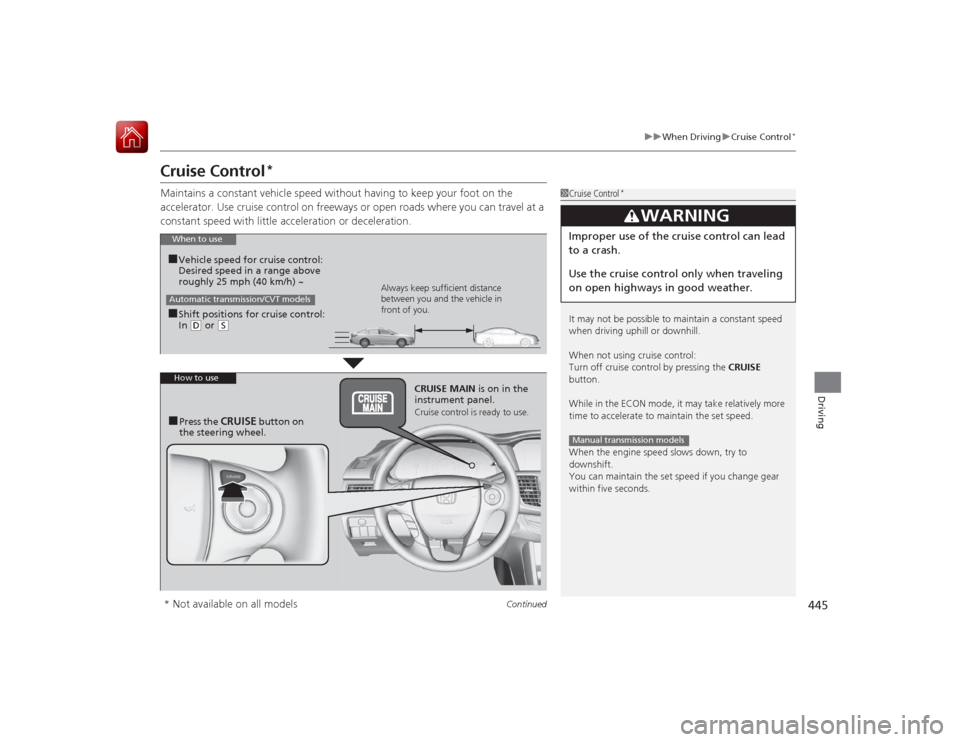
Maintains a constant vehicle speed without having to keep your foot on the
accelerator. Use cruise control on freeways or open roads where you can travel at a
constant speed with little acceleration or deceleration.
1 Cruise Control
*
It may not be possible to maintain a constant speed
when driving uphill or downhill.
When not using cruise control:
Turn off cruise control by pressing the CRUISE
button.
While in the ECON mode, it may take relatively more
time to accelera te to maintain the set speed.
When the engine speed slows down, try to
downshift.
You can maintain the set speed if you change gear
within five seconds.
3
WARNING
Improper use of the cruise control can lead
to a crash.
Use the cruise control only when traveling
on open highways in good weather.Manual transmission models
When to use■Shift positions for cruise control:
In ( D or
(S Always keep sufficient distance
between you and the vehicle in
front of you.
Automatic transmission/CVT models■Vehicle speed for cruise control:
Desired speed in a range above
roughly 25 mph (40 km/h) ~How to use
CRUISE MAIN is on in the
instrument panel.Cruise control is ready to use.
■Press the
CRUISE
button on
the steering wheel.
* Not available on all models
Page 469 of 593
468
uuWhen Driving uTire Pressure Monitoring System (TPMS)
Driving
Tire Pressure Monitoring System (TPMS)Instead of directly measuring the pressure in each tire, the TPMS on this vehicle
monitors and compares the rolling radius and rotational characteristics of each
wheel and tire while you are driving to determine if one or more tires are
significantly under-inflated. This will cause the low tire pressure/TPMS indicator to
come on and a message to appear on the multi-information display
*.
You must start TPMS calibration every time you:
• Adjust the pressure in one or more tires.
• Rotate the tires.
• Replace one or more tires.
Before calibrating the TPMS:
• Set the cold tire pressure in all four tires.
2 Checking Tires P. 523
Make sure:
•The vehicle is at a complete stop.
• The shift lever is in
(N
.
• The shift lever is in
(P
.
• The ignition switch is in ON
(w
*1.
*1: Models with the smart entry system have an ENGINE START/STOP button instead of an
ignition switch.■
TPMS Calibration
1 Tire Pressure Monitoring System (TPMS)
The system does not monitor the tires when driving
at low speed.
Conditions such as low ambient temperature and
altitude change directly affect tire pressure and can
trigger the low tire pressure/TPMS indicator to come on.
Tire pressure checked and inflated in:•Warm weather can become under-inflated in
colder weather.•Cold weather can become over-inflated in warmer
weather.
The low tire pressure i ndicator will not come on as a
result of over inflation.
The TPMS may not function properly if tire type and
size are mixed. Make sure to use the same size and
type of tire. 2 Checking and Maintaining Tires P. 523
The low tire pressure/TP MS indicator may come on
with a delay or may not come on at all when:•You rapidly accele rate, decelerate, or turn the
steering wheel.•You drive on snowy or slippery roads.•Snow chains are used.
The low tire pressure/TP MS indicator may come on
under the following conditions:•A compact spare tire is used.•There is a heavier and uneven load on the tires,
such as when towing a trailer, than the condition at
calibration.•Snow chains are used.
Manual transmission modelsAutomatic transmission/CVT modelsAll models* Not available on all models
Page 474 of 593
473
uuBraking uBrake System
Driving
Your vehicle is equipped with disc brakes at all four wheels. A vacuum power assist
helps reduce the effort needed on the brake pedal. The brake assist system increases
the stopping force when you depress the brake pedal hard in an emergency
situation. The anti-lock brake system (ABS) helps you retain steering control when
braking very hard.2 Brake Assist System P. 475
2 Anti-lock Brake System (ABS) P. 474■
Foot Brake
1Foot Brake
Check the brakes after driving through deep water,
or if there is a buildup of road surface water. If
necessary, dry the brakes by lightly depressing the
pedal several times.
If you hear a continuous metallic friction sound when
applying the brakes, the brake pads need to be
replaced. Have your vehicle checked by a dealer.
Constantly using the brake pedal while going down a
long hill builds up heat, which reduces the brake
effectiveness. Apply engine braking by taking your
foot off the accelerator pedal and downshifting to a
lower gear. With manual transmission use a lower
gear for greater engine braking.
Do not rest your foot on the brake pedal while
driving, as it will lightly apply the brakes and cause
them to lose effectiveness over time and reduce pad
life. It will also confuse drivers behind you.