CAN ID HONDA ACCORD 2022 Owners Manual
[x] Cancel search | Manufacturer: HONDA, Model Year: 2022, Model line: ACCORD, Model: HONDA ACCORD 2022Pages: 657, PDF Size: 11.42 MB
Page 235 of 657
Continued233
uuInterior Convenience Items uOther Interior Convenience Items
Controls
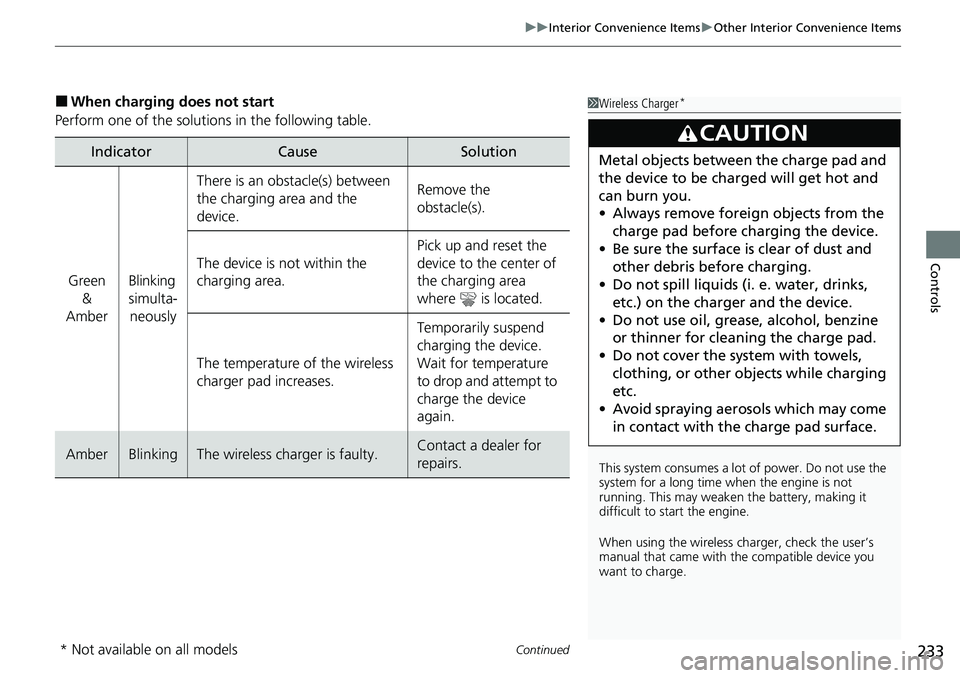
■When charging does not start
Perform one of the solutions in the following table.
IndicatorCauseSolution
Green &
AmberBlinking
simulta- neously
There is an obstacle(s) between
the charging area and the
device.Remove the
obstacle(s).
The device is not within the
charging area. Pick up and reset the
device to the center of
the charging area
where is located.
The temperature of the wireless
charger pad increases. Temporarily suspend
charging the device.
Wait for temperature
to drop and attempt to
charge the device
again.
AmberBlinkingThe wireless charger is faulty.Contact a dealer for
repairs.
1
Wireless Charger*
This system consumes a lot of power. Do not use the
system for a long time when the engine is not
running. This may weaken the battery, making it
difficult to start the engine.
When using the wireless charger, check the user’s
manual that came with th e compatible device you
want to charge.
3CAUTION
Metal objects between the charge pad and
the device to be charged will get hot and
can burn you.
• Always remove foreign objects from the
charge pad before charging the device.
• Be sure the surface is clear of dust and
other debris before charging.
• Do not spill liquids (i. e. water, drinks,
etc.) on the charge r and the device.
• Do not use oil, grease, alcohol, benzine
or thinner for cleaning the charge pad.
• Do not cover the system with towels,
clothing, or other objects while charging
etc.
• Avoid spraying aerosols which may come
in contact with the charge pad surface.
* Not available on all models
Page 236 of 657
uuInterior Convenience Items uOther Interior Convenience Items
234
Controls
1Wireless Charger*
The wireless charger can su pport up to 15 W, but the
charging rate varies base d on the device and other
conditions.
NOTICE
Do not place any magnetic re cording media or precision
machines within the charging area while charging.
The data on your cards such as credit cards can be
lost because of the magneti c effect. Also precision
machines such as watches can go wrong.
“Qi” and marks are the registered trademarks
owned by Wire less Power Consortium (WPC).
In the following cases, ch arging may stop or not start:
•The device is already fully charged.•The temperature of the device is extremely high
while charging.
•You are at a place that emits strong
electromagnetic waves or noises, such as a TV
station, electric power plant, or gas station.
•The device has a cover, case or accessories which
are not compatible wi th wireless charging.
A device may not charge if the size or shape of its
chargeable side is not a ppropriate for use with the
charging area.
Not all devices are compatible with the system.
During the charging phase, it is normal for the
charging area and de vice to heat up.
* Not available on all models
Page 238 of 657
uuInterior Convenience Items uOther Interior Convenience Items
236
Controls
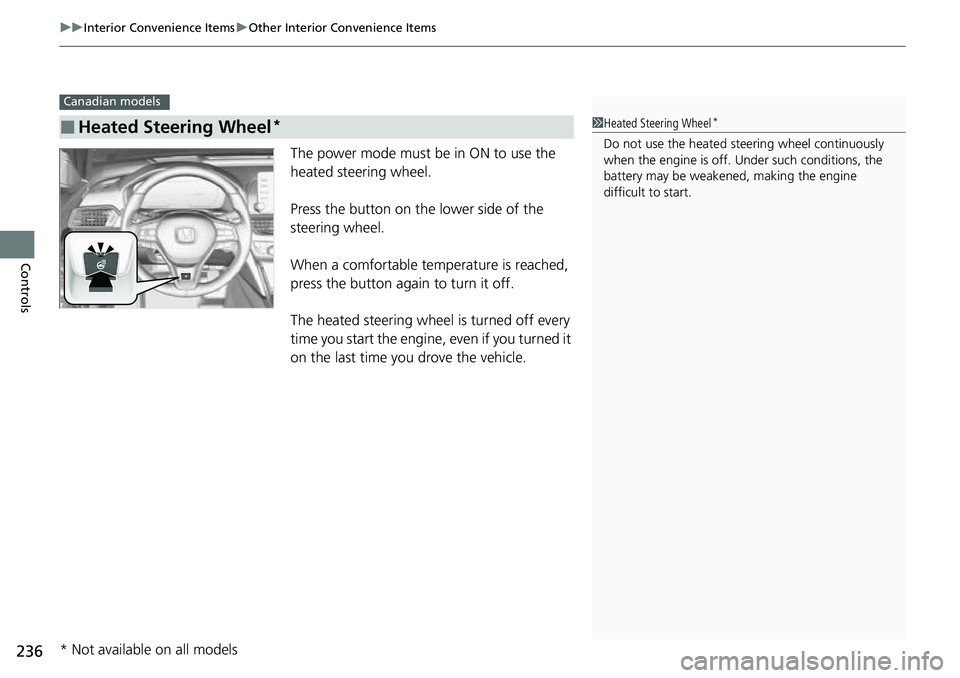
The power mode must be in ON to use the
heated steering wheel.
Press the button on the lower side of the
steering wheel.
When a comfortable temperature is reached,
press the button again to turn it off.
The heated steering wheel is turned off every
time you start the engine, even if you turned it
on the last time you drove the vehicle.
■Heated Steering Wheel*
Canadian models
1Heated Steering Wheel*
Do not use the heated st eering wheel continuously
when the engine is off. Under such conditions, the
battery may be weaken ed, making the engine
difficult to start.
* Not available on all models
Page 240 of 657
uuInterior Convenience Items uOther Interior Convenience Items
238
Controls
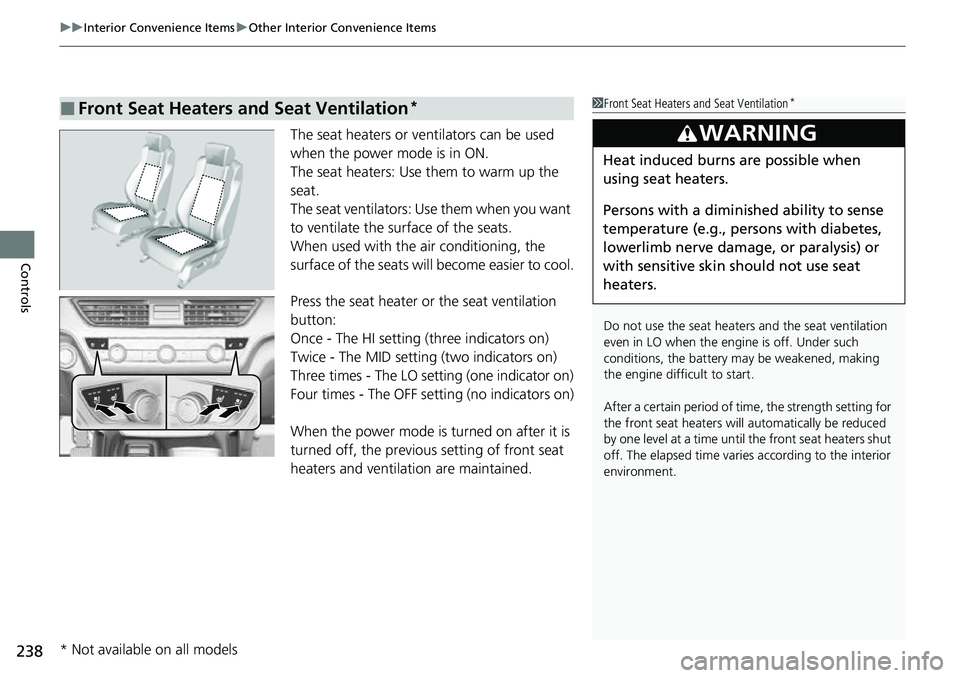
The seat heaters or ve ntilators can be used
when the power mode is in ON.
The seat heaters: Use them to warm up the
seat.
The seat ventilators: Use them when you want
to ventilate the surface of the seats.
When used with the air conditioning, the
surface of the seats will become easier to cool.
Press the seat heater or the seat ventilation
button:
Once - The HI setting (three indicators on)
Twice - The MID setting (two indicators on)
Three times - The LO setting (one indicator on)
Four times - The OFF setting (no indicators on)
When the power mode is turned on after it is
turned off, the previous setting of front seat
heaters and ventilation are maintained.
■Front Seat Heaters and Seat Ventilation*1 Front Seat Heaters and Seat Ventilation*
Do not use the seat heater s and the seat ventilation
even in LO when the engine is off. Under such
conditions, the battery ma y be weakened, making
the engine difficult to start.
After a certain period of time, the strength setting for
the front seat heaters will automatically be reduced
by one level at a ti me until the front seat heaters shut
off. The elapsed time varies according to the interior
environment.
3WARNING
Heat induced burns are possible when
using seat heaters.
Persons with a diminished ability to sense
temperature (e.g., persons with diabetes,
lowerlimb nerve damage, or paralysis) or
with sensitive skin should not use seat
heaters.
* Not available on all models
Page 242 of 657
240
Controls
Climate Control System
Using Automatic Climate Control
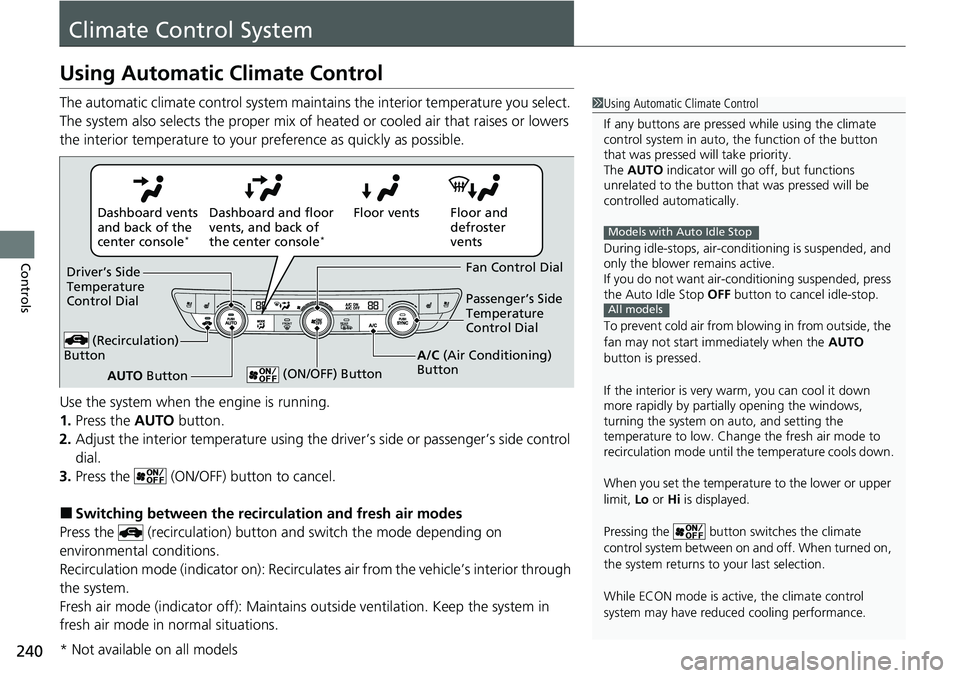
The automatic climate control system maintains the interior temperature you select.
The system also selects the proper mix of heated or cooled air that raises or lowers
the interior temperature to your preference as quickly as possible.
Use the system when the engine is running.
1. Press the AUTO button.
2. Adjust the interior temperature using the dr iver’s side or passenger’s side control
dial.
3. Press the (ON/OFF) button to cancel.
■Switching between the recirc ulation and fresh air modes
Press the (recirculation) button and switch the mode depending on
environmental conditions.
Recirculation mode (indicator on): Recirculates air from the vehicle’s interior through
the system.
Fresh air mode (indicator off): Maintains out side ventilation. Keep the system in
fresh air mode in normal situations.
1 Using Automatic Climate Control
If any buttons are presse d while using the climate
control system in auto, the function of the button
that was pressed will take priority.
The AUTO indicator will go off, but functions
unrelated to the button th at was pressed will be
controlled automatically.
During idle-stops, air-conditioning is suspended, and
only the blower remains active.
If you do not want air-cond itioning suspended, press
the Auto Idle Stop OFF button to cancel idle-stop.
To prevent cold air from bl owing in from outside, the
fan may not start i mmediately when the AUTO
button is pressed.
If the interior is very warm, you can cool it down
more rapidly by partial ly opening the windows,
turning the system on auto, and setting the
temperature to low. Change the fresh air mode to
recirculation mode until the temperature cools down.
When you set the temperat ure to the lower or upper
limit, Lo or Hi is displayed.
Pressing the button switches the climate
control system between on and off. When turned on,
the system returns to your last selection.
While ECON mode is active, the climate control
system may have reduced cooling performance.
Models with Auto Idle Stop
All models
Floor and
defroster
vents
Floor vents
Dashboard and floor
vents, and back of
the center console
*
Dashboard vents
and back of the
center console
*
AUTO Button
Driver’s Side
Temperature
Control Dial
(Recirculation)
Button
Fan Control Dial
A/C (Air Conditioning)
Button Passenger’s Side
Temperature
Control Dial
(ON/OFF) Button
* Not available on all models
Page 244 of 657
uuClimate Control System uUsing Automatic Climate Control
242
Controls
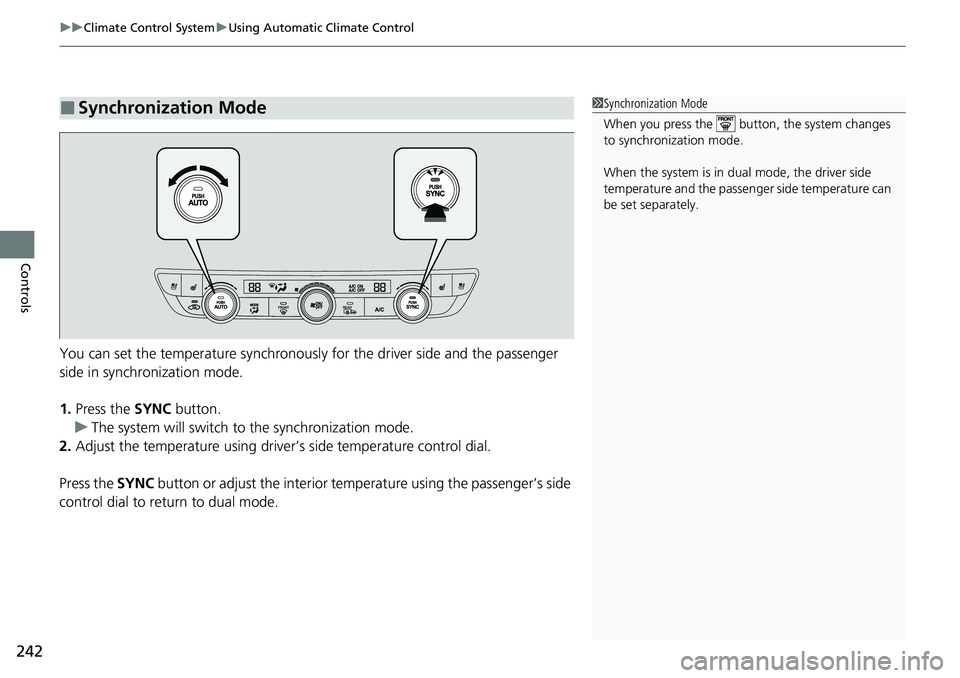
You can set the temperature synchronously for the driver side and the passenger
side in synchronization mode.
1. Press the SYNC button.
u The system will switch to the synchronization mode.
2. Adjust the temperature using driver ’s side temperature control dial.
Press the SYNC button or adjust the interior temperature using the passenger’s side
control dial to return to dual mode.
■Synchronization Mode1 Synchronization Mode
When you press the button, the system changes
to synchronization mode.
When the system is in dua l mode, the driver side
temperature and the passe nger side temperature can
be set separately.
Page 248 of 657
246
Features
Audio System
About Your Audio System
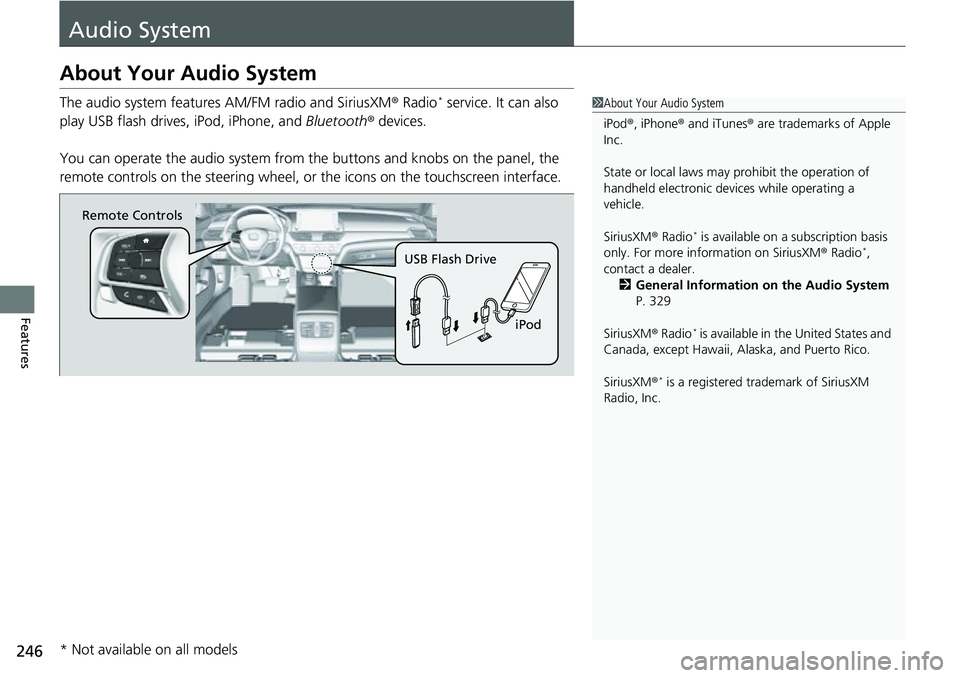
The audio system features AM/FM radio and SiriusXM® Radio* service. It can also
play USB flash drives, iPod, iPhone, and Bluetooth® devices.
You can operate the audio system from the buttons and knobs on the panel, the
remote controls on the steering wheel, or the icons on the touchscreen interface.1 About Your Audio System
iPod ®, iPhone ® and iTunes ® are trademarks of Apple
Inc.
State or local laws may pr ohibit the operation of
handheld electronic devices while operating a
vehicle.
SiriusXM ® Radio
* is available on a subscription basis
only. For more information on SiriusXM ® Radio*,
contact a dealer. 2 General Information on the Audio System
P. 329
SiriusXM ® Radio
* is available in the United States and
Canada, except Ha waii, Alaska, and Puerto Rico.
SiriusXM ®
* is a registered tra demark of SiriusXM
Radio, Inc.
Remote Controls
iPod
USB Flash Drive
* Not available on all models
Page 249 of 657

247
uuAudio System uUSB Ports
Continued
Features
USB Ports
■In the Center Pocket ( )
The USB port(s) (2.5A) is/are for charging
devices, playing audio files and connecting
compatible phones with Apple CarPlay or
Android Auto. u To prevent any potenti al issues, be sure
to use an Apple MFi Certified Lightning
Connector for Apple CarPlay, and for
Android Auto, the USB cables should be
certified by USB-IF to be compliant with
USB 2.0 Standard.
■In the Center Pocket ( )*
The USB port (2.5A) is only for charging
devices. u You cannot play music even if you have
connected music players to it.
*1 : Models without wireless Apple Ca rPlay and wireless Android Auto
*2 : Models with wireless Apple CarPlay and wireless Android Auto
1USB Ports
•Do not leave the iPod or USB flash drive in the
vehicle. Direct sunlight and high temperatures may
damage it.
•We recommend that you us e a USB cable if you are
attaching a USB flash drive to the USB port.
•Do not connect the iPod or USB flash drive using a
hub.
•Do not use a device such as a card reader or hard
disk drive, as the device or your files may be
damaged.
•We recommend backing up yo ur data before using
the device in your vehicle.
•Displayed messages may vary depending on the
device model and software version.
The USB port can supply up to 2.5A of power. It does
not output 2.5A unless the device requests.
For amperage details, read the operating manual of
the device that ne eds to be charged.
Under certain condi tions, a device connected to the
port may generate noise to the radio station you are
listening to.
USB charge
*1
*2
In the Center Pocket
* Not available on all models
Page 250 of 657
248
uuAudio System uUSB Ports
Features
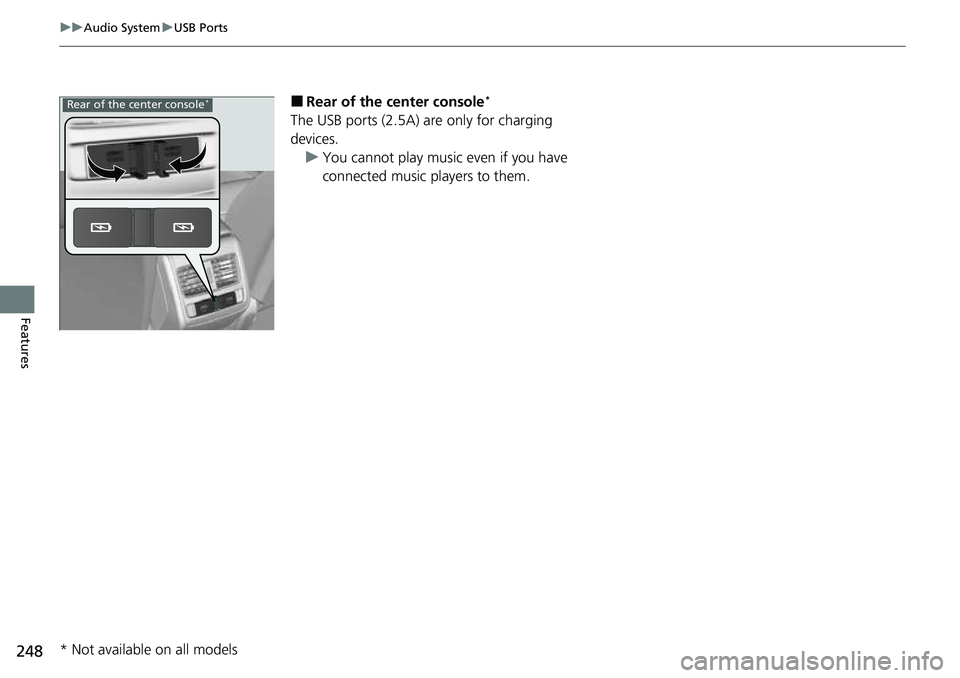
■Rear of the center console*
The USB ports (2.5A) are only for charging
devices.
u You cannot play music even if you have
connected music players to them.
Rear of the center console*
* Not available on all models
Page 252 of 657
250
uuAudio System uAudio Remote Controls
Features
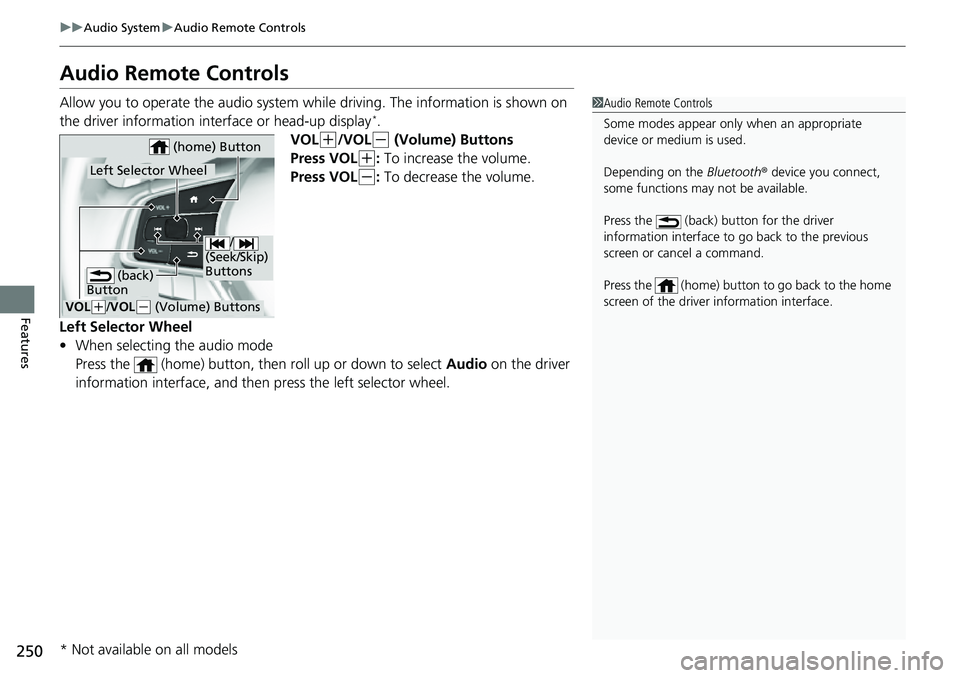
Audio Remote Controls
Allow you to operate the audio system wh ile driving. The information is shown on
the driver information interface or head-up display*.
VOL
(+/VOL(- (Volume) Buttons
Press VOL
(+: To increase the volume.
Press VOL
(-: To decrease the volume.
Left Selector Wheel
• When selecting the audio mode
Press the (home) button, then roll up or down to select Audio on the driver
information interface, and then press the left selector wheel.
1 Audio Remote Controls
Some modes appear only when an appropriate
device or medium is used.
Depending on the Bluetooth® device you connect,
some functions may not be available.
Press the (back) button for the driver
information interface to go back to the previous
screen or cancel a command.
Press the (home) button to go back to the home
screen of the driver information interface.
/
(Seek/Skip)
Buttons
VOL( +/VOL(- (Volume) Buttons
Left Selector Wheel
(home) Button
(back)
Button
* Not available on all models