sensor HONDA ACCORD 2022 Workshop Manual
[x] Cancel search | Manufacturer: HONDA, Model Year: 2022, Model line: ACCORD, Model: HONDA ACCORD 2022Pages: 657, PDF Size: 11.42 MB
Page 496 of 657
494
uuHonda Sensing ®u Road Departure Mitigation (RDM) System
Driving
Road Departure Mitigation (RDM) System
Alerts and helps to assist you when the sy stem detects a possibility of your vehicle
unintentionally crossing over detected la ne markings and/or leaving the roadway
altogether.
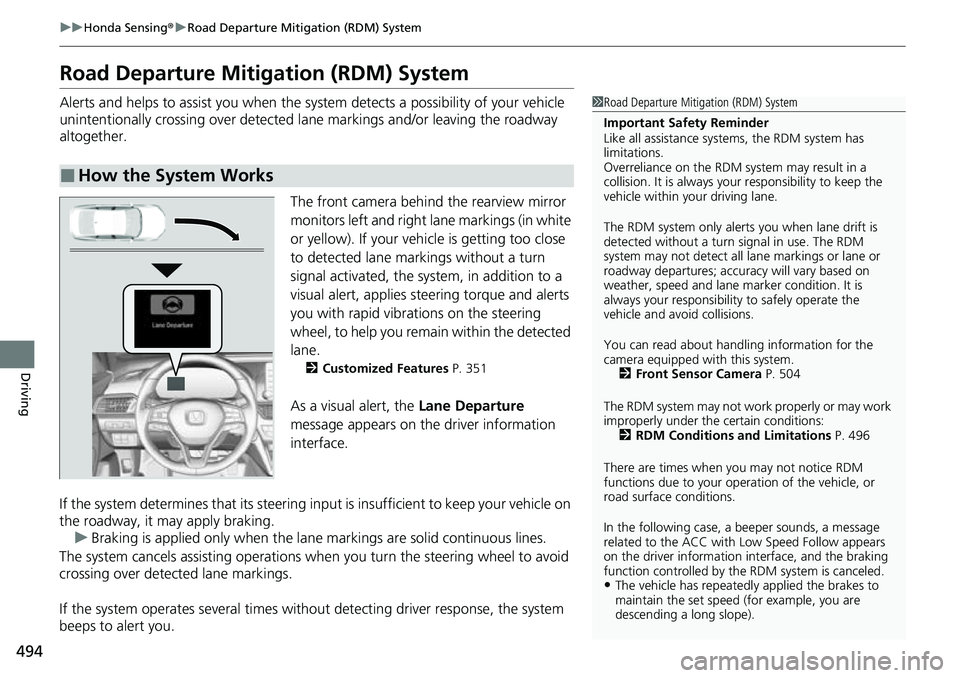
The front camera behind the rearview mirror
monitors left and right lane markings (in white
or yellow). If your vehicle is getting too close
to detected lane markings without a turn
signal activated, the system, in addition to a
visual alert, applies steering torque and alerts
you with rapid vibrations on the steering
wheel, to help you remain within the detected
lane.
2 Customized Features P. 351
As a visual alert, the Lane Departure
message appears on the driver information
interface.
If the system determines that its steering i nput is insufficient to keep your vehicle on
the roadway, it may apply braking. u Braking is applied only when the lane markings are solid continuous lines.
The system cancels assisting operations wh en you turn the steering wheel to avoid
crossing over detected lane markings.
If the system operates several times without detecting driver response, the system
beeps to alert you.
■How the System Works
1 Road Departure Mitigation (RDM) System
Important Safety Reminder
Like all assistance systems, the RDM system has
limitations.
Overreliance on the RDM system may result in a
collision. It is always your responsibility to keep the
vehicle within your driving lane.
The RDM system only alerts you when lane drift is
detected without a turn signal in use. The RDM
system may not detect all la ne markings or lane or
roadway departures; accu racy will vary based on
weather, speed and lane marker condition. It is
always your responsibilit y to safely operate the
vehicle and avoid collisions.
You can read about handling information for the
camera equipped with this system. 2 Front Sensor Camera P. 504
The RDM system may not wo rk properly or may work
improperly under the certain conditions: 2 RDM Conditions and Limitations P. 496
There are times when you may not notice RDM
functions due to your opera tion of the vehicle, or
road surface conditions.
In the following case, a beeper sounds, a message
related to the ACC with Low Speed Follow appears
on the driver information interface, and the braking
function controlled by the RDM system is canceled.
•The vehicle has repeatedly applied the brakes to
maintain the set speed (for example, you are
descending a long slope).
Page 501 of 657
Continued499
uuHonda Sensing ®u Traffic Sign Recognition System
Driving
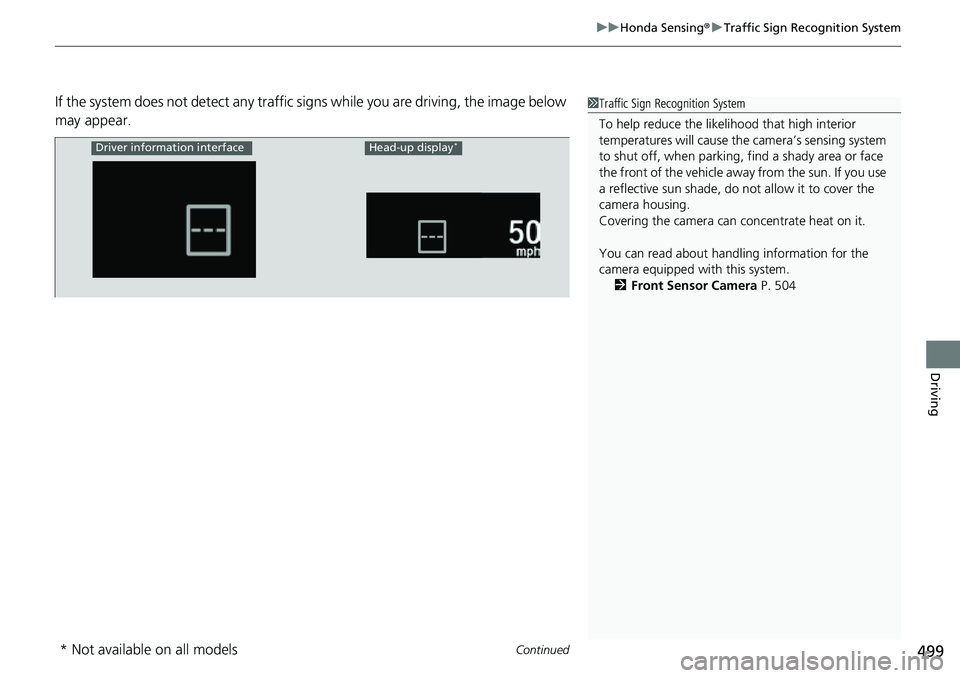
If the system does not detect any traffic si gns while you are driving, the image below
may appear.1 Traffic Sign Recognition System
To help reduce the likel ihood that high interior
temperatures will cause the camera’s sensing system
to shut off, when parking, find a shady area or face
the front of the vehicle away from the sun. If you use
a reflective sun shade, do not allow it to cover the
camera housing.
Covering the camera can concentrate heat on it.
You can read about handling information for the
camera equipped with this system. 2 Front Sensor Camera P. 504
Driver information interfaceHead-up display*
* Not available on all models
Page 506 of 657

504
uuHonda Sensing ®u Front Sensor Camera
Driving
Front Sensor Camera
The camera, used in systems such as Lane Keeping Assist System, Road Departure
Mitigation system, Adaptive Cruise Control with Low Speed Follow, Collision
Mitigation Braking System
TM and traffic sign recognition system, is designed to
detect an object that triggers any of the systems to operate their functions.
This camera is located behind the rearview
mirror.
To help reduce the likelihood that high interior
temperatures will cause the camera’s sensing
system to shut off, when parking, find a shady
area or face the front of the vehicle away from
the sun. If you use a reflective sun shade, do
not allow it to cover the camera housing.
Covering the camera can concentrate heat on
it.
■Camera Location and Handling Tips
1 Front Sensor Camera
Never apply a film or attach any objects to the
windshield, the hood, or th e front grille that could
obstruct the camera’s fiel d of vision and cause the
system to operate abnormally.
Scratches, nicks, and othe r damage to the windshield
within the camera’s fiel d of vision can cause the
system to operate abnormall y. If this occurs, we
recommend that you replac e the windshield with a
genuine Honda replacem ent windshield. Making
even minor repairs within th e camera’s field of vision
or installing an aftermarket replacement windshield
may also cause the system to operate abnormally.
After replacing the winds hield, have a dealer
recalibrate the camera. Pr oper calibration of the
camera is necessary for the system to operate
properly.
Do not place an object on the top of the instrument
panel. It may reflect onto the windshield and prevent
the system from detecting lane lines properly.
Front Sensor
Camera
Page 507 of 657
505
uuHonda Sensing ®u Front Sensor Camera
Driving
1Front Sensor Camera
If the Some Driver Assist Systems Cannot
Operate: Camera Temperature Too High message
appears:
•Use the climate control system to cool down the
interior and, if necessary, also use defroster mode
with the airflow directed towards the camera.
•Start driving the vehicle to lower the windshield
temperature, which cool s down the area around
the camera.
If the Some Driver Assist Systems Cannot
Operate: Clean Front Windshield message
appears:
•Park your vehicle in a sa fe place, and clean the
windshield. If the message does not disappear after
you have cleaned the windshield and driven for a
while, have your vehicle checked by a dealer.
Page 508 of 657
506
uuHonda Sensing ®u Radar Sensor
Driving
Radar Sensor
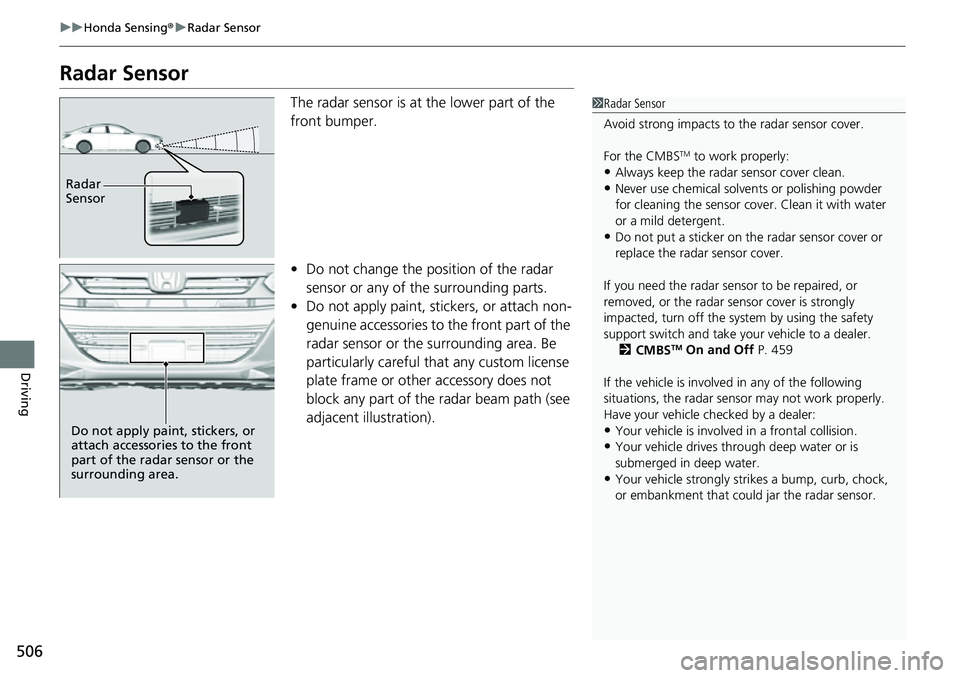
The radar sensor is at the lower part of the
front bumper.
• Do not change the position of the radar
sensor or any of the surrounding parts.
• Do not apply paint, stickers, or attach non-
genuine accessories to the front part of the
radar sensor or the surrounding area. Be
particularly careful that any custom license
plate frame or other accessory does not
block any part of the radar beam path (see
adjacent illustration).1Radar Sensor
Avoid strong impacts to the radar sensor cover.
For the CMBS
TM to work properly:
•Always keep the radar sensor cover clean.•Never use chemical solvents or polishing powder
for cleaning the sensor cove r. Clean it with water
or a mild detergent.
•Do not put a sticker on th e radar sensor cover or
replace the radar sensor cover.
If you need the radar sensor to be repaired, or
removed, or the radar se nsor cover is strongly
impacted, turn off the syst em by using the safety
support switch and take y our vehicle to a dealer.
2 CMBS
TM On and Off P. 459
If the vehicle is involved in any of the following
situations, the radar sensor may not work properly.
Have your vehicle checked by a dealer:
•Your vehicle is involved in a frontal collision.•Your vehicle drives th rough deep water or is
submerged in deep water.
•Your vehicle strongly strikes a bump, curb, chock,
or embankment that coul d jar the radar sensor.
Radar
Sensor
Do not apply paint, stickers, or
attach accessories to the front
part of the radar sensor or the
surrounding area.
Page 509 of 657
507
uuHonda Sensing ®u Sonar Sensors*
Driving
Sonar Sensors*
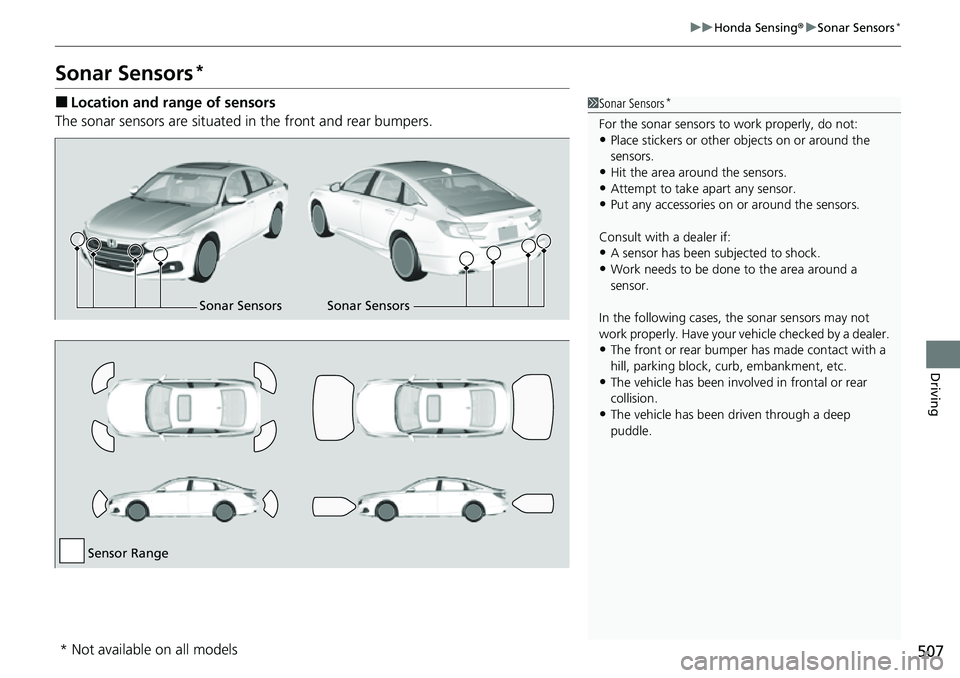
■Location and range of sensors
The sonar sensors are situated in the front and rear bumpers.1Sonar Sensors*
For the sonar sensors to work properly, do not:•Place stickers or other objects on or around the
sensors.
•Hit the area around the sensors.•Attempt to take apart any sensor.
•Put any accessories on or around the sensors.
Consult with a dealer if:
•A sensor has been subjected to shock.
•Work needs to be done to the area around a
sensor.
In the following cases, the sonar sensors may not
work properly. Have your ve hicle checked by a dealer.
•The front or rear bumper has made contact with a
hill, parking block, curb, embankment, etc.
•The vehicle has been involv ed in frontal or rear
collision.
•The vehicle has been driven through a deep
puddle.
Sonar Sensors Sonar Sensors
Sensor Range
* Not available on all models
Page 522 of 657
520
uuParking Your Vehicle uParking Sensor System*
Driving
Parking Sensor System*
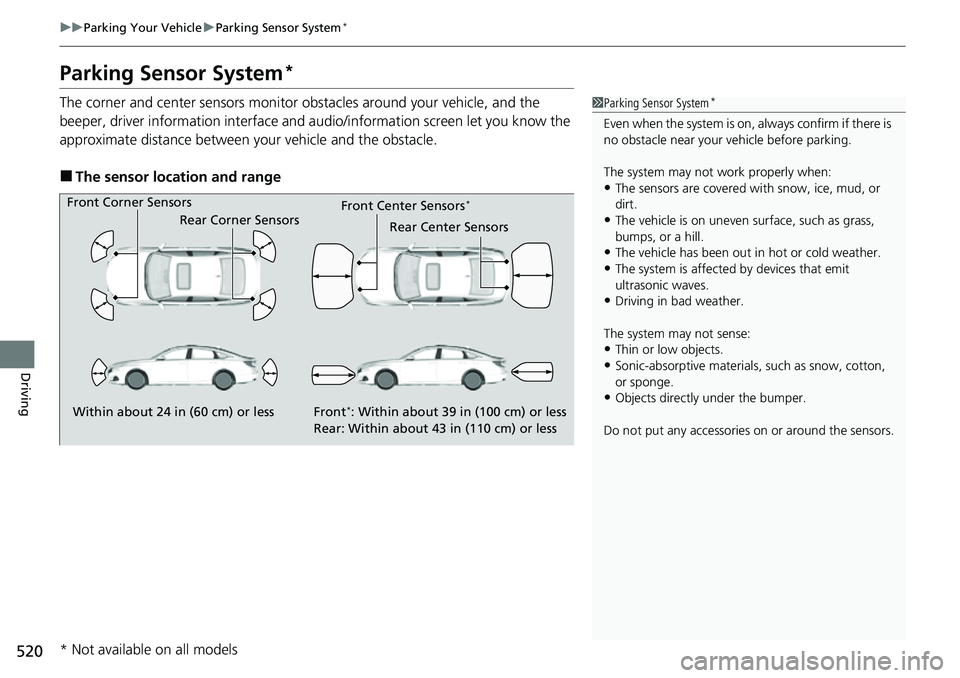
The corner and center sensors monitor obstacles around your vehicle, and the
beeper, driver information interface and audio/informatio n screen let you know the
approximate distance between your vehicle and the obstacle.
■The sensor location and range
1 Parking Sensor System*
Even when the system is on, always confirm if there is
no obstacle near your ve hicle before parking.
The system may not work properly when:
•The sensors are covered with snow, ice, mud, or
dirt.
•The vehicle is on uneven su rface, such as grass,
bumps, or a hill.
•The vehicle has been out in hot or cold weather.•The system is affected by devices that emit
ultrasonic waves.
•Driving in bad weather.
The system may not sense:
•Thin or low objects.•Sonic-absorptive materials, such as snow, cotton,
or sponge.
•Objects directly under the bumper.
Do not put any accessories on or around the sensors.Within about 24 in (60 cm) or less
Front Corner Sensors
Rear Corner Sensors
Front*: Within about 39 in (100 cm) or less
Rear: Within about 43 in (110 cm) or less
Rear Center Sensors
Front Center Sensors*
* Not available on all models
Page 523 of 657
Continued521
uuParking Your Vehicle uParking Sensor System*
Driving
■Parking sensor system on and off
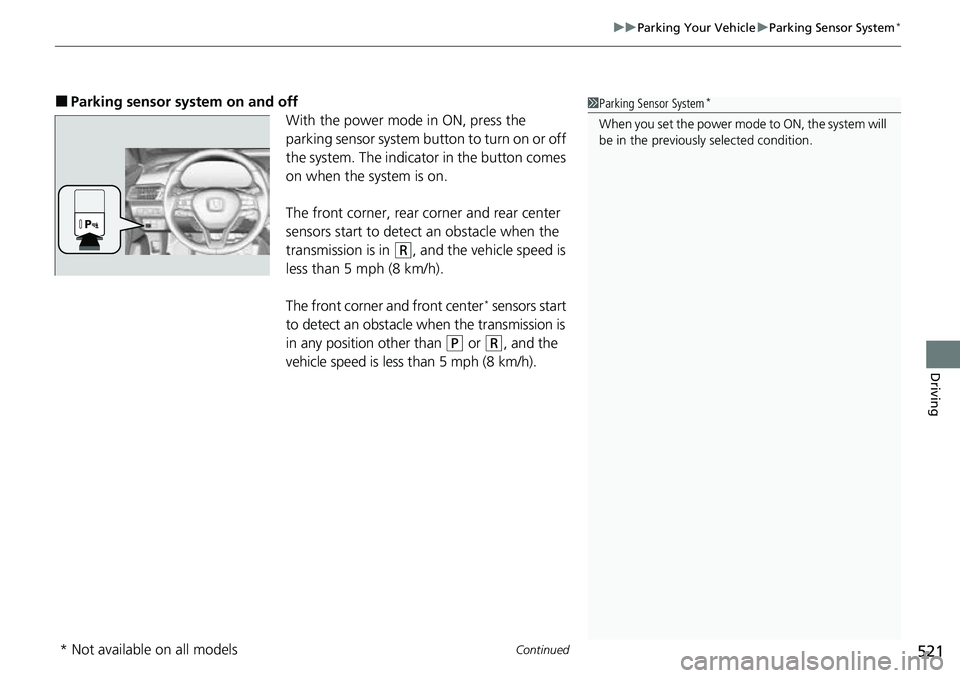
With the power mode in ON, press the
parking sensor system button to turn on or off
the system. The indicator in the button comes
on when the system is on.
The front corner, rear corner and rear center
sensors start to detect an obstacle when the
transmission is in
(R, and the vehicle speed is
less than 5 mph (8 km/h).
The front corner and front center
* sensors start
to detect an obstacle when the transmission is
in any position other than
(P or (R, and the
vehicle speed is less than 5 mph (8 km/h).
1 Parking Sensor System*
When you set the power mode to ON, the system will
be in the previously selected condition.
* Not available on all models
Page 524 of 657

uuParking Your Vehicle uParking Sensor System*
522
Driving
■Screen Operation
You can switch between split view off and
split view on by touching the split screen tab.1Screen Operation
The split screen tab disappears, and the split view
returns to the last camera view mode under the
following conditions:
•If the parking sensor system is turned off.•If there is a malfunction in the system.
Split Screen
Tab
Split View Off
Split View On
Page 525 of 657
523
uuParking Your Vehicle uParking Sensor System*
Continued
Driving
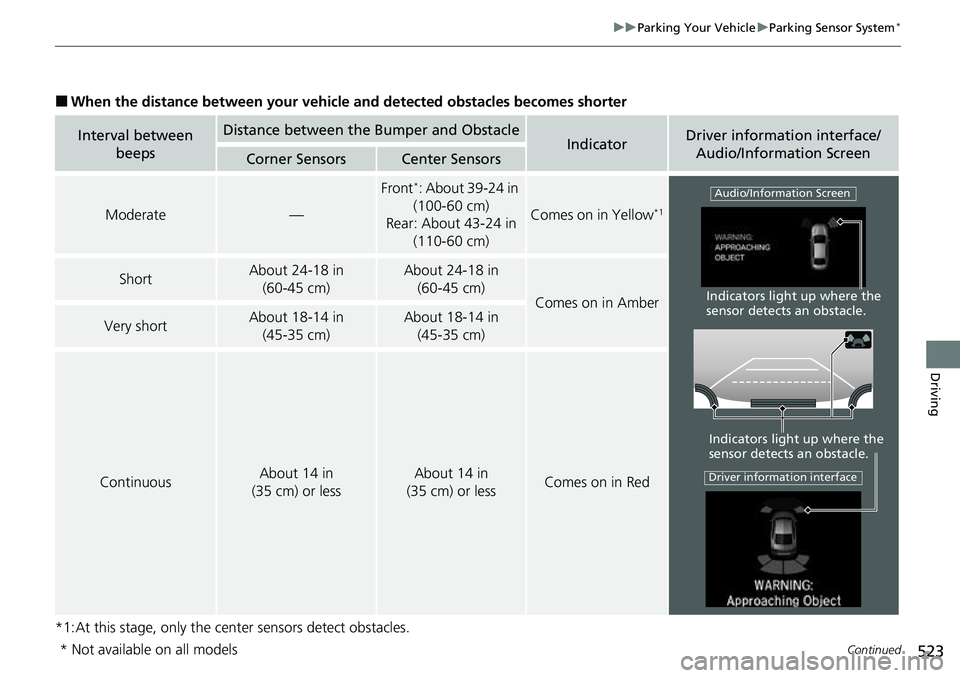
■When the distance between your vehicle and detected obstacles becomes shorter
*1:At this stage, only the center sensors detect obstacles.
Interval between beepsDistance between the Bumper and ObstacleIndicatorDriver information interface/
Audio/Information Screen
Corner SensorsCenter Sensors
Moderate—
Front*: About 39-24 in
(100-60 cm)
Rear: About 43-24 in
(110-60 cm)
Comes on in Yellow*1
ShortAbout 24-18 in (60-45 cm) About 24-18 in (60-45 cm)
Comes on in Amber
Very shortAbout 18-14 in (45-35 cm) About 18-14 in (45-35 cm)
ContinuousAbout 14 in
(35 cm) or lessAbout 14 in
(35 cm) or lessComes on in Red
Indicators light up where the
sensor detects an obstacle.
Indicators light up where the
sensor detects an obstacle.
Audio/Information Screen
Driver information interface
* Not available on all models