stop start HONDA ACCORD COUPE 2001 CF / 6.G Owners Manual
[x] Cancel search | Manufacturer: HONDA, Model Year: 2001, Model line: ACCORD COUPE, Model: HONDA ACCORD COUPE 2001 CF / 6.GPages: 372, PDF Size: 6.1 MB
Page 70 of 372
Controls Near the Steering Wheel
Make sure the rear window is clear
and you have good visibility before
starting to drive.
The defogger and antenna wires on the inside of the rear window can beaccidentally damaged. When
cleaning the glass, always wipe side
to side. Steering Wheel Adjustment
See page 16 for important safety
information about how to properly
position the steering wheel.
Make any steering wheel adjustment
before you start driving.
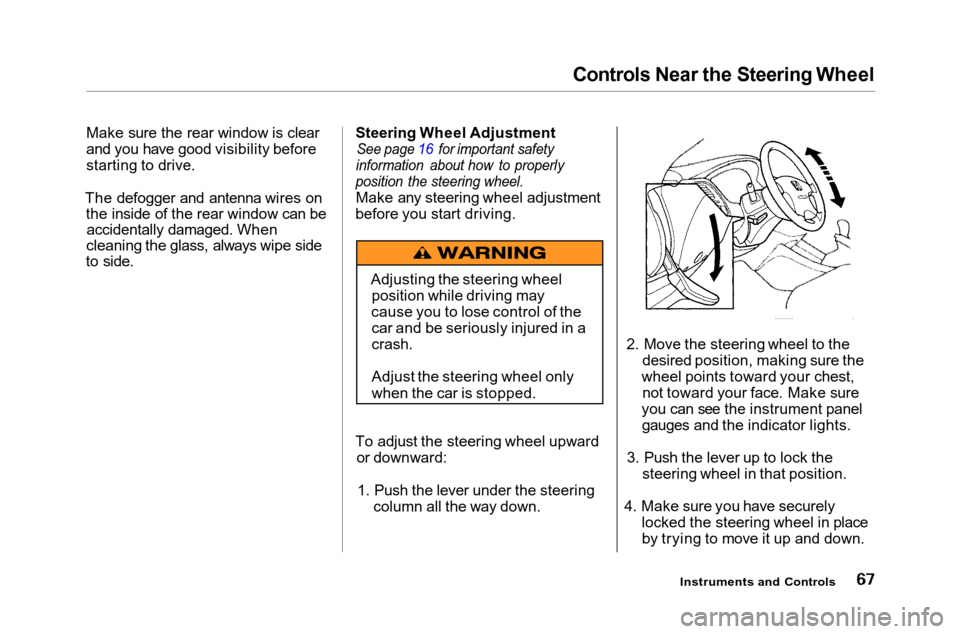
To adjust the steering wheel upward or downward:
1. Push the lever under the steering column all the way down. 2. Move the steering wheel to the
desired position, making sure the
wheel points toward your chest, not toward your face. Make sure
you can see the instrument panel gauges and the indicator lights.
3. Push the lever up to lock the steering wheel in that position.
4. Make sure you have securely locked the steering wheel in placeby trying to move it up and down.
Instruments and Controls
Adjusting the steering wheel
position while driving may
cause you to lose control of the car and be seriously injured in a
crash.
Adjust the steering wheel only
when the car is stopped.
Page 117 of 372
Heating and Cooling
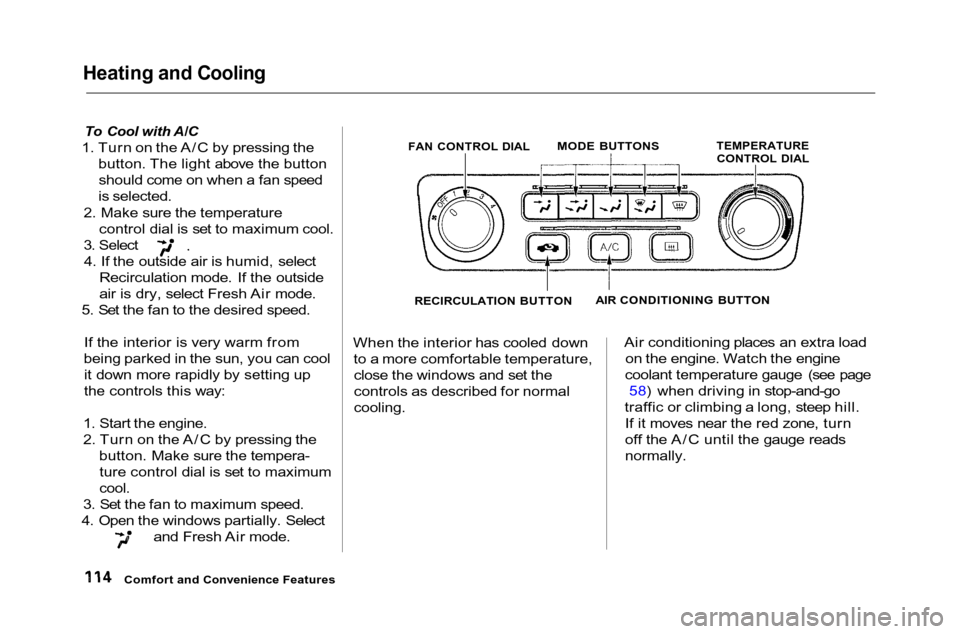
To Cool with A/C
1. Turn on the A/C by pressing the button. The light above the buttonshould come on when a fan speed
is selected.
2. Make sure the temperature control dial is set to maximum cool. 3. Select
4. If the outside air is humid, select Recirculation mode. If the outside
air is dry, select Fresh Air mode.
5. Set the fan to the desired speed.
If the interior is very warm from
being parked in the sun, you can cool it down more rapidly by setting up
the controls this way:
1. Start the engine.
2. Turn on the A/C by pressing the button. Make sure the tempera-ture control dial is set to maximum
cool.
3. Set the fan to maximum speed.
4. Open the windows partially. Select and Fresh Air mode. When the interior has cooled down
to a more comfortable temperature,close the windows and set the
controls as described for normal
cooling.
Air conditioning places an extra load
on the engine. Watch the engine
coolant temperature gauge (see page 58) when driving in stop-and-go
traffic or climbing a long, steep hill. If it moves near the red zone, turn
off the A/C until the gauge reads
normally.
Comfort and Convenience Features
FAN CONTROL DIAL
MODE BUTTONS
TEMPERATURE
CONTROL DIAL
AIR CONDITIONING BUTTON
RECIRCULATION BUTTON
Page 129 of 372
Audio System
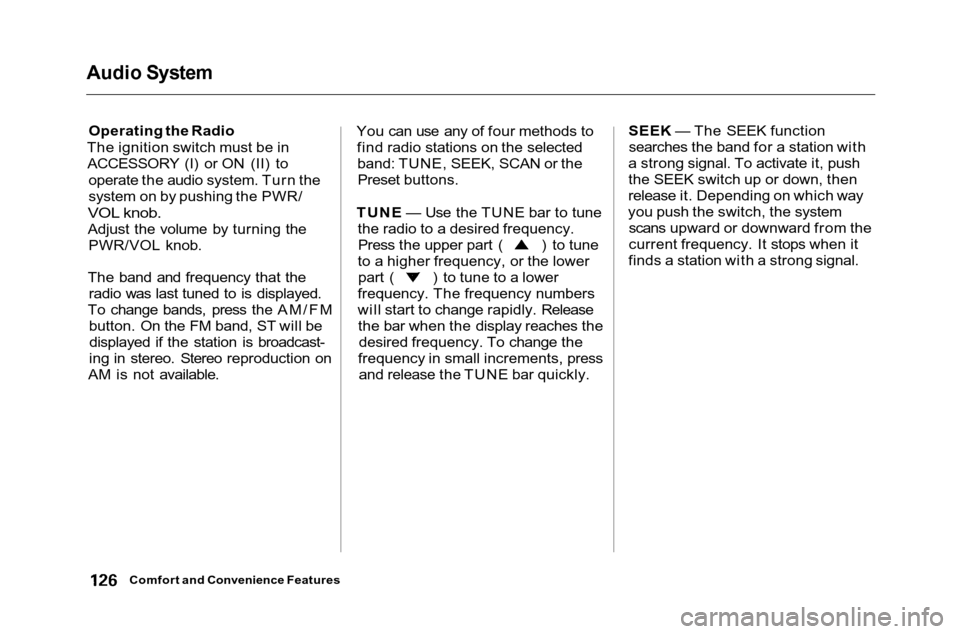
Operating the Radio
The ignition switch must be in ACCESSORY (I) or ON (II) to
operate the audio system. Turn the
system on by pushing the PWR/
VOL knob.
Adjust the volume by turning the PWR/VOL knob.
The band and frequency that the
radio was last tuned to is displayed.
To change bands, press the AM/FM button. On the FM band, ST will bedisplayed if the station is broadcast-
ing in stereo. Stereo reproduction on
AM is not available. You can use any of four methods to
find radio stations on the selectedband: TUNE, SEEK, SCAN or thePreset buttons.
TUNE — Use the TUNE bar to tune the radio to a desired frequency. Press the upper part ( ) to tune
to a higher frequency, or the lower part ( ) to tune to a lower
frequency. The frequency numbers
will start to change rapidly. Release the bar when the display reaches the desired frequency. To change the
frequency in small increments, press and release the TUNE bar quickly. SEEK — The SEEK function
searches the band for a station with
a strong signal. To activate it, push
the SEEK switch up or down, then
release it. Depending on which way
you push the switch, the system scans upward or downward from the
current frequency. It stops when it
finds a station with a strong signal.
Comfort and Convenience Features
Page 169 of 372
Audio System
Loading CDs in the Changer
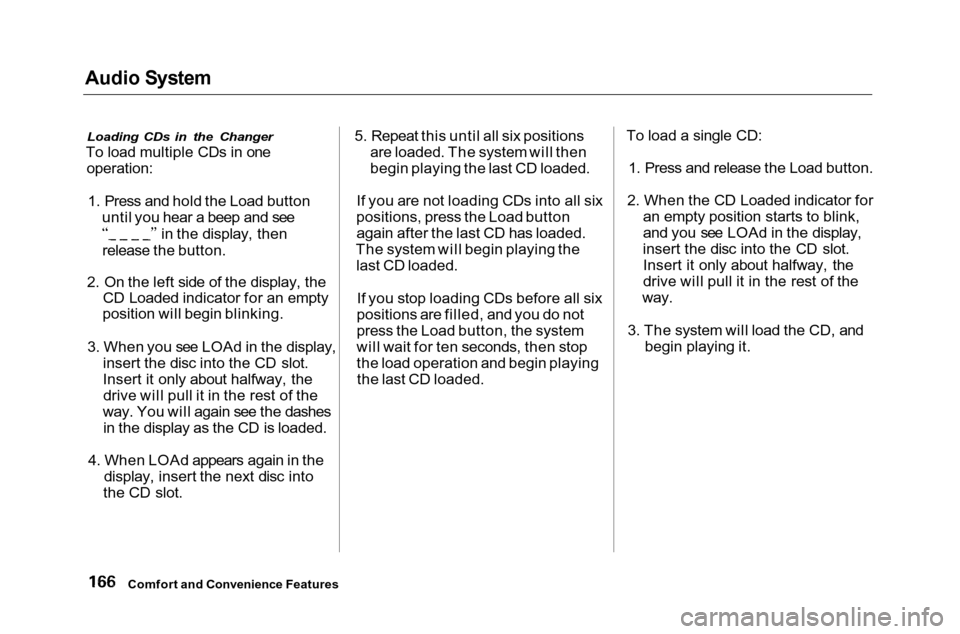
To load multiple CDs in one
operation:
1. Press and hold the Load button until you hear a beep and see in the display, then
release the button.
2. On the left side of the display, the CD Loaded indicator for an empty
position will begin blinking.
3. When you see LOAd in the display, insert the disc into the CD slot.
Insert it only about halfway, thedrive will pull it in the rest of the
way. You will again see the dashes in the display as the CD is loaded.
4. When LOAd appears again in the display, insert the next disc into
the CD slot. 5. Repeat this until all six positions
are loaded. The system will then
begin playing the last CD loaded.
If you are not loading CDs into all six
positions, press the Load button again after the last CD has loaded.
The system will begin playing the last CD loaded.
If you stop loading CDs before all six
positions are filled, and you do not
press the Load button, the system
will wait for ten seconds, then stop
the load operation and begin playing the last CD loaded. To load a single CD:
1. Press and release the Load button.
2. When the CD Loaded indicator for an empty position starts to blink,
and you see LOAd in the display,
insert the disc into the CD slot. Insert it only about halfway, the
drive will pull it in the rest of the
way.
3. The system will load the CD, and begin playing it.
Comfort and Convenience Features
Page 170 of 372
Audio System
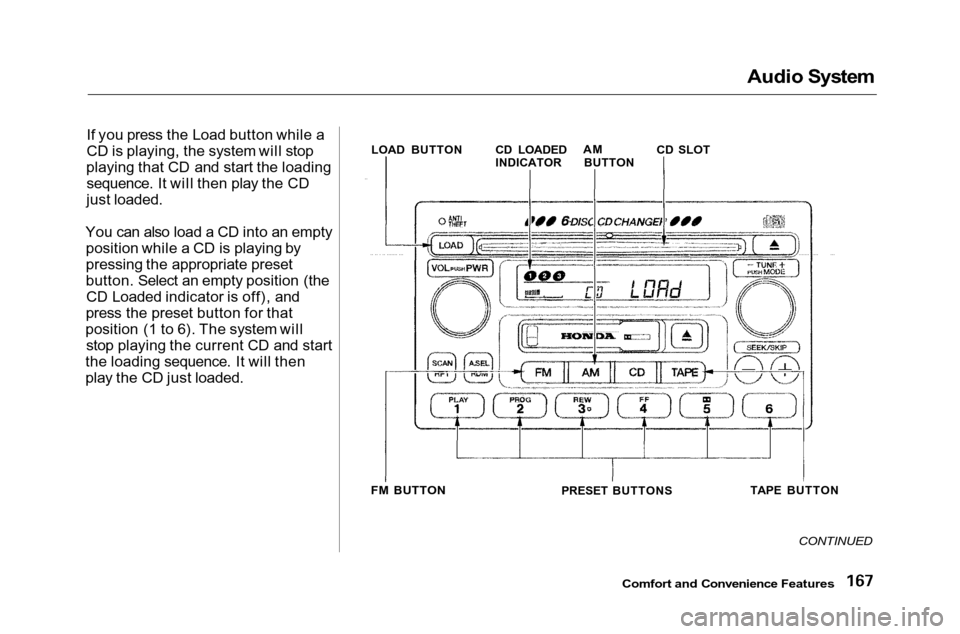
If you press the Load button while a
CD is playing, the system will stop
playing that CD and start the loading sequence. It will then play the CD
just loaded.
You can also load a CD into an empty position while a CD is playing by
pressing the appropriate preset
button. Select an empty position (theCD Loaded indicator is off), and
press the preset button for that
position (1 to 6). The system will stop playing the current CD and start
the loading sequence. It will then
play the CD just loaded.
CONTINUED
Comfort and Convenience Features
LOAD BUTTON
CD LOADED
INDICATORAM
BUTTON CD SLOT
FM BUTTON
PRESET BUTTONSTAPE BUTTON
Page 200 of 372
Automatic Transmission
Shift Lever Position Indicator
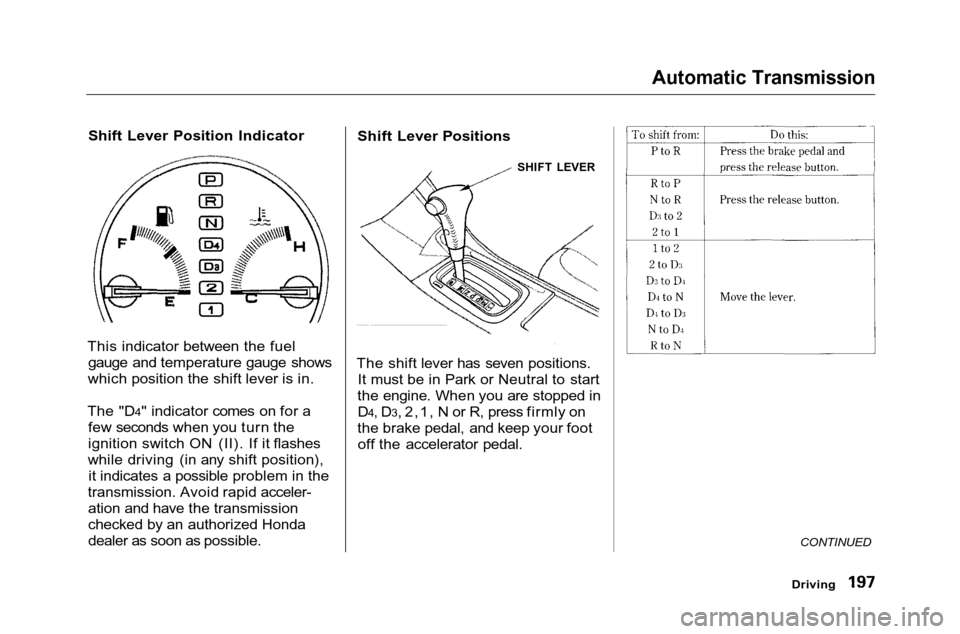
This indicator between the fuel gauge and temperature gauge shows
which position the shift lever is in.
The "D4" indicator comes on for a few seconds when you turn the
ignition switch ON (II). If it flashes
while driving (in any shift position), it indicates a possible problem in the
transmission. Avoid rapid acceler- ation and have the transmission
checked by an authorized Honda
dealer as soon as possible. Shift Lever Positions
SHIFT LEVER
The shift lever has seven positions. It must be in Park or Neutral to start
the engine. When you are stopped in D4, D3, 2,1, N or R, press firmly on
the brake pedal, and keep your foot off the accelerator pedal.
CONTINUED
Driving
Page 201 of 372
Automatic Transmission
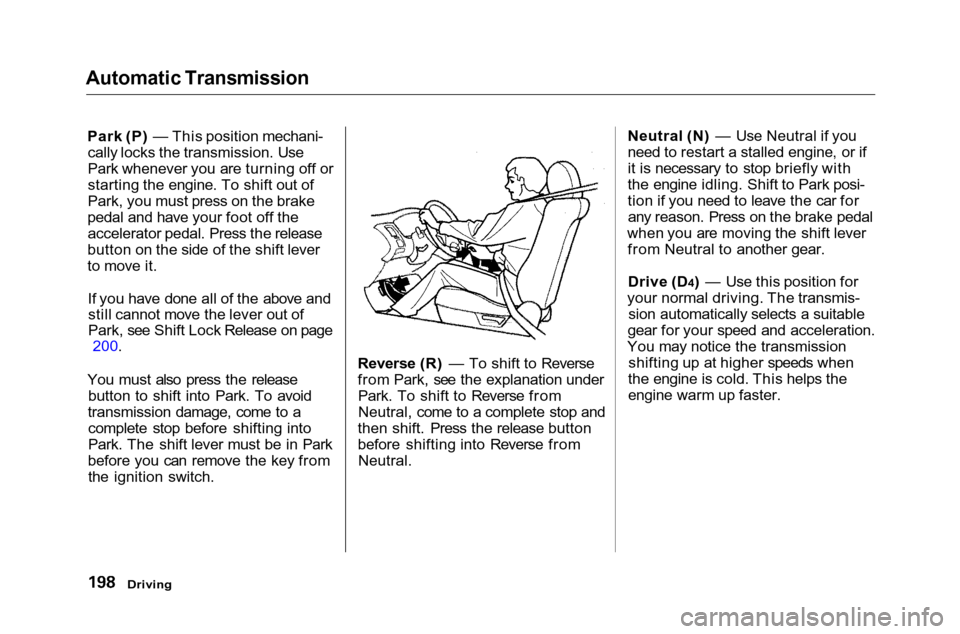
Park (P) — This position mechani-cally locks the transmission. Use
Park whenever you are turning off or
starting the engine. To shift out of
Park, you must press on the brake
pedal and have your foot off the accelerator pedal. Press the release
button on the side of the shift lever
to move it.
If you have done all of the above andstill cannot move the lever out of
Park, see Shift Lock Release on page 200.
You must also press the release button to shift into Park. To avoid
transmission damage, come to a complete stop before shifting into
Park. The shift lever must be in Park
before you can remove the key from the ignition switch. Reverse (R) — To shift to Reverse
from Park, see the explanation under
Park. To shift to Reverse from
Neutral, come to a complete stop and
then shift. Press the release button
before shifting into Reverse from Neutral. Neutral (N) — Use Neutral if you
need to restart a stalled engine, or if
it is necessary to stop briefly with
the engine idling. Shift to Park posi-
tion if you need to leave the car for
any reason. Press on the brake pedal
when you are moving the shift lever from Neutral to another gear.
Drive (D4) — Use this position for
your normal driving. The transmis- sion automatically selects a suitable
gear for your speed and acceleration.
You may notice the transmission shifting up at higher speeds when
the engine is cold. This helps the
engine warm up faster.
Driving
Page 202 of 372

Automatic Transmission
Drive (D3) —This position is similar
to D4, except only the first three
gears are selected. Use D3 when
towing a trailer in hilly terrain, or to
provide engine braking when going down a steep hill. D3 can also keep
the transmission from cycling
between third and fourth gears in stop-and-go driving.
For faster acceleration when in D3 or
D4, you can get the transmission to
automatically downshift by pushing
the accelerator pedal to the floor.
The transmission will shift down one or two gears, depending on your
speed.
Second (2) — To shift to Second,
press the release button on the side
of the shift lever. This position locks
the transmission in second gear. It does not downshift to first gear
when you come to a stop. Second
gives you more power when climbing, and increased engine braking when
going down steep hills. Use second
gear when starting out on a slippery surface or in deep snow. It will help
reduce wheelspin. First (1) — To shift from Second to
First, press the release button on theside of the shift lever. With the lever
in this position, the transmission
locks in First gear. By upshifting and downshifting through 1, 2, D3 and D4,
you can operate this transmission much like a manual transmission
without a clutch pedal.
Driving
Page 209 of 372
Traction Control System
On LX V6 and EX V6 models
Your Honda is equipped with a
Traction Control System (TCS) to assist you in maintaining traction
while driving slowly on loose or slippery surfaces. The TCS assists
only in low-speed, low-traction
conditions; up to approximately 18
mph (30km/h).
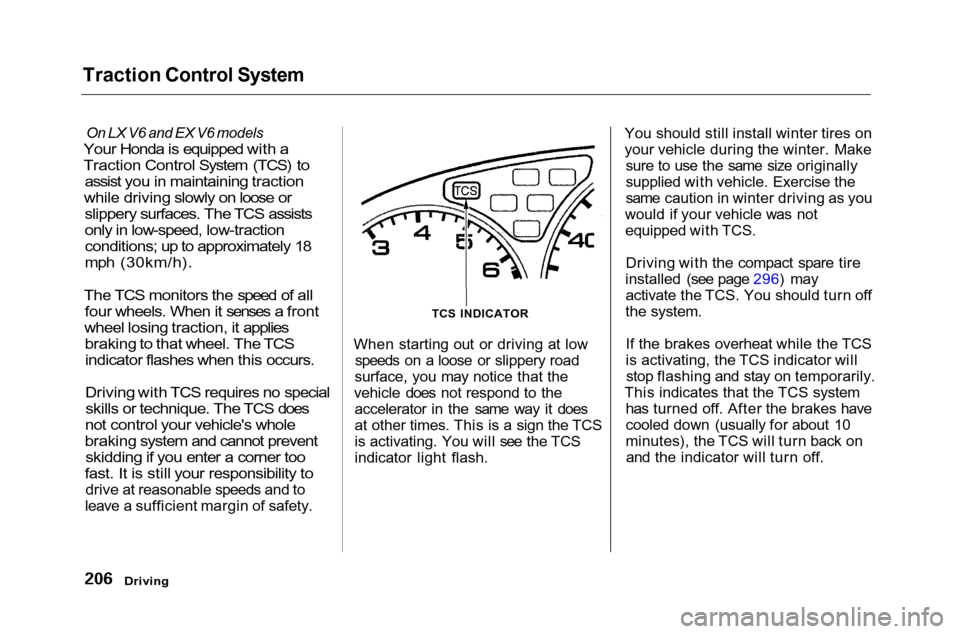
The TCS monitors the speed of all four wheels. When it senses a front
wheel losing traction, it applies braking to that wheel. The TCSindicator flashes when this occurs.
Driving with TCS requires no specialskills or technique. The TCS does
not control your vehicle's whole
braking system and cannot prevent skidding if you enter a corner too
fast. It is still your responsibility to
drive at reasonable speeds and to
leave a sufficient margin of safety. When starting out or driving at low
speeds on a loose or slippery road
surface, you may notice that the
vehicle does not respond to the accelerator in the same way it does
at other times. This is a sign the TCS
is activating. You will see the TCS
indicator light flash. You should still install winter tires on
your vehicle during the winter. Make
sure to use the same size originally
supplied with vehicle. Exercise the
same caution in winter driving as you
would if your vehicle was not equipped with TCS.
Driving with the compact spare tire
installed (see page 296) may activate the TCS. You should turn off
the system.
If the brakes overheat while the TCS
is activating, the TCS indicator willstop flashing and stay on temporarily.
This indicates that the TCS system has turned off. After the brakes have
cooled down (usually for about 10
minutes), the TCS will turn back onand the indicator will turn off.
Driving
TCS INDICATOR
Page 248 of 372
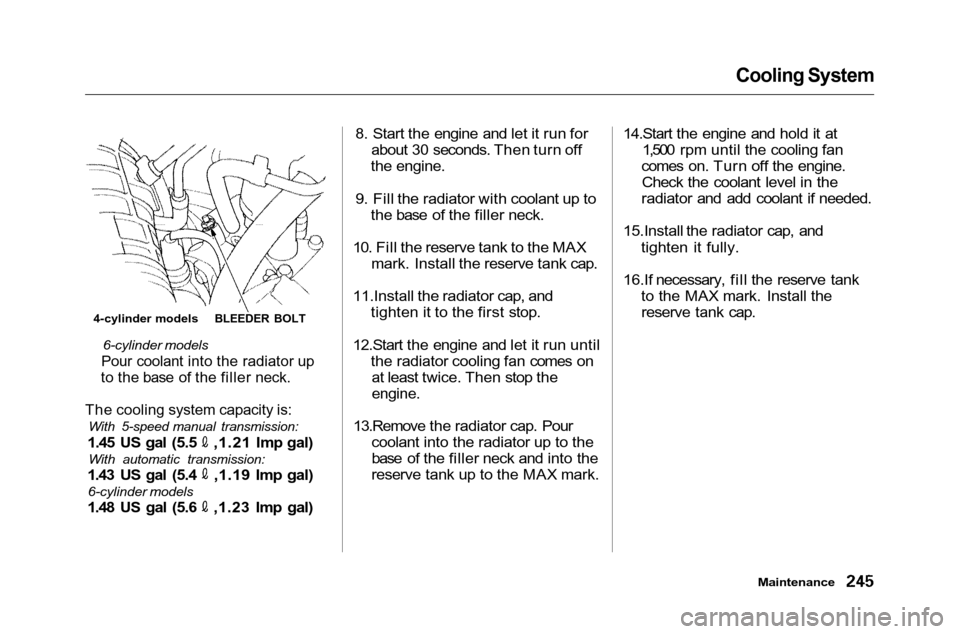
Cooling System
6-cylinder models
Pour coolant into the radiator up
to the base of the filler neck.
The cooling system capacity is:
With 5-speed manual transmission:
1.45 US gal (5.5 ,1.21 Imp gal)
With automatic transmission:
1.43 US gal (5.4 ,1.19 Imp gal)
6-cylinder models 1.48 US gal (5.6 ,1.23 Imp gal) 8. Start the engine and let it run for
about 30 seconds. Then turn off
the engine.
9. Fill the radiator with coolant up to the base of the filler neck.
10. Fill the reserve tank to the MAX mark. Install the reserve tank cap.
11.Install the radiator cap, and tighten it to the first stop.
12.Start the engine and let it run until the radiator cooling fan comes onat least twice. Then stop the
engine.
13.Remove the radiator cap. Pour coolant into the radiator up to the
base of the filler neck and into the
reserve tank up to the MAX mark. 14.Start the engine and hold it at
1,500 rpm until the cooling fan
comes on. Turn off the engine. Check the coolant level in the
radiator and add coolant if needed.
15.Install the radiator cap, and tighten it fully.
16.If necessary, fill the reserve tank to the MAX mark. Install thereserve tank cap.
Maintenance
4-cylinder models
BLEEDER BOLT