trunk HONDA ACCORD COUPE 2002 CL7 / 7.G Owners Manual
[x] Cancel search | Manufacturer: HONDA, Model Year: 2002, Model line: ACCORD COUPE, Model: HONDA ACCORD COUPE 2002 CL7 / 7.GPages: 375, PDF Size: 4.89 MB
Page 28 of 375
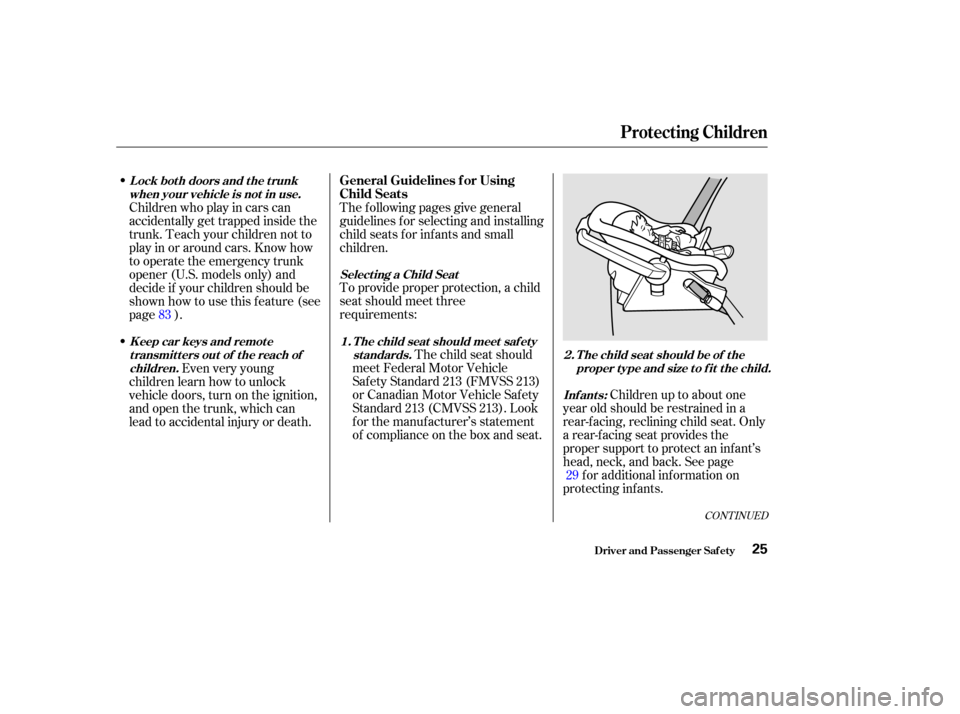
Childrenuptoaboutone
year old should be restrained in a
rear-f acing, reclining child seat. Only
a rear-f acing seat provides the
proper support to protect an inf ant’s
head, neck, and back. See page for additional information on
protecting inf ants.
The f ollowing pages give general
guidelines f or selecting and installing
child seats f or inf ants and small
children.
To provide proper protection, a child
seat should meet three
requirements:
The child seat should
meet Federal Motor Vehicle
Saf ety Standard 213 (FMVSS 213)
or Canadian Motor Vehicle Saf ety
Standard 213 (CMVSS 213). Look
for the manufacturer’s statement
of compliance on the box and seat.
Children who play in cars can
accidentally get trapped inside the
trunk. Teach your children not to
play in or around cars. Know how
to operate the emergency trunk
opener (U.S. models only) and
decide if your children should be
shown how to use this f eature (see
page ).
Even very young
children learn how to unlock
vehicle doors, turn on the ignition,
and open the trunk, which can
lead to accidental injury or death.
29
83
CONT INUED
Inf ant s:
Select ing a Child Seat
T he child seat should meet saf et ystandards. T he child seat should be of the
proper t ype and size t o f it t he child.
Lock both doors and the trunk
when your vehicle is not in use.
K eep car keys and remot etransmitters out of the reach ofchildren. 1.
2.
General Guidelines f or Using
Child Seats
Protecting Children
Driver and Passenger Saf ety25
Page 55 of 375

High levels of carbon monoxide can
collect rapidly in enclosed areas,
such as a garage. Do not run the
engine with the garage door closed.
Even with the door open, run the
engine only long enough to move the
vehicle out of the garage.Select the Fresh Air mode.
Select the mode.
Turn the f an on high speed.
Set the temperature control to a
comfortable setting.
Your car’s exhaust contains carbon
monoxide gas. You should have no
problem with carbon monoxide
entering the car in normal driving if
you maintain your car properly.
Have the exhaust system inspected
f or leaks whenever:
The car is raised f or an oil change.
You notice a change in the sound
of the exhaust.
Thecarwasinanaccidentthat
may have damaged the underside. With the trunk lid open, air f low can
pull exhaust gas into your car’s
interior and create a hazardous
condition. If you must drive with the
trunk lid open, open all the windows
and set the heating and cooling
system/climate control system as
shown below.
If you must sit in your parked car,
even in an unconf ined area, with the
engine running, adjust the heating
and cooling system/climate control
system as f ollows:
1.
2.
3.
4.
Carbon Monoxide Hazard
Driver and Passenger Saf ety52
Carbon monoxide gas is toxic.
Breathing it can cause
unconsciousness and even kill
you.
Avoid any enclosed areas or
activities that expose you to
carbon monoxide.
Page 58 of 375
This section gives inf ormation about
the controls and displays that
contribute to the daily operation of
your Honda. All the essential
controls are within easy reach............................
Control Locations .56
...............................
Indicator Lights .57
.............................................
Gauges .63
...............................
Speedometer .63
.................................
Tachometer .63
.....................................
Odometer .63
...................................
Trip Meter .64
...................
Temperature Gauge . 64
..................................
Fuel Gauge .64
Maintenance Required ...................................
Indicator .65
Controls Near the Steering .......................................
Wheel .66
...................................
Headlights .67 Automatic Lighting Off
.....................................
Feature .68
............
Daytime Running Lights . 68
....
Instrument Panel Brightness . 69
................................
Turn Signals .69
.....................
Windshield Wipers .70
..................
Windshield Washers . 71
..........................
Hazard Warning .71
.............
Rear Window Def ogger . 72
......
Steering Wheel Adjustment . 73
...............................
Keys and Locks .74
..............................................
Keys .75
....................
Immobilizer System . 75
............................
Ignition Switch .76
......................
Power Door Locks .78
................
Lockout Prevention . 79
...................
Remote Transmitter . 79
...........................................
Trunk .82
........
Emergency Trunk Opener . 83
....................................
Glove Box .84
............................
Seat Adjustments .85
.............
Front Seat Adjustments . 85
Driver’s Seat Manual Height ..............................
Adjustment .86
Driver’s Seat Power Height ..............................
Adjustment .86 Driver’s Seat Power
............................
Adjustments .87
...........
Driver’s Lumbar Support . 88
........................
Rear Seat Access .89
..........................
Head Restraints .90
.......................
Folding Rear Seat .91
....................................
Seat Heaters .93
..............................
Power Windows .94
.........................................
Moonroof .96
.............................................
Mirrors .97
....
Adjusting the Power Mirrors . 97
.................................
Parking Brake .99
..................................
Digital Clock .100
........................
Sunglasses Holder .100
...........................
Beverage Holder .101
.................
Console Compartment . 102
........................................
Sun Visor .103
................................
Vanity Mirror .103
........................................
Coin Box .104
...............................
Center Pocket .104
.............
Accessory Power Socket . 104
...............................
Interior Lights .105
..............................
Ceiling Light .105
...................................
Spotlights .105
........................
Courtesy Lights .106
Instruments and Controls
Inst rument s and Cont rols55
Page 64 of 375
Canadian models only
This indicator lights when you turn
the ignition switch to ON (II) with
the headlight switch of f and the
parking brake set. It should go of f if
youturnontheheadlightsorrelease
the parking brake. If it comes on at
any other time, it means there is a
problem with the DRL. There may
also be a problem with the high
beam headlights.
The lef t or right turn signal light
blinks when you signal a lane change
or turn. If the light does not blink or
blinks rapidly, it usually means one
of the turn signal bulbs is burned out
(see page ). Replace the bulb as
soon as possible, since other drivers
cannot see that you are signalling.
A burned out brake light is a hazard
when drivers behind you cannot tell
you are braking. Have your brake
lights repaired right away. The appropriate light comes on in
this display if the trunk or either
door is not closed tightly. If a brake
light does not work, the indicator comes on when you
push the brake pedal with the
ignition switch ON (II).
All the lights in the monitor display
come on when you turn the ignition
switch ON (II). The lights go of f
af ter the engine starts and the trunk
and both doors are closed tightly. WhenyouturnontheHazard
Warning switch, both turn signal
lights blink. All turn signals on the
outside of the car should f lash.
292 ‘‘Daytime Running
Lights’’ Indicator
Turn Signal and
Hazard Warning
Indicators
Door and Brake L amp Monitor
Indicator L ights
Inst rument s and Cont rols61
BRAKE
LAMP
Page 77 of 375
These keys contain electronic
circuits that are activated by the
Immobilizer System. They will not
work to start the engine if the
circuits are damaged.Protect the keys f rom direct
sunlight, high temperature, and
high humidity.
Donotdropthekeysorsetheavy
objects on them.
Keep the keys away f rom liquids.
If they get wet, dry them immedi-
ately with a soft cloth.
The keys do not contain batteries.
Do not try to take them apart.
Some models also come with two
remote transmitters; see page for
an explanation of their operation.
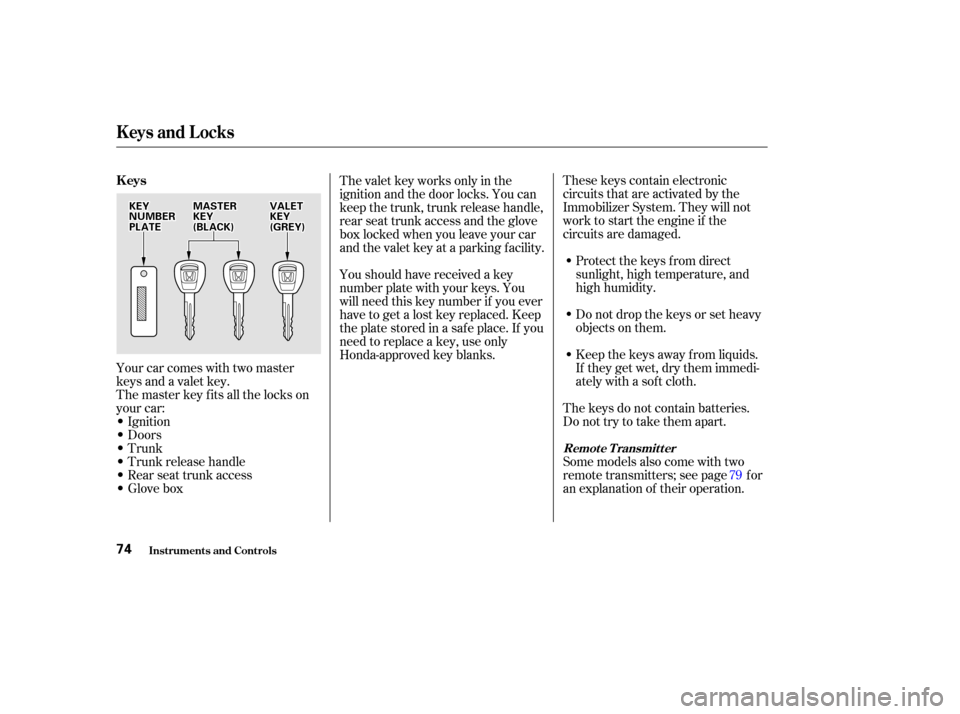
The master key fits all the locks on
your car:
Ignition
Doors
Trunk
Trunk release handle
Rear seat trunk access
Glovebox Your car comes with two master
keys and a valet key. Youshouldhavereceivedakey
number plate with your keys. You
will need this key number if you ever
have to get a lost key replaced. Keep
the plate stored in a saf e place. If you
need to replace a key, use only
Honda-approved key blanks. The valet key works only in the
ignition and the door locks. You can
keep the trunk, trunk release handle,
rear seat trunk access and the glove
boxlockedwhenyouleaveyourcar
and the valet key at a parking f acility.
79
Keys and Locks
Inst rument s and Cont rols
Remote Transmitter
Keys
74
K KEEY
Y
N
NU UMM B
BEER
R
P
P L
LAA T
TE
E M
M
A
AS
STTE
ER
R
K
KE EY
Y
(
( B
BL LAA C
CKK)) V
V
A
AL
LEE T
T
K
KE EY
Y
(
( G
GR REEY
Y) )
Page 83 of 375
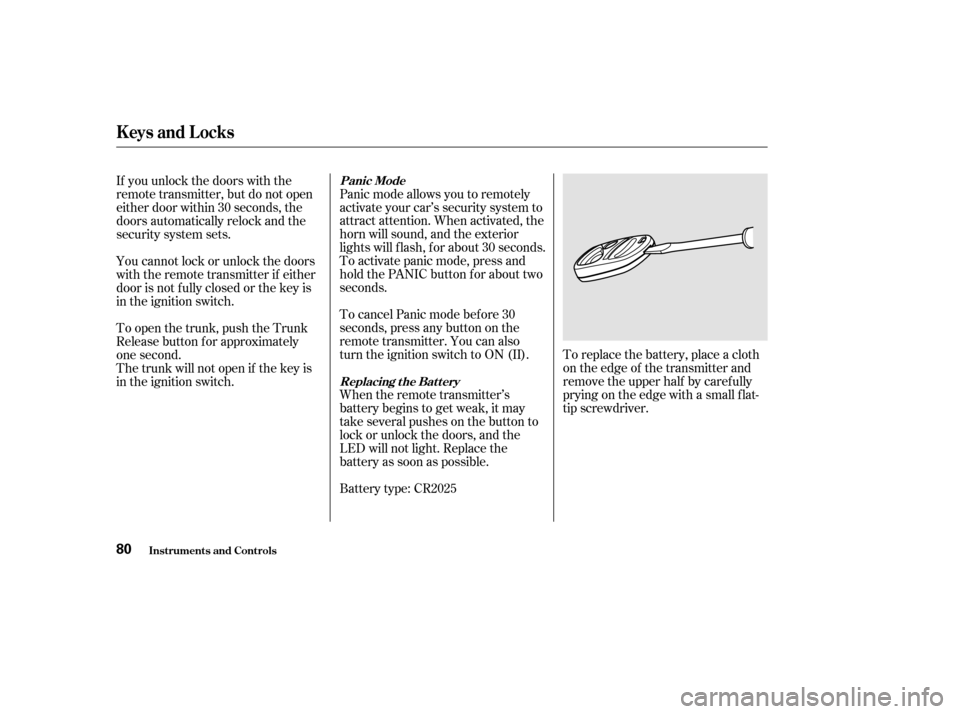
To replace the battery, place a cloth
on the edge of the transmitter and
remove the upper half by carefully
prying on the edge with a small f lat-
tip screwdriver.
Panic mode allows you to remotely
activate your car’s security system to
attract attention. When activated, the
horn will sound, and the exterior
lights will f lash, f or about 30 seconds.
To activate panic mode, press and
hold the PANIC button for about two
seconds.
To cancel Panic mode bef ore 30
seconds, press any button on the
remote transmitter. You can also
turn the ignition switch to ON (II).
When the remote transmitter’s
battery begins to get weak, it may
take several pushes on the button to
lock or unlock the doors, and the
LED will not light. Replace the
battery as soon as possible.
Battery type: CR2025
If you unlock the doors with the
remote transmitter, but do not open
either door within 30 seconds, the
doors automatically relock and the
security system sets.
You cannot lock or unlock the doors
with the remote transmitter if either
door is not f ully closed or the key is
in the ignition switch.
To open the trunk, push the Trunk
Release button f or approximately
one second.
The trunk will not open if the key is
in the ignition switch.
Keys and Locks
Inst rument s and Cont rols
Panic Mode
Replacing the Battery
80
Page 85 of 375
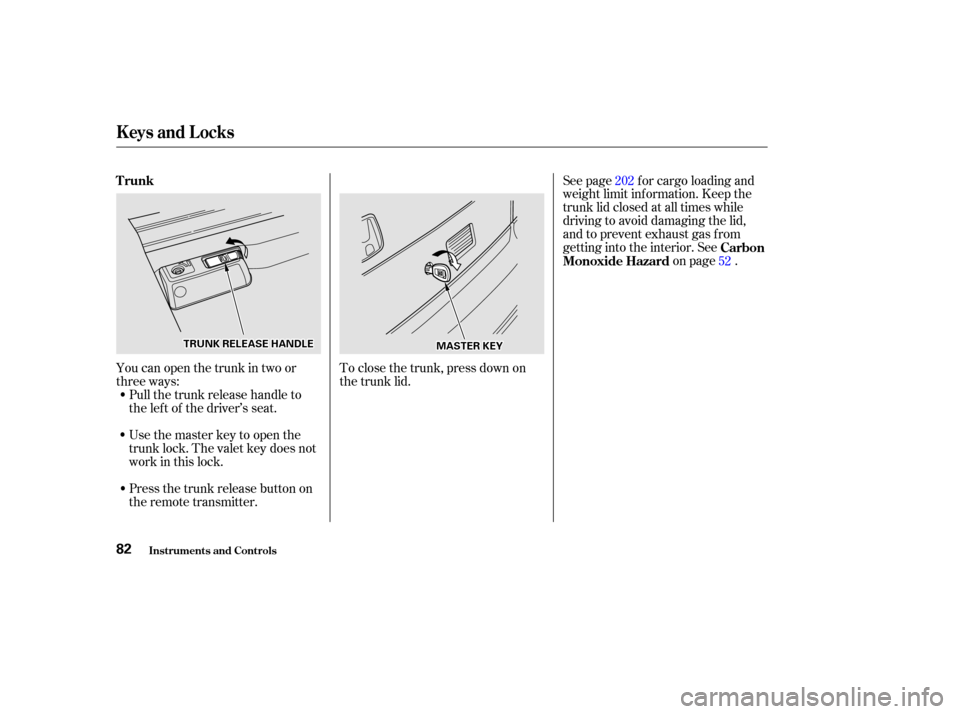
Usethemasterkeytoopenthe
trunk lock. The valet key does not
work in this lock.To close the trunk, press down on
the trunk lid. See page f or cargo loading and
weight limit inf ormation. Keep the
trunk lid closed at all times while
driving to avoid damaging the lid,
and to prevent exhaust gas from
getting into the interior. See
on page .
Pull the trunk release handle to
the lef t of the driver’s seat.
Press the trunk release button on
the remote transmitter.
Youcanopenthetrunkintwoor
three ways:
52
202
Trunk
Carbon
Monoxide Hazard
Keys and Locks
Inst rument s and Cont rols82
T T R
RU UN NKK R
REEL
LEE A
A S
SEE H
HA
AN
ND DL
LEE
M
MA
AS
STTE
ER
R K
KEEY
Y
Page 86 of 375
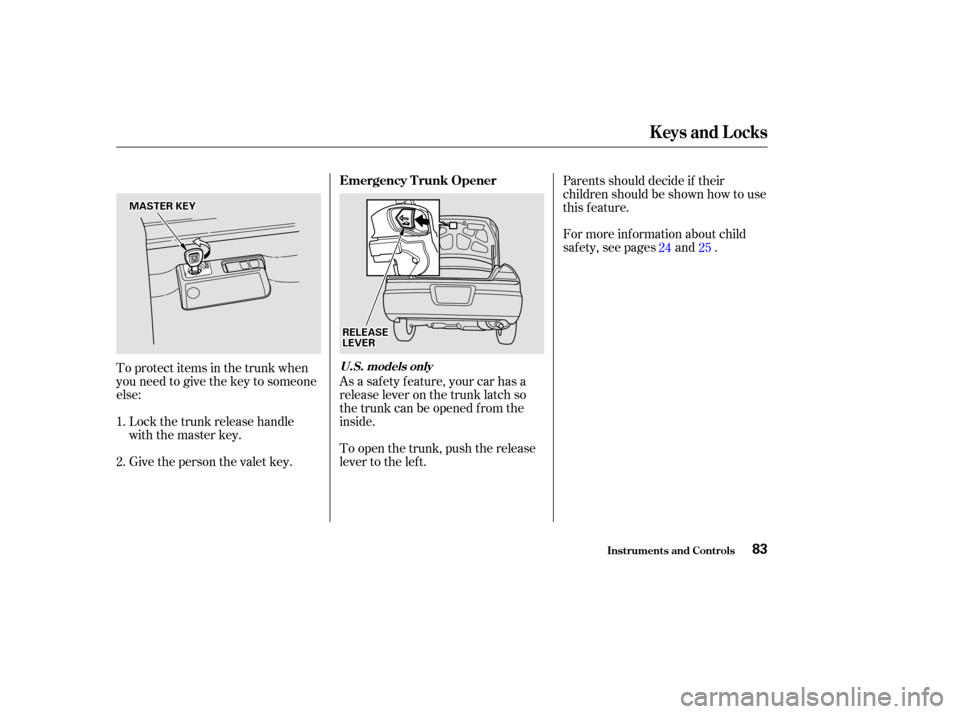
To protect items in the trunk when
you need to give the key to someone
else:Lock the trunk release handle
with the master key.
Give the person the valet key. As a saf ety f eature, your car has a
release lever on the trunk latch so
the trunk can be opened f rom the
inside. Parents should decide if their
children should be shown how to use
this feature.
For more inf ormation about child
saf ety, see pages and .
To open the trunk, push the release
lever to the lef t.
1.
2. 24 25
Keys and Locks
Inst rument s and Cont rols
Emergency T runk Opener
U.S. models only
83
M M
A
AS
STTE
ER
R K
KEEY
Y
R
REEL
LEE A
A S
SEE
L
LE E V
V E
ER
R
Page 94 of 375
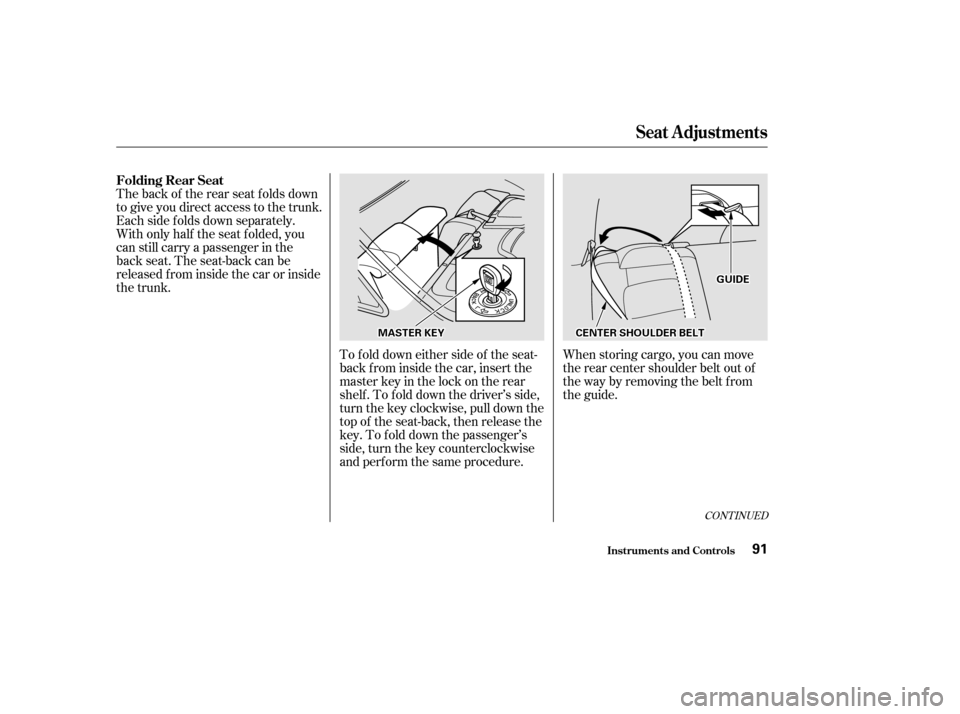
When storing cargo, you can move
therearcentershoulderbeltoutof
the way by removing the belt f rom
the guide.
The back of the rear seat folds down
to give you direct access to the trunk.
Each side f olds down separately.
With only half the seat f olded, you
can still carry a passenger in the
back seat. The seat-back can be
released f rom inside the car or inside
the trunk.
To f old down either side of the seat-
back f rom inside the car, insert the
master key in the lock on the rear
shelf. To fold down the driver’s side,
turn the key clockwise, pull down the
top of the seat-back, then release the
key. To f old down the passenger’s
side, turn the key counterclockwise
and perf orm the same procedure.
CONT INUED
Folding Rear Seat
Seat A djustments
Inst rument s and Cont rols91
M MA
AS
STTE
ER
R K
KEEY
Y C
CEEN
NT TE
ER
R S
SHH O
OU ULLDD E
ER
R B
BEEL
LTT G
GU
UIIDD E
E
Page 95 of 375
Make sure all rear shoulder belts are
positioned in f ront of the rear seat-
back whenever the seat-back is in its
upright position.
Never drive with the seat-back
f olded down and the trunk lid open.
Seeon
page .
To lock the seat-back upright, push it
f irmly against the trunk panel. Make
sure it is latched in place by pulling
on the top of the seat. Make sure all items in the trunk, or
items extending through the opening
into the back seat, are secured.
Looseitemscanflyforwardand
cause injury if you have to brake
hard. See
on page
.
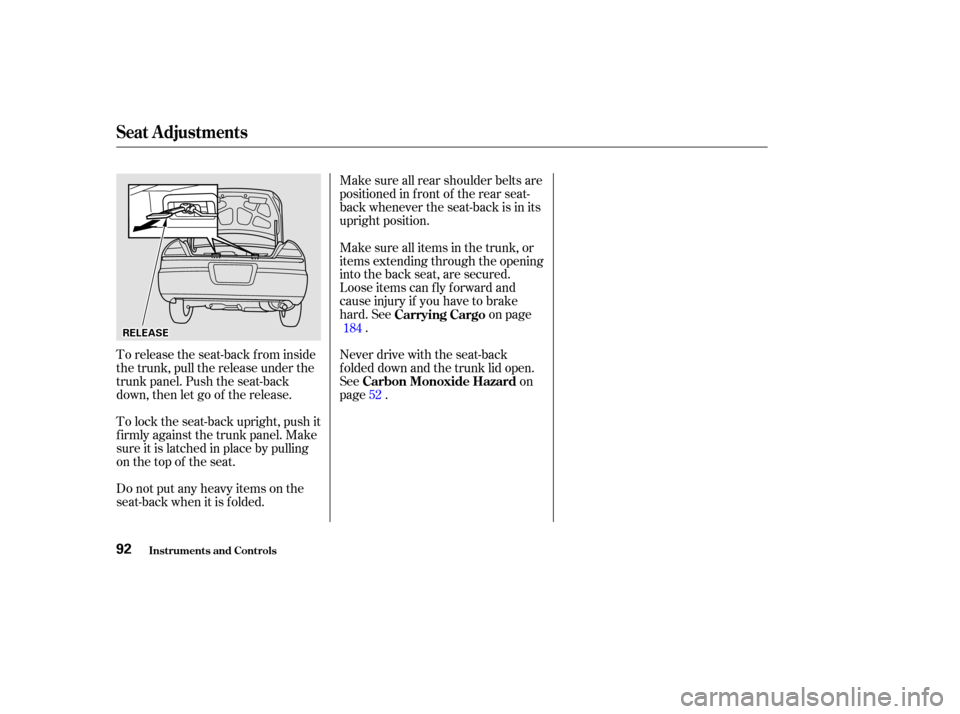
To release the seat-back from inside
the trunk, pull the release under the
trunk panel. Push the seat-back
down, then let go of the release.
Do not put any heavy items on the
seat-back when it is folded. 184
52
Carbon Monoxide Hazard Carrying Cargo
Seat A djustments
Inst rument s and Cont rols92
R RE
EL
LEE A
A S
SEE