engine HONDA ACCORD COUPE 2003 CL7 / 7.G Owner's Manual
[x] Cancel search | Manufacturer: HONDA, Model Year: 2003, Model line: ACCORD COUPE, Model: HONDA ACCORD COUPE 2003 CL7 / 7.GPages: 429, PDF Size: 6.42 MB
Page 131 of 429

For saf ety, make sure you have a
clear view through all the windows
bef ore driving away.To shut of f the system temporarily,
turn the fan speed and temperature
control dials all the way to the lef t.
These settings direct all the air f low
to the defroster vents at the base of
the windshield and the side window
def roster vents. The air f low will get
warmer and clear the windows faster
as the engine warms up. You can
close the side vents with the dial
underneath each vent. This will send
more warm air to the windshield
defroster vents.
To remove exterior f rost or ice f rom
the windshield and side windows
after the car has been sitting out in
cold weather:
Start the engine.
Select .
When you select , the
system automatically switches to
Fresh Air mode and turns on the
A/C. (The indicator above the
A/C button stays off.)
Set the f an and temperature
controls to maximum.
To rapidly remove exterior f rost or
ice f rom the windshield (on very cold
days), f irst select the Recirculation
mode. Once the windshield is clear,
select the Fresh Air mode to avoid
f ogging the windows. No air flow can cause the windows to
fogup.Itisrecommendedthatyou
keep the fan on at all times so stale
air and moisture do not build up in
the interior and cause f ogging.
1.
2.
3.
Heating and Cooling
Comf ort and Convenience Feat ures
To Turn Everything Of f
128
Page 133 of 429
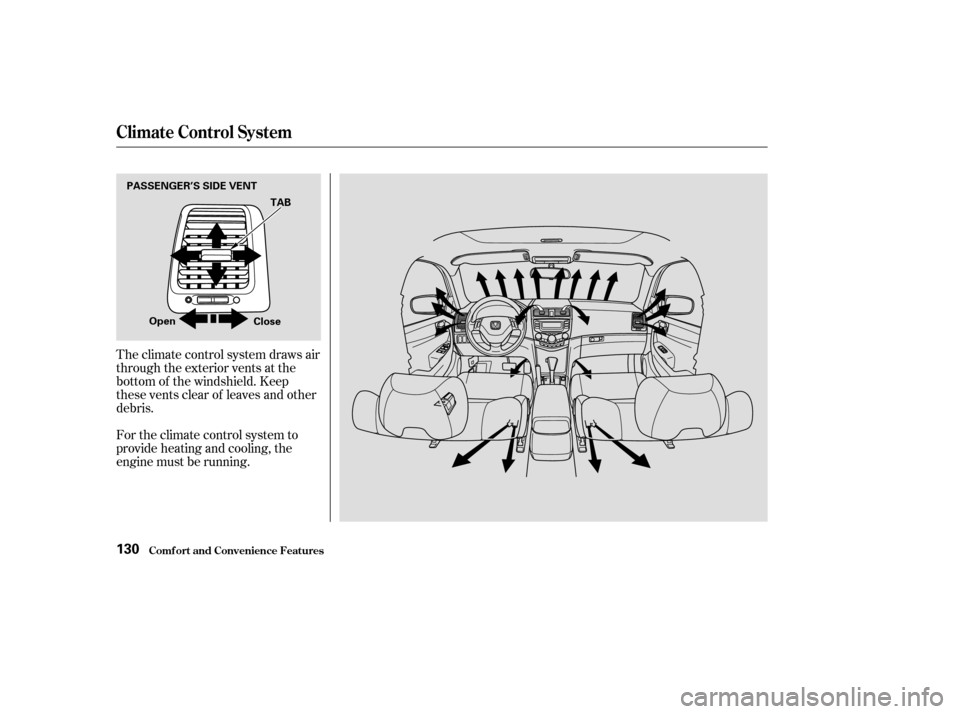
The climate control system draws air
through the exterior vents at the
bottom of the windshield. Keep
these vents clear of leaves and other
debris.
For the climate control system to
provide heating and cooling, the
engine must be running.
Climat e Cont rol Syst em
Comf ort and Convenience Feat ures130
PASSENGER’S SIDE VENTOpen CloseTAB
Page 226 of 429

Bef ore you begin driving your Honda,
youshouldknowwhatgasolineto
use, and how to check the levels of
important f luids. You also need to
know how to properly store luggage
or packages. The inf ormation in this
section will help you. If you plan to
add any accessories to your car,
please read the inf ormation in this
section f irst..............................
Break-in Period .224
.........................................
Gasoline .224
.........
Service Station Procedures . 225
................
Filling the Fuel Tank . 225
....................
Opening the Hood .226
...............................
Oil Check .228
.........
Engine Coolant Check . 230
...............................
Fuel Economy .231
............................
Car Condition .231
...........................
Driving Habits .231
...
Accessories and Modif ications . 232
.............................
Carrying Cargo .234
Bef ore Driving
Bef ore Driving223
Page 227 of 429

During this period:Avoid full-throttle starts and rapid
acceleration.
Avoidhardbraking.Newbrakes
need to be broken-in by moderate
use f or the f irst 200 miles (300
km).
Help assure your car’s f uture
reliability and perf ormance by paying
extra attention to how you drive
during the f irst 600 miles (1,000 km).
Youshouldfollowthesesamere-
commendations with an overhauled
or exchanged engine, or when the
brakes are relined.
Do not change the oil until the
recommended time or mileage
intervalshowninthemaintenance
schedule. Your Honda is designed to operate
on unleaded gasoline with a pump
octane number of 86 or higher. Use
of a lower octane gasoline can cause
a persistent, heavy metallic rapping
noise in the engine that can lead to
mechanical damage.
In Canada, some gasolines contain
an octane-enhancing additive called
MMT. If you use such gasolines,
your emission control system
perf ormance may deteriorate and
the Malf unction Indicator Lamp on
your instrument panel may turn on.
If this happens, contact your
authorized Honda dealer f or service.
Using gasoline containing lead will
damage your vehicle’s emissions
controls. This contributes to air
pollution. We recommend gasolines containing
detergent additives that help prevent
f uel system and engine deposits. If you drive with the low engine
speed (below than about 1,000 rpm),
you may f eel the engine knocking. In
this case, you can use premium
unleaded gasoline with a pump
octane number of 91 or higher to
prevent the engine f rom knocking.
On EX-V6 with manual transmission
Bef ore Driving
Break-in Period Gasoline
Break-in Period, Gasoline
224
Page 228 of 429
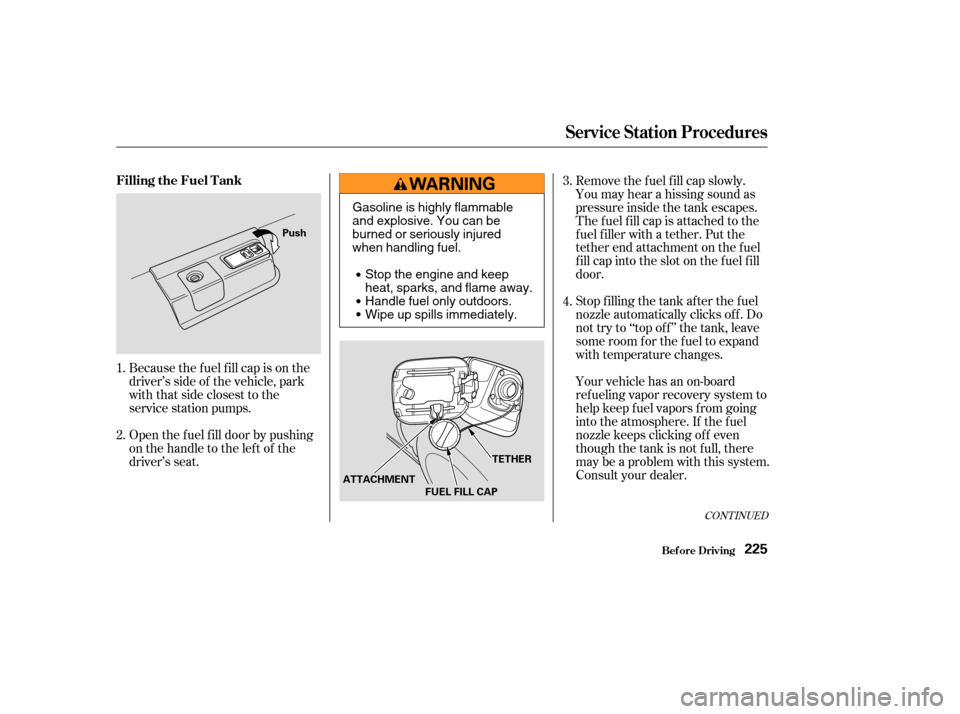
Open the f uel f ill door by pushing
onthehandletotheleftof the
driver’s seat. Because the f uel f ill cap is on the
driver’s side of the vehicle, park
with that side closest to the
service station pumps.Remove the f uel f ill cap slowly.
You may hear a hissing sound as
pressure inside the tank escapes.
The fuel fill cap is attached to the
f uel f iller with a tether. Put the
tether end attachment on the fuel
f ill cap into the slot on the f uel f ill
door.
Stop f illing the tank af ter the f uel
nozzle automatically clicks of f . Do
not try to ‘‘top of f ’’ the tank, leave
some room f or the f uel to expand
with temperature changes.
Your vehicle has an on-board
ref ueling vapor recovery system to
help keep f uel vapors f rom going
into the atmosphere. If the fuel
nozzle keeps clicking of f even
though the tank is not full, there
maybeaproblemwiththissystem.
Consult your dealer.
3.
4.
1.
2.
CONT INUED
Service Station Procedures
Bef ore Driving
Filling the Fuel Tank
225
FUEL FILL CAP TETHER
Push
ATTACHMENT
Gasoline is highly flammable
and explosive. You can be
burned or seriously injured
when handling fuel.Stop the engine and keep
heat, sparks, and flame away.
Handle fuel only outdoors.
Wipe up spills immediately.
Page 231 of 429
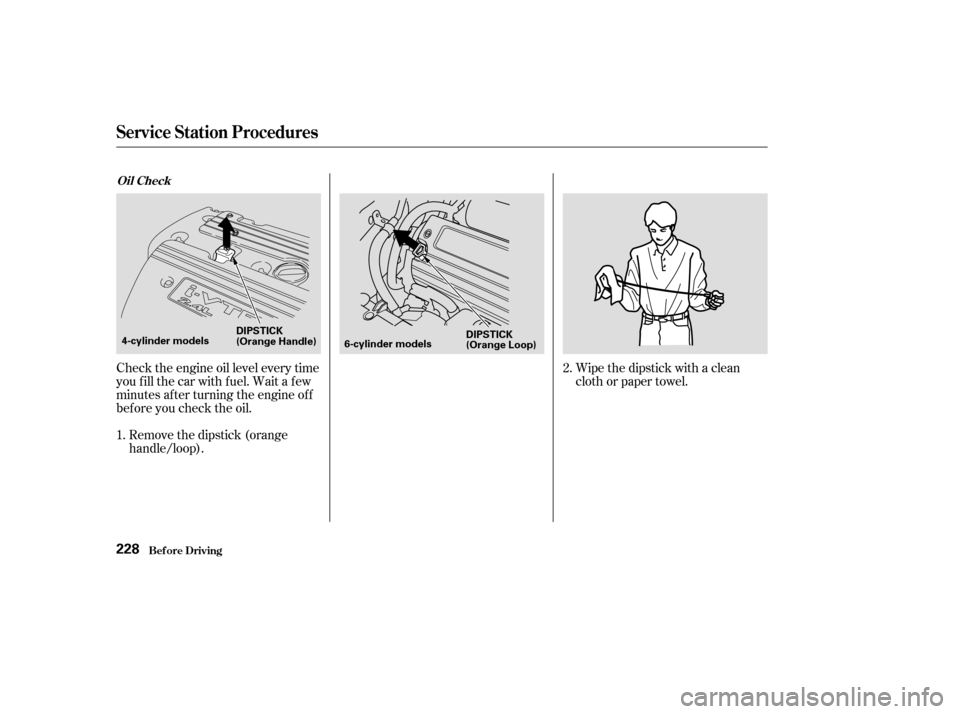
Check the engine oil level every time
you f ill the car with f uel. Wait a f ew
minutes af ter turning the engine of f
bef ore you check the oil.Wipe the dipstick with a clean
cloth or paper towel.
Remove the dipstick (orange
handle/loop).
1. 2.
Service Station Procedures
Bef ore Driving
Oil Check
228
4-cylinder models
6-cylinder models
DIPSTICK
(Orange Handle)
DIPSTICK
(Orange Loop)
Page 233 of 429
Refer toon page f or inf ormation
on checking other items in your
Honda.
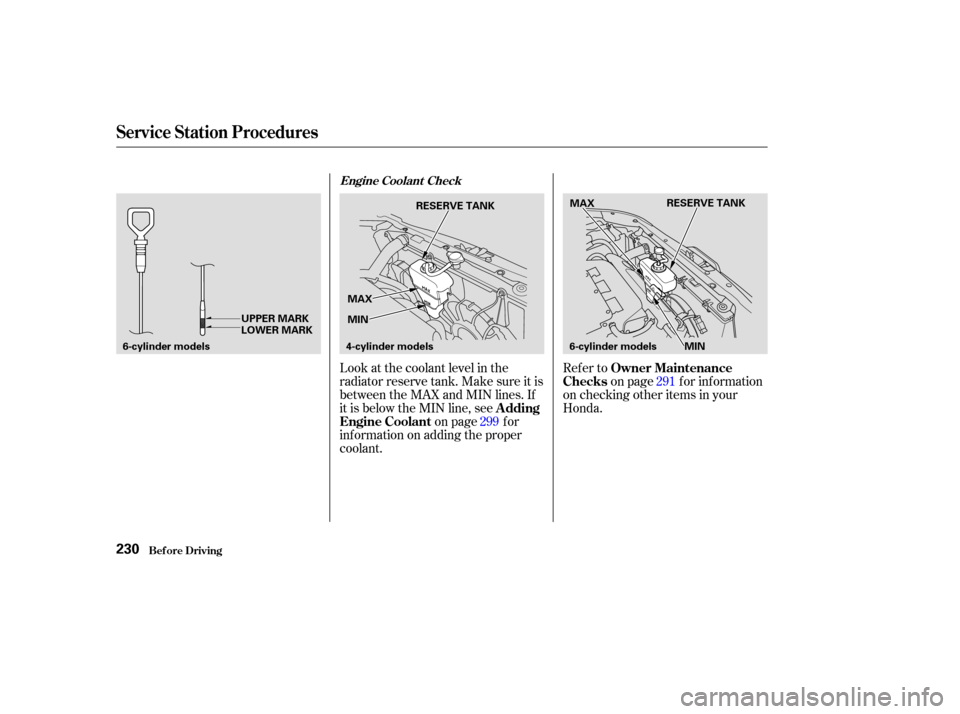
Look at the coolant level in the
radiator reserve tank. Make sure it is
between the MAX and MIN lines. If
it is below the MIN line, see
on page f or
inf ormation on adding the proper
coolant. 299 291
Service Station Procedures
Bef ore Driving
Owner Maintenance
Checks
A dding
Engine Coolant
Engine Coolant Check
230
UPPER MARK
LOWER MARK RESERVE TANK
4-cylinder models MIN MAX MAX
RESERVE TANK
6-cylinder models MIN
6-cylinder models
Page 234 of 429

A cold engine uses more f uel than a
warm engine. It is not necessary to
‘‘warm-up’’ a cold engine by letting it
idle f or a long time. You can drive
away in about a minute, no matter
how cold it is outside. The engine
will warm up f aster, and you get
better f uel economy. To cut down on
the number of ‘‘cold starts,’’ try to
combine several short trips into one.
You can improve f uel economy by
driving moderately. Rapid acceler-
ation, abrupt cornering, and hard
braking use more f uel.
Always drive in the highest gear that
allows the engine to run and acceler-
ate smoothly.
The air conditioning puts an extra
load on the engine which makes it
usemorefuel.Turnoff theA/Cto
cut down on air conditioning use.
Use the f low-through ventilation
when the outside air temperature is
moderate.
The condition of your car and your
driving habits are the two most
important things that affect the fuel
mileage you get.
Always maintain your car according
to the maintenance schedule. This
will keep it in top operating condition.
Depending on traf f ic conditions, try
to maintain a constant speed. Every
time you slow down and speed up,
your car uses extra f uel. Use the
cruise control, when appropriate, to
increase f uel economy.
An important part of that mainte-
nance is the
(see page ). For
example, an underinf lated tire
causes more ‘‘rolling resistance,’’
which uses f uel. It also wears out
f aster, so check the tire pressure at
least monthly.
In winter, the build-up of snow on
your car’s underside adds weight and
rolling resistance. Frequent cleaning
helps your f uel mileage and reduces
thechanceof corrosion. 291 Driving Habits
Owner Maintenance
Checks Car Condition
Fuel Economy
Bef ore Driving231
Page 242 of 429
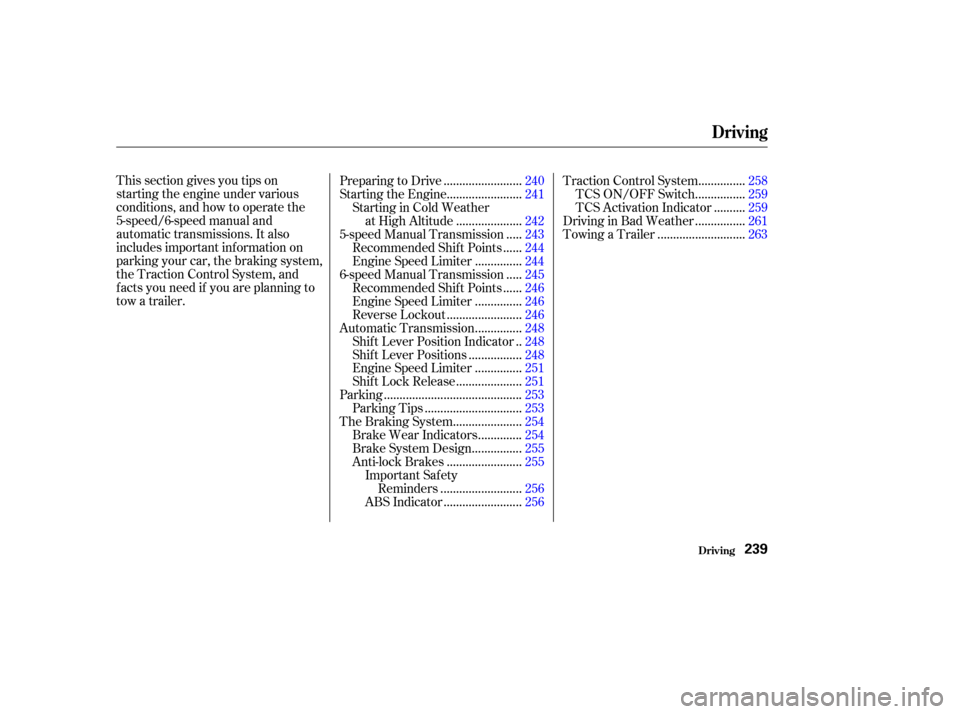
This section gives you tips on
starting the engine under various
conditions, and how to operate the
5-speed/6-speed manual and
automatic transmissions. It also
includes important inf ormation on
parking your car, the braking system,
the Traction Control System, and
f acts you need if you are planning to
tow a trailer.........................
Preparing to Drive .240
.......................
Starting the Engine .241
Starting in Cold Weather ....................
at High Altitude .242
....
5-speed Manual Transmission . 243
.....
Recommended Shif t Points . 244
..............
Engine Speed Limiter . 244
....
6-speed Manual Transmission . 245
.....
Recommended Shif t Points . 246
..............
Engine Speed Limiter . 246
.......................
Reverse Lockout .246
..............
Automatic Transmission . 248
.
Shif t Lever Position Indicator . 248
................
Shif t Lever Positions . 248
..............
Engine Speed Limiter . 251
....................
Shif t Lock Release . 251
...........................................
Parking .253
..............................
Parking Tips .253
.....................
The Braking System .254
.............
Brake Wear Indicators . 254
...............
Brake System Design . 255
.......................
Anti-lock Brakes .255
Important Saf ety .........................
Reminders .256
........................
ABS Indicator .256 ..............
Traction Control System . 258
...............
TCS ON/OFF Switch . 259
.........
TCSActivationIndicator . 259
...............
Driving in Bad Weather . 261
...........................
Towing a Trailer .263
Driving
Driving239
Page 243 of 429

Make sure all windows, mirrors,
and outside lights are clean and
unobstructed. Remove f rost, snow,
or ice.
Check that the hood and trunk are
f ully closed.Check the adjustment of the seat
(see page ).
Check the adjustment of the
inside and outside mirrors (see
page ).
Check the adjustment of the
steering wheel (see page ).
Make sure the doors are securely
closed and locked.
Fasten your seat belt. Check that
your passengers have f astened
their seat belts (see page ).Turn the ignition switch ON (II).
Check the indicator lights in the
instrument panel.
Start the engine (see page ).
Check the gauges and indicator
lights in the instrument panel (see
page ).
Check that any items you may be
carrying with you inside are stored
properly or f astened down
securely. Visually check the tires. If a tire
looks low, use a gauge to check its
pressure.
Youshoulddothefollowingchecks
and adjustments every day bef ore
you drive your car.
3.2.
1.
4. 5.
6.
7.
8.
9. 11.
12. 10.
16 61
94
108 80 241
Preparing to Drive
Driving240