mirror HONDA ACCORD COUPE 2003 CL7 / 7.G Owners Manual
[x] Cancel search | Manufacturer: HONDA, Model Year: 2003, Model line: ACCORD COUPE, Model: HONDA ACCORD COUPE 2003 CL7 / 7.GPages: 429, PDF Size: 6.42 MB
Page 5 of 429
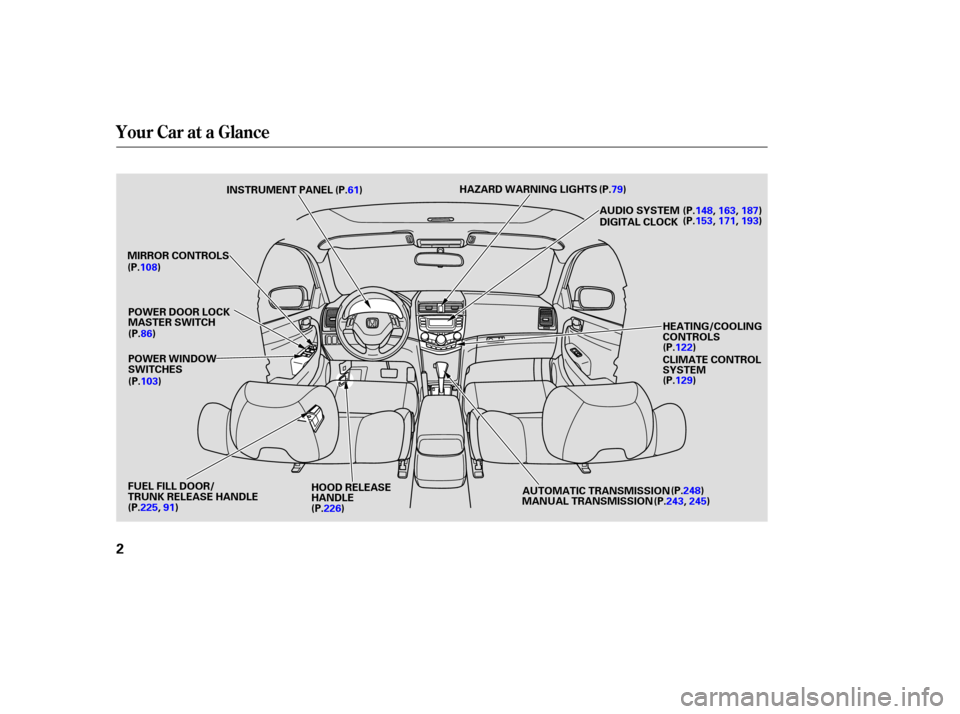
Your Car at a Glance
2
POWER WINDOW
SWITCHES
MIRROR CONTROLS
AUDIO SYSTEM
DIGITAL CLOCK
INSTRUMENT PANEL (P.
61)
POWER DOOR LOCK
MASTER SWITCH
HOOD RELEASE
HANDLE AUTOMATIC TRANSMISSION
MANUAL TRANSMISSION HEATING/COOLING
CONTROLS
(P.122)
CLIMATE CONTROL
SYSTEM
(P.129)
FUEL FILL DOOR/
TRUNK RELEASE HANDLE
(P.108)
(P.86)
(P.103)
(P.225, 91)
(P.226) (P.243,
245)
(P.248) (P.153,
171,193)
(P.148,
163,187)
HAZARD WARNING LIGHTS
(P.79)
Page 62 of 429
This section gives inf ormation about
the controls and displays that
contribute to the daily operation of
your Honda. All the essential
controls are within easy reach............................
Control Locations .60
...............................
Indicator Lights .61
.............................................
Gauges .68
...............................
Speedometer .68
.................................
Tachometer .68
.....................................
Odometer .69
Outside Temperature ...................................
Indicator .69
...................................
Trip Meter .70
...................
Temperature Gauge . 70
..................................
Fuel Gauge .70
Maintenance Required ...................................
Indicator .71
Controls Near the Steering .......................................
Wheel .73
...................................
Headlights .74 Automatic Lighting Off
.....................................
Feature .75
............
Daytime Running Lights . 76
....
Instrument Panel Brightness . 76
................................
Turn Signals .77
.....................
Windshield Wipers .77
..................
Windshield Washers . 79
..........................
Hazard Warning .79
.............
Rear Window Def ogger . 79
......
Steering Wheel Adjustment . 80
...............................
Keys and Locks .82
..............................................
Keys .82
....................
Immobilizer System . 83
............................
Ignition Switch .84
......................
Power Door Locks .86
...................
Remote Transmitter . 87
...........................................
Trunk .91
........
Emergency Trunk Opener . 92
....................................
Glove Box .93
............................
Seat Adjustments .94
.............
Front Seat Adjustments . 94
Driver’s Seat Manual Height ..............................
Adjustment .95
Driver’s Seat Power Height ..............................
Adjustment .95 Driver’s Seat Power
............................
Adjustments .96
...........
Driver’s Lumbar Support . 97
........................
Rear Seat Access .98
..........................
Head Restraints .99
.....................
Folding Rear Seat .100
..................................
Seat Heaters .102
............................
Power Windows .103
.......................................
Moonroof .107
...........................................
Mirrors .108
..
Adjusting the Power Mirrors . 108
...............................
Parking Brake .110
.................
Console Compartment . 111
..........................................
Armrest .111
.........................
Beverage Holders .112
.........................
Center CD Pocket .113
...................................
Coin Pocket .113
........................................
Sun Visor .114
................................
Vanity Mirror .115
......................................
Coat Hook .115
........................
Sunglasses Holder .116
............
Accessory Power Sockets . 116
...............................
Interior Lights .117
..............................
Ceiling Light .117
...................................
Spotlights .118
........................
Courtesy Lights .119
Instruments and Controls
Inst rument s and Cont rols59
Page 63 of 429
Inst rument s and Cont rols
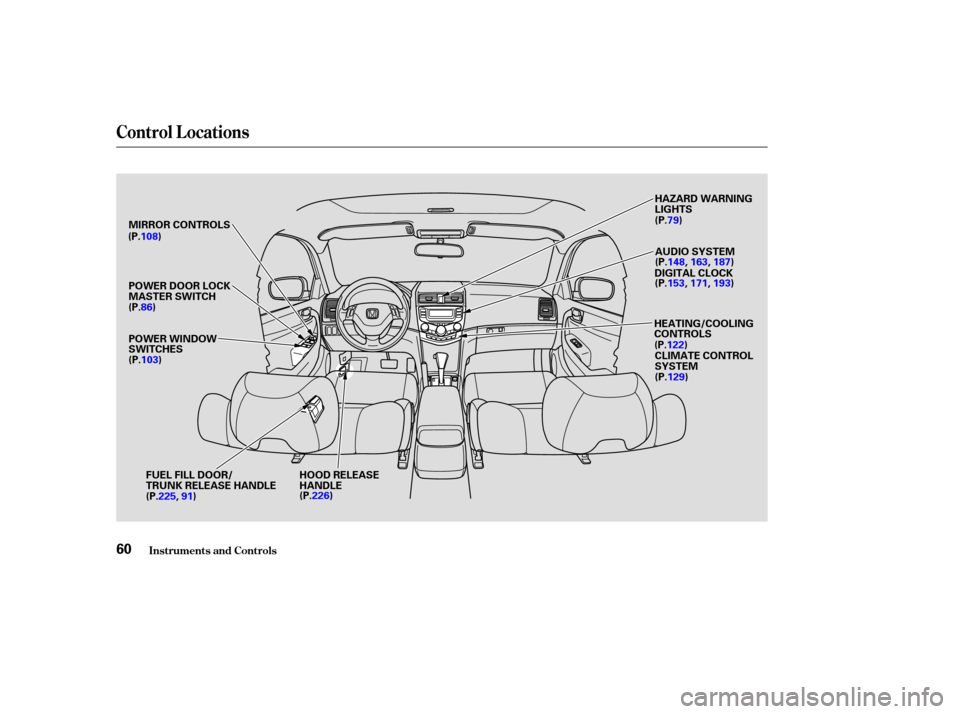
Control L ocations
60
MIRROR CONTROLS
POWER WINDOW
SWITCHESHOOD RELEASE
HANDLE AUDIO SYSTEM
DIGITAL CLOCK
POWER DOOR LOCK
MASTER SWITCH
(P.122)CLIMATE CONTROL
SYSTEM
HEATING/COOLING
CONTROLS
(P.129)
FUEL FILL DOOR/
TRUNK RELEASE HANDLE
(P.108)
(P.86)(P.103)
(P.225, 91) (P.226) (P.
79)
(P.153, 171,193)
(P.148,
163,187)
HAZARD WARNING
LIGHTS
Page 111 of 429

Adjust the outside mirrors with the
adjustment knob on the driver’s door
armrest:Turn the ignition switch ON (II).
Turn the adjustment knob to L
(driver’s side) or R (passenger’s
side).
Keeptheinsideandoutsidemirrors
clean and adjusted f or best visibility.
Be sure to adjust the mirrors bef ore
you start driving.
The inside mirror has day and night
positions. The night position reduces
glare f rom headlights behind you.
Flip the tab on the bottom edge of
the mirror to select the day or night
position.
The moonroof has a key-of f delay.
You can still open and close the
moonroof f or up to ten minutes af ter
you turn of f the ignition. The key-of f
delay cancels as soon as you open
either door. You must then turn the
ignition ON (II) f or the moonroof to
operate.
1.
2.
Inst rument s and Cont rols
Mirrors
Moonroof , Mirrors
Adjusting the Power Mirrors
108
TABADJUSTMENT KNOB
If you try to open the moonroof in
below-f reezing temperatures, or when
it is covered with snow or ice, you can
damage the moonroof panel or motor.
Page 112 of 429
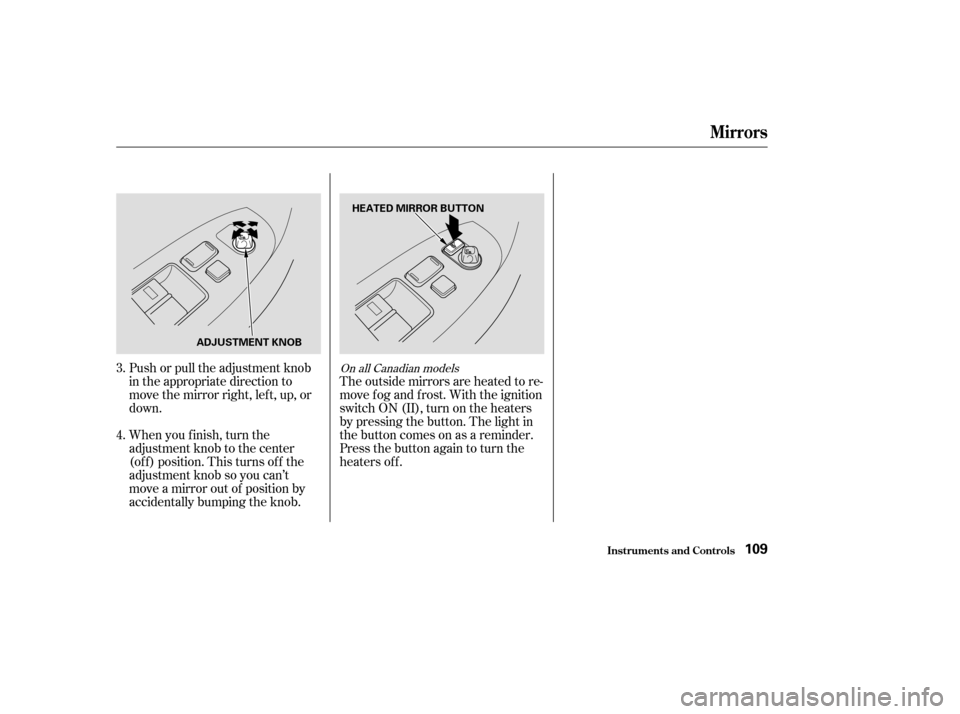
Push or pull the adjustment knob
in the appropriate direction to
move the mirror right, left, up, or
down.
When you f inish, turn the
adjustment knob to the center
(of f ) position. This turns of f the
adjustment knob so you can’t
move a mirror out of position by
accidentally bumping the knob.The outside mirrors are heated to re-
move fog and frost. With the ignition
switchON(II),turnontheheaters
by pressing the button. The light in
the button comes on as a reminder.
Press the button again to turn the
heaters off.
3.
4.On all Canadian models
Mirrors
Inst rument s and Cont rols109
HEATED MIRROR BUTTON
ADJUSTMENT KNOB
Page 117 of 429
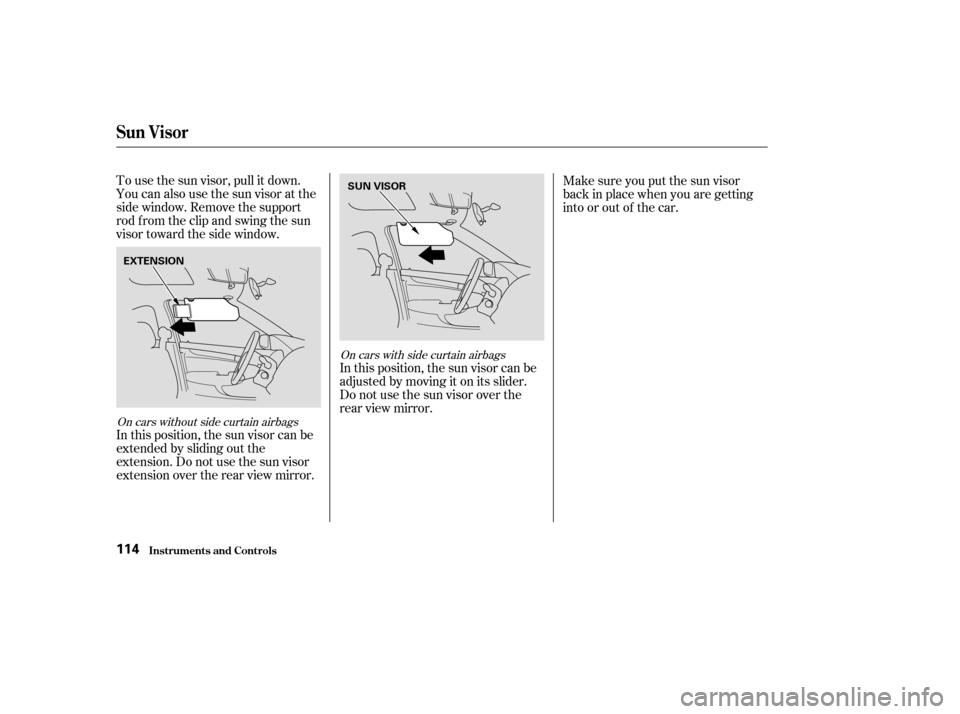
To use the sun visor, pull it down.
You can also use the sun visor at the
side window. Remove the support
rod f rom the clip and swing the sun
visor toward the side window.In this position, the sun visor can be
adjusted by moving it on its slider.Make sure you put the sun visor
back in place when you are getting
into or out of the car.
In this position, the sun visor can be
extended by sliding out the
extension. Do not use the sun visor
extension over the rear view mirror. Do not use the sun visor over the
rear view mirror.
On cars without side curtain airbags
On cars with side curtain airbags
Inst rument s and Cont rols
Sun Visor
114
EXTENSION SUN VISOR
Page 118 of 429
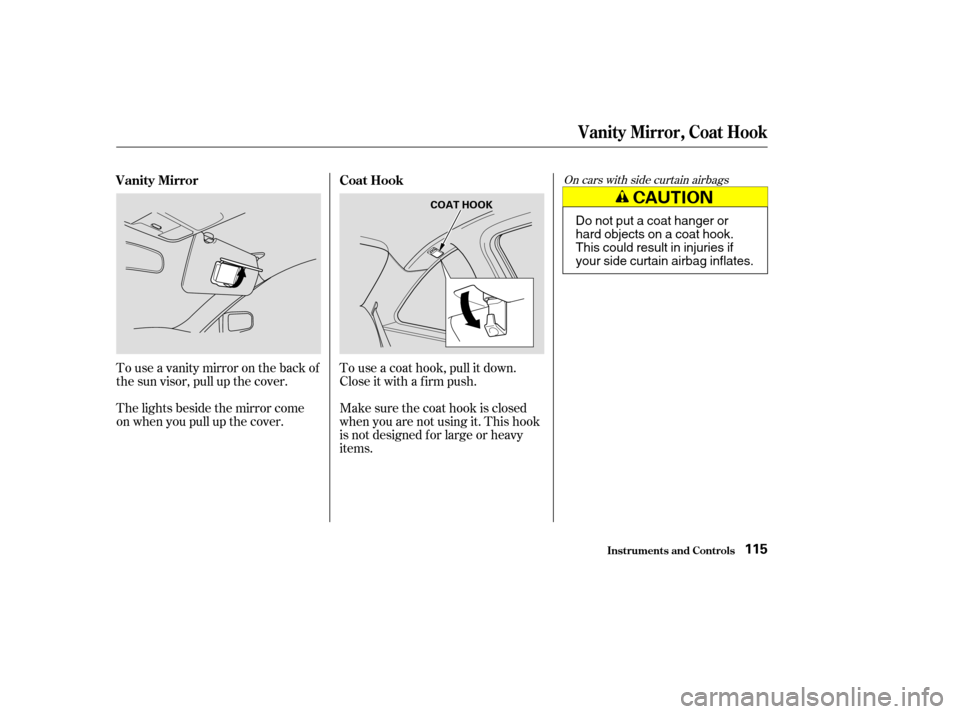
Touseavanitymirroronthebackof
the sun visor, pull up the cover.
The lights beside the mirror come
on when you pull up the cover.Make sure the coat hook is closed
when you are not using it. This hook
is not designed f or large or heavy
items. To use a coat hook, pull it down.
Close it with a f irm push.
On cars with side curtain airbags
Inst rument s and Cont rols
Vanity Mirror
Coat Hook
Vanity Mirror, Coat Hook
115
COAT HOOK
Do not put a coat hanger or
hard objects on a coat hook.
This could result in injuries if
your side curtain airbag inflates.
Page 243 of 429

Make sure all windows, mirrors,
and outside lights are clean and
unobstructed. Remove f rost, snow,
or ice.
Check that the hood and trunk are
f ully closed.Check the adjustment of the seat
(see page ).
Check the adjustment of the
inside and outside mirrors (see
page ).
Check the adjustment of the
steering wheel (see page ).
Make sure the doors are securely
closed and locked.
Fasten your seat belt. Check that
your passengers have f astened
their seat belts (see page ).Turn the ignition switch ON (II).
Check the indicator lights in the
instrument panel.
Start the engine (see page ).
Check the gauges and indicator
lights in the instrument panel (see
page ).
Check that any items you may be
carrying with you inside are stored
properly or f astened down
securely. Visually check the tires. If a tire
looks low, use a gauge to check its
pressure.
Youshoulddothefollowingchecks
and adjustments every day bef ore
you drive your car.
3.2.
1.
4. 5.
6.
7.
8.
9. 11.
12. 10.
16 61
94
108 80 241
Preparing to Drive
Driving240
Page 270 of 429

Many states and Canadian provinces
require special outside mirrors when
towing a trailer. Even if they don’t,
you should install special mirrors if
you cannot clearly see behind you, or
if the trailer creates a blind spot.
Askyourtrailersalesorrental
agency if any other items are
recommended or required f or your
towing situation.When preparing to tow, and bef ore
driving away, be sure to check the
f ollowing:
All weights and loads are within
limits (see pages and ).
Thehitch,safetychains,andany
other attachments are secure.
Allitemsonandinthetrailerare
properly secured and cannot shif t
while you drive. The car has been properly
serviced, and the tires, brakes,
suspension, and cooling system
are in good operating condition.
The lights and brakes on your car
and the trailer are working
properly. Your car tires and spare are
properly inf lated (see page ),
and the trailer tires and spare are
inflated as recommended by the
trailer maker.
263 264 334
Additional Trailer EquipmentPre-T ow Checklist
Towing a Trailer
Driving267
Page 354 of 429
CONT INUED
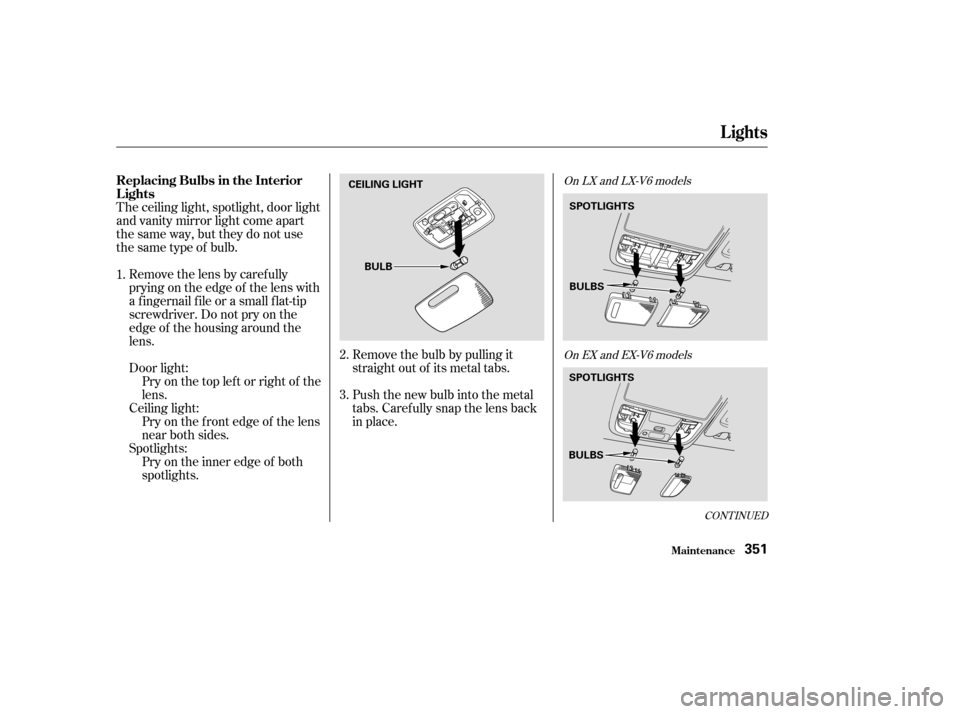
The ceiling light, spotlight, door light
and vanity mirror light come apart
the same way, but they do not use
thesametypeof bulb.Removethelensbycarefully
prying on the edge of the lens with
a f ingernail f ile or a small f lat-tip
screwdriver. Do not pry on the
edge of the housing around the
lens.
Door light:Pry on the top lef t or right of the
lens.
Ceiling light: Pry on the f ront edge of the lens
near both sides.
Spotlights: Pry on the inner edge of both
spotlights. Remove the bulb by pulling it
straight out of its metal tabs.
Push the new bulb into the metal
tabs. Carefully snap the lens back
in place.
1.
2.
3.
On LX and LX-V6 models
On EX and EX-V6 models
Lights
Maint enance
Replacing Bulbs in the Interior
Lights
351
CEILING LIGHTBULB SPOTLIGHTS
BULBS
SPOTLIGHTS
BULBS