change wheel HONDA ACCORD COUPE 2014 9.G Owners Manual
[x] Cancel search | Manufacturer: HONDA, Model Year: 2014, Model line: ACCORD COUPE, Model: HONDA ACCORD COUPE 2014 9.GPages: 593, PDF Size: 22.22 MB
Page 18 of 593
17
Quick Reference Guide
Driving (P 415)
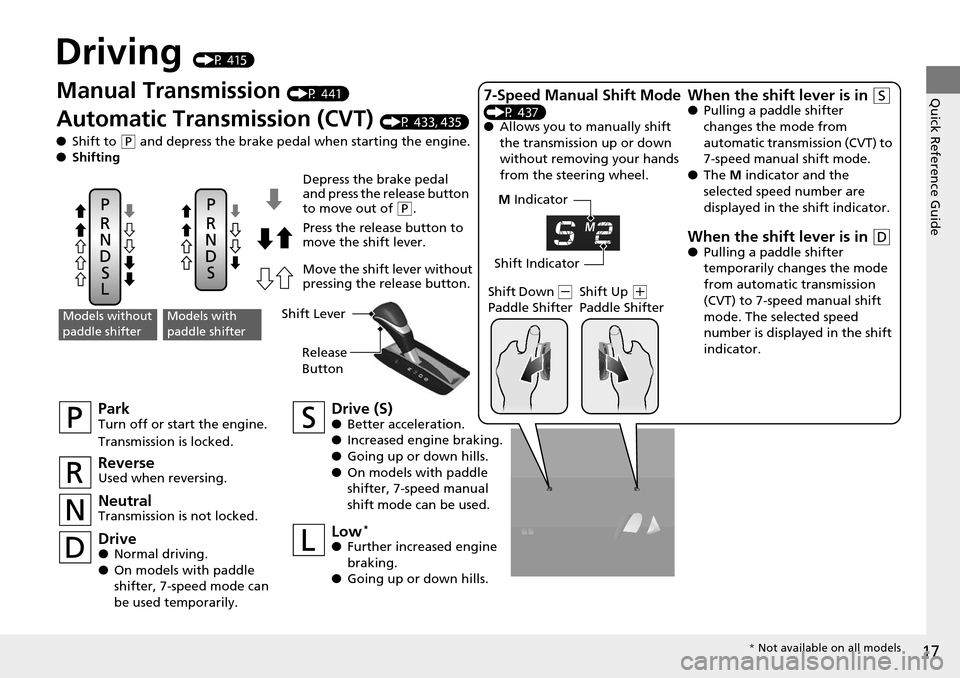
M Indicator
Shift Indicator
Manual Transmission (P 441)
Automatic Transmission (CVT) (P 433, 435)
● Shift to
(P and depress the brake pedal when starting the engine.
● Shifting
ParkTurn off or start the engine.
Transmission is locked.
NeutralTransmission is not locked.
Drive (S)●Better acceleration.
● Increased engine braking.
● Going up or down hills.
● On models with paddle
shifter, 7-speed manual
shift mode can be used.
Models without
paddle shifterModels with
paddle shifter
Depress the brake pedal
and press the release button
to move out of
(P.
Press the release button to
move the shift lever.
Move the shift lever without
pressing the release button.
ReverseUsed when reversing.
Drive● Normal driving.
● On models with paddle
shifter, 7-speed mode can
be used temporarily.
Low*
●Further increased engine
braking.
● Going up or down hills. Shift Down
(
-
Paddle Shifter Shift Up (
+
Paddle Shifter
7-Speed Manual Shift Mode
(P 437)
● Allows you to manually shift
the transmission up or down
without removing your hands
from the steering wheel.
When the shift lever is in (S●Pulling a paddle shifter
changes the mode from
automatic transmission (CVT) to
7-speed manual shift mode.
● The M indicator and the
selected speed number are
displayed in the shift indicator.
When the shift lever is in (D● Pulling a paddle shifter
temporarily changes the mode
from automatic transmission
(CVT) to 7-speed manual shift
mode. The selected speed
number is displayed in the shift
indicator.
Shift Lever
Release
Button
* Not available on all models
Page 135 of 593
uuOperating the Switches Around the Steering Wheel uENGINE START/STOP Button*
134
Controls
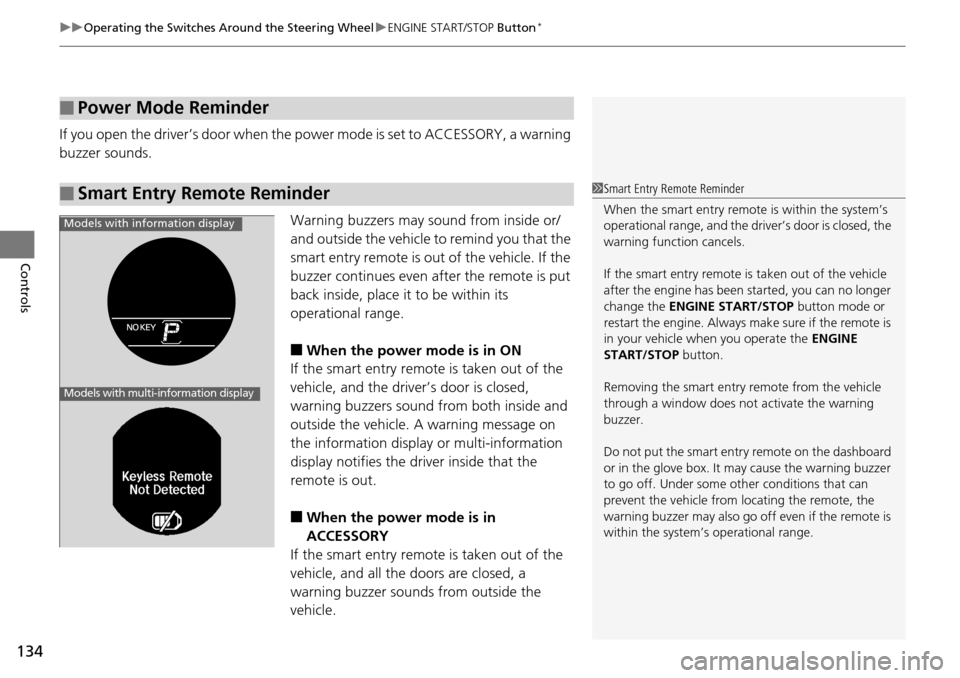
If you open the driver’s doo r when the power mode is set to ACCESSORY, a warning
buzzer sounds.
Warning buzzers may sound from inside or/
and outside the vehicle to remind you that the
smart entry remote is out of the vehicle. If the
buzzer continues even after the remote is put
back inside, place it to be within its
operational range.
■When the power mode is in ON
If the smart entry remote is taken out of the
vehicle, and the driver’s door is closed,
warning buzzers sound from both inside and
outside the vehicle. A warning message on
the information display or multi-information
display notifies the driver inside that the
remote is out.
■When the power mode is in
ACCESSORY
If the smart entry remote is taken out of the
vehicle, and all the doors are closed, a
warning buzzer sounds from outside the
vehicle.
■Power Mode Reminder
■Smart Entry Remote Reminder1 Smart Entry Remote Reminder
When the smart entry remote is within the system’s
operational range, and the driv er’s door is closed, the
warning function cancels.
If the smart entry remote is taken out of the vehicle
after the engine has been started, you can no longer
change the ENGINE START/STOP button mode or
restart the engine. Always make sure if the remote is
in your vehicle when you operate the ENGINE
START/STOP button.
Removing the smart entry remote from the vehicle
through a window does not activate the warning
buzzer.
Do not put the smart entr y remote on the dashboard
or in the glove box. It may cause the warning buzzer
to go off. Under some other conditions that can
prevent the vehicle from locating the remote, the
warning buzzer may al so go off even if the remote is
within the system’s operational range.
Models with information display
Models with multi-information display
Page 137 of 593
136
uuOperating the Switches Around the Steering Wheel uTurn Signals
Controls
Turn Signals
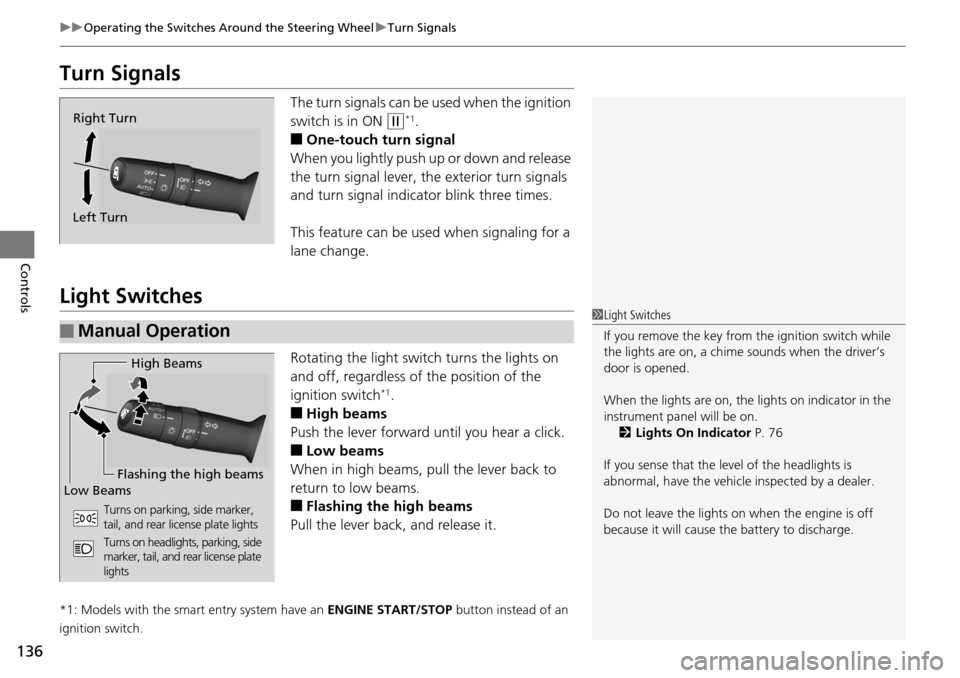
The turn signals can be used when the ignition
switch is in ON
(w*1.
■One-touch turn signal
When you lightly push up or down and release
the turn signal lever, th e exterior turn signals
and turn signal indicator blink three times.
This feature can be used when signaling for a
lane change.
Light Switches
Rotating the light switch turns the lights on
and off, regardless of the position of the
ignition switch
*1.
■High beams
Push the lever forward until you hear a click.
■Low beams
When in high beams, pull the lever back to
return to low beams.
■Flashing the high beams
Pull the lever back, and release it.
*1: Models with the smart entry system have an ENGINE START/STOP button instead of an
ignition switch.
Right Turn
Left Turn
■Manual Operation
1 Light Switches
If you remove the key from the ignition switch while
the lights are on, a chime sounds when the driver’s
door is opened.
When the lights are on, the lights on indicator in the
instrument pane l will be on.
2 Lights On Indicator P. 76
If you sense that the le vel of the headlights is
abnormal, have the vehicl e inspected by a dealer.
Do not leave the lights on when the engine is off
because it will cause the battery to discharge.
High Beams
Flashing the high beams
Low Beams
Turns on parking, side marker,
tail, and rear license plate lights
Turns on headlights, parking, side
marker, tail, and rear license plate
lights
Page 138 of 593
Continued137
uuOperating the Switches Around the Steering Wheel uLight Switches
Controls
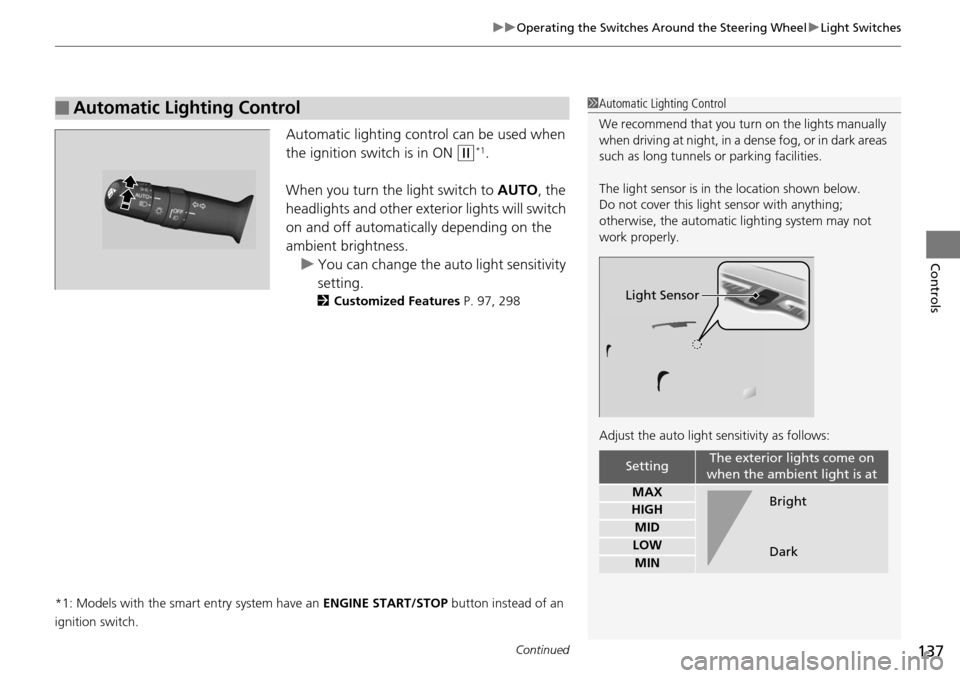
Automatic lighting control can be used when
the ignition switch is in ON
(w*1.
When you turn the light switch to AUTO, the
headlights and other exterior lights will switch
on and off automatically depending on the
ambient brightness. u You can change the auto light sensitivity
setting.
2 Customized Features P. 97, 298
*1: Models with the smart entry system have an ENGINE START/STOP button instead of an
ignition switch.
■Automatic Lighting Control1 Automatic Lighting Control
We recommend that you turn on the lights manually
when driving at night, in a dense fog, or in dark areas
such as long tunnels or parking facilities.
The light sensor is in the location shown below.
Do not cover this light sensor with anything;
otherwise, the automatic lighting system may not
work properly.
Adjust the auto light sensitivity as follows:
SettingThe exterior lights come on
when the ambient light is at
MAX
HIGH
MID
LOW
MIN
Light Sensor
Bright
Dark
Page 139 of 593
uuOperating the Switches Around the Steering Wheel uFog Lights*
138
Controls
The headlights automatically co me on when the wipers are used several times within
a certain number of intervals wi th the headlight switch in AUTO.
The headlights automatically go off a few minutes later if the wipers are stopped.
The headlights, all other exterior lights, an d the instrument panel lights turn off 15
seconds after you remove the key or set the power mode to VEHICLE OFF (LOCK),
take the remote with you, and close the driver's door.
u You can change the headlight auto off timer setting.
2 Customized Features P. 97, 298
If you turn the ignition switch to LOCK (0*1 with the headlight switch on, but do
not open the door, the lights turn off after 10 minutes (three minutes, if the switch
is in the AUTO position).
The lights turn on again when you unlock or open the driver's door. If you unlock
the door, but do not open it within 15 seconds, the lights go off. If you open the
driver's door, you will hear a lights on reminder chime.
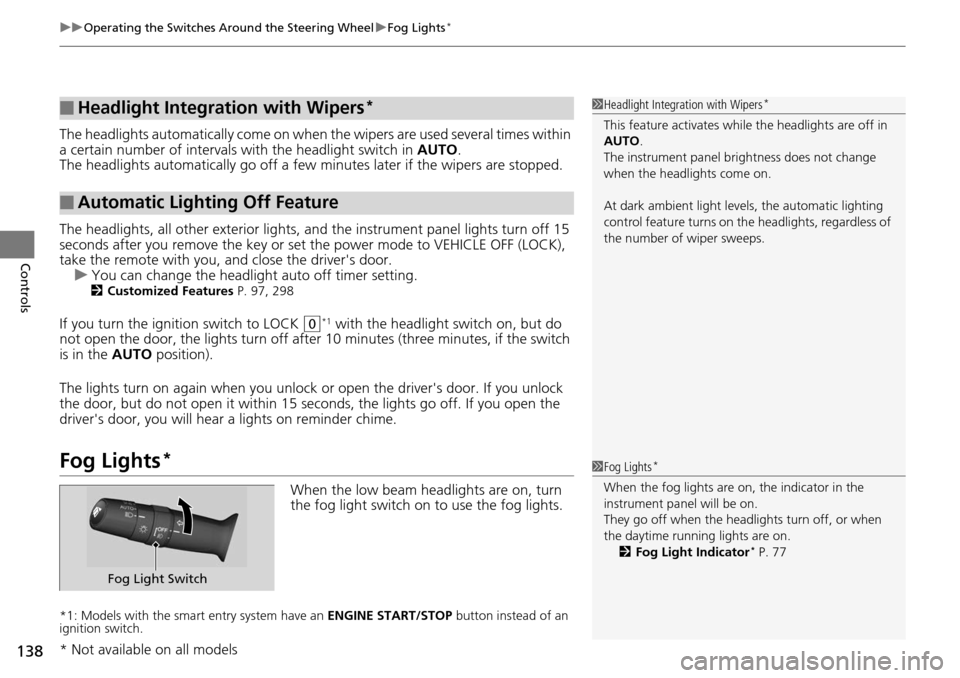
Fog Lights*
When the low beam headlights are on, turn
the fog light switch on to use the fog lights.
*1: Models with the smart entry system have an ENGINE START/STOP button instead of an
ignition switch.
■Headlight Integration with Wipers*
■Automatic Lighting Off Feature
1 Headlight Integration with Wipers*
This feature activates while the headlights are off in
AUTO .
The instrument panel br ightness does not change
when the headlights come on.
At dark ambient light leve ls, the automatic lighting
control feature turns on the headlights, regardless of
the number of wiper sweeps.
1 Fog Lights*
When the fog lights are on, the indicator in the
instrument pane l will be on.
They go off when the headlights turn off, or when
the daytime running lights are on.
2 Fog Light Indicator
* P. 77
Fog Light Switch
* Not available on all models
Page 141 of 593
140
uuOperating the Switches Around the Steering Wheel uWipers and Washers
Controls
Wipers and Washers
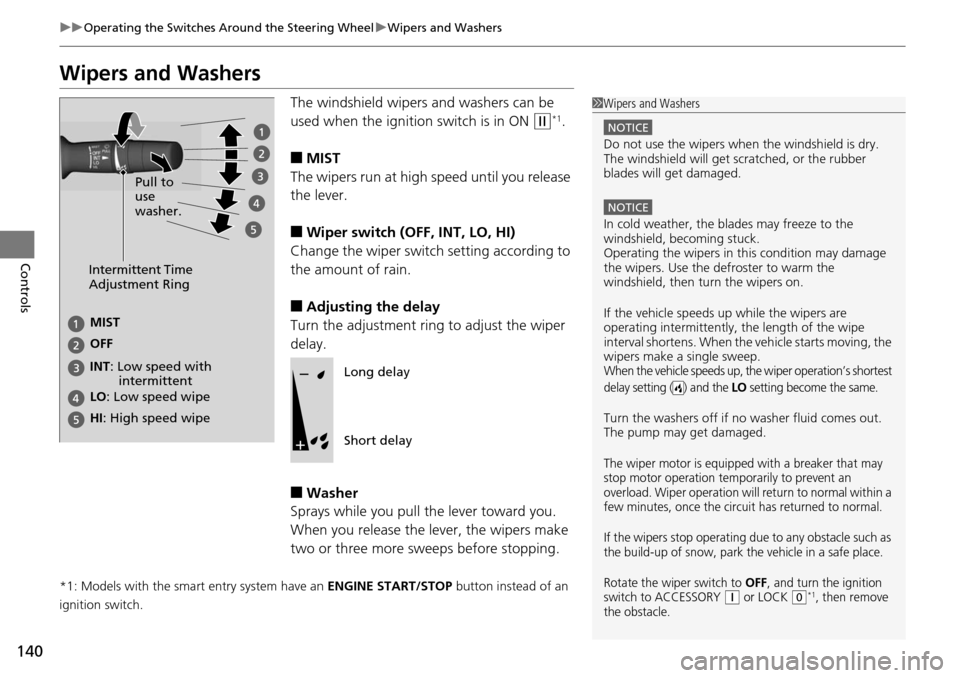
The windshield wipers and washers can be
used when the ignition switch is in ON
(w*1.
■MIST
The wipers run at high speed until you release
the lever.
■Wiper switch (OFF, INT, LO, HI)
Change the wiper switch setting according to
the amount of rain.
■Adjusting the delay
Turn the adjustment ring to adjust the wiper
delay.
■Washer
Sprays while you pull the lever toward you.
When you release the lever, the wipers make
two or three more sweeps before stopping.
*1: Models with the smart entry system have an ENGINE START/STOP button instead of an
ignition switch.
1 Wipers and Washers
NOTICE
Do not use the wipers when the windshield is dry.
The windshield will get sc ratched, or the rubber
blades will get damaged.
NOTICE
In cold weather, the blades may freeze to the
windshield, becoming stuck.
Operating the wipers in th is condition may damage
the wipers. Use the defroster to warm the
windshield, then turn the wipers on.
If the vehicle speeds up while the wipers are
operating intermittently, the length of the wipe
interval shortens. When the vehicle starts moving, the
wipers make a single sweep.
When the vehicle speeds up, the wiper operation’s shortest
delay setting ( ) and the
LO setting become the same.
Turn the washers off if no washer fluid comes out.
The pump may get damaged.
The wiper motor is equipped with a breaker that may
stop motor operation temporarily to prevent an
overload. Wiper operation will return to normal within a
few minutes, once the circ uit has returned to normal.
If the wipers stop operating due to any obstacle such as
the build-up of snow, park the vehicle in a safe place.
Rotate the wiper switch to
OFF, and turn the ignition
switch to ACCESSORY ( q or LOCK (0*1, then remove
the obstacle.
Intermittent Time
Adjustment Ring
MIST
INT: Low speed with
intermittent OFF
LO : Low speed wipe
HI: High speed wipe Pull to
use
washer.
Long delay
Short delay
Page 189 of 593
uuAudio System Basic Operation uPlaying AM/FM Radio
188
Features
Provides text data information related to your selected RDS-capable FM station.
■To find an RDS station from Station List
1. Press while listening to an FM station.
2. Rotate to select the station, then press .
■Manual update
Updates your available station list at any time.
1. Press while listening to an FM station.
2. Rotate to select Refresh, then press .
■Radio text
Displays the radio text informat ion of the selected RDS station.
1. Press the MENU button.
2. Rotate to select Radio Text, then press .
■Scan
Samples each of the strongest stations on the selected band for 10 seconds.
1. Press the MENU button.
2. Rotate to select Scan, then press .
To turn off scan, press to select Stop, or press the BACK button.
■Radio Data System (RDS)1Playing AM/FM Radio
The ST indicator appears on the display indicating
stereo FM broadcasts.
Stereo reproduction in AM is not available.
Switching the Audio Mode
Press the SOURCE button on the steering wheel.
2 Audio Remote Controls P. 179
You can also switch the mode by pressing the MENU
button and selecting Change Source on the MENU
screen.
You can store 6 AM stations and 12 FM stations into
the preset memory.
1 Radio Data System (RDS)
When you select an RDS-capable FM station, the RDS
automatically turns on, and the frequency display
changes to the station name. However, when the
signals of that station become weak, the display
changes from the statio n name to the frequency.
Page 215 of 593
uuAudio System Basic Operation uPlaying AM/FM Radio
214
Features
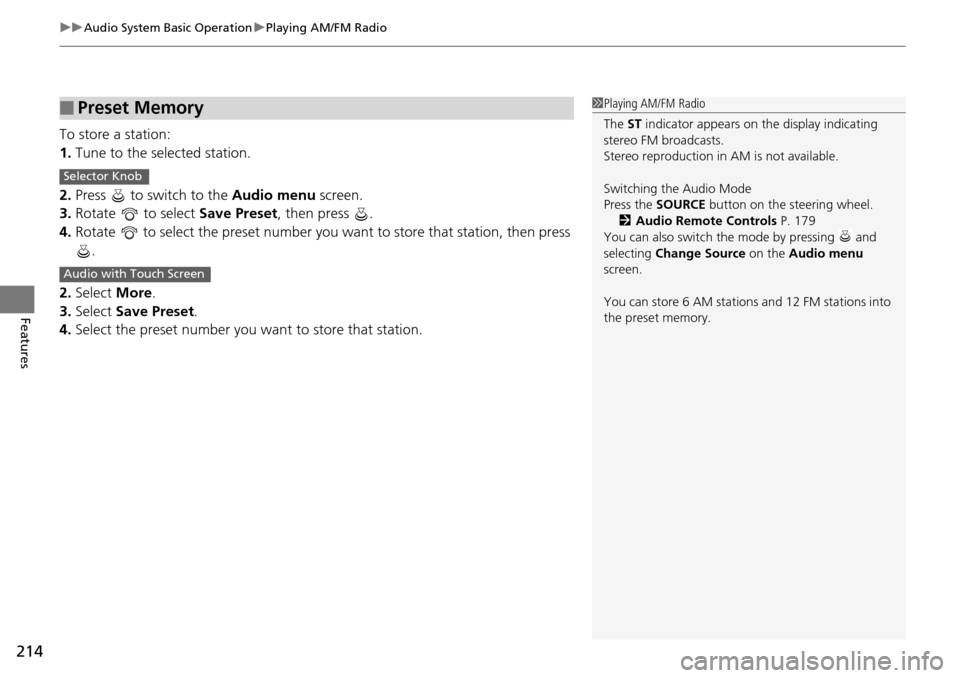
To store a station:
1. Tune to the selected station.
2. Press to switch to the Audio menu screen.
3. Rotate to select Save Preset, then press .
4. Rotate to select the preset number you want to store that station, then press \
.
2. Select More.
3. Select Save Preset .
4. Select the preset number you want to store that station.
■Preset Memory1Playing AM/FM Radio
The ST indicator appears on the display indicating
stereo FM broadcasts.
Stereo reproduction in AM is not available.
Switching the Audio Mode
Press the SOURCE button on the steering wheel.
2 Audio Remote Controls P. 179
You can also switch the mode by pressing and
selecting Change Source on the Audio menu
screen.
You can store 6 AM stations and 12 FM stations into
the preset memory.
Selector Knob
Audio with Touch Screen
Page 254 of 593
Continued253
uuAudio System Basic Operation uPlaying AM/FM Radio
Features
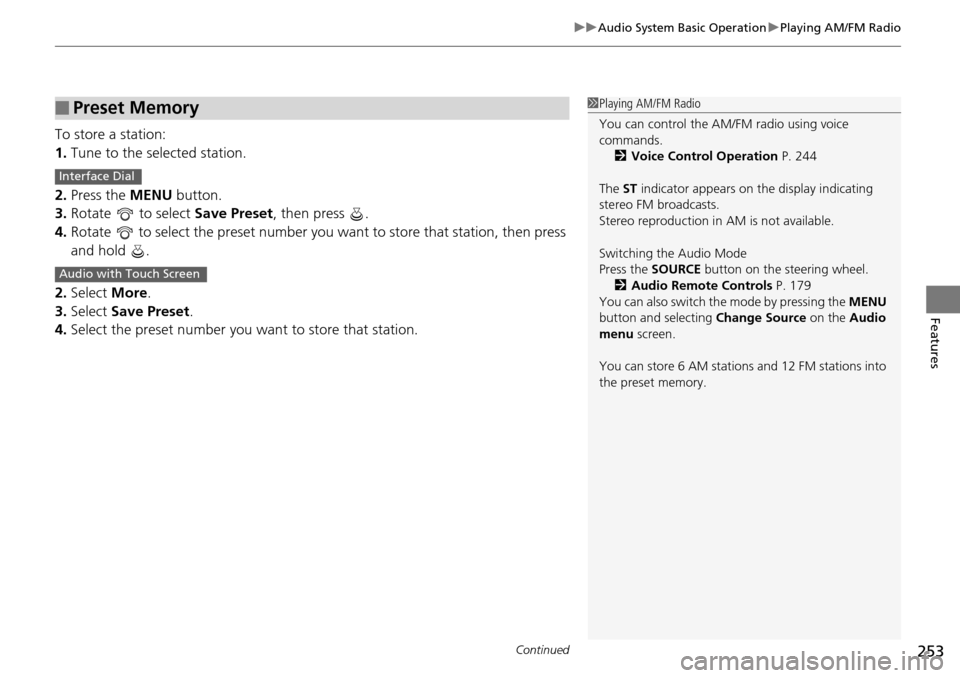
To store a station:
1. Tune to the selected station.
2. Press the MENU button.
3. Rotate to select Save Preset, then press .
4. Rotate to select the preset number you want to store that station, then press
and hold .
2. Select More.
3. Select Save Preset .
4. Select the preset number you want to store that station.
■Preset Memory1Playing AM/FM Radio
You can control the AM/FM radio using voice
commands.
2 Voice Control Operation P. 244
The ST indicator appears on the display indicating
stereo FM broadcasts.
Stereo reproduction in AM is not available.
Switching the Audio Mode
Press the SOURCE button on the steering wheel.
2 Audio Remote Controls P. 179
You can also switch the mode by pressing the MENU
button and selecting Change Source on the Audio
menu screen.
You can store 6 AM stations and 12 FM stations into
the preset memory.
Interface Dial
Audio with Touch Screen
Page 339 of 593
338
Features
Bluetooth® HandsFreeLink ®
Bluetooth® HandsFreeLink ® (HFL) allows you to place and receive phone calls using
your vehicle’s audio system, without handling your cell phone.
Using HFL
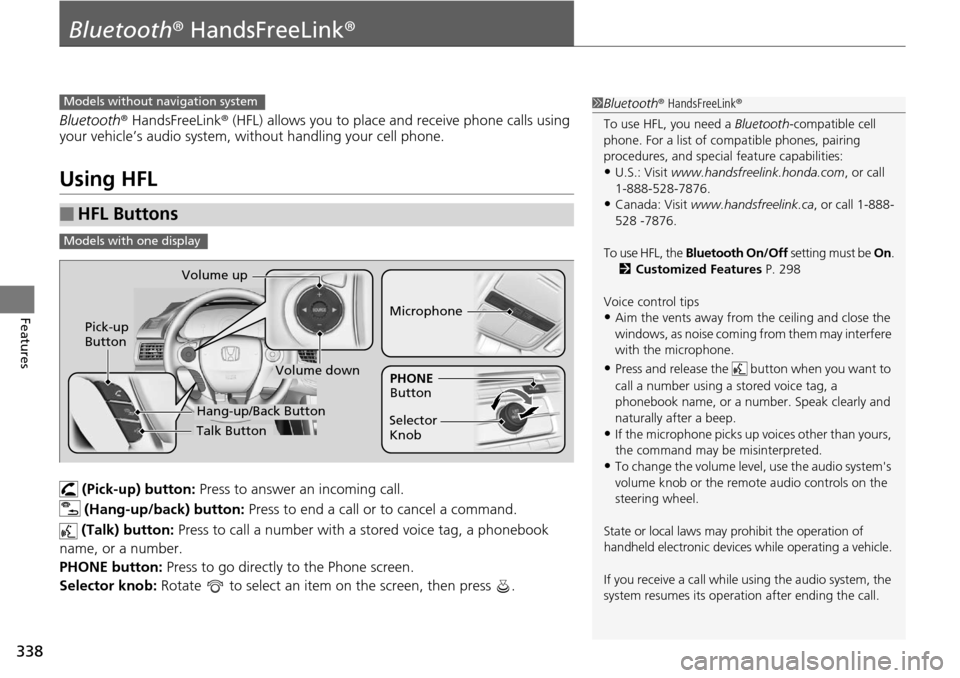
(Pick-up) button: Press to answer an incoming call.
(Hang-up/back) button: Press to end a call or to cancel a command.
(Talk) button: Press to call a number with a stored voice tag, a phonebook
name, or a number.
PHONE button: Press to go directly to the Phone screen.
Selector knob: Rotate to select an item on the screen, then press .
■HFL Buttons
1Bluetooth ® HandsFreeLink ®
To use HFL, you need a Bluetooth-compatible cell
phone. For a list of compatible phones, pairing
procedures, and special feature capabilities:
•U.S.: Visit www.handsfreelink.honda.com , or call
1-888-528-7876.
•Canada: Visit www.handsfreelink.ca , or call 1-888-
528 -7876.
To use HFL, the Bluetooth On/Off setting must be On.
2 Customized Features P. 298
Voice control tips
•Aim the vents away from the ceiling and close the
windows, as noise coming fr om them may interfere
with the microphone.
•Press and release the but ton when you want to
call a number using a stored voice tag, a
phonebook name, or a numbe r. Speak clearly and
naturally after a beep.
•If the microphone picks up vo ices other than yours,
the command may be misinterpreted.
•To change the volume level, use the audio system's
volume knob or the remote audio controls on the
steering wheel.
State or local laws may prohibit the operation of
handheld electronic devices while operating a vehicle.
If you receive a call while using the audio system, the
system resumes its operati on after ending the call.
Models without navigation system
Models with one display
Talk Button
Volume up
Microphone
Hang-up/Back Button
Pick-up
Button
Volume down
Selector
KnobPHONE
Button