instrument panel HONDA ACCORD SEDAN 2001 (in English) Owner's Guide
[x] Cancel search | Manufacturer: HONDA, Model Year: 2001, Model line: ACCORD SEDAN, Model: HONDA ACCORD SEDAN 2001Pages: 372, PDF Size: 6.1 MB
Page 96 of 372
Seat Adjustments
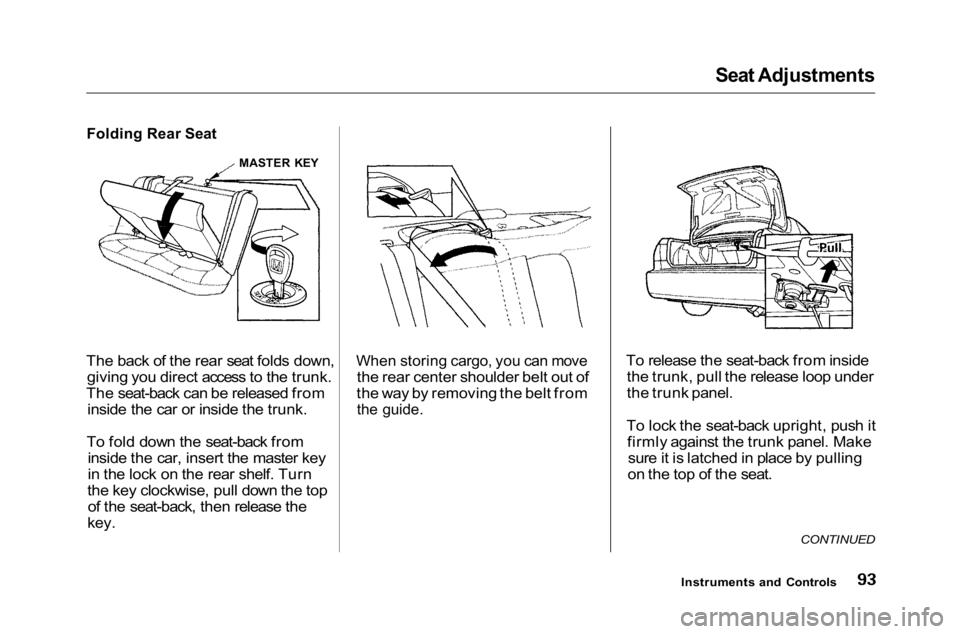
Folding Rear Seat
The back of the rear seat folds down, giving you direct access to the trunk.
The seat-back can be released from inside the car or inside the trunk.
To fold down the seat-back from inside the car, insert the master key
in the lock on the rear shelf. Turn
the key clockwise, pull down the top of the seat-back, then release the
key.
When storing cargo, you can move
the rear center shoulder belt out of
the way by removing the belt from
the guide.
To release the seat-back from inside
the trunk, pull the release loop under
the trunk panel.
To lock the seat-back upright, push it firmly against the trunk panel. Makesure it is latched in place by pulling
on the top of the seat.
CONTINUED
Instruments and Controls
MASTER KEY
Page 100 of 372
Power Windows
On all models except DX
Your car's windows are electrically- powered. Turn the ignition switch toON (II) to raise or lower any window.
Each door has a switch that controls
its window. To open the window,
push the switch down and hold it. Release the switch when you want
the window to stop. Close the
window by pushing the switch up and holding it.
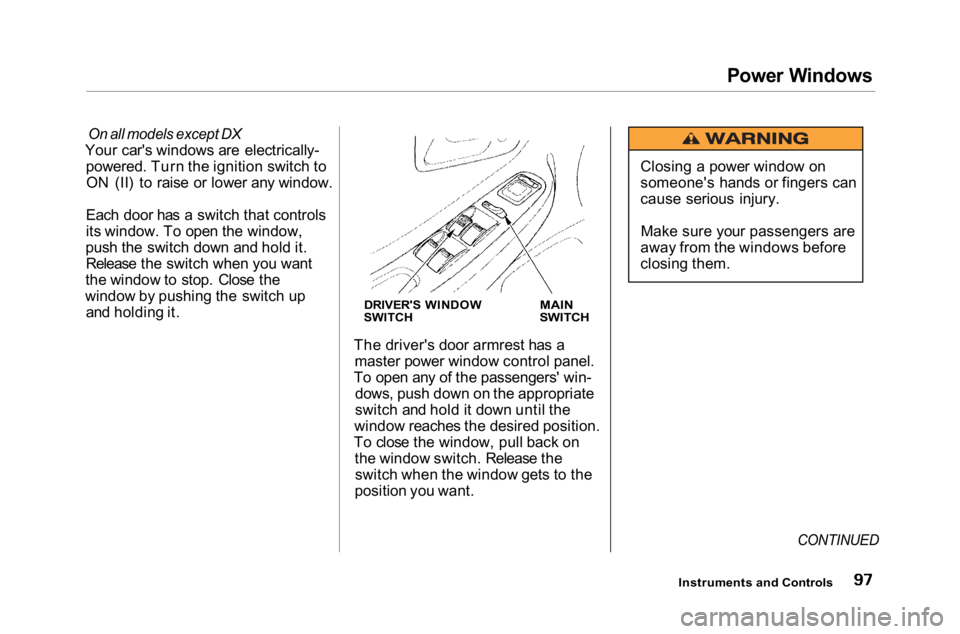
DRIVER'S WINDOW
SWITCH
MAIN
SWITCH
The driver's door armrest has a master power window control panel.
To open any of the passengers' win- dows, push down on the appropriate
switch and hold it down until the
window reaches the desired position.
To close the window, pull back on the window switch. Release theswitch when the window gets to the
position you want.
CONTINUED
Instruments and Controls
Closing a power window on
someone's hands or fingers can
cause serious injury.
Make sure your passengers are
away from the windows before
closing them.
Page 101 of 372
Power Windows, Moonroof
The master control panel also con- tains these extra features:
AUTO — To open the driver's window fully, push the window switch firmly down and release it.
The window automatically goes all the way down. To stop the windowfrom going all the way down, pull
back on the window switch briefly.
To open the driver's window only partially, push the window switchdown lightly and hold it. The window
will stop as soon as you release the
switch.
The AUTO function only works to lower the driver's window. To raise
the window, you must pull back on
the window switch and hold it until
the window reaches the desired
position.
The MAIN switch controls power to
the passengers' windows. With thisswitch off, the passengers' windows
cannot be raised or lowered. The
MAIN switch does not affect thedriver's window. Keep the MAIN
switch off when you have children in
the car so they do not injure them- selves by operating the windows
unintentionally.
The power window system has a key- off delay function. The windows willstill operate for up to ten minutes
after you turn off the ignition.
Opening either front door cancels
the delay function. You must turn
the ignition switch ON (II) again
before you can raise or lower the
windows. Moonroof
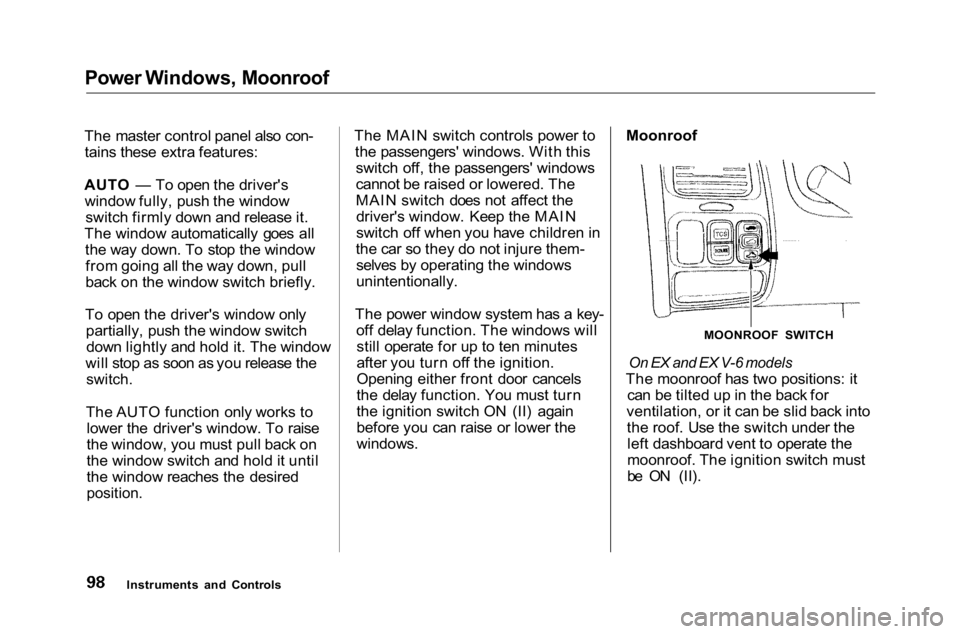
MOONROOF SWITCH
On EX and EX V-6 models
The moonroof has two positions: it can be tilted up in the back for
ventilation, or it can be slid back into the roof. Use the switch under theleft dashboard vent to operate the
moonroof. The ignition switch must
be ON (II).
Instruments and Controls
Page 102 of 372
Moonroof, Mirrors
To tilt up the back of the moonroof, press and hold the center button ( ). To close the moonroof,
press and hold the top of the switch ( ). To open the moonroof,
press and hold the bottom of the switch ( ).Release the switch
when the moonroof gets to the desired position. Make sure
everyone's hands are away from the
moonroof before opening or closing
it.
The moonroof has a key-off delay.
You can still open and close the
moonroof for up to ten minutes after
you turn off the ignition. The key-off delay cancels as soon as you open
either front door. You must then
turn the ignition ON (II) for the
moonroof to operate.
If you try to open the moonroof in
below-freezing temperatures, or when it is covered with snow or ice, you can
damage the moonroof panel or motor.
Mirrors
Keep the inside and outside mirrors
clean and adjusted for best visibility.
Be sure to adjust the mirrors before
you start driving.
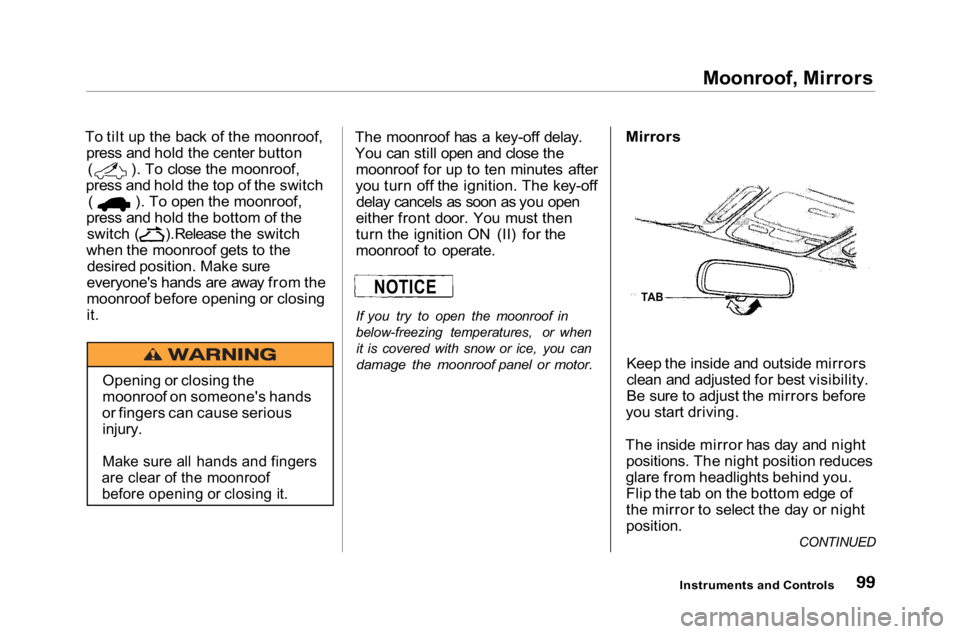
The inside mirror has day and night positions. The night position reduces
glare from headlights behind you. Flip the tab on the bottom edge of
the mirror to select the day or night
position.
Instruments and Controls
Opening or closing the
moonroof on someone's hands
or fingers can cause serious injury.
Make sure all hands and fingers
are clear of the moonroof before opening or closing it.
TAB
NOTICE
CONTINUED
Page 104 of 372
Mirrors, Parking Brake
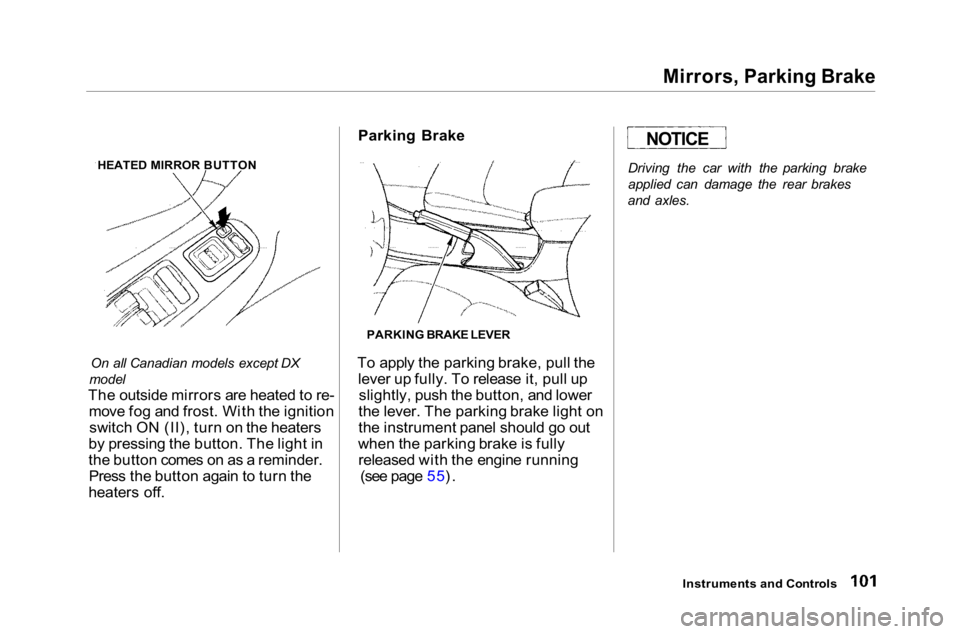
On all Canadian models except DX
model
The outside mirrors are heated to re- move fog and frost. With the ignitionswitch ON (II), turn on the heaters
by pressing the button. The light in
the button comes on as a reminder. Press the button again to turn the
heaters off. Parking Brake
To apply the parking brake, pull the lever up fully. To release it, pull upslightly, push the button, and lower
the lever. The parking brake light on
the instrument panel should go out
when the parking brake is fully released with the engine running (see page 55). Driving the car with the parking brake
applied can damage the rear brakes
and axles.
Instruments and Controls
HEATED MIRROR BUTTON
PARKING BRAKE LEVER
NOTICE
Page 145 of 372
Audio System
Audio System Lighting You can use the instrument panelbrightness control dial to adjust the il-lumination of the audio system (see
page 62 ). The audio system
illuminates when the parking lightsare on, even if the radio is turned off.
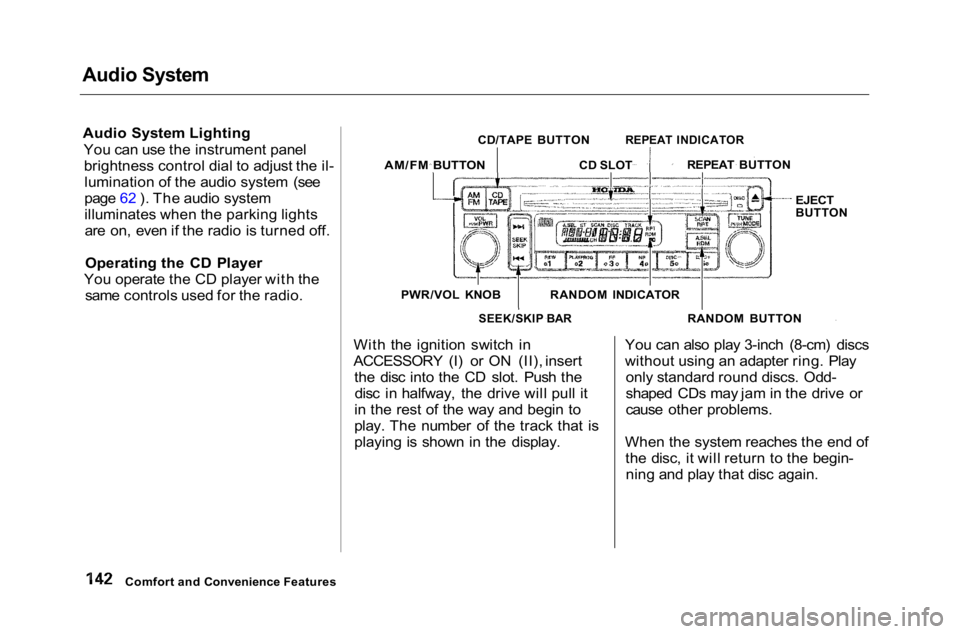
Operating the CD Player
You operate the CD player with the same controls used for the radio.
With the ignition switch in
ACCESSORY (I) or ON (II), insert
the disc into the CD slot. Push the
disc in halfway, the drive will pull it
in the rest of the way and begin to
play. The number of the track that is
playing is shown in the display. You can also play 3-inch (8-cm) discs
without using an adapter ring. Play
only standard round discs. Odd-
shaped CDs may jam in the drive or
cause other problems.
When the system reaches the end of the disc, it will return to the begin-ning and play that disc again.
Comfort and Convenience Features
AM/FM BUTTON
CD/TAPE BUTTON
REPEAT INDICATOR
CD SLOT REPEAT BUTTON
EJECT
BUTTON
RANDOM BUTTON
RANDOM INDICATOR
SEEK/SKIP BAR
PWR/VOL KNOB
Page 161 of 372
Audio System
Audio System LightingYou can use the instrument panel brightness control dial to adjust the il-
lumination of the audio system (see
page 63 ). The audio system
illuminates when the parking lightsare on, even if the radio is turned off.
Radio Frequencies
Your Honda's radio can receive the complete AM and FM bands.
Those bands cover these frequen-
cies:
AM band:
530 to 1,710 kilohertz
FM band:
87.7 to 107.9 megahertz
Radio stations on the AM band are
assigned frequencies at least ten
kilohertz apart (530, 540, 550). Stations on the FM band are
assigned frequencies at least 0.2
megahertz apart (87.9, 88.1, 88.3). Stations must use these exact
frequencies. It is fairly common for stations to round-off the frequency in
their advertising, so your radio could display a frequency of 100.9 even
though the announcer may identify
the station as "FM101."
Radio Reception How well your Honda's radio
receives stations is dependent on
many factors, such as the distance
from the station's transmitter, nearby large objects, and atmos-
pheric conditions.
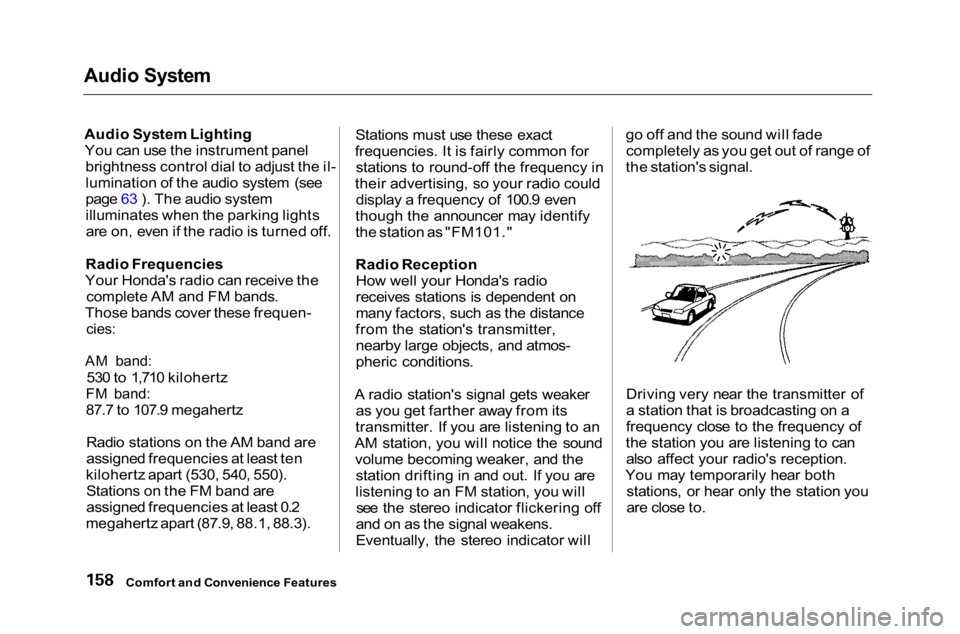
A radio station's signal gets weaker as you get farther away from its
transmitter. If you are listening to an
AM station, you will notice the sound volume becoming weaker, and the station drifting in and out. If you are
listening to an FM station, you will see the stereo indicator flickering off
and on as the signal weakens.
Eventually, the stereo indicator will go off and the sound will fade
completely as you get out of range of
the station's signal.
Driving very near the transmitter of
a station that is broadcasting on a
frequency close to the frequency of
the station you are listening to can also affect your radio's reception.
You may temporarily hear both stations, or hear only the station you
are close to.
Comfort and Convenience Features
Page 178 of 372
Security System
On EX and EX-V6 models
The security system helps to protect your car and valuables from theft.
The horn sounds and a combination of headlights, parking lights, side
marker lights and taillights flashes if
someone attempts to break into your
car or remove the radio. This alarm
continues for two minutes, then the system resets. To reset an alarming
system before the two minutes have
elapsed, unlock either front door
with the key or the remote transmitter.
The security system sets auto- matically fifteen seconds after you
lock the doors, hood, and trunk. For
the system to activate, you must lock
the doors from the outside with the
key, lock tab, door lock switch, or
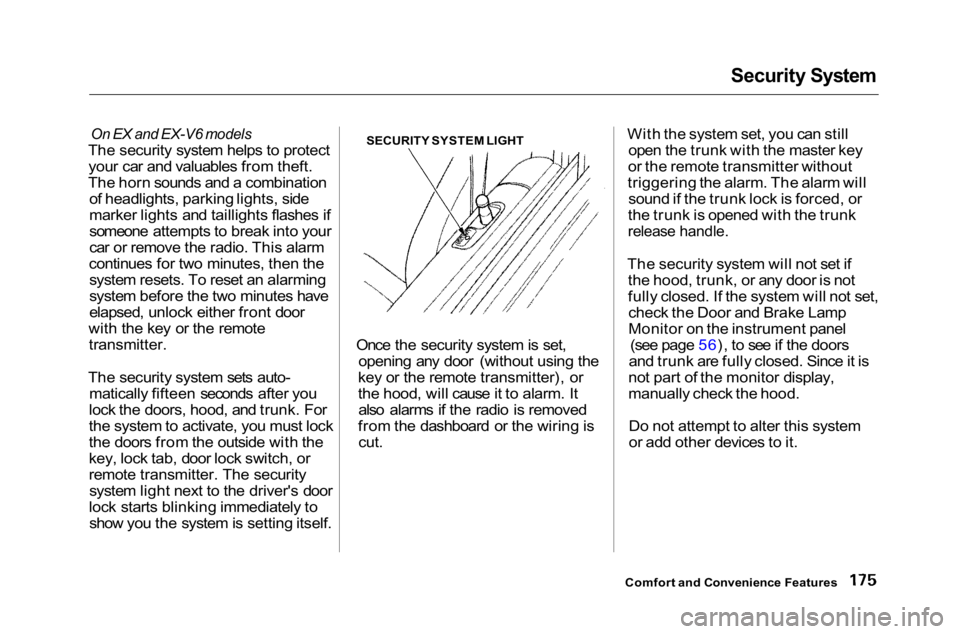
remote transmitter. The security system light next to the driver's door
lock starts blinking immediately to show you the system is setting itself. SECURITY SYSTEM LIGHT
Once the security system is set, opening any door (without using the
key or the remote transmitter), or
the hood, will cause it to alarm. It also alarms if the radio is removed
from the dashboard or the wiring is cut. With the system set, you can still
open the trunk with the master key
or the remote transmitter without
triggering the alarm. The alarm will sound if the trunk lock is forced, or
the trunk is opened with the trunk
release handle.
The security system will not set if the hood, trunk, or any door is not
fully closed. If the system will not set,check the Door and Brake Lamp
Monitor on the instrument panel (see page 56), to see if the doors
and trunk are fully closed. Since it is
not part of the monitor display,
manually check the hood.
Do not attempt to alter this system
or add other devices to it.
Comfort and Convenience Features
Page 181 of 372
Break-in Period, Gasoline, Service Station Procedures
Break-in Period
Help assure your car's future
reliability and performance by paying
extra attention to how you drive
during the first 600 miles (1,000 km).
During this period: Avoid full-throttle starts and rapid
acceleration.
Avoid hard braking. New brakes
need to be broken-in by moderate
use for the first 200 miles (300
km).
Do not change the oil until the
recommended time or mileage
interval shown in the maintenance
schedule.
You should follow these same re-
commendations with an overhauled
or exchanged engine, or when the
brakes are relined.
Gasoline
Your Honda is designed to operate on unleaded gasoline with a pump
octane number of 86 or higher. Useof a lower octane gasoline can cause
a persistent, heavy metallic rapping
noise in the engine that can lead to
mechanical damage.
We recommend gasolines containing detergent additives that help prevent
fuel system and engine deposits. Using gasoline containing lead willdamage your car's emissions
controls. This contributes to air
pollution.
In Canada, some gasolines contain
an octane-enhancing additive called
MMT. If you use such gasolines,
your emission control system performance may deteriorate and
the Malfunction Indicator Lamp on
your instrument panel may turn on.If this happens, contact your
authorized Honda dealer for service. Filling the Fuel Tank
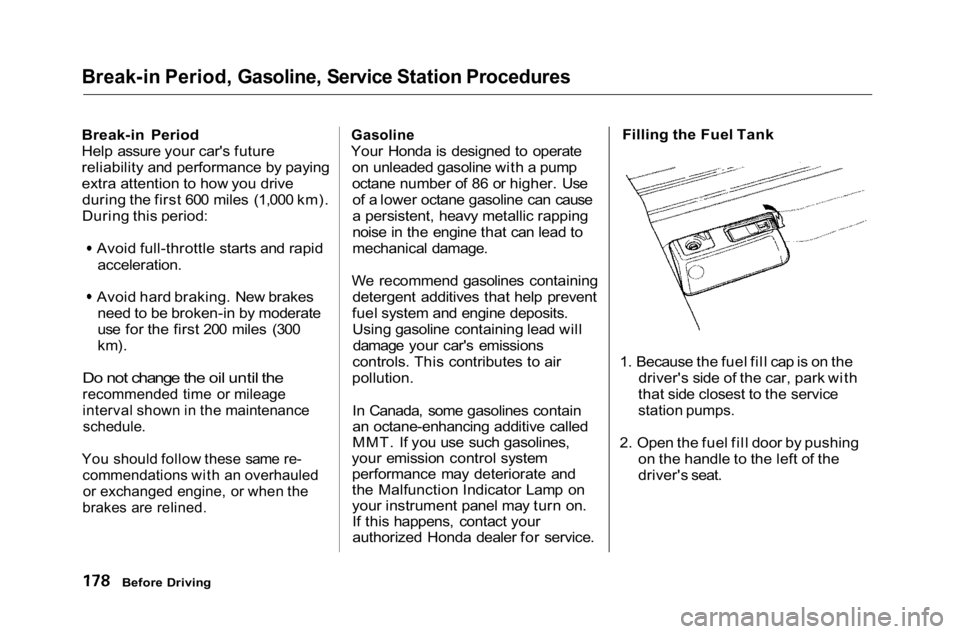
1. Because the fuel fill cap is on the driver's side of the car, park with
that side closest to the service
station pumps.
2. Open the fuel fill door by pushing on the handle to the left of the
driver's seat.
Before Driving
Page 195 of 372
Preparing to Drive
You should do the following checks and adjustments every day before
you drive your car.
1. Make sure all windows, mirrors, and outside lights are clean and
unobstructed. Remove frost, snow,
or ice.
2. Check that the hood and trunk are fully closed.
3. Visually check the tires. If a tire looks low, use a gauge to check its
pressure.
4. Check that any items you may be carrying with you inside are stored
properly or fastened down
securely. 5. Check the adjustment of the seat
(see page 88).
6. Check the adjustment of the inside and outside mirrors (see
page 99).
7. Check the adjustment of the steering wheel (see page 67).
8. Make sure the doors are securely
closed and locked.
9. Fasten your seat belt. Check that your passengers have fastened
their seat belts (see page 14 ). 10.Turn the ignition switch ON (II).
Check the indicator lights in the
instrument panel.
11.Start the engine (see page 193).
12. Check the gauges and indicator lights in the instrument panel (see
page 53).
Driving