sensor HONDA ACCORD SEDAN 2020 (in English) User Guide
[x] Cancel search | Manufacturer: HONDA, Model Year: 2020, Model line: ACCORD SEDAN, Model: HONDA ACCORD SEDAN 2020Pages: 728, PDF Size: 34.06 MB
Page 62 of 728
60
uuAirbags uAirbag Care
Safe Driving
Airbag Care
You do not need to, and should not, perform any maintenance on or replace any
airbag system components yourself. However, you should have your vehicle
inspected by a dealer in the following situations:
■When the airbags have deployed
If an airbag has inflated, th e control unit and other related parts must be replaced.
Similarly, once an automatic seat belt te nsioner has been activated, it must be
replaced.
■When the vehicl e has been in a moderate-to-severe collision
Even if the airbags did not inflate, have your dealer inspect the following: the driver’s
seat position sensor, weight sensors in the passenger’s seat, front seat belt
tensioners, and each seat belt that was worn during the crash.
■Do not remove or modify a front seat without consulting a dealer
This would likely disable or affect the prop er operation of the driver’s seat position
sensor or the weight sensors in the passenger ’s seat. If it is necessary to remove or
modify a front seat to accommodate a pe rson with disabilities, contact a Honda
dealer, or for U.S. vehicles, American Honda Automobile Customer Service at
1-800-999-1009 and for Canadian vehicles , Honda Canada Customer Relations at
1-888-9-HONDA-9.
1 Airbag Care
We recommend against the use of salvaged airbag
system components, includi ng the airbag, tensioners,
sensors, and control unit.
Page 65 of 728
63
uuChild Safety uSafety of Infants and Small Children
Continued
Safe Driving
Safety of Infants and Small Children
An infant must be properly restrained in a rear-facing, reclining child seat until the
infant reaches the seat manufacturer’s weig ht or height limit for the seat, and the
infant is at least one year old.
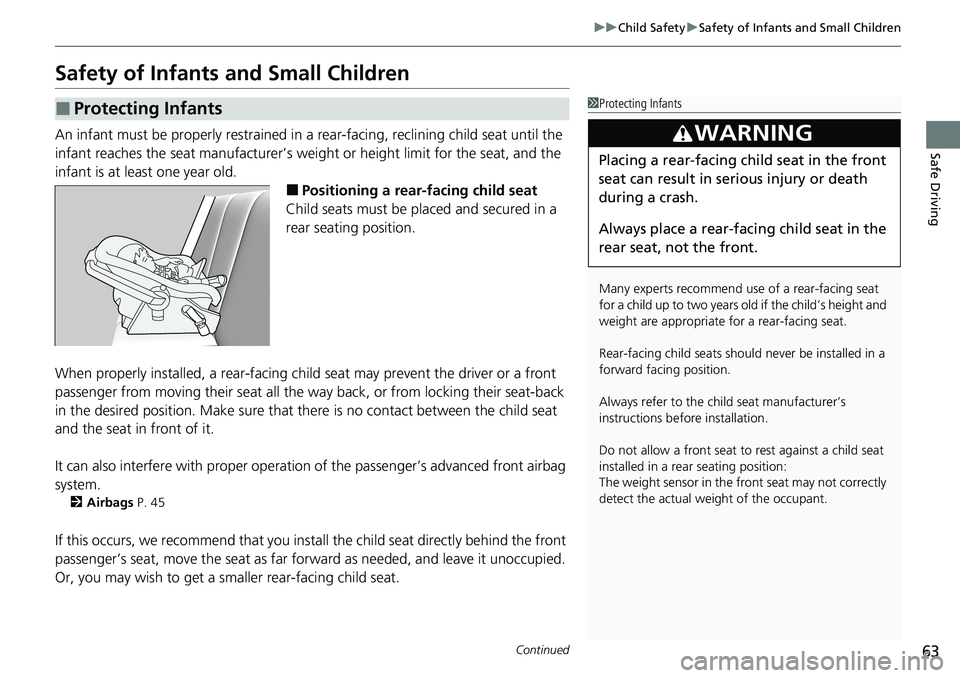
■Positioning a rear-facing child seat
Child seats must be placed and secured in a
rear seating position.
When properly installed, a rear-facing chil d seat may prevent the driver or a front
passenger from moving their seat all the wa y back, or from locking their seat-back
in the desired position. Make sure that there is no contact between the child seat
and the seat in front of it.
It can also interfere with proper operation of the passenger’s advanced front airbag
system.
2 Airbags P. 45
If this occurs, we recommend that you insta ll the child seat directly behind the front
passenger’s seat, move the seat as far fo rward as needed, and leave it unoccupied.
Or, you may wish to get a smaller rear-facing child seat.
■Protecting Infants1 Protecting Infants
Many experts recommend us e of a rear-facing seat
for a child up to two years ol d if the child’s height and
weight are appropriate for a rear-facing seat.
Rear-facing child seats should never be installed in a
forward facing position.
Always refer to the child seat manufacturer’s
instructions before installation.
Do not allow a front seat to rest against a child seat
installed in a rear seating position:
The weight sensor in the fr ont seat may not correctly
detect the actual weight of the occupant.
3WARNING
Placing a rear-facing child seat in the front
seat can result in serious injury or death
during a crash.
Always place a rear-fac ing child seat in the
rear seat, not the front.
Page 83 of 728
81
uuIndicators u
Continued
Instrument Panel
IndicatorNameOn/BlinkingExplanationMessage
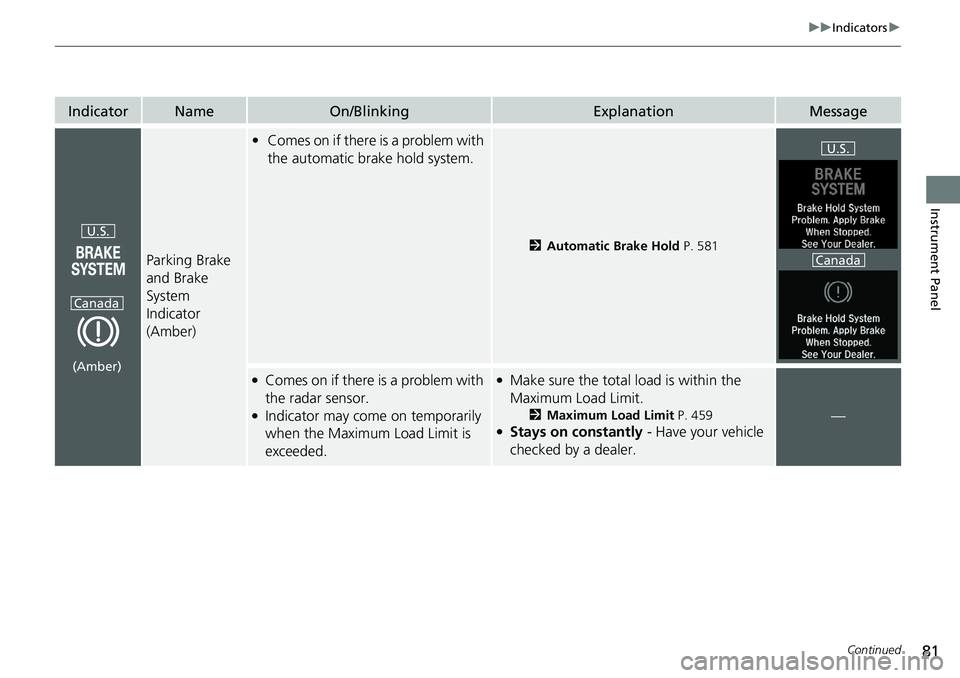
Parking Brake
and Brake
System
Indicator
(Amber)
•Comes on if there is a problem with
the automatic brake hold system.
2 Automatic Brake Hold P. 581
●Comes on if there is a problem with
the radar sensor.
●Indicator may come on temporarily
when the Maximum Load Limit is
exceeded.
●Make sure the total load is within the
Maximum Load Limit.
2Maximum Load Limit P. 459●Stays on constantly - Have your vehicle
checked by a dealer.
—
U.S.
Canada
(Amber)
U.S.
Canada
Page 91 of 728
89
uuIndicators u
Continued
Instrument Panel
IndicatorNameOn/BlinkingExplanationMessage
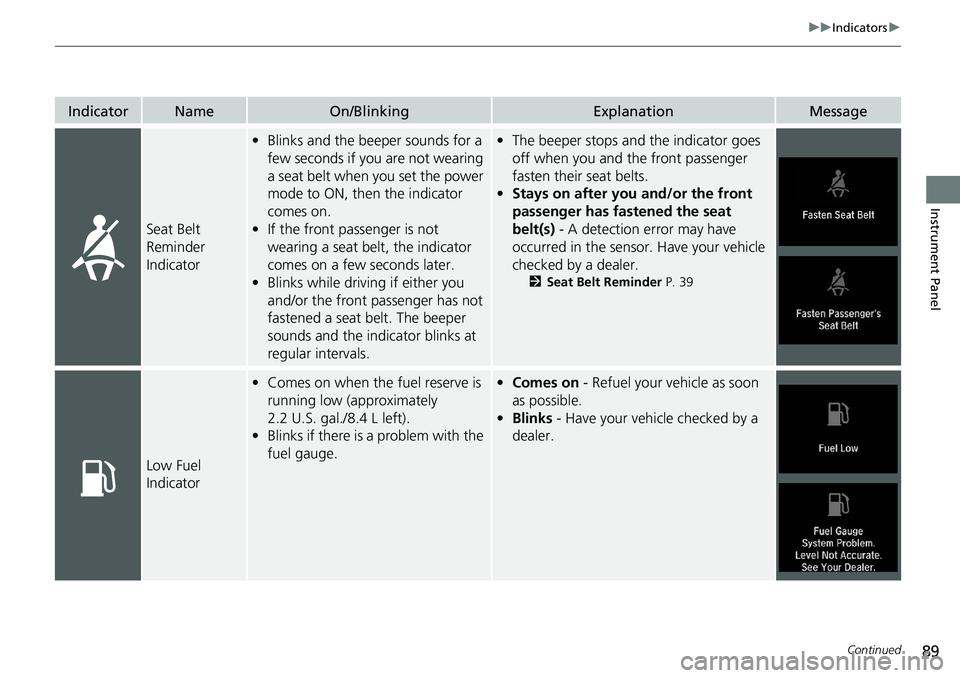
Seat Belt
Reminder
Indicator
•Blinks and the beep er sounds for a
few seconds if you are not wearing
a seat belt when you set the power
mode to ON, then the indicator
comes on.
• If the front passenger is not
wearing a seat belt, the indicator
comes on a few seconds later.
• Blinks while driving if either you
and/or the front passenger has not
fastened a seat belt. The beeper
sounds and the indicator blinks at
regular intervals.•The beeper stops and the indicator goes
off when you and the front passenger
fasten their seat belts.
• Stays on after you and/or the front
passenger has fastened the seat
belt(s) - A detection error may have
occurred in the sensor. Have your vehicle
checked by a dealer.
2 Seat Belt Reminder P. 39
Low Fuel
Indicator
•Comes on when the fuel reserve is
running low (approximately
2.2 U.S. gal./8.4 L left).
• Blinks if there is a problem with the
fuel gauge.•Comes on - Refuel your vehicle as soon
as possible.
• Blinks - Have your vehicle checked by a
dealer.
Page 104 of 728
102
uuIndicators u
Instrument Panel
IndicatorNameOn/BlinkingExplanationMessage
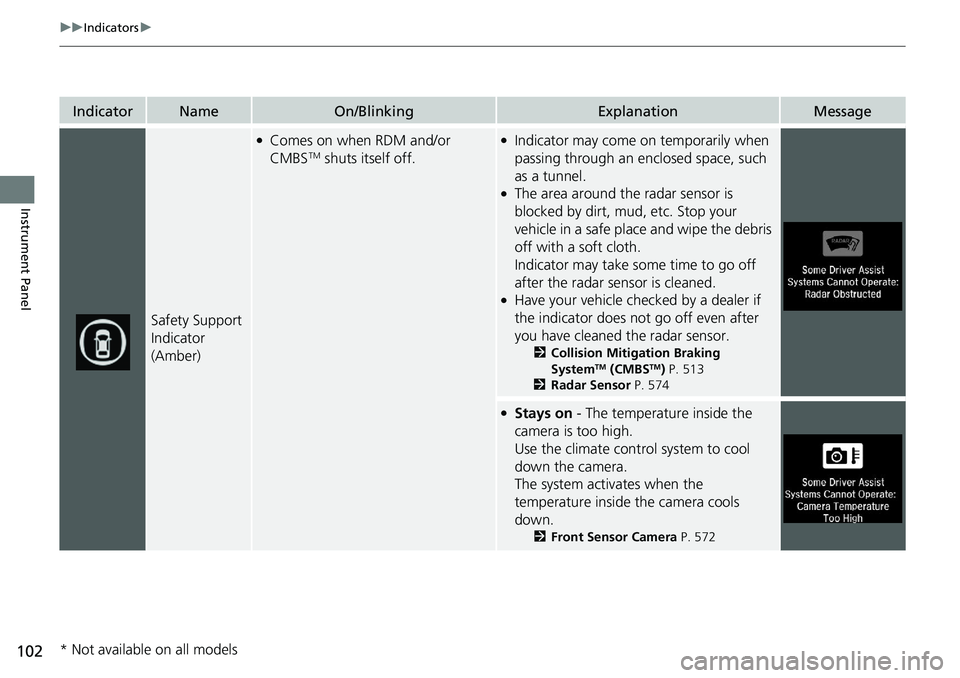
Safety Support
Indicator
(Amber)
●Comes on when RDM and/or
CMBSTM shuts itself off.
●Indicator may come on temporarily when
passing through an enclosed space, such
as a tunnel.
●The area around the radar sensor is
blocked by dirt, mud, etc. Stop your
vehicle in a safe place and wipe the debris
off with a soft cloth.
Indicator may take some time to go off
after the radar sensor is cleaned.
●Have your vehicle checked by a dealer if
the indicator does not go off even after
you have cleaned the radar sensor.
2 Collision Mitigation Braking
SystemTM (CMBSTM) P. 513
2 Radar Sensor P. 574
●Stays on - The temperature inside the
camera is too high.
Use the climate control system to cool
down the camera.
The system activates when the
temperature inside the camera cools
down.
2 Front Sensor Camera P. 572
* Not available on all models
Page 105 of 728

103
uuIndicators u
Continued
Instrument Panel
IndicatorNameOn/BlinkingExplanationMessage
Safety Support
Indicator
(Amber)
●Comes on when RDM and/or
CMBSTM shuts itself off.
●Stays on - The area around the camera is
blocked by dirt, mud, etc. Stop your
vehicle in a safe place and wipe the debris
off with a soft cloth.
●Have your vehicle checked by a dealer if
the indicator and message are still
displayed even after you have cleaned the
area around the camera.
2 Front Sensor Camera P. 572
●Comes on when mud, snow, or ice
has accumulated in the vicinity of
the blind spot information system
sensor.
●Comes on while driving - Something
may be interfering wi th the blind spot
information system sensor. Check the
vicinity of the blind spot information
system sensor and remove any obstacles.
2 Blind spot information System*
P. 505
●Indicator may come on temporarily
when the Maximum Load Limit is
exceeded.●Make sure the total load is within the
Maximum Load Limit.
2 Maximum Load Limit P. 459
—
Models with the blind spot
information system
* Not available on all models
Page 109 of 728
107
uuIndicators uDriver Information Interface Wa rning and Information Messages
Continued
Instrument Panel
MessageConditionExplanation
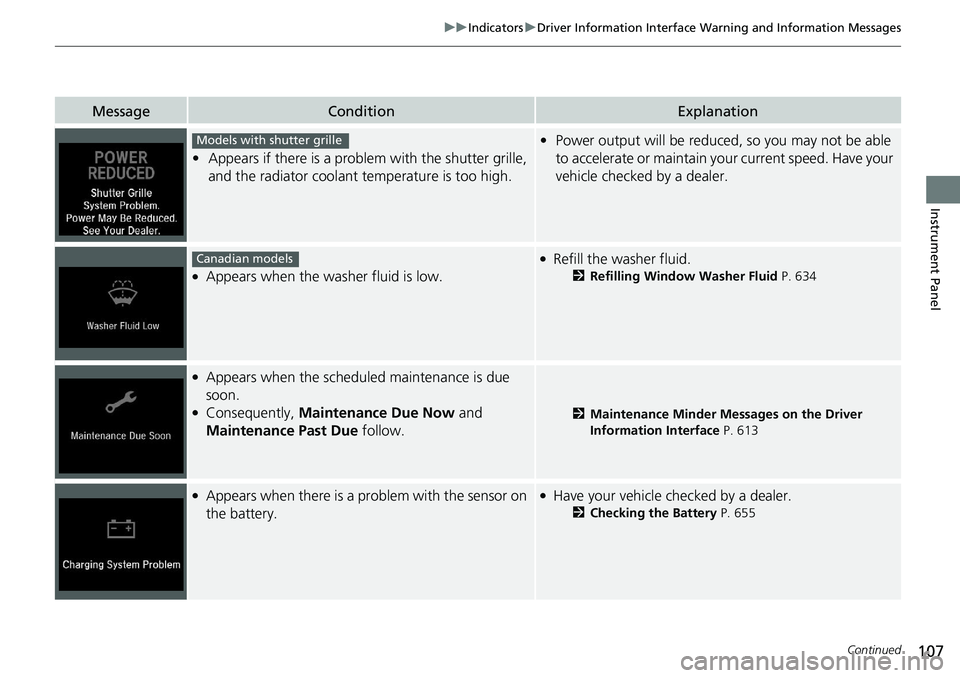
•Appears if there is a problem with the shutter grille,
and the radiator coolant temperature is too high.
•Power output will be reduced , so you may not be able
to accelerate or maintain yo ur current speed. Have your
vehicle checked by a dealer.
●Appears when the washer fluid is low.
●Refill the washer fluid.
2 Refilling Window Washer Fluid P. 634
●Appears when the scheduled maintenance is due
soon.
●Consequently, Maintenance Due Now and
Maintenance Past Due follow.2Maintenance Minder Messages on the Driver
Information Interface P. 613
●Appears when there is a problem with the sensor on
the battery.●Have your vehicle checked by a dealer.
2Checking the Battery P. 655
Models with shutter grille
Canadian models
Page 123 of 728
121
uuIndicators uDriver Information Interface Wa rning and Information Messages
Continued
Instrument Panel
MessageConditionExplanation
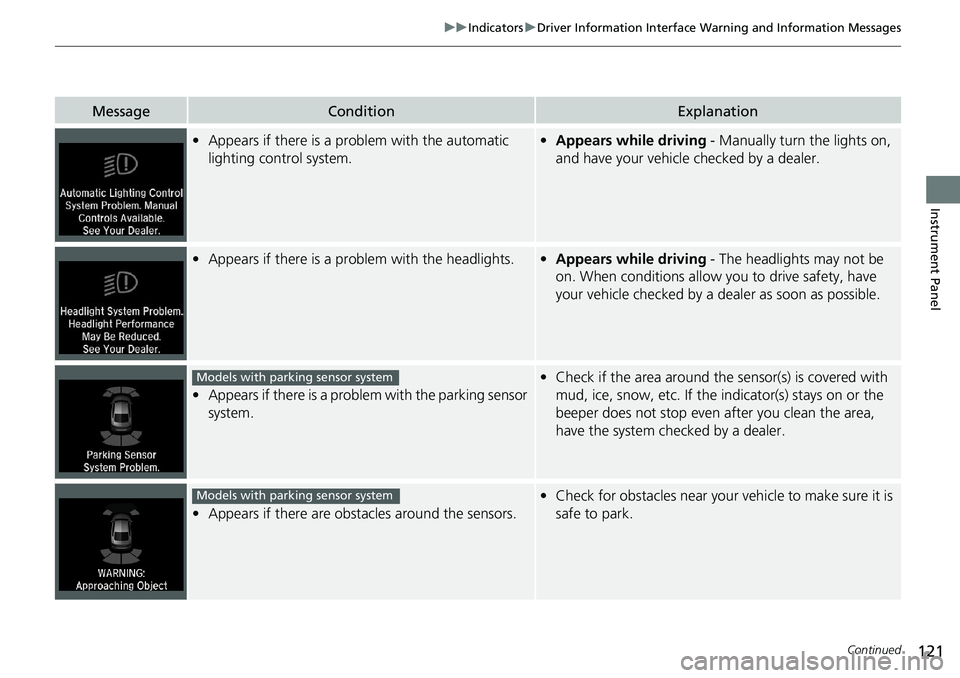
•Appears if there is a pr oblem with the automatic
lighting control system.• Appears while driving - Manually turn the lights on,
and have your vehicle checked by a dealer.
• Appears if there is a pr oblem with the headlights.•Appears while driving - The headlights may not be
on. When conditions allow you to drive safety, have
your vehicle checked by a d ealer as soon as possible.
•Appears if there is a proble m with the parking sensor
system.
• Check if the area around the sensor(s) is covered with
mud, ice, snow, etc. If the indicator(s) stays on or the
beeper does not stop even after you clean the area,
have the system checked by a dealer.
• Appears if there are obstacles around the sensors.
•Check for obstacles near your vehicle to make sure it is
safe to park.
Models with parking sensor system
Models with parking sensor system
Page 135 of 728
133
uuIndicators uDriver Information Interface Wa rning and Information Messages
Continued
Instrument Panel
MessageConditionExplanation
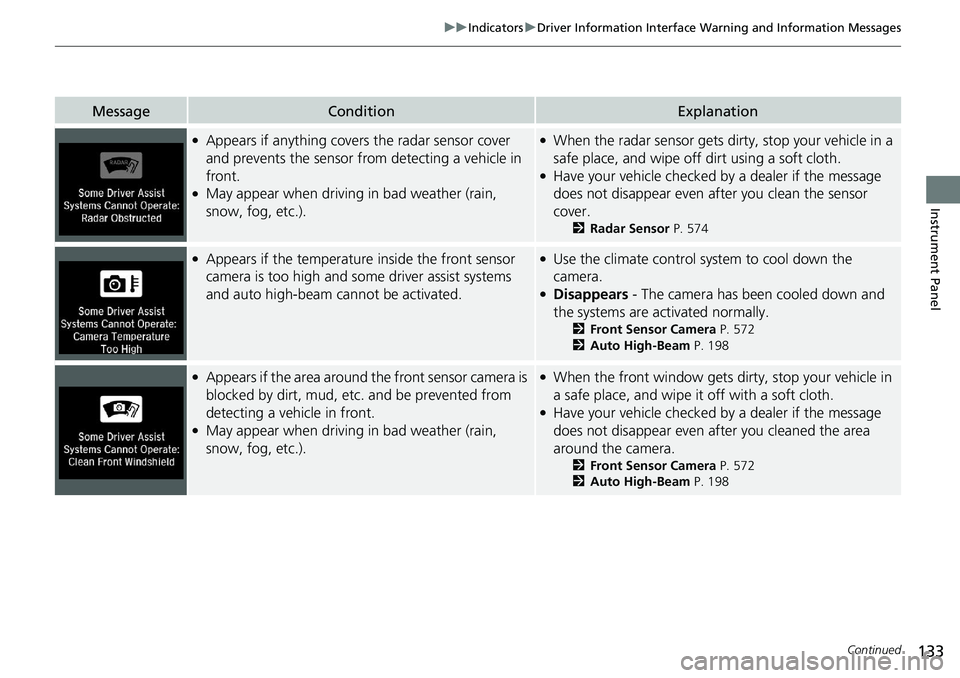
●Appears if anything covers the radar sensor cover
and prevents the sensor from detecting a vehicle in
front.
●May appear when driving in bad weather (rain,
snow, fog, etc.).
●When the radar sensor gets dirty, stop your vehicle in a
safe place, and wipe off dirt using a soft cloth.
●Have your vehicle checked by a dealer if the message
does not disappear even after you clean the sensor
cover.
2 Radar Sensor P. 574
●Appears if the temperature inside the front sensor
camera is too high and some driver assist systems
and auto high-beam cannot be activated.●Use the climate control sy stem to cool down the
camera.
●Disappears - The camera has b een cooled down and
the systems are activated normally.
2 Front Sensor Camera P. 572
2 Auto High-Beam P. 198
●Appears if the area around th e front sensor camera is
blocked by dirt, mud, etc. and be prevented from
detecting a vehicle in front.
●May appear when driving in bad weather (rain,
snow, fog, etc.).
●When the front window gets dirty, stop your vehicle in
a safe place, and wipe it off with a soft cloth.
●Have your vehicle checked by a dealer if the message
does not disappear even a fter you cleaned the area
around the camera.
2 Front Sensor Camera P. 572
2 Auto High-Beam P. 198
Page 143 of 728
Continued141
uuGauges and Displays uDriver Information Interface
Instrument Panel
Shows the total number of miles or kilomete rs driven since the last reset. Meters A
and B can be used to measure two separate trips.
■Resetting a trip meter
To reset a trip meter, display it, then press and hold the TRIP Button. The trip meter
is reset to 0.0.
Shows the outside temperature in Fahr enheit (U.S.) or Celsius (Canada).
■Adjusting the outside temperature display
Adjust the temperature reading by up to ±5°F or ±3°C if the temperature reading
seems incorrect.
Use the customized features in the au dio/information screen to correct the
temperature.
2 Customized Features P. 372, 383
■Trip Meter
■Outside Temperature
1Trip Meter
Switch between trip meter A and trip meter B by
pressing the TRIP Button.
1Outside Temperature
The temperature sensor is in the front bumper.
Road heat and exhaust from another vehicle can
affect the temperature reading when your vehicle
speed is less than 19 mph (30 km/h).
It may take several minutes for the display to be
updated after the temperature reading has stabilized.