warning light HONDA ACCORD SEDAN 2020 (in English) Owner's Guide
[x] Cancel search | Manufacturer: HONDA, Model Year: 2020, Model line: ACCORD SEDAN, Model: HONDA ACCORD SEDAN 2020Pages: 728, PDF Size: 34.06 MB
Page 546 of 728
uuHonda Sensing ®u Adaptive Cruise Control (ACC)*
544
Driving
The system may automatically shut off and the ACC indicator will come on under
certain conditions. Some examples of th ese conditions are listed below. Other
conditions may reduce some of the ACC functions.
■Environmental conditions
• Driving in bad weather (rain, fog, snow, etc.).
■Roadway conditions
• Driving on a snowy or wet roadway (obs cured lane marking, vehicle tracks,
reflected lights, road spray, high contrast).
■Vehicle conditions
• The outside of the windshie ld is blocked by dirt, mud, leaves, wet snow, etc.
• An abnormal tire or wheel condition (Wrong sized, varied size or construction,
improperly inflated, comp act spare tire, etc.).
• The camera temperature gets too high.
• The parking brake is applied.
• When the radar sensor cover is dirty.
• When the front of the vehicle tilts up due to heavy cargo in the trunk or rear seats.
• When tire chains
* are installed.
■ACC Conditions and Limitations1ACC Conditions and Limitations
For directions on the prop er handling of the radar
sensor, refer to the following page. 2 Radar Sensor P. 574
You can read about handling information for the
camera equipped with this system. 2 Front Sensor Camera P. 572
Always keep the radar sensor cover clean.
Never use chemical solvents or polishing powder for
cleaning the sensor cover. Clean it with water or a
mild detergent.
Do not put a sticker on the radar sensor cover or
replace the radar sensor cover.
If you need the radar sensor to be repaired, or
removed, or the radar se nsor cover is strongly
impacted, turn off the system by pressing the MAIN
button and take your vehicle to a dealer.
Have your vehicle checked by a dealer if you find any
unusual behavior of the system (e.g., the warning
message appears too frequently).
If the front of the vehicle is impacted in any of the
following situations, the ra dar sensor may not work
properly. Have your vehi cle checked by a dealer:
•The vehicle mounted onto a bump, curb, chock,
embankment, etc.
•You drive the vehicle where the water is deep.•Your vehicle has a frontal collision.
* Not available on all models
Page 557 of 728
Continued555
uuHonda Sensing ®u Lane Keeping Assist System (LKAS)
Driving
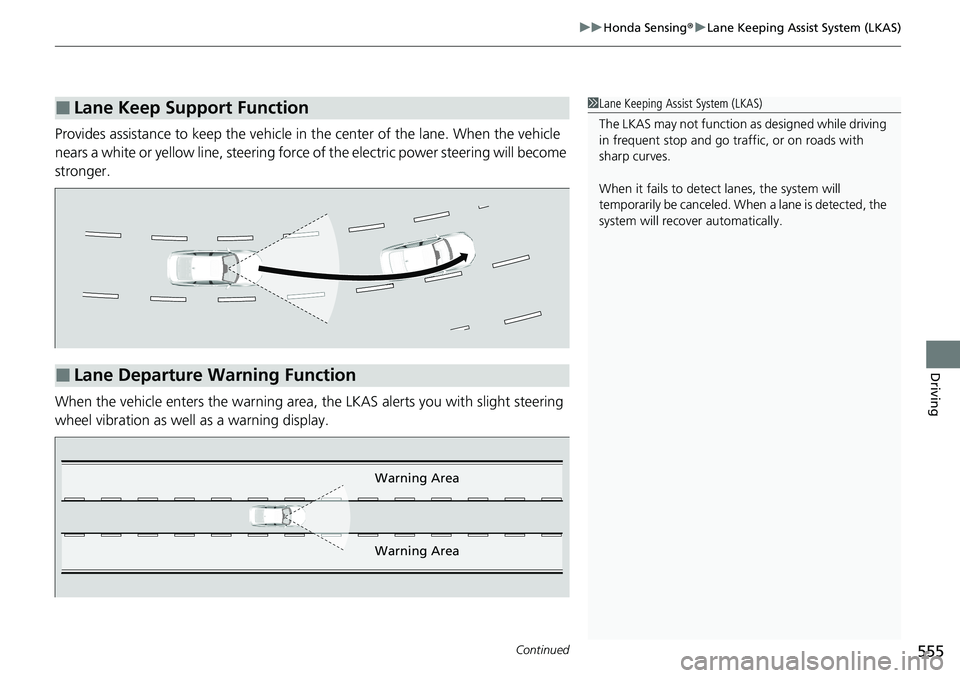
Provides assistance to keep the vehicle in the center of the lane. When the vehicle
nears a white or yellow line, steering force of the electric power steering will become
stronger.
When the vehicle enters the warning area, the LKAS alerts you with slight steering
wheel vibration as well as a warning display.
■Lane Keep Support Function1 Lane Keeping Assist System (LKAS)
The LKAS may not function as designed while driving
in frequent stop and go traf fic, or on roads with
sharp curves.
When it fails to detect lanes, the system will
temporarily be canceled. When a lane is detected, the
system will recover automatically.
■Lane Departure Warning Function
Warning Area
Warning Area
Page 566 of 728
uuHonda Sensing ®u Road Departure Mitigation (RDM) System
564
Driving
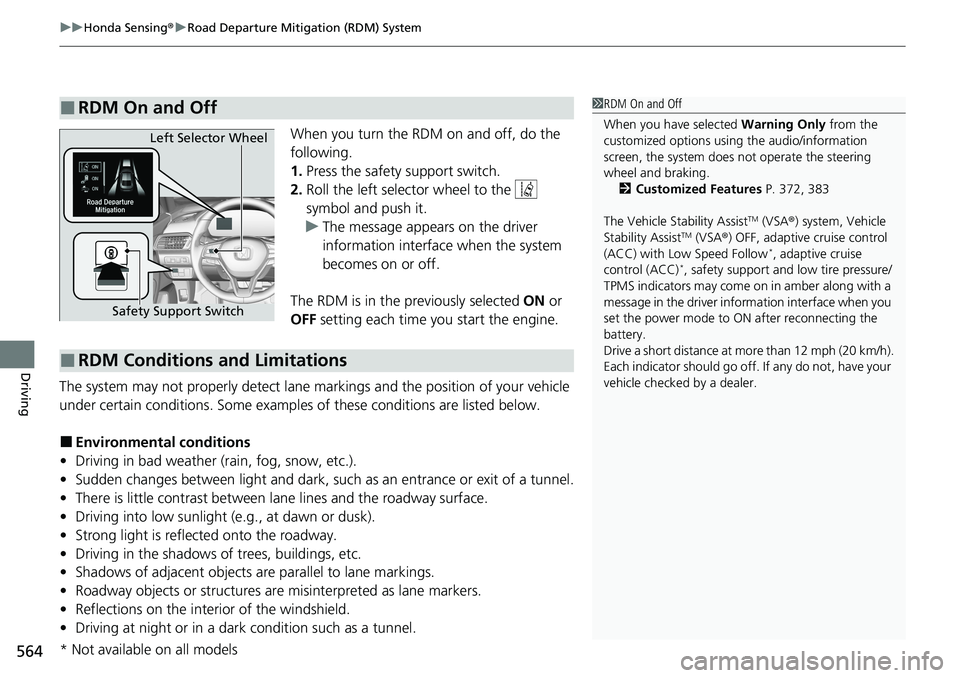
When you turn the RDM on and off, do the
following.
1. Press the safety support switch.
2. Roll the left selector wheel to the
symbol and push it.
u The message appears on the driver
information interface when the system
becomes on or off.
The RDM is in the previously selected ON or
OFF setting each time you start the engine.
The system may not properly detect lane markings and the position of your vehicle
under certain conditions. Some examples of these conditions are listed below.
■Environmental conditions
• Driving in bad weather (rain, fog, snow, etc.).
• Sudden changes between light and dark, such as an entrance or exit of a tunnel.
• There is little contrast between la ne lines and the roadway surface.
• Driving into low sunlight (e.g., at dawn or dusk).
• Strong light is reflected onto the roadway.
• Driving in the shadows of trees, buildings, etc.
• Shadows of adjacent objects are parallel to lane markings.
• Roadway objects or structures are misinterpreted as lane markers.
• Reflections on the interi or of the windshield.
• Driving at night or in a dark condition such as a tunnel.
■RDM On and Off1RDM On and Off
When you have selected Warning Only from the
customized options using the audio/information
screen, the system does not operate the steering
wheel and braking. 2 Customized Features P. 372, 383
The Vehicle Stability Assist
TM (VSA ®) system, Vehicle
Stability AssistTM (VSA ®) OFF, adaptive cruise control
(ACC) with Low Speed Follow*, adaptive cruise
control (ACC)*, safety support and low tire pressure/
TPMS indicators may come on in amber along with a
message in the driver info rmation interface when you
set the power mode to ON after reconnecting the
battery.
Drive a short distance at mo re than 12 mph (20 km/h).
Each indicator should go off. If any do not, have your
vehicle checked by a dealer.
Safety Support Switch Left Selector Wheel
■RDM Conditions and Limitations
* Not available on all models
Page 583 of 728
Continued581
uuBraking uBrake System
Driving
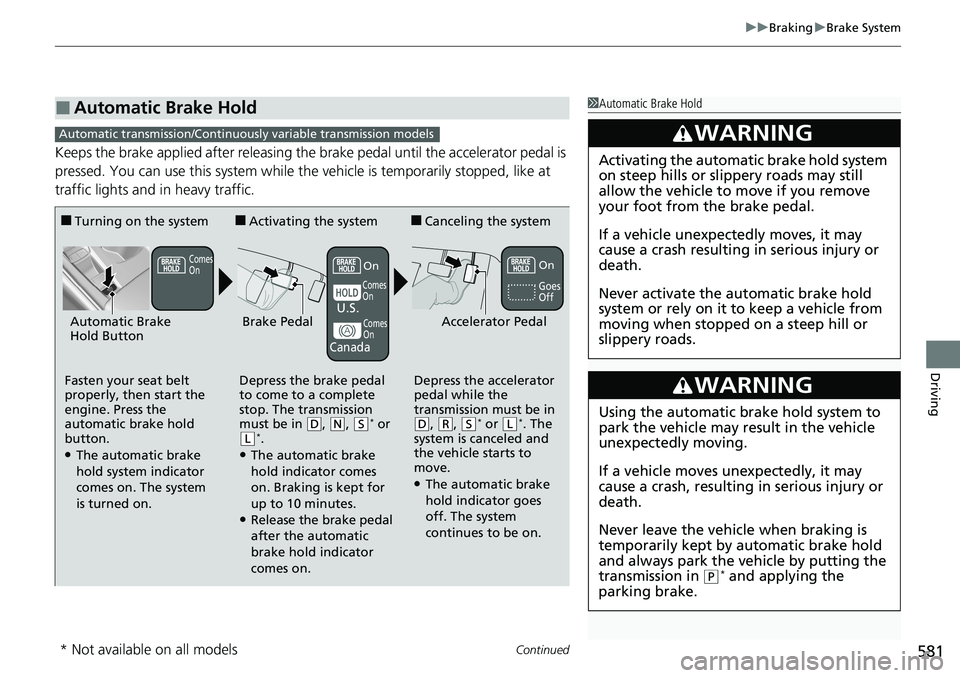
Keeps the brake applied after releasing the brake pedal until the accelerator pedal is
pressed. You can use this system while th e vehicle is temporarily stopped, like at
traffic lights and in heavy traffic.
■Automatic Brake Hold1 Automatic Brake Hold
3WARNING
Activating the automatic brake hold system
on steep hills or slippery roads may still
allow the vehicle to move if you remove
your foot from the brake pedal.
If a vehicle unexpectedly moves, it may
cause a crash resulting in serious injury or
death.
Never activate the automatic brake hold
system or rely on it to keep a vehicle from
moving when stopped on a steep hill or
slippery roads.
3WARNING
Using the automatic brake hold system to
park the vehicle may result in the vehicle
unexpectedly moving.
If a vehicle moves unexpectedly, it may
cause a crash, resulting in serious injury or
death.
Never leave the vehicle when braking is
temporarily kept by automatic brake hold
and always park the vehicle by putting the
transmission in
( P* and applying the
parking brake.
Automatic transmission/Continuousl y variable transmission models
■Turning on the system
Fasten your seat belt
properly, then start the
engine. Press the
automatic brake hold
button.
●The automatic brake
hold system indicator
comes on. The system
is turned on.
■Activating the system
Depress the brake pedal
to come to a complete
stop. The transmission
must be in
( D, (N, (S* or (L*.●The automatic brake
hold indicator comes
on. Braking is kept for
up to 10 minutes.
●Release the brake pedal
after the automatic
brake hold indicator
comes on.
■Canceling the system
Depress the accelerator
pedal while the
transmission must be in
( D, (R, (S* or (L*. The
system is canceled and
the vehicle starts to
move.
●The automatic brake
hold indicator goes
off. The system
continues to be on.
Accelerator PedalBrake PedalAutomatic Brake
Hold Button
Goes
Off
U.S.
Canada
On
On
Comes
On
Comes
On
Comes
On
* Not available on all models
Page 671 of 728
669Continued
Handling the Unexpected
If a Tire Goes Flat
Changing a Flat Tire
If a tire goes flat while driving, grasp the steering wheel firmly, and brake gradually
to reduce speed. Then, stop in a safe plac e. Replace the flat tire with a compact
spare tire. Go to a dealer as soon as possib le to have the full-size tire repaired or
replaced.
1. Park the vehicle on a firm, level, and n on-slippery surface, and apply the parking
brake.
2. Put the transmission into
(P.
2. Move the shift lever to
(R.
3. Turn on the hazard warning lights an d set the power mode to VEHICLE OFF.
1Changing a Flat Tire
Follow these compact spare precautions:
Periodically check the tire pressure of the compact
spare. It should be set to the specified pressure.
Specified Pressure: 60 psi (420 kPa, 4.2 kgf/cm
2)
When driving with the compact spare tire, keep the
vehicle speed under 50 mph (80 km/h). Replace with
a full-size tire as soon as possible.
The compact spare tire and wheel in your vehicle are
specifically for this model. Do not use them with
another vehicle. Do not us e another type of compact
spare tire or wheel with your vehicle.
Do not mount tire chains on a compact spare tire.
If a chain-mounted front tire goes flat, remove one of
the full-size rear tires and replace it with the compact
spare tire. Remove the flat front tire and replace it
with the full-size tire that was removed from the rear.
Mount the tire chains on the front tire.
NOTICE
Do not use the jack if it doesn’t work properly.
Call your dealer or a pr ofessional towing service.
Do not mount the compact spare on the front.
If either front tire goes flat, remove the rear tire on
the same side, and mount the compact spare on the
rear and the rear tire on the front.
Automatic transmission/Continuousl y variable transmission models
Manual transmission models
All models
Page 680 of 728
678
Handling the Unexpected
Jump Starting
Jump Starting Procedure
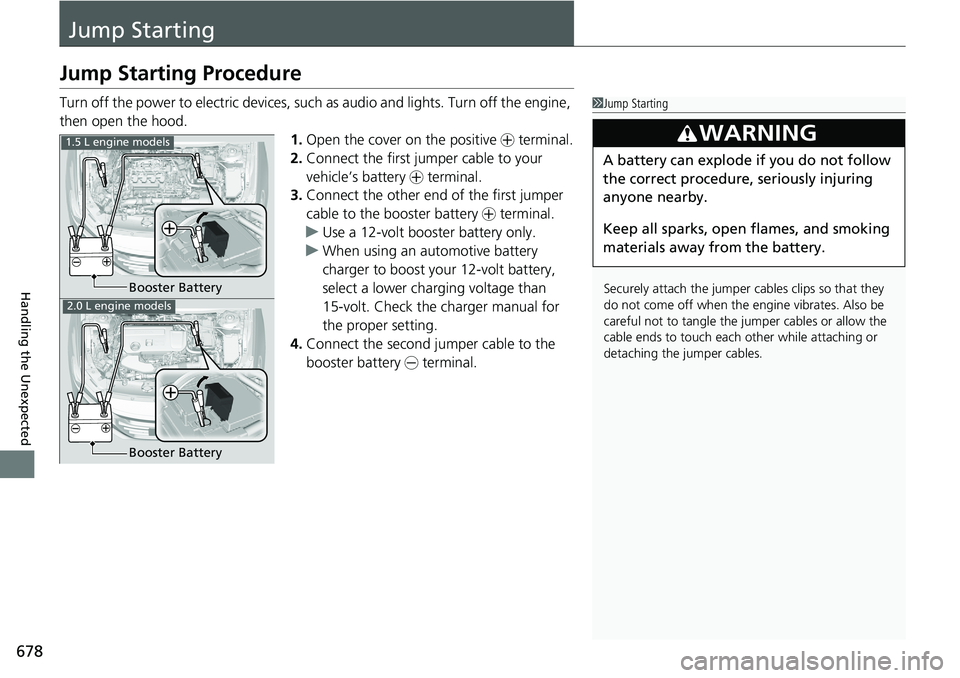
Turn off the power to electric devices, such as audio and lights. Turn off the engine,
then open the hood. 1.Open the cover on the positive + terminal.
2. Connect the first jump er cable to your
vehicle’s battery + terminal.
3. Connect the other end of the first jumper
cable to the booster battery + terminal.
u Use a 12-volt booster battery only.
u When using an automotive battery
charger to boost your 12-volt battery,
select a lower charging voltage than
15-volt. Check the charger manual for
the proper setting.
4. Connect the second jumper cable to the
booster battery - terminal.1Jump Starting
Securely attach the jumper cables clips so that they
do not come off when the e ngine vibrates. Also be
careful not to tangle the ju mper cables or allow the
cable ends to touch each other while attaching or
detaching the jumper cables.
3WARNING
A battery can explode if you do not follow
the correct procedure, seriously injuring
anyone nearby.
Keep all sparks, open flames, and smoking
materials away from the battery.
Booster Battery
1.5 L engine models
2.0 L engine models
Booster Battery
Page 685 of 728
683Continued
Handling the Unexpected
Overheating
How to Handle Overheating
Overheating symptoms are as follows:
•The temperature gauge pointer is at th e mark or the engine suddenly loses
power.
• Engine Temperature Too Hot. Do No t Drive. Allow Engine To Cool.
message appears on the dr iver information interface.
• Steam or spray comes out of the engine compartment.
■First thing to do
1. Immediately park the vehicle in a safe place.
2. Turn off all accessories and turn on the hazard warning lights.
u No steam or spray present: Keep the engine running and open the hood.
u Steam or spray is present: Turn off the engine and wait until it subsides.
Then open the hood.
1 How to Handle Overheating
NOTICE
Continuing to drive with the temperature gauge
pointer at the mark may damage the engine.
3WARNING
Steam and spray from an overheated
engine can seriously scald you.
Do not open the hood if steam is coming
out.
H
H
Page 687 of 728
685
Handling the Unexpected
Indicator, Coming On/Blinking
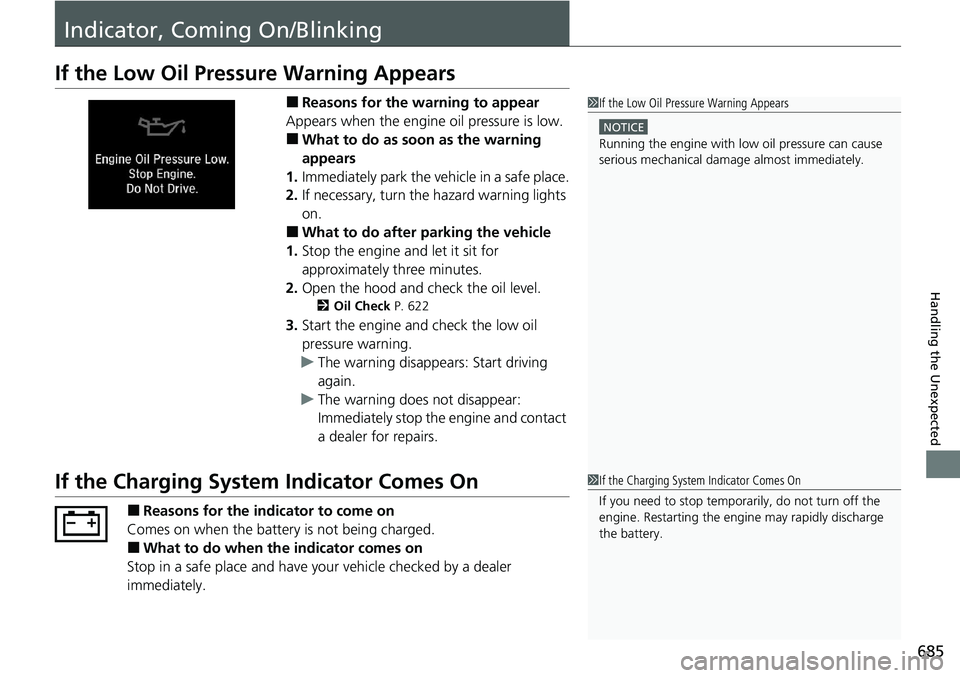
If the Low Oil Pressure Warning Appears
■Reasons for the warning to appear
Appears when the engine oil pressure is low.
■What to do as soon as the warning
appears
1. Immediately park the vehicle in a safe place.
2. If necessary, turn the hazard warning lights
on.
■What to do after parking the vehicle
1. Stop the engine and let it sit for
approximately three minutes.
2. Open the hood and ch eck the oil level.
2Oil Check P. 622
3.Start the engine and check the low oil
pressure warning.
u The warning disappears: Start driving
again.
u The warning does not disappear:
Immediately stop the engine and contact
a dealer for repairs.
If the Charging System Indicator Comes On
■Reasons for the indicator to come on
Comes on when the battery is not being charged.
■What to do when th e indicator comes on
Stop in a safe place and have y our vehicle checked by a dealer
immediately.
1 If the Low Oil Pressure Warning Appears
NOTICE
Running the engine with low oil pressure can cause
serious mechanical damage almost immediately.
1If the Charging System Indicator Comes On
If you need to stop temporarily, do not turn off the
engine. Restarting the engi ne may rapidly discharge
the battery.
Page 693 of 728
691
uuIndicator, Coming On/Blinking uIf the Transmission Indicator Blin ks along with the Warning Message
Handling the Unexpected
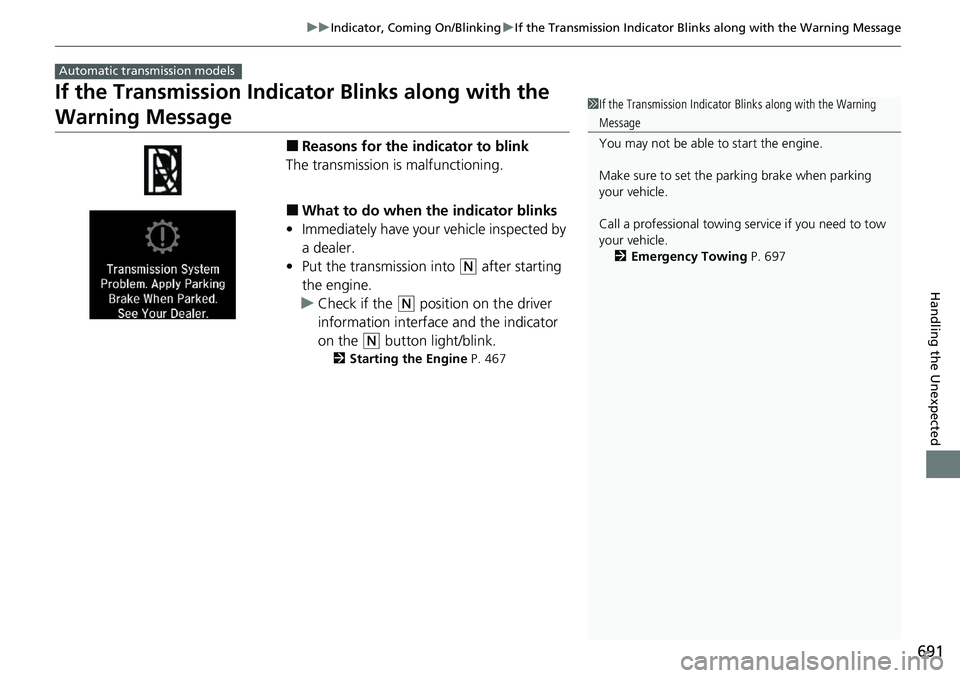
If the Transmission Indicator Blinks along with the
Warning Message
■Reasons for the indicator to blink
The transmission is malfunctioning.
■What to do when the indicator blinks
• Immediately have your vehicle inspected by
a dealer.
• Put the transmission into
(N after starting
the engine.
u Check if the
(N position on the driver
information interface and the indicator
on the
(N button light/blink.
2 Starting the Engine P. 467
Automatic transmission models
1If the Transmission Indicator Blinks along with the Warning
Message
You may not be able to start the engine.
Make sure to set the pa rking brake when parking
your vehicle.
Call a professional towing service if you need to tow
your vehicle. 2 Emergency Towing P. 697
Page 721 of 728
719
Index
Continuously Variable TransmissionCreeping................................................. 476
Fluid ....................................................... 631
Kickdown ............................................... 476
Operating the Shift Lever .......... 23, 485, 487
Shift Lever Does Not Move ...................... 681
Shifting ........................................... 484, 486
Controls .................................................... 163
Coolant (Engine) ...................................... 629
Adding to the Engine Coolant Reserve Tank ..................................................... 629
Adding to the Radiator ........................... 630
Overheating ............................................ 683
Creeping (Automatic Transmission/
Continuously Variable Transmission) .... 476
Cross Traffic Monitor ............................... 594
Cup Holders .............................................. 227
Customer Service Information ................ 716
Customized Features ....................... 372, 383
D
Daytime Running Lights .......................... 197
Dead Battery ............................................ 678
Defaulting All the Settings ...................... 401
Defrosting the Windshield and Windows ................................................. 241
Devices that Emit Radio Waves ............... 709
Dimming Headlights .............................................. 194
Rearview Mirror ...................................... 209 Dipstick (Engine Oil)
................................. 622
Directional Signals (Turn Signal) ............. 193
Door Mirrors ............................................. 210
Doors ......................................................... 166
Auto Door Locking .................................. 179
Auto Door Unlocking ............................... 179
Door and Trunk Open Message ................. 37
Keys ........................................................ 166
Locking/Unlocking the Doors from the Inside ...................................... 176
Locking/Unlocking the Doors
from the Outside ................................... 169
Lockout Prevention System ...................... 175
DOT Tire Quality Grading ........................ 649
Driver Attention Monitor ........................ 152
Driver Information Interface ................... 138
Switching the Display .............................. 138
Warning and Information Messages ........ 105
Driving ....................................................... 455
Automatic Transmission/ Continuously Variable Transmission ....... 476
Braking .................................................... 575
Shifting Gear ................................... 477, 490
Shifting Position .............................. 484, 486
Starting the Engine .................................. 467
Driving Position Memory System ............. 206
Driving Support Information ................... 155
Dust and Pollen Filter ............................... 658
E
Eco Assist® System ........................................ 9
ECON Button ............................................ 494
Econ Mode Indicator.................................................... 97
Elapsed Time ............................................. 145
Electric Power Steering (EPS) System Indicator............................................ 92, 689
Electronic Stability Control (ESC) ............. 496
Emergency ................................................ 697
Emergency Engine Stop ........................... 677
Emergency Trunk Opener ........................ 182
Emissions Testing (Readiness Codes) ....... 711
Engine ....................................................... 708
Coolant ................................................... 629
Jump Starting .......................................... 678
Oil ........................................................... 621
Starting ................................................... 467
Engine Coolant ......................................... 629
Adding to the Engine Coolant Reserve Tank ...................................................... 629
Adding to the Radiator ............................ 630
Overheating ............................................ 683
Temperature Gauge ................................ 137
Engine Oil ................................................. 621
Adding .................................................... 624
Checking................................................. 622
Displaying Oil Life .................................... 612
Low Oil Pressure Warning........................ 685
Recommended Engine Oil ....................... 621
ENGINE START/STOP Button .................... 190