hood HONDA ACCORD SEDAN 2020 Owner's Manual (in English)
[x] Cancel search | Manufacturer: HONDA, Model Year: 2020, Model line: ACCORD SEDAN, Model: HONDA ACCORD SEDAN 2020Pages: 728, PDF Size: 34.06 MB
Page 5 of 728
Contents
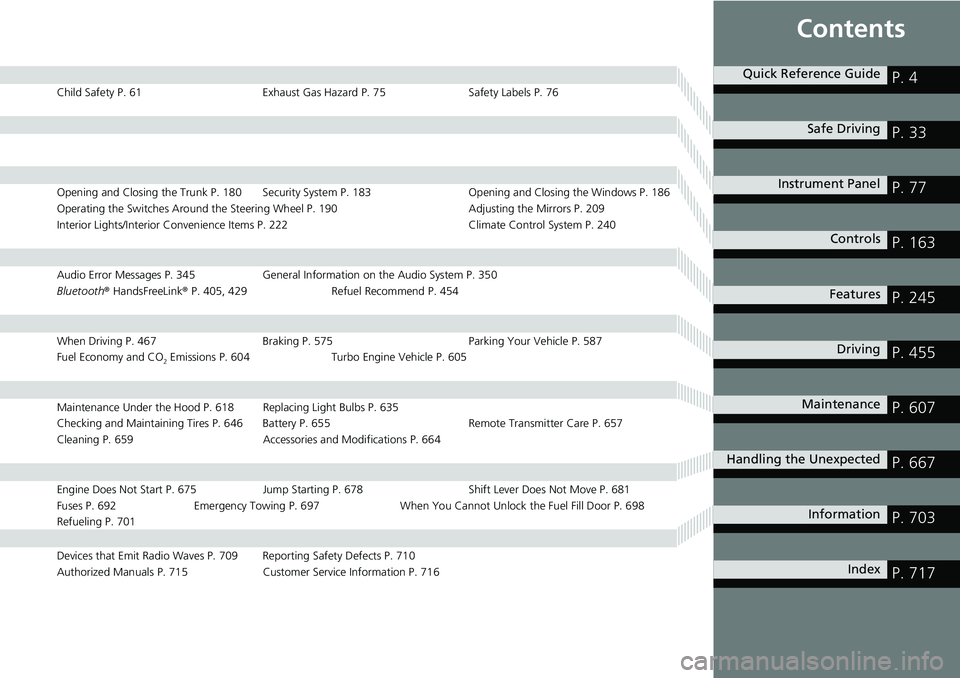
Child Safety P. 61Exhaust Gas Hazard P. 75Safety Labels P. 76
Opening and Closing the Trunk P. 180 Security Sy stem P. 183 Opening and Closing the Windows P. 186
Operating the Switches Around the Steering Wheel P. 190 Adjusting the Mirrors P. 209
Interior Lights/Interior Convenience Items P. 222 Climate Control System P. 240
Audio Error Messages P. 345 General Information on the Audio System P. 350
Bluetooth ® HandsFreeLink ® P. 405, 429 Refuel Recommend P. 454
When Driving P. 467 Braking P. 575Parking Your Vehicle P. 587
Fuel Economy and CO
2 Emissions P. 604 Turbo Engine Vehicle P. 605
Maintenance Under the Hood P. 618 Replacing Light Bulbs P. 635
Checking and Maintaining Tires P. 646 Battery P. 655 Remote Transmitter Care P. 657
Cleaning P. 659 Accessories and Modifications P. 664
Engine Does Not Start P. 675 Jump Starting P. 678 Shift Lever Does Not Move P. 681
Fuses P. 692 Emergency Towing P. 697 When You Cannot Unlock the Fuel Fill Door P. 698
Refueling P. 701
Devices that Emit Radio Waves P. 709 Reporting Safety Defects P. 710
Authorized Manuals P. 715 Customer Service Information P. 716
Quick Reference GuideP. 4
Safe DrivingP. 33
Instrument PanelP. 77
ControlsP. 163
FeaturesP. 245
DrivingP. 455
MaintenanceP. 607
Handling the UnexpectedP. 667
InformationP. 703
IndexP. 717
Page 8 of 728
Visual Index
6
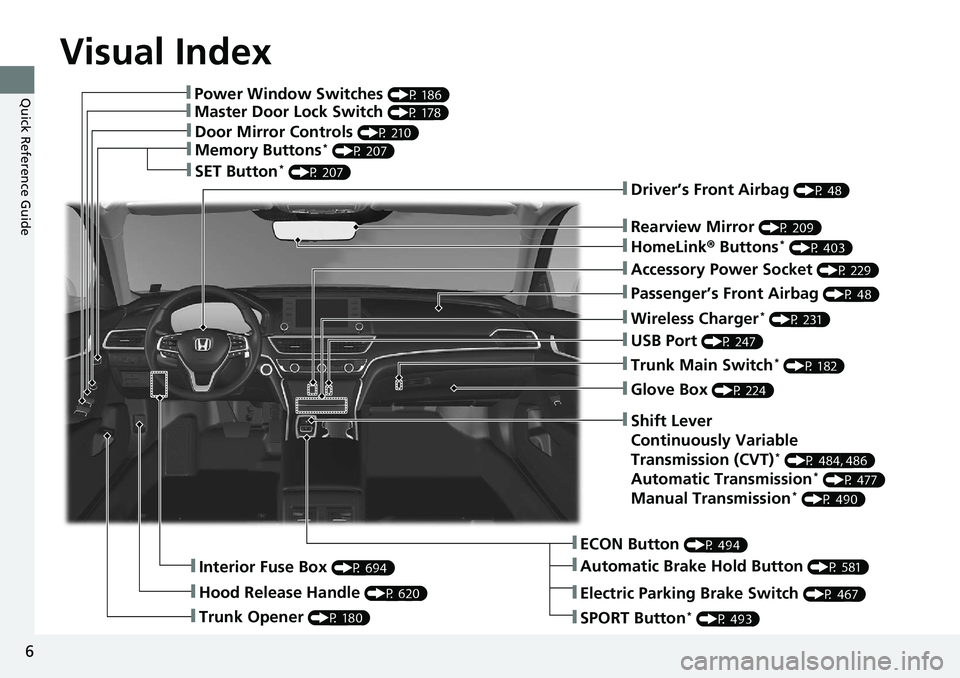
Quick Reference Guide❚Power Window Switches (P 186)
❚Master Door Lock Switch (P 178)
❚Door Mirror Controls (P 210)
❚Memory Buttons* (P 207)
❚SET Button* (P 207)
❚Trunk Opener (P 180)
❚Interior Fuse Box (P 694)
❚Hood Release Handle (P 620)
❚Driver’s Front Airbag (P 48)
❚Rearview Mirror (P 209)
❚HomeLink® Buttons* (P 403)
❚Accessory Power Socket (P 229)
❚Passenger’s Front Airbag (P 48)
❚Wireless Charger* (P 231)
❚USB Port (P 247)
❚Trunk Main Switch* (P 182)
❚Glove Box (P 224)
❚ECON Button (P 494)
❚Automatic Brake Hold Button (P 581)
❚Shift Lever
Continuously Variable
Transmission (CVT)
* (P 484, 486)
Automatic Transmission* (P 477)
Manual Transmission* (P 490)
❚Electric Parking Brake Switch (P 467)
❚SPORT Button* (P 493)
Page 10 of 728
Visual Index
8
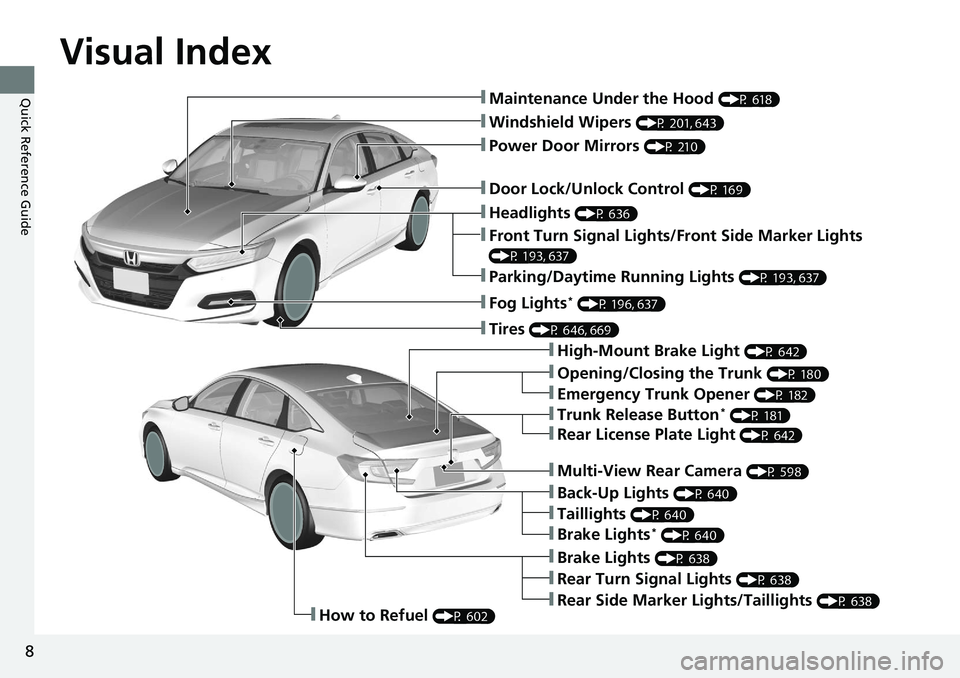
Quick Reference Guide❚Maintenance Under the Hood (P 618)
❚Windshield Wipers (P 201, 643)
❚Door Lock/Unlock Control (P 169)
❚Power Door Mirrors (P 210)
❚Headlights (P 636)
❚High-Mount Brake Light (P 642)
❚Emergency Trunk Opener (P 182)
❚Opening/Closing the Trunk (P 180)
❚Parking/Daytime Running Lights (P 193, 637)
❚Front Turn Signal Lights/Front Side Marker Lights
(P 193, 637)
❚Fog Lights* (P 196, 637)
❚Trunk Release Button* (P 181)
❚Brake Lights (P 638)
❚Rear Side Marker Lights/Taillights (P 638)
❚Rear Turn Signal Lights (P 638)
❚Back-Up Lights (P 640)
❚How to Refuel (P 602)
❚Tires (P 646, 669)
❚Brake Lights* (P 640)
❚Taillights (P 640)
❚Multi-View Rear Camera (P 598)
❚Rear License Plate Light (P 642)
Page 29 of 728
27
Quick Reference Guide
Maintenance (P 607)
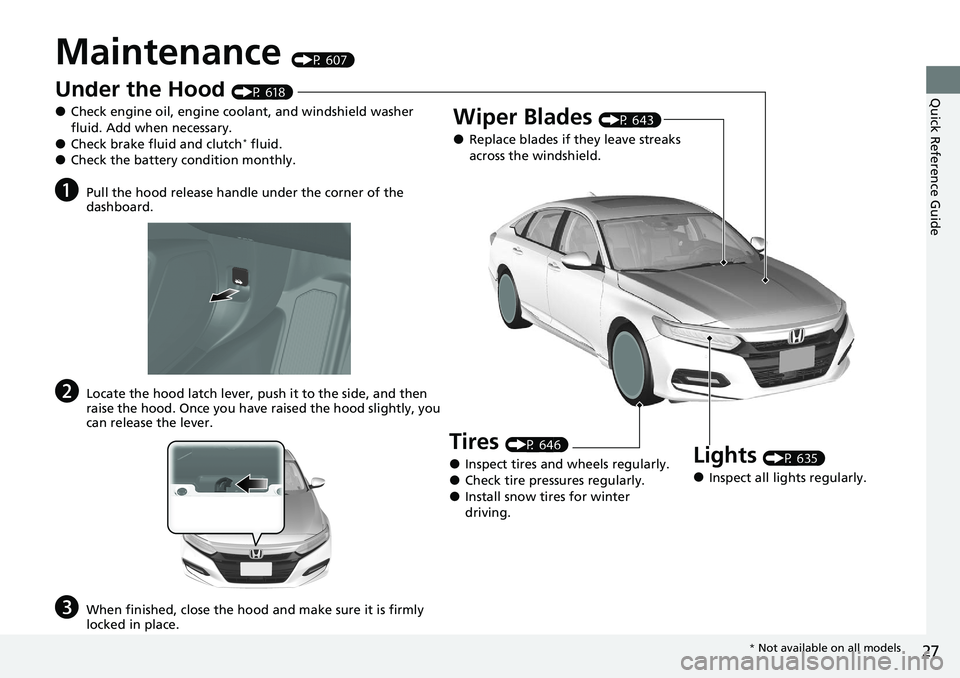
Under the Hood (P 618)
●Check engine oil, engine coolant, and windshield washer
fluid. Add when necessary.
●Check brake fluid and clutch* fluid.●Check the battery condition monthly.
aPull the hood release handle under the corner of the
dashboard.
bLocate the hood latch lever, push it to the side, and then
raise the hood. Once you have raised the hood slightly, you
can release the lever.
cWhen finished, close the hood and make sure it is firmly
locked in place.
Lights (P 635)
●Inspect all lights regularly.
Wiper Blades (P 643)
●Replace blades if they leave streaks
across the windshield.
Tires (P 646)
●Inspect tires and wheels regularly.●Check tire pressures regularly.●Install snow tires for winter
driving.
* Not available on all models
Page 30 of 728
28
Quick Reference Guide
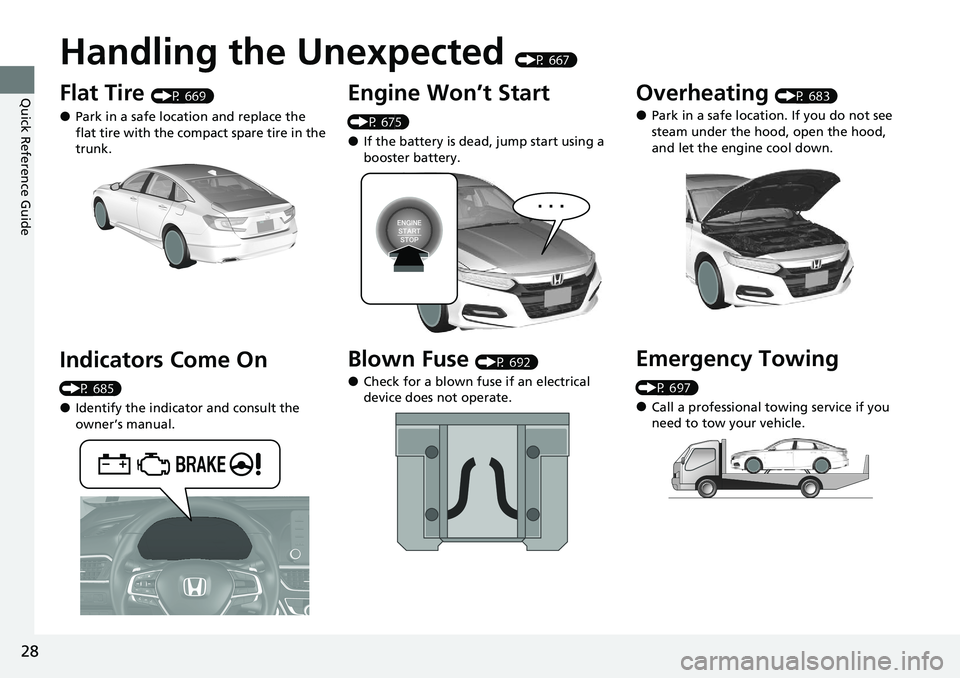
Handling the Unexpected (P 667)
Flat Tire (P 669)
●Park in a safe location and replace the
flat tire with the compact spare tire in the
trunk.
Indicators Come On
(P 685)
●Identify the indicator and consult the
owner’s manual.
Engine Won’t Start
(P 675)
●If the battery is dead, jump start using a
booster battery.
Blown Fuse (P 692)
●Check for a blown fuse if an electrical
device does not operate.
Overheating (P 683)
●Park in a safe location. If you do not see
steam under the hood, open the hood,
and let the engine cool down.
Emergency Towing
(P 697)
●Call a professional towing service if you
need to tow your vehicle.
Page 50 of 728
48
uuAirbags uTypes of Airbags
Safe Driving
Types of Airbags
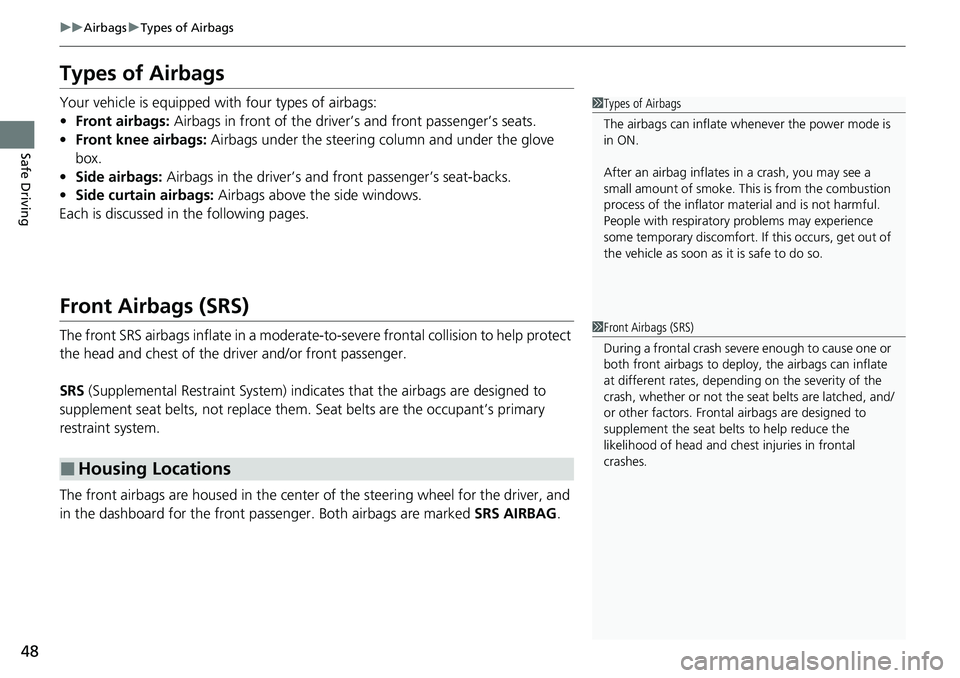
Your vehicle is equipped with four types of airbags:
• Front airbags: Airbags in front of the driver ’s and front passenger’s seats.
• Front knee airbags: Airbags under the steering column and under the glove
box.
• Side airbags: Airbags in the driver’s and front passenger’s seat-backs.
• Side curtain airbags: Airbags above the side windows.
Each is discussed in the following pages.
Front Airbags (SRS)
The front SRS airbags inflate in a moderate-to -severe frontal collision to help protect
the head and chest of the driver and/or front passenger.
SRS (Supplemental Restraint System) indica tes that the airbags are designed to
supplement seat belts, not replace them. Seat belts are the occupant’s primary
restraint system.
The front airbags are housed in the center of the steering wheel for the driver, and
in the dashboard for the front pass enger. Both airbags are marked SRS AIRBAG.
■Housing Locations
1Types of Airbags
The airbags can inflate whenever the power mode is
in ON.
After an airbag inflates in a crash, you may see a
small amount of smoke. This is from the combustion
process of the infl ator material and is not harmful.
People with respiratory pr oblems may experience
some temporary discomfort. If this occurs, get out of
the vehicle as soon as it is safe to do so.
1 Front Airbags (SRS)
During a frontal crash severe enough to cause one or
both front airbags to deploy, the airbags can inflate
at different rates, dependi ng on the severity of the
crash, whether or not the se at belts are latched, and/
or other factors. Frontal airbags are designed to
supplement the seat belts to help reduce the
likelihood of head and chest injuries in frontal
crashes.
Page 53 of 728
51
uuAirbags uFront Airbags (SRS)
Safe DrivingThe airbags have advanced features to he lp reduce the likelihood of airbag related
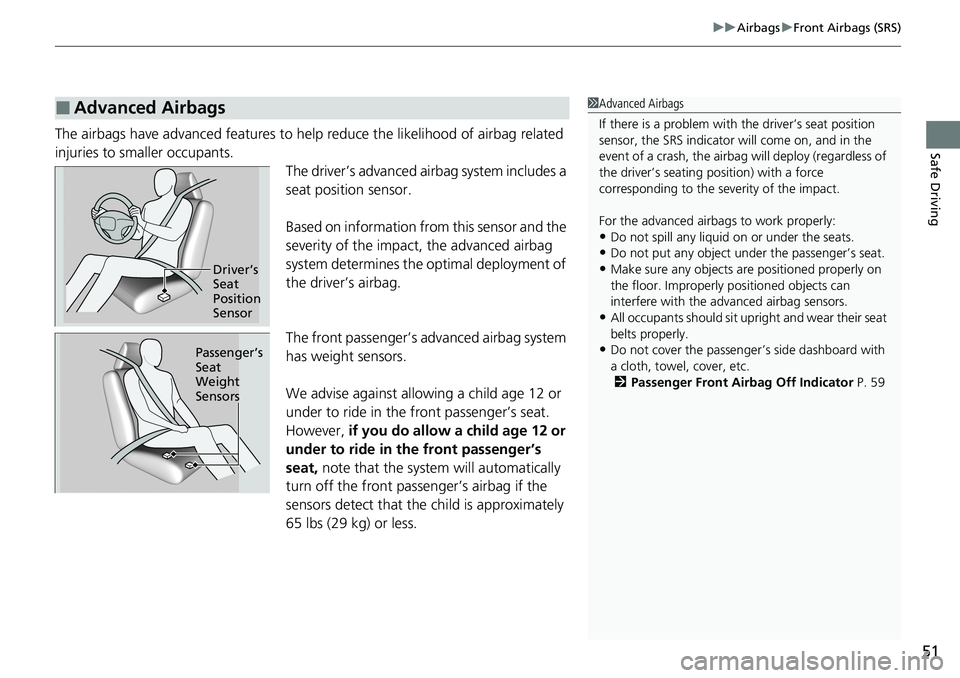
injuries to smaller occupants. The driver’s advanced airbag system includes a
seat position sensor.
Based on information from this sensor and the
severity of the impact, the advanced airbag
system determines the optimal deployment of
the driver’s airbag.
The front passenger’s ad vanced airbag system
has weight sensors.
We advise against allowi ng a child age 12 or
under to ride in the front passenger’s seat.
However, if you do allow a child age 12 or
under to ride in the front passenger’s
seat, note that the system will automatically
turn off the front passenger’s airbag if the
sensors detect that the child is approximately
65 lbs (29 kg) or less.
■Advanced Airbags1 Advanced Airbags
If there is a problem with the driver’s seat position
sensor, the SRS indicator wi ll come on, and in the
event of a crash, the airbag will deploy (regardless of
the driver’s seating position) with a force
corresponding to the se verity of the impact.
For the advanced airbags to work properly:
•Do not spill any liquid on or under the seats.
•Do not put any object under the passenger’s seat.
•Make sure any objects are positioned properly on
the floor. Improperly pos itioned objects can
interfere with the advanced airbag sensors.
•All occupants should sit upr ight and wear their seat
belts properly.
•Do not cover the passenger ’s side dashboard with
a cloth, towel, cover, etc. 2 Passenger Front Airbag Off Indicator P. 59
Driver’s
Seat
Position
Sensor
Passenger’s
Seat
Weight
Sensors
Page 59 of 728
57
uuAirbags uSide Curtain Airbags
Continued
Safe Driving
Side Curtain Airbags
The side curtain airbags help protect the heads of the driver and passengers in the
outer seating positions during a moderate-to -severe side impact. The side curtain
airbags equipped in this vehicle are also designed to help reduce the likelihood of
partial and complete ejection of vehicle occupants through side windows in crashes,
particularly rollover crashes.
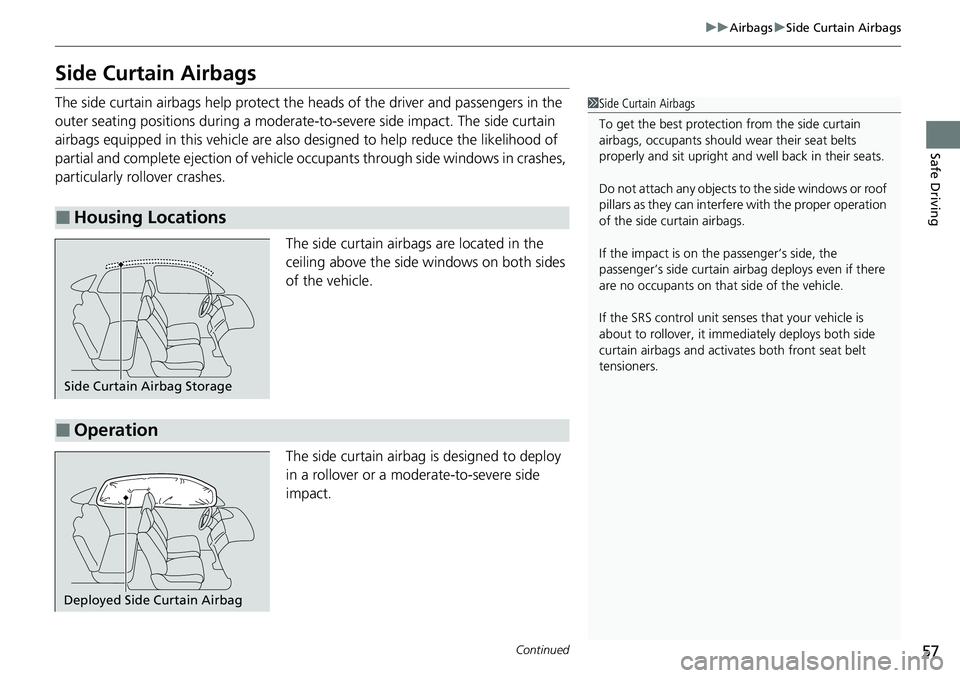
The side curtain airbags are located in the
ceiling above the side windows on both sides
of the vehicle.
The side curtain airbag is designed to deploy
in a rollover or a moderate-to-severe side
impact.
■Housing Locations
1 Side Curtain Airbags
To get the best protecti on from the side curtain
airbags, occupants should wear their seat belts
properly and sit upr ight and well back in their seats.
Do not attach any objects to the side windows or roof
pillars as they can interfere with the proper operation
of the side curtain airbags.
If the impact is on the passenger’s side, the
passenger’s side curtain airbag deploys even if there
are no occupants on that side of the vehicle.
If the SRS control unit sens es that your vehicle is
about to rollover, it imme diately deploys both side
curtain airbags and activates both front seat belt
tensioners.
Side Curtain Airbag Storage
■Operation
Deployed Side Curtain Airbag
Page 67 of 728
Continued65
uuChild Safety uSafety of Infants and Small Children
Safe DrivingMost child seats are LATCH-compatible (L ower Anchors and Tethers for CHildren).
Some have a rigid-type connector, while othe rs have a flexible-type connector. Both
are equally easy to use. Some existing and previously owned child seats can only be
installed using the seat belt. Whichever type you choose, follow the child seat
manufacturer’s use and care instructions including recommended expiration dates
as well as the instructions in this manual. Proper installation is key to maximizing
your child’s safety.
In seating positions and vehicles not equipped with LATCH, a LATCH-compatible
child seat can be installed using the seat belt and a top tether for added security.
This is because all child seats are required to be designed so that they can be secured
with a lap belt or the lap part of a lap/shoulder belt. In addition, the child seat
manufacturer may advise that a seat belt be used to attach a LATCH-compatible seat
once a child reaches a specified weight. Pl ease read the child seat owner’s manual
for proper installation instructions.
■Important consideration wh en selecting a child seat
Make sure the child seat meets the following three requirements:
• The child seat is the correct type and size for the child.
• The child seat is the correct type for the seating position.
• The child seat is compliant with Federal Motor Vehicle Safety Standard 213 or
Canadian Motor Vehicle Safety Standard 213.
■Selecting a Child Seat1Selecting a Child Seat
Installation of a LATCH-compatible child seat is
simple.
LATCH-compatible child s eats have been developed
to simplify the installati on process and reduce the
likelihood of injuries caused by incorrect installation.
Page 174 of 728
uuLocking and Unlocking the Doors uLocking/Unlocking the Doors from the Outside
172
Controls
To temporarily deactivate the function:
1. Set the power mode to OFF.
2. Open the driver’s door.
3. Using the master door lock switch, operate
the lock as follows:
Lock Unlock Lock Unlock.
u The beeper sounds and the function is
deactivated.
To restore the function:
• Set the power mode to ON.
• Lock the vehicle without using the auto lock
function.
• Walk away at least more than about 5 feet
(1.5 m) away from the vehicle while
carrying the remote.
• Open any door.1Locking the vehicle (Walk away auto lock® )
The auto lock function does not operate when any of
the following conditions are met.
•The remote is inside the vehicle.
•A door or the hood is not closed.•The power mode is set to any mode other than
OFF.
•The remote is not located within a radius of about
5 feet (1.5 m) from the vehicle when you get out of
the vehicle and close the doors.
Auto lock function operation stop beeper
After the auto lock function has been activated, the
auto lock operation stop beeper sounds for
approximately two seconds in the following cases.
•The remote is put inside the vehicle through a
window.
•You are located too close to the vehicle.
•The remote is put inside the trunk.
If the warning beeper sounds, check that you are
carrying the remote. Then, open/close a door and
confirm the auto lock ac tivation beeper sounds once.
In the case that the remote is out of operating range
when you close a door or the trunk, a beeper will
sound to indicate that the auto lock function has
been canceled.