instrument panel HONDA CIVIC 2002 7.G User Guide
[x] Cancel search | Manufacturer: HONDA, Model Year: 2002, Model line: CIVIC, Model: HONDA CIVIC 2002 7.GPages: 321, PDF Size: 5.13 MB
Page 73 of 321
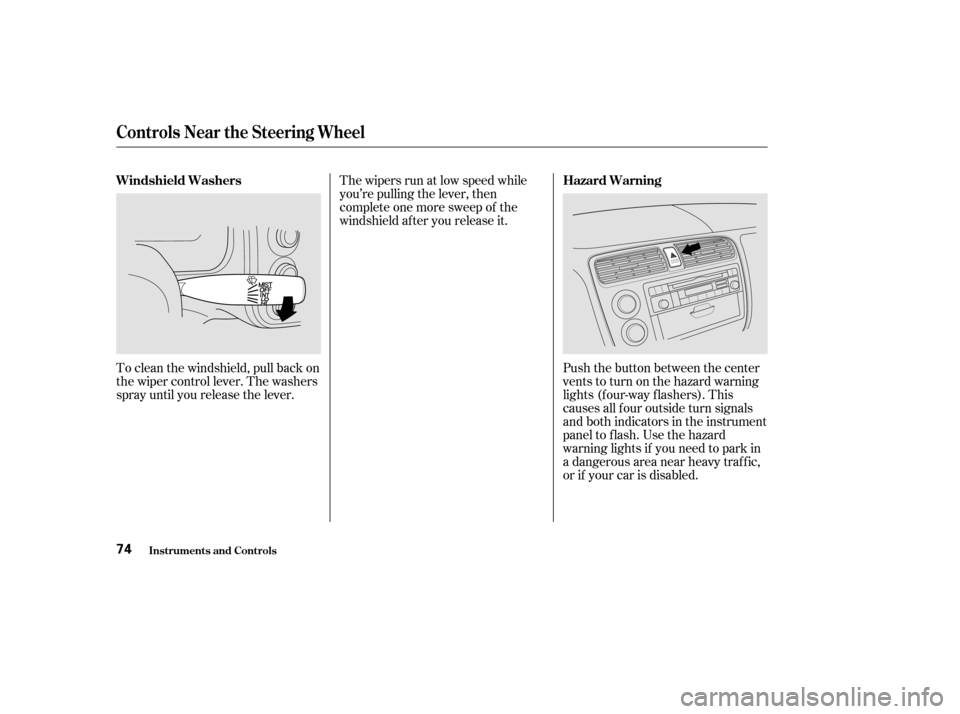
To clean the windshield, pull back on
the wiper control lever. The washers
spray until you release the lever.Push the button between the center
vents to turn on the hazard warning
lights (f our-way f lashers). This
causes all f our outside turn signals
and both indicators in the instrument
panel to f lash. Use the hazard
warning lights if you need to park in
a dangerous area near heavy traffic,
or if your car is disabled.
The wipers run at low speed while
you’re pulling the lever, then
complete one more sweep of the
windshield af ter you release it.
Controls Near the Steering Wheel
Inst rument s and Cont rols
Windshield Washers
Hazard Warning
74
Page 75 of 321
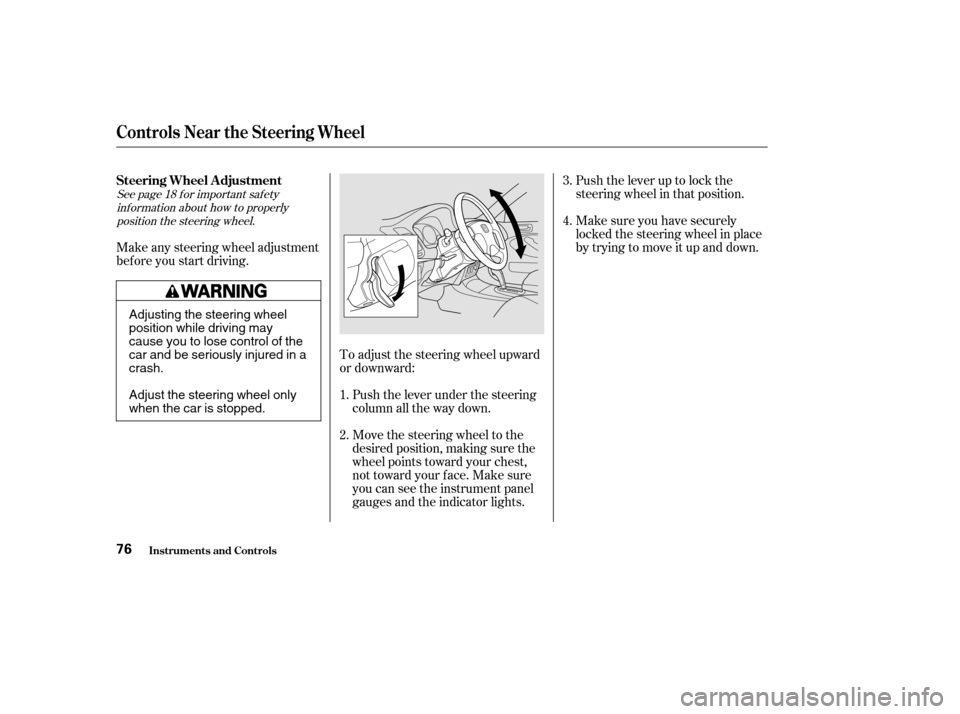
Push the lever up to lock the
steering wheel in that position.
Make sure you have securely
locked the steering wheel in place
by trying to move it up and down.
Move the steering wheel to the
desired position, making sure the
wheel points toward your chest,
not toward your f ace. Make sure
you can see the instrument panel
gauges and the indicator lights.
Push the lever under the steering
column all the way down.
To adjust the steering wheel upward
or downward:
Make any steering wheel adjustment
bef ore you start driving.
1.4.
3.
2.
See page f or important saf ety inf ormation about how to properlyposition the steering wheel. 18
Steering Wheel A djustment
Controls Near the Steering Wheel
Inst rument s and Cont rols76
Adjusting the steering wheel
position while driving may
cause you to lose control of the
car and be seriously injured in acrash.
Adjust the steering wheel only
when the car is stopped.
Page 96 of 321
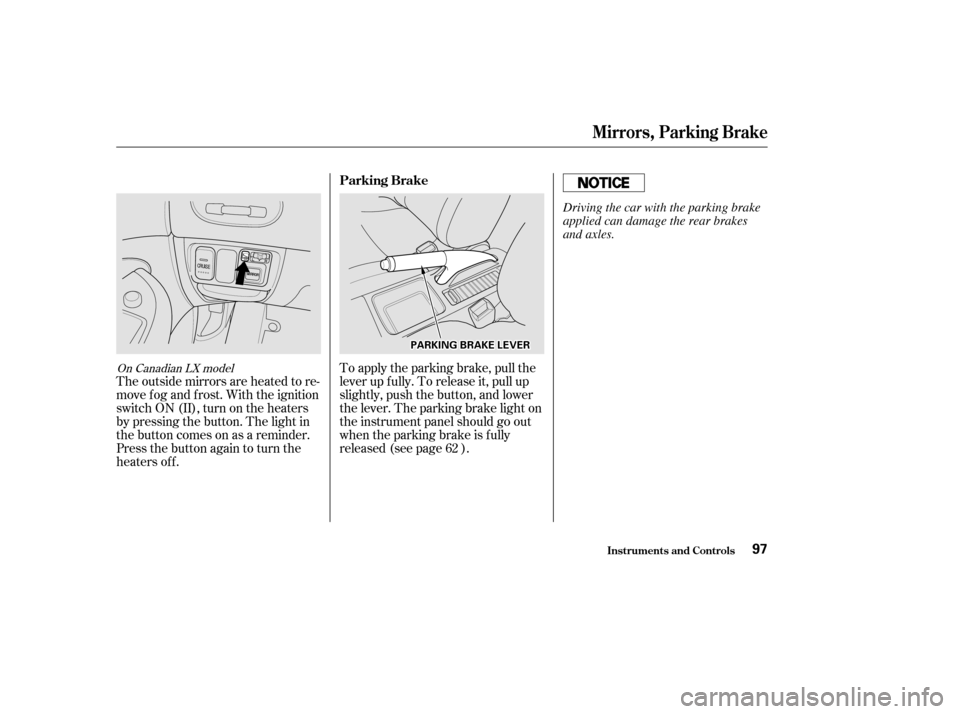
To apply the parking brake, pull the
lever up f ully. To release it, pull up
slightly, push the button, and lower
the lever. The parking brake light on
the instrument panel should go out
when the parking brake is f ully
released (see page ).
The outside mirrors are heated to re-
move fog and frost. With the ignition
switchON(II),turnontheheaters
by pressing the button. The light in
the button comes on as a reminder.
Press the button again to turn the
heaters off.
62On Canadian LX model
Inst rument s and Cont rols
Mirrors, Parking Brake
Parking Brake
97
PPAARRKKIINNGGBBRRAAKKEELLEEVVEERR
Driving the car with the parking brake
applied can damage the rear brakes
and axles.
Page 118 of 321
You can use the instrument panel
brightness control knob to adjust the
illumination of the audio system (see
page ). The audio system
illuminates when the parking lights
are on, even if the radio is turned of f .
The audio system display usually
shows the time when the ignition
switch is in ACCESSORY (I) or ON
(II). It shows the operation mode of
the radio, optional cassette player, or
optional CD player/changer when
you operate them, then goes back to
the time display af ter f ive seconds.
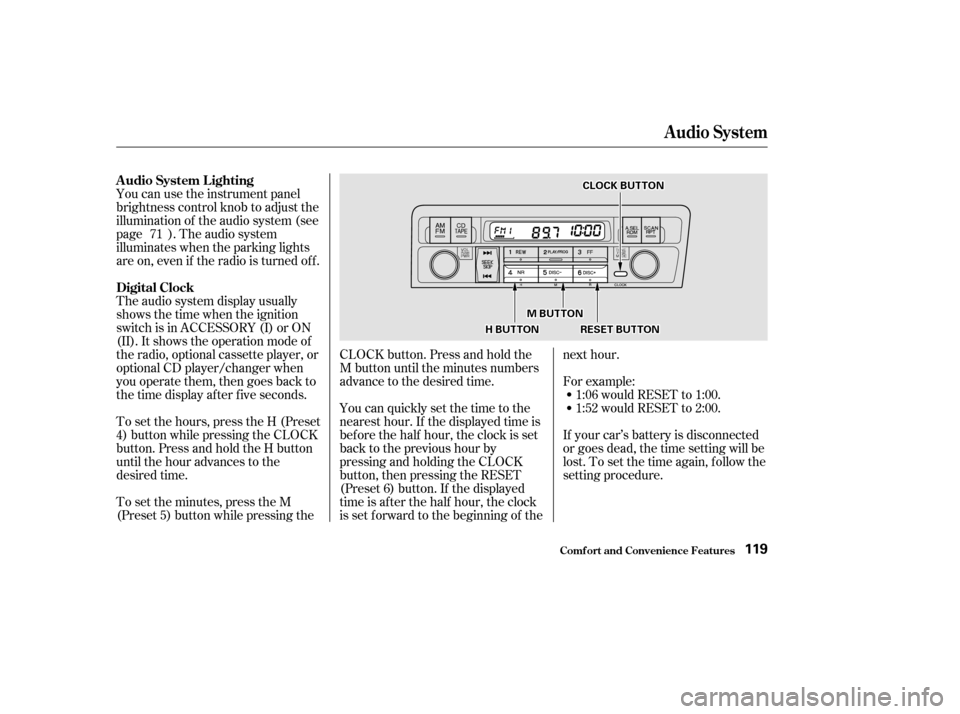
To set the hours, press the H (Preset
4) button while pressing the CLOCK
button. Press and hold the H button
until the hour advances to the
desired time.
To set the minutes, press the M
(Preset 5) button while pressing theCLOCK button. Press and hold the
M button until the minutes numbers
advance to the desired time.
You can quickly set the time to the
nearest hour. If the displayed time is
bef ore the half hour, the clock is set
back to the previous hour by
pressing and holding the CLOCK
button, then pressing the RESET
(Preset 6) button. If the displayed
time is af ter the half hour, the clock
is set forward to the beginning of thenext hour.
1:06 would RESET to 1:00.
1:52 would RESET to 2:00.
For example:
If your car’s battery is disconnected
or goes dead, the time setting will be
lost. To set the time again, f ollow the
setting procedure.
71
Audio System
Comf ort and Convenience Feat ures
A udio System L ighting
Digital Clock
119
CCLLOOCCKKBBUUTTTTOONN
RREESSEETTBBUUTTTTOONN
MMBBUUTTTTOONN
HHBBUUTTTTOONN
Page 130 of 321
CONT INUED
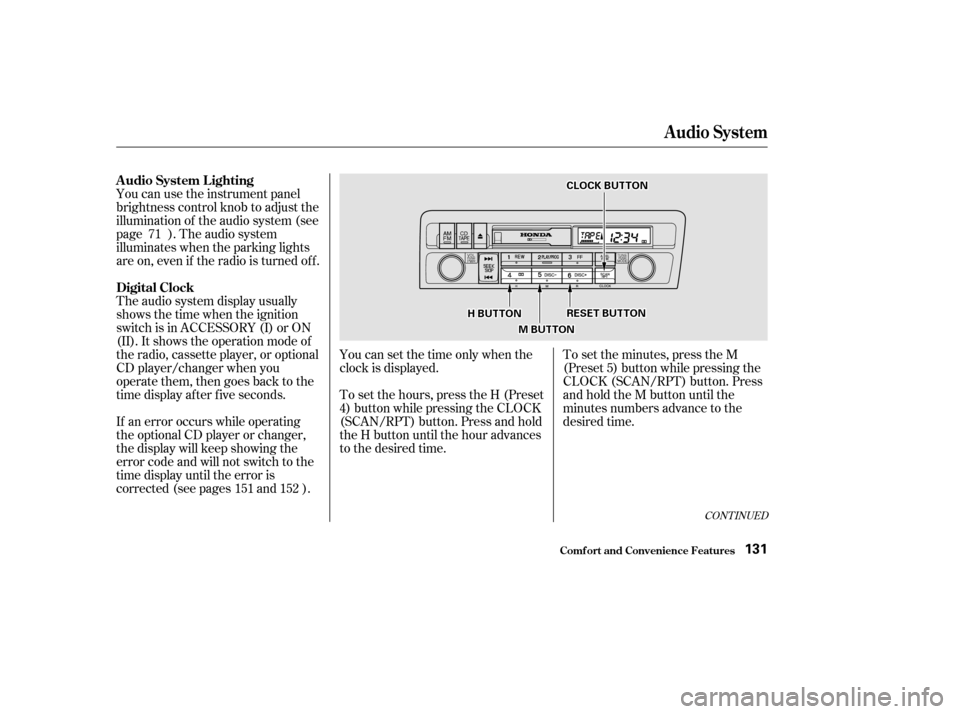
You can use the instrument panel
brightness control knob to adjust the
illumination of the audio system (see
page ). The audio system
illuminates when the parking lights
are on, even if the radio is turned of f .
The audio system display usually
shows the time when the ignition
switch is in ACCESSORY (I) or ON
(II). It shows the operation mode of
the radio, cassette player, or optional
CD player/changer when you
operate them, then goes back to the
time display af ter f ive seconds.
If an error occurs while operating
the optional CD player or changer,
the display will keep showing the
error code and will not switch to the
time display until the error is
corrected (see pages and ).You can set the time only when the
clock is displayed.
To set the hours, press the H (Preset
4) button while pressing the CLOCK
(SCAN/RPT) button. Press and hold
the H button until the hour advances
to the desired time.
To set the minutes, press the M
(Preset 5) button while pressing the
CLOCK (SCAN/RPT) button. Press
andholdtheMbuttonuntilthe
minutes numbers advance to the
desired time.
71
152
151
Audio System
Comf ort and Convenience Feat ures
A udio System L ighting
Digital Clock
131
CCLLOOCCKKBBUUTTTTOONN
RREESSEETTBBUUTTTTOONN
MMBBUUTTTTOONN
HHBBUUTTTTOONN
Page 142 of 321
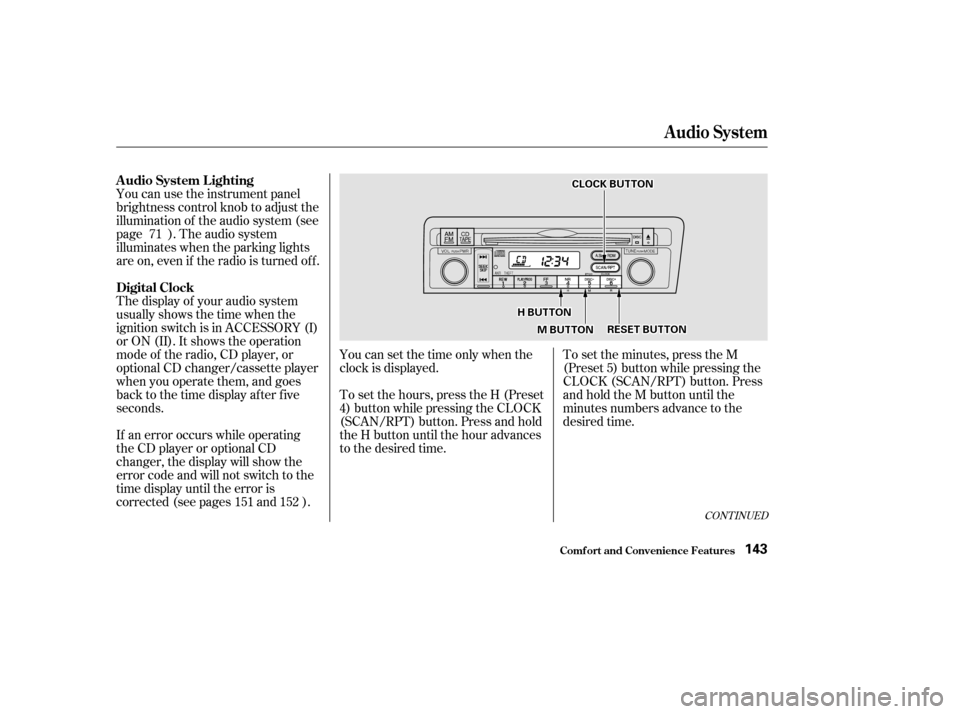
The display of your audio system
usually shows the time when the
ignition switch is in ACCESSORY (I)
or ON (II). It shows the operation
mode of the radio, CD player, or
optional CD changer/cassette player
when you operate them, and goes
back to the time display after five
seconds.
You can use the instrument panel
brightness control knob to adjust the
illumination of the audio system (see
page ). The audio system
illuminates when the parking lights
are on, even if the radio is turned of f .
If an error occurs while operating
the CD player or optional CD
changer, the display will show the
error code and will not switch to the
time display until the error is
corrected (see pages and ).
You can set the time only when the
clock is displayed.
To set the hours, press the H (Preset
4) button while pressing the CLOCK
(SCAN/RPT) button. Press and hold
the H button until the hour advances
to the desired time.
To set the minutes, press the M
(Preset 5) button while pressing the
CLOCK (SCAN/RPT) button. Press
andholdtheMbuttonuntilthe
minutes numbers advance to the
desired time.
152
151
71
CONT INUED
A udio System L ighting
Digital Clock
Audio System
Comf ort and Convenience Feat ures143
CCLLOOCCKKBBUUTTTTOONN
HHBBUUTTTTOONN
MMBBUUTTTTOONNRREESSEETTBBUUTTTTOONN
Page 159 of 321
You can increase the set cruising
speed in any of these ways:Press and hold the RESUME/
accel button. The car will acceler-
ate. When you reach the desired
cruising speed, release the button.
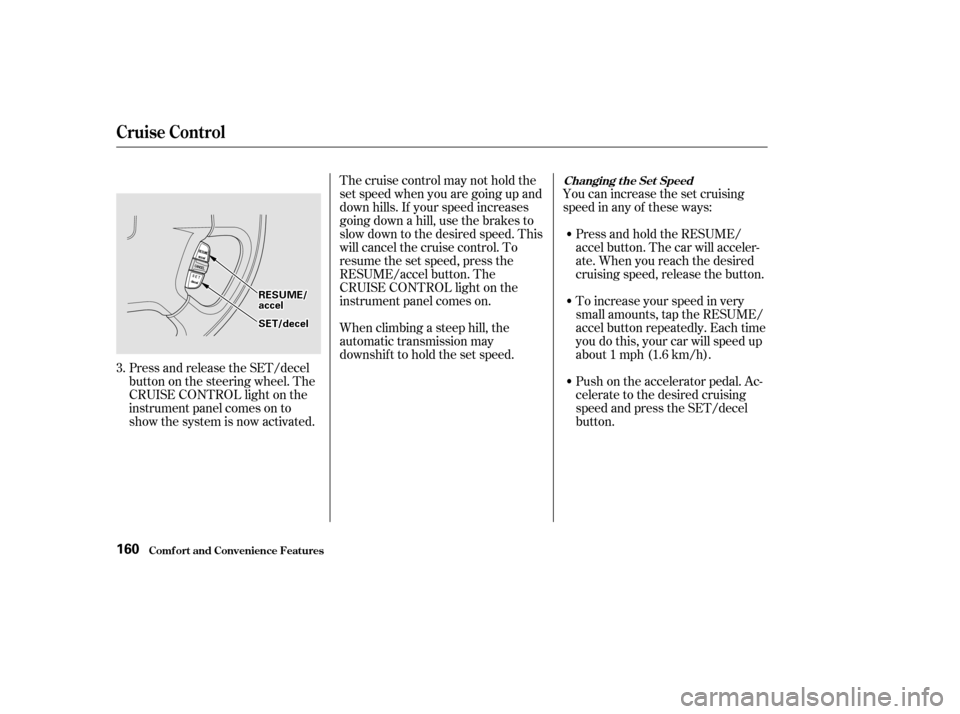
Press and release the SET/decel
buttononthesteeringwheel.The
CRUISE CONTROL light on the
instrument panel comes on to
show the system is now activated. Thecruisecontrolmaynotholdthe
set speed when you are going up and
down hills. If your speed increases
going down a hill, use the brakes to
slow down to the desired speed. This
will cancel the cruise control. To
resume the set speed, press the
RESUME/accel button. The
CRUISE CONTROL light on the
instrument panel comes on.
When climbing a steep hill, the
automatic transmission may
downshif t to hold the set speed.
To increase your speed in very
small amounts, tap the RESUME/
accel button repeatedly. Each time
you do this, your car will speed up
about 1 mph (1.6 km/h).
Push on the accelerator pedal. Ac-
celerate to the desired cruising
speed and press the SET/decel
button.
3.
Changing t he Set Speed
Comf ort and Convenience Feat ures
Cruise Control
160
RREESSUUMMEE//aacccceell
SSEETT//ddeecceell
Page 160 of 321
Even with the cruise control turned
on, you can still use the accelerator
pedal to speed up f or passing. Af ter
completing the pass, take your foot
of f the accelerator pedal. The car
will return to the set cruising speed.
Resting your f oot on the brake or
clutch pedal will cause the cruise
control to cancel.
You can decrease the set cruising
speed in any of these ways:
Press and hold the SET/decel
button. The car will decelerate.
Release the button when you
reach the desired speed.
To slow down in very small
amounts, tap the SET/decel
button repeatedly. Each time you
do this, your car will slow down
about 1 mph (1.6 km/h).
Tap the brake or clutch pedal
lightly with your f oot. The
CRUISE CONTROL light on the
instrument panel will go out.
When the car slows to the desired
speed, press the SET/decel button.
The car will then maintain the
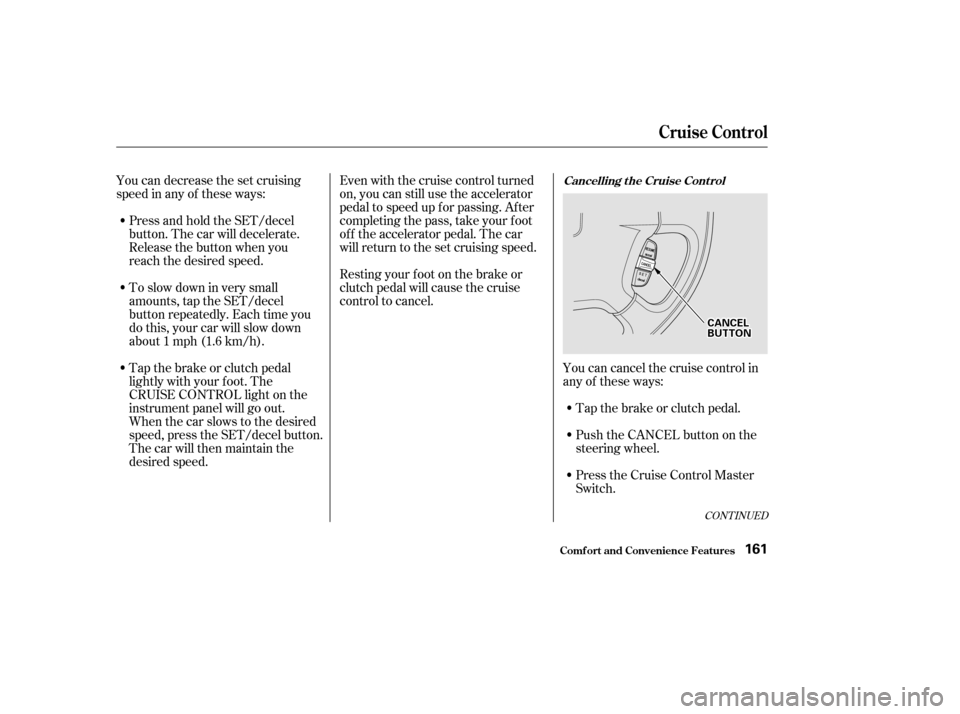
desired speed. Tap the brake or clutch pedal.
Youcancancelthecruisecontrolin
any of these ways:
Push the CANCEL button on the
steering wheel.
Press the Cruise Control Master
Switch.
CONT INUED
Cancelling t he Cruise Cont rol
Cruise Control
Comf ort and Convenience Feat ures161
CCAANNCCEELLBBUUTTTTOONN
Page 161 of 321

When you push the CANCEL button,
or tap the brake or clutch pedal, the
CRUISE CONTROL light on the
instrument panel will go out and the
car will begin to slow down. You can
use the accelerator pedal in the
normal way.
The system remembers the
previously-set cruising speed. To
return to that speed, accelerate to
above25mph(40km/h),thenpress
the RESUME/accel button. The
CRUISE CONTROL light comes on,
and the car will accelerate to the
same cruising speed as bef ore.Pressing the Cruise Control Master
Switch turns the system completely
of f and erases the previous cruising
speed f rom memory. To use the
system again, ref er to
.
Cruise Control
Comf ort and Convenience Feat ures
Using t he
Cruise Cont rol
162
Page 163 of 321

During this period:Avoid full-throttle starts and rapid
acceleration.
Avoidhardbraking.Newbrakes
need to be broken-in by moderate
use f or the f irst 200 miles (300
km). Your Honda is designed to operate
on unleaded gasoline with a pump
octane number of 86 or higher. Use
of a lower octane gasoline can cause
a persistent, heavy metallic rapping
noise in the engine that can lead to
mechanical damage.
We recommend gasolines containing
detergent additives that help prevent
f uel system and engine deposits.
In Canada, some gasolines contain
an octane-enhancing additive called
MMT. If you use such gasolines,
your emission control system
perf ormance may deteriorate and
the Malf unction Indicator Lamp on
your instrument panel may turn on.
If this happens, contact your
authorized Honda dealer f or service.
Help assure your car’s f uture
reliability and perf ormance by paying
extra attention to how you drive
during the f irst 600 miles (1,000 km).
Using gasoline containing lead will
damage your car’s emissions
controls. This contributes to air
pollution.
Youshouldfollowthesesamere-
commendations with an overhauled
or exchanged engine, or when the
brakes are relined. Do not change the oil until the
recommended time or mileage
intervalshowninthemaintenance
schedule.
Break-in Period, Gasoline
Bef ore Driving
Break-in Period Gasoline
164