Tire HONDA CIVIC 2012 9.G Owner's Manual
[x] Cancel search | Manufacturer: HONDA, Model Year: 2012, Model line: CIVIC, Model: HONDA CIVIC 2012 9.GPages: 345, PDF Size: 9.02 MB
Page 227 of 345
226
uuWhen DrivinguTire Pressure Monitoring System (TPMS) - Required Federal Explanation
Driving
Tire Pressure Monitoring System (TPMS) - Required
Federal Explanation Each tire, including the spare (if provided), should be checked
monthly when cold and inflated to the inflation pressure
recommended by the vehicle manufactu rer on the vehicle placard
or tire inflation pressure label.
(If your vehicle has tires of a different size than the size indicated
on the vehicle placard or tire inflation pressure label, you should
determine the proper tire inflation pressure for those tires.)
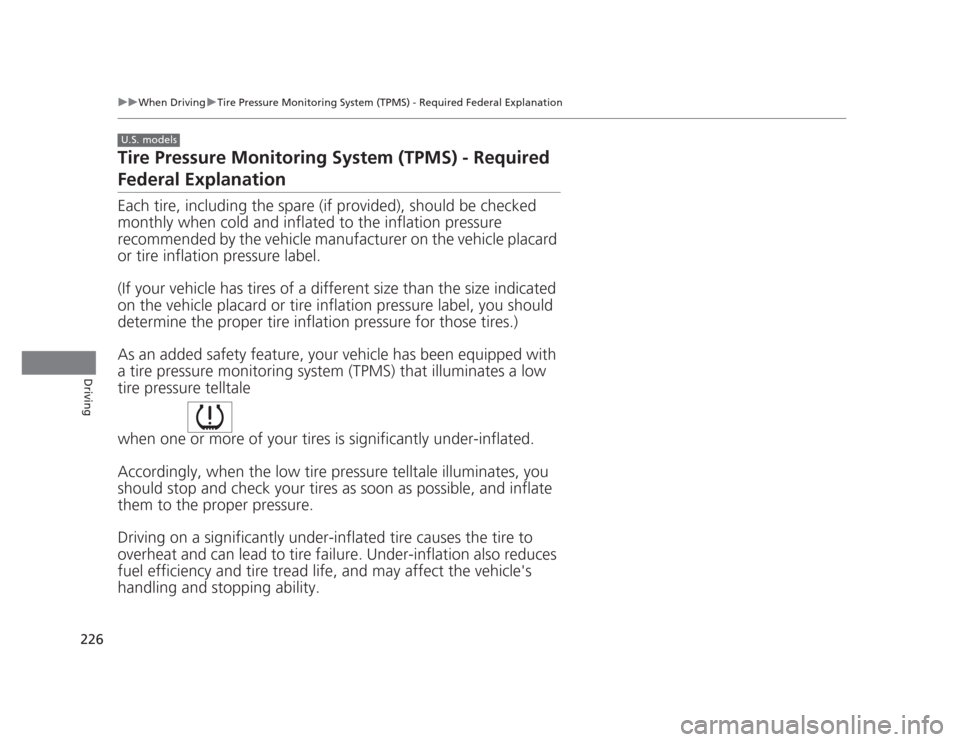
As an added safety feature, your vehicle has been equipped with
a tire pressure monitoring system (TPMS) that illuminates a low
tire pressure telltale
when one or more of your tires is significantly under-inflated.
Accordingly, when the low tire pressure telltale illuminates, you
should stop and check yo ur tires as soon as possible, and inflate
them to the proper pressure. Driving on a significantly under-inflated tire causes the tire to
overheat and can lead to tire failure. Under-inflation also reduces
fuel efficiency and tire tread life, and may affect the vehicle's
handling and stopping ability.
U.S. models
Page 228 of 345
227
uuWhen DrivinguTire Pressure Monitoring System (TPMS) - Required Federal Explanation
Continued
Driving
Please note that the TPMS is not a substitute for proper tire
maintenance, and it is the driver's responsibility to maintain
correct tire pressure, even if u nder-inflation has not reached the
level to trigger il lumination of the TPMS low tire pressure telltale.
Your vehicle has also been equipped with a TPMS malfunction
indicator to indicate when the sy stem is not operating properly.
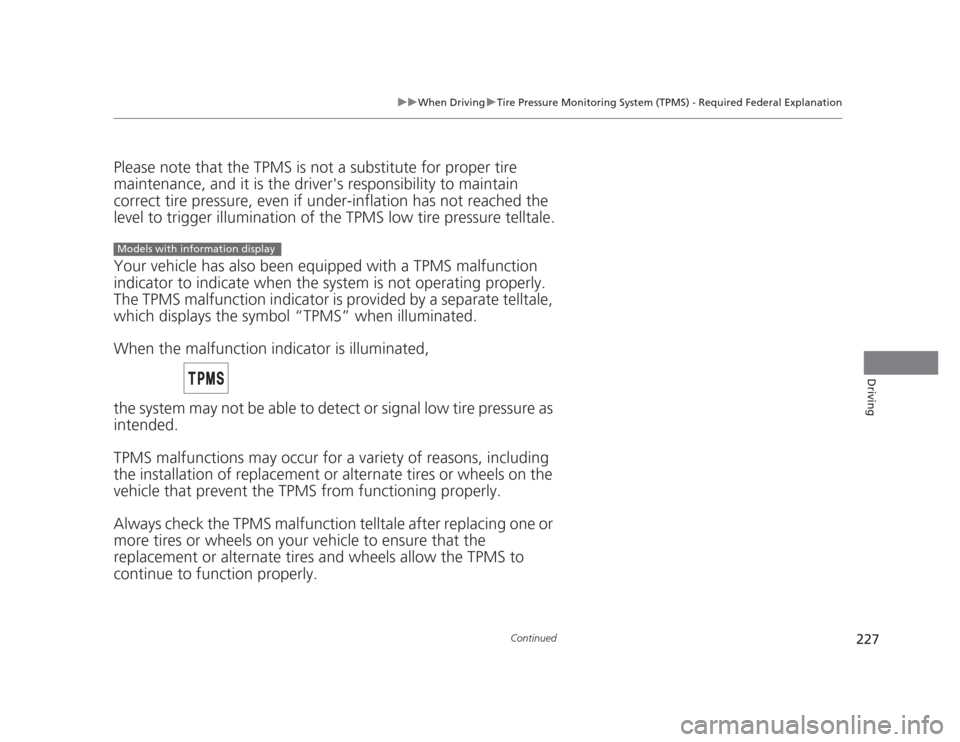
The TPMS malfunction indic ator is provided by a separate telltale,
which displays the symbol “TPMS” when illuminated.
When the malfunction indicator is illuminated,
the system may not be able to detect or signal low tire pressure as
intended.
TPMS malfunctions may occur for a variety of reasons, including
the installation of replacement or alternate tires or wheels on the
vehicle that prevent the TPMS from functioning properly.
Always check the TPMS malfunction telltale after replacing one or
more tires or wheels on your vehicle to ensure that the
replacement or alternate tires and wheels allow the TPMS to continue to function properly.
Models with information display
Page 229 of 345
228
uuWhen DrivinguTire Pressure Monitoring System (TPMS) - Required Federal Explanation
Driving
Your vehicle has also been equipped with a TPMS malfunction
indicator to indicate when the system is not operating properly.
The TPMS malfunction indicator is combined with the low tire
pressure telltale. When the system detects a malfunction, the
telltale will flash for approximately one minute and then remain continuously illuminated. This se quence will continue upon
subsequent vehicle start-ups as long as the malfunction exists.
When the malfunction indicator is illuminated, the system may
not be able to detect or signal low tire pressure as intended.
TPMS malfunctions may occur for a vari ety of reasons, including
the installation of replacement or alternate tires or wheels on the
vehicle that prevent the TPMS from functioning properly. Always check the TPMS malfunction telltale after replacing one or
more tires or wheels on your vehicle to ensure that the
replacement or alternate tires and wheels allow the TPMS to
continue to function properly.
Models with multi-information display
Page 232 of 345
231
uuBrakinguABS (Anti-lock Brake System)
Driving
ABS (Anti-lock Brake System)
Helps prevent the wheels from locking up, and helps you retain steering control by
pumping the brakes rapidly, much faster than you.
The electronic brake distribution (EBD) system, which is part of the ABS, also
balances the front-to-rear braking distribution according to vehicle loading.
You should never pump the brake pedal. Let the ABS work for you by always
keeping firm, steady pressure on the brake pedal. This is sometimes referred to as
"stomp and steer." ■ABS operation
The brake pedal may pulsate slightly when the ABS is working. Keep holding the
pedal firmly down. On dry pavement, you will need to press on the brake pedal very
hard before the ABS activates. However, you may feel the ABS activate immediately
if you are trying to stop on snow or ice.
When the vehicle speed goes under 6 mph (10 km/h), the ABS stops.
■ABS1ABS (Anti-lock Brake System)
NOTICE
The ABS may not function correctly if you use an
incorrect tire type and size.
When the ABS indicator comes on while driving,
there may be a problem with the system.
While normal braking is not affected, there is a
possibility of the ABS not operating. Have the vehicle checked by a dealer immediately.
The ABS does not reduce the time or distance it takes
to stop the vehicle. It only helps with steering control
during hard braking.
In the following cases, your vehicle may need more
stopping distance than a vehicle without the ABS: • When driving on rough road surfaces, including
when driving on uneven surfaces, such as gravel or
snow.
• When tire chains are installed.
You may hear a motor sound coming from the
engine compartment while system checks are being
performed immediately after starting the engine or
while driving. This is normal.
Page 238 of 345
237
Driving
Fuel Economy
Improving Fuel Economy
Fuel economy depends on several conditions, including driving conditions, your
driving habits, the condition of your vehicle, and loading. Depending on these and
other conditions, you may or may not achieve the rated fuel economy of this vehicle.
You can optimize your fuel economy with proper maintenance of your vehicle.
Always maintain your vehicle in accordance with the messages displayed on the information display *
/multi-information display *
.
• Use the recommended viscosity engine oil, displaying the API Certification Seal.
• Maintain the specified tire pressure.
• Do not load the vehicle with excess cargo.
• Keep your vehicle clean. A buildup of snow or mud on your vehicle's underside
adds weight and increases wind resistance.
■Maintenance and Fuel Economy
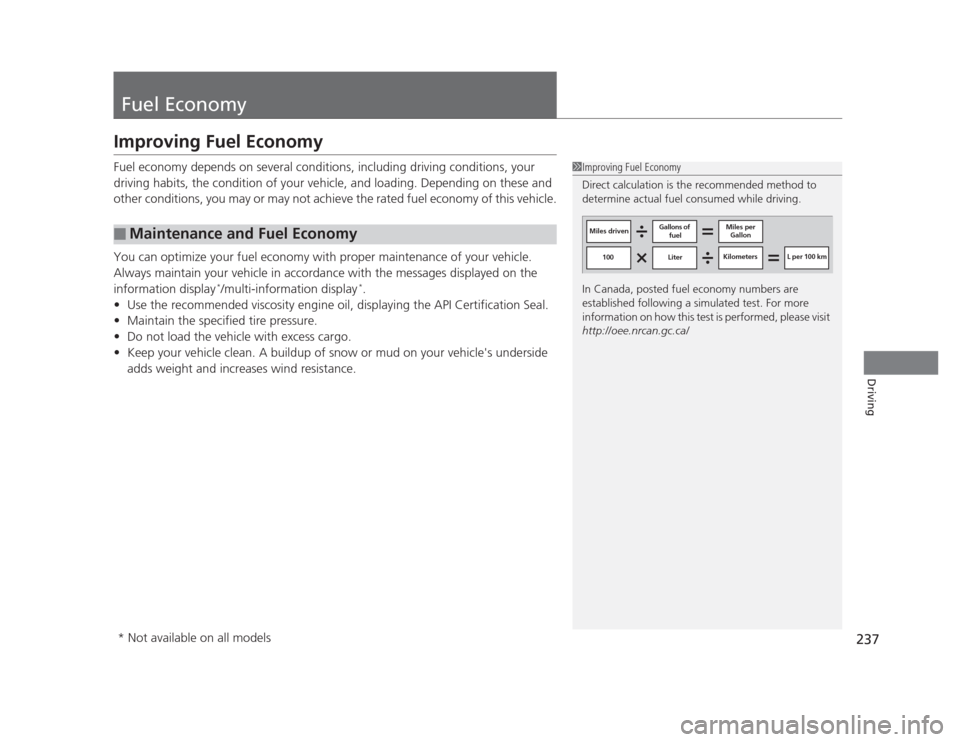
1Improving Fuel Economy
Direct calculation is the recommended method to
determine actual fuel consumed while driving.
In Canada, posted fuel economy numbers are
established following a simulated test. For more
information on how this test is performed, please visit
http://oee.nrcan.gc.ca/
Miles driven Gallons of
fuel Miles per
Gallon
100 Liter Kilometers L per 100 km
* Not available on all models
Page 240 of 345
239
Maintenance
This chapter discusses basic maintenance.
Before Performing Maintenance Inspection and Maintenance ............ 240
Safety When Performing Maintenance..... 241
Parts and Fluids Used in Maintenance Service ........................................... 242
Maintenance Minder™ .................... 243
Maintenance Under the Hood Maintenance Items Under the Hood ..... 251
Opening the Hood ........................... 253
Recommended Engine Oil ...... .......... 254
Oil Check ......................................... 255
Adding Engine Oil ............................ 257
Changing the Engine Oil and Oil Filter ..... 258
Engine Coolant ................................ 261
Transmission Fluid ............................ 263
Brake/Clutch Fluid ............................ 266
Refilling Window Washer Fluid......... 267
Replacing Light Bulbs ....................... 268
Checking and Maintaining Wiper
Blades .......................................... 278
Checking and Maintaining Tires Checking Tires ................................. 280
Tire and Loading Information Label ...... 281
Tire Labeling .................................... 281
DOT Tire Quality Grading (U.S. Vehicles)....... 283
Wear Indicators................................ 285 Tire Service Life ................................ 285
Tire and Wheel Replacement ........... 286
Tire Rotation .................................... 287
Winter Tires ..................................... 288
Battery ............................................... 289
Remote Transmitter Care *
Replacing the Battery ....................... 290
Heating and Cooling *
System
Maintenance ................................... 291
Cleaning
Interior Care .................................... 292
Exterior Care.................................... 294
* Not available on all models
Page 241 of 345
240
Maintenance
Before Performing Maintenance
Inspection and Maintenance
For your safety, perform all listed inspections and maintenance to keep your vehicle
in good condition. If you become aware of any abnormality (noise, smell, insufficient
brake fluid, oil residue on the ground, etc.), have your vehicle inspected by a dealer.
(Note, however, that service at a dealer is not mandatory to keep your warranties in
effect.) Refer to the separate maintenance booklet for detailed maintenance and inspection information. ■Daily inspections
Perform inspections before long distance trips, when washing the vehicle, or when refueling. ■ Periodic inspections
• Check the automatic transmission fluid level monthly.
2 Automatic Transmission Fluid P. 263
• Check the brake fluid level monthly.
2 Brake/Clutch Fluid P. 266
• Check the tire pressure monthly. Examine the tread for wear and foreign objects.
2 Checking and Maintaining Tires P. 280
• Check the operation of the exterior lights monthly.
2 Replacing Light Bulbs P. 268
• Check the condition of the wiper blades at least every six months.
2 Checking and Maintaining Wiper Blades P. 278
■Types of Inspection and Maintenance
1Inspection and Maintenance
Maintenance, replacement, or repair of
emissions control devices and systems may be
done by any automotive repair establishment or
individuals using parts that are "certified" to EPA standards.
According to state and federal regulations, failure to
perform maintenance on the maintenance main
items marked with # will not void your emissions
warranties. However, all maintenance services should
be performed in accordance with the intervals
indicated by the information display *
/multi-
information display *
.
2 Maintenance Service Items P. 245, 249
If you want to perform complex maintenance tasks
that require more skills and tools, you can purchase a
subscription to the Service Express website at
www.techinfo.honda.com .
2 Authorized Manuals P. 335
If you want to perform maintenance yourself, make
sure that you have the necessary tools and skills first.
After performing maintenance, update the records in
the separate maintenance booklet.
U.S. models
* Not available on all models
Page 281 of 345
280
Maintenance
Checking and Maintaining Tires
Checking Tires
To safely operate your vehicle, your tires must be of the proper type and size, in
good condition with adequate tread, and properly inflated. ■Inflation guidelines
Properly inflated tires provide the best combination of handling, tread life, and comfort.
Refer to the driver’s doorjamb label or specification’s page for the specified pressure.
Underinflated tires wear unevenly, adversely affect handling and fuel economy, and
are more likely to fail from overheating.
Overinflated tires make your vehicle ride harshly, are more prone to road hazards, and wear unevenly.
Every day before you drive, look at each of the tires. If one looks lower than the
others, check the pressure with a tire gauge.
At least once a month or before long trips, use a gauge to measure the pressure in
all tires, including the spare. Even tires in good condition can lose 1 to 2 psi (10 to
20 kPa, 0.1 to 0.2 kgf/cm 2
) per month.
■ Inspection guidelines
Every time you check inflation, also examine the tires and valve stems.Look for:• Bumps or bulges on the side or in the tread. Replace the tire if you find any cuts,
splits, or cracks in the side of the tire. Replace it if you see fabric or cord.
• Remove any foreign objects and inspect for air leaks.
• Uneven tread wear. Have a dealer check the wheel alignment.
• Excessive tread wear.
2 Wear Indicators P. 285
• Cracks or other damage around valve stem.
1Checking Tires
Measure the air pressure when tires are cold. This
means the vehicle has been parked for at least three
hours, or driven less than 1 mile (1.6 km). If
necessary, add or release air until the specified
pressure is reached.
If checked when hot, tire pressure can be as much as
4–6 psi (30–40 kPa, 0.3–0.4 kgf/cm 2
) higher than if
checked when cold.
Have a dealer check the tires if you feel a consistent
vibration while driving. New tires and any that have
been removed and reinstalled should be properly balanced.
3WARNING
Using tires that are excessively worn or
improperly inflated can cause a crash in
which you can be seriously hurt or killed.
Follow all instruction s in this owner’s
manual regarding tire inflation and
maintenance.
Page 282 of 345
281
uuChecking and Maintaining TiresuTire and Loading Information Label
Continued
Maintenance
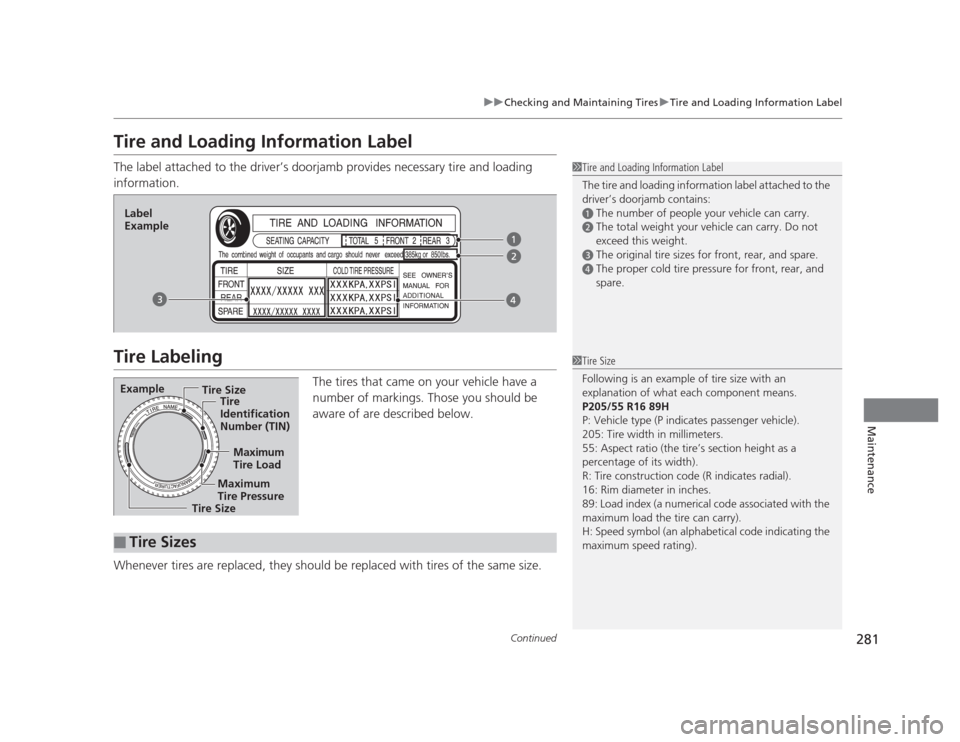
Tire and Loading Information Label
The label attached to the driver’s doorjamb provides necessary tire and loading information.
Tire LabelingThe tires that came on your vehicle have a
number of markings. Those you should be
aware of are described below.
Whenever tires are replaced, they should be replaced with tires of the same size.
1Tire and Loading Information Label
The tire and loading information label attached to the
driver’s doorjamb contains:
aThe number of people your vehicle can carry.
bThe total weight your vehicle can carry. Do not
exceed this weight.
cThe original tire sizes for front, rear, and spare.
dThe proper cold tire pressure for front, rear, and
spare.
Label
Example
Example Tire Size
Tire
Identification
Number (TIN)
Maximum Tire Load
Maximum
Tire Pressure
Tire Size
■Tire Sizes
1Tire Size
Following is an example of tire size with an
explanation of what each component means.
P205/55 R16 89H
P: Vehicle type (P indicates passenger vehicle).
205: Tire width in millimeters.
55: Aspect ratio (the tire’s section height as a
percentage of its width).
R: Tire construction code (R indicates radial).
16: Rim diameter in inches.
89: Load index (a numerical code associated with the
maximum load the tire can carry).
H: Speed symbol (an alphabetical code indicating the
maximum speed rating).
Page 283 of 345
uuChecking and Maintaining TiresuTire Labeling
282
Maintenance
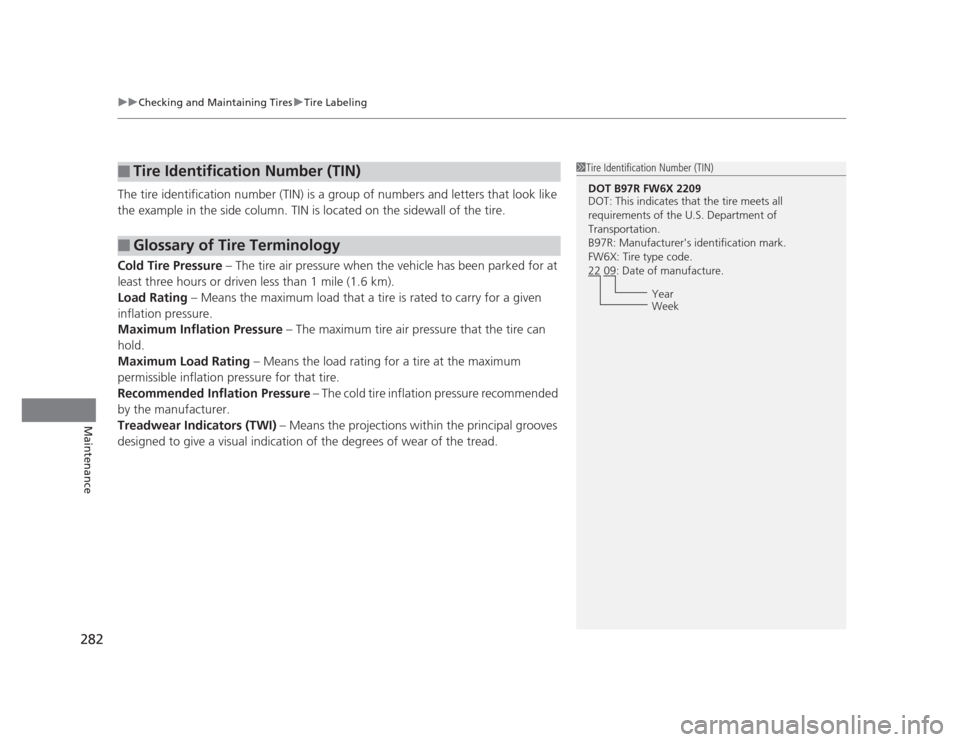
The tire identification number (TIN) is a group of numbers and letters that look like
the example in the side column. TIN is located on the sidewall of the tire.
Cold Tire Pressure – The tire air pressure when the vehicle has been parked for at
least three hours or driven less than 1 mile (1.6 km).
Load Rating – Means the maximum load that a tire is rated to carry for a given
inflation pressure.
Maximum Inflation Pressure – The maximum tire air pressure that the tire can
hold.
Maximum Load Rating – Means the load rating for a tire at the maximum
permissible inflation pressure for that tire.
Recommended Inflation Pressure – The cold tire inflation pressure recommended
by the manufacturer.
Treadwear Indicators (TWI) – Means the projections within the principal grooves
designed to give a vi sual indication of the degrees of wear of the tread.
■Tire Identification Number (TIN)
■Glossary of Tire Terminology
1Tire Identification Number (TIN)
DOT B97R FW6X 2209
DOT: This indicates that the tire meets all
requirements of the U.S. Department of Transportation.
B97R: Manufacturer's identification mark.
FW6X: Tire type code.
22 09: Date of manufacture.
Year
Week