steering wheel adjustment HONDA CIVIC 2014 9.G Owners Manual
[x] Cancel search | Manufacturer: HONDA, Model Year: 2014, Model line: CIVIC, Model: HONDA CIVIC 2014 9.GPages: 469, PDF Size: 17.32 MB
Page 3 of 469
2Quick Reference Guide
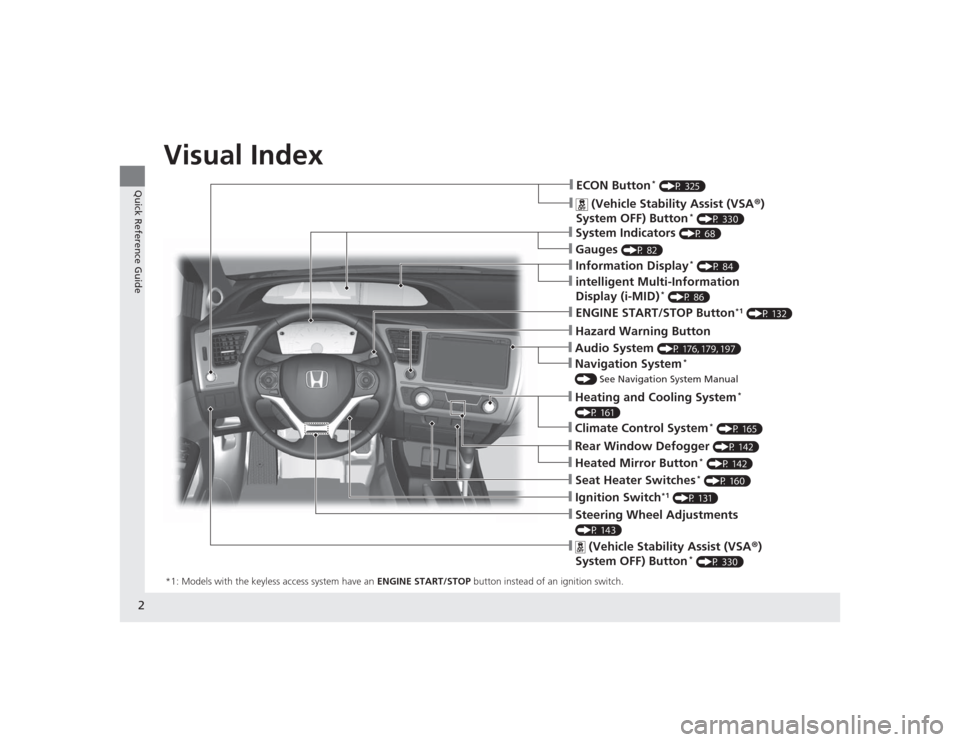
Quick Reference GuideVisual Index
❙Navigation System
*
() See Navigation System Manual❙Audio System
(P 176, 179, 197)
❙Hazard Warning Button❙Seat Heater Switches
* (P 160)
❙Ignition Switch
*1 (P 131)
❙Steering Wheel Adjustments (P 143)❙
(Vehicle Stability Assist (VSA ®)
System OFF) Button
* (P 330)
❙ECON Button
* (P 325)
❙
(Vehicle Stability Assist (VSA ®)
System OFF) Button
* (P 330)
❙Heating and Cooling System
*
(P 161)❙Climate Control System
* (P 165)
❙Rear Window Defogger
(P 142)
❙Heated Mirror Button
* (P 142)
❙System Indicators
(P 68)
❙Gauges
(P 82)
❙Information Display
* (P 84)
❙intelligent Multi-Information
Display (i-MID)
* (P 86)
❙ENGINE START/STOP Button
*1 (P 132)
*1: Models with the keyless access system have an ENGINE START/STOP button instead of an ignition switch.
Page 12 of 469
11Quick Reference Guide
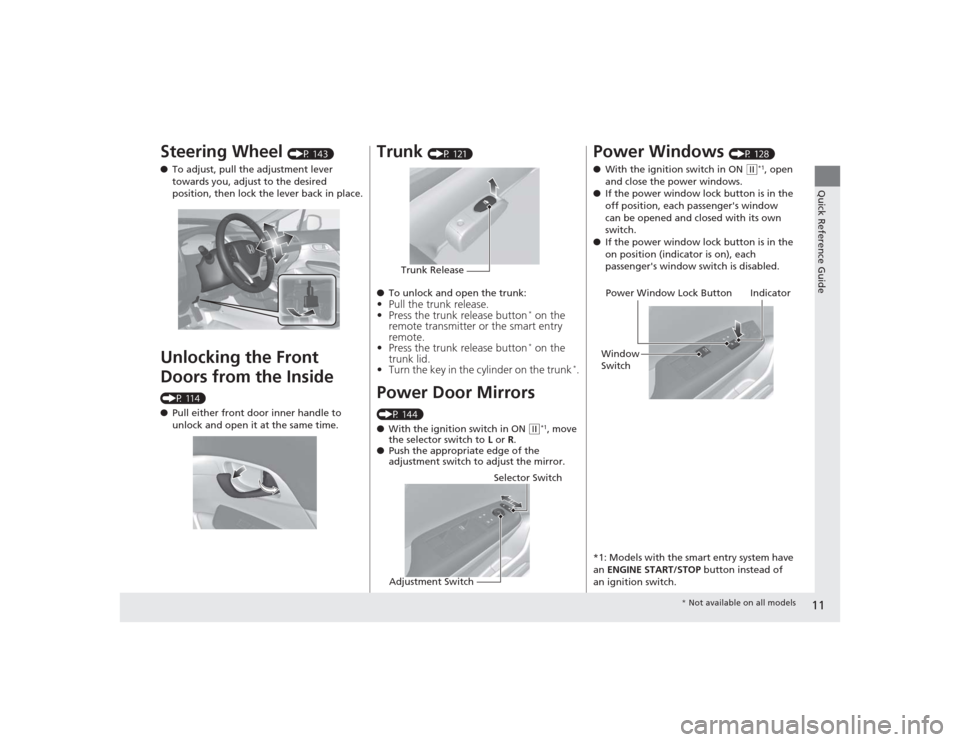
Steering Wheel
(P 143)
● To adjust, pull the adjustment lever
towards you, adjust to the desired
position, then lock the lever back in place.
Unlocking the Front
Doors from the Inside (P 114)
●Pull either front door inner handle to
unlock and open it at the same time.
Trunk
(P 121)
● To unlock and open the trunk:
•Pull the trunk release.
• Press the trunk release button
* on the
remote transmitter or the smart entry
remote.
• Press the trunk release button* on the
trunk lid.
• Turn the key in the cylinder on the trunk
*.
Power Door Mirrors (P 144)
● With the ignition switch in ON
(w*1, move
the selector switch to L or R .
● Push the appropriate edge of the
adjustment switch to adjust the mirror.
Trunk Release
Selector Switch
Adjustment Switch
Power Windows
(P 128)
● With the ignition switch in ON
(w*1, open
and close the power windows.
● If the power window lock button is in the
off position, each passenger's window
can be opened and closed with its own
switch.
● If the power window lock button is in the
on position (indicator is on), each
passenger's window switch is disabled.
*1: Models with the smart entry system have
an ENGINE START/STOP button instead of
an ignition switch.
Power Window Lock Button
Window
Switch Indicator
*
Not available on all models
Page 141 of 469
140
uuOperating the Switches Around the Steering Wheel uWipers and Washers
Controls
Wipers and Washers
The windshield wipers and washers can be
used when the ignition switch is in ON
(w
*1.
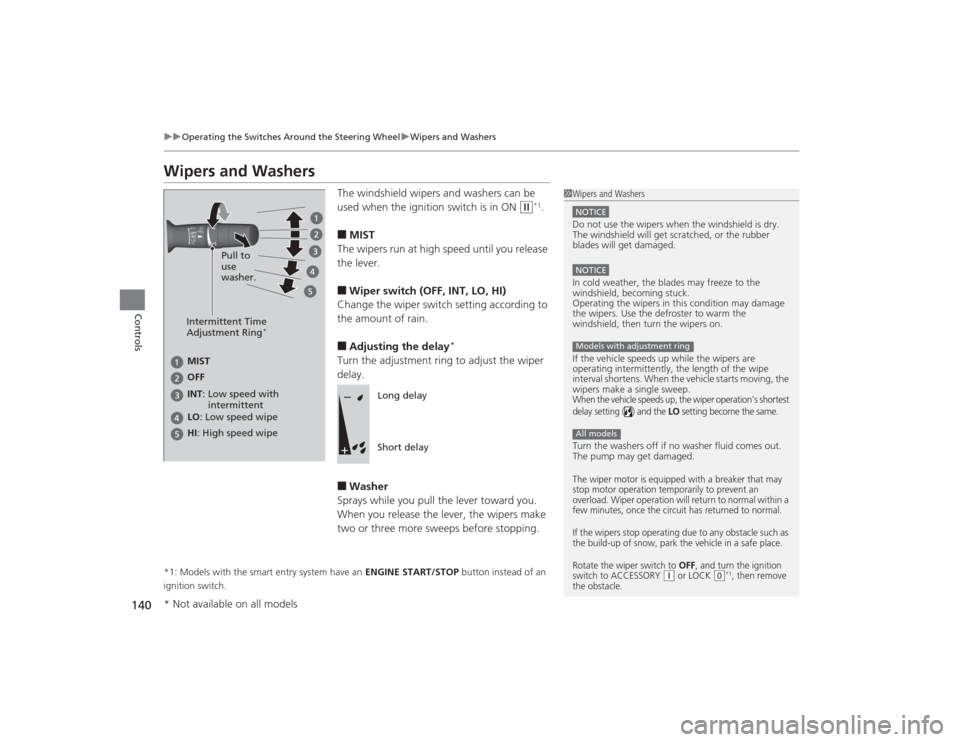
■MIST
The wipers run at high speed until you release
the lever.■Wiper switch (OFF, INT, LO, HI)
Change the wiper switch setting according to
the amount of rain.■Adjusting the delay
*
Turn the adjustment ring to adjust the wiper
delay.■Washer
Sprays while you pull the lever toward you.
When you release the lever, the wipers make
two or three more sweeps before stopping.
*1: Models with the smart entry system have an ENGINE START/STOP button instead of an
ignition switch.
1 Wipers and WashersNOTICEDo not use the wipers when the windshield is dry.
The windshield will get scratched, or the rubber
blades will get damaged.NOTICEIn cold weather, the blades may freeze to the
windshield, becoming stuck.
Operating the wipers in this condition may damage
the wipers. Use the defroster to warm the
windshield, then turn the wipers on.
If the vehicle speeds up while the wipers are
operating intermitte ntly, the length of the wipe
interval shortens. When the vehicle starts moving, the
wipers make a single sweep.When the vehicle speeds up, the wiper operation’s shortest
delay setting ( ) and the
LO setting become the same.
Turn the washers off if no washer fluid comes out.
The pump may get damaged.The wiper motor is equipped with a breaker that may
stop motor operation temporarily to prevent an
overload. Wiper operation will return to normal within a
few minutes, once the circuit has returned to normal.
If the wipers stop operating due to any obstacle such as
the build-up of snow, park the vehicle in a safe place.
Rotate the wiper switch to
OFF
, and turn the ignition
switch to ACCESSORY
( q or LOCK
(0*1, then remove
the obstacle.
Models with adjustment ringAll models
Intermittent Time
Adjustment Ring
*
MIST
INT: OFF
LO : Low speed wipe
HI: High speed wipe Pull to
use
washer.
Low speed with
intermittent
Long delay
Short delay
* Not available on all models
Page 144 of 469
143
uuOperating the Switches Around the Steering Wheel uAdjusting the Steering Wheel
Controls
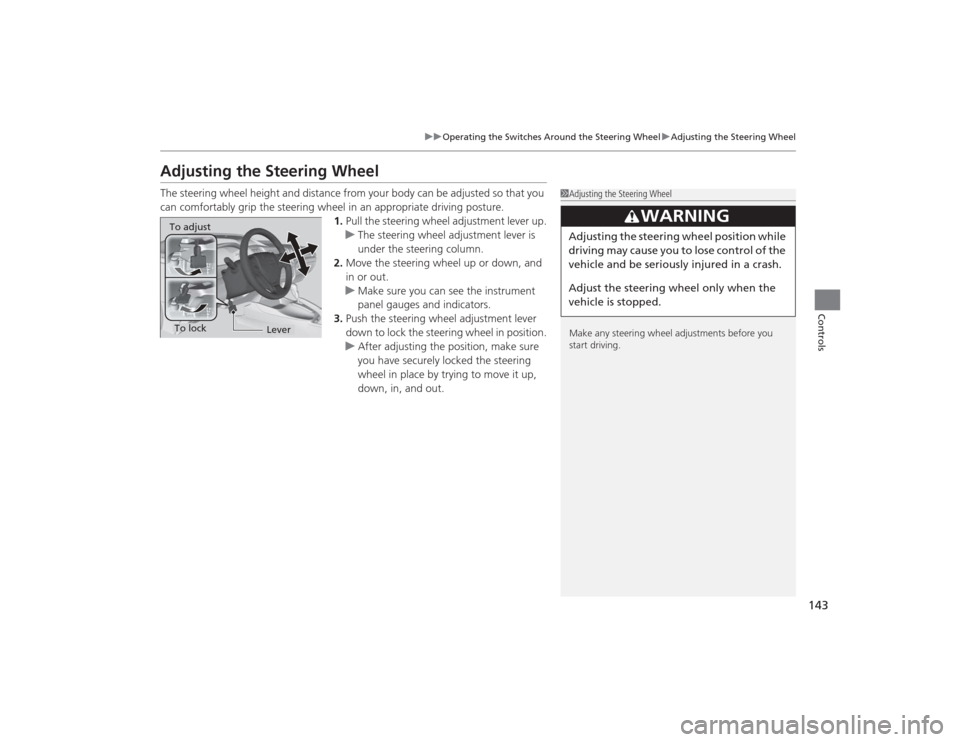
Adjusting the Steering WheelThe steering wheel height and distance from your body can be adjusted so that you
can comfortably grip the steering wheel in an appropriate driving posture.
1.Pull the steering wheel adjustment lever up.
u The steering wheel adjustment lever is
under the steering column.
2. Move the steering wheel up or down, and
in or out.
u Make sure you can see the instrument
panel gauges and indicators.
3. Push the steering wheel adjustment lever
down to lock the steering wheel in position.
u After adjusting the position, make sure
you have securely locked the steering
wheel in place by trying to move it up,
down, in, and out.
1Adjusting the Steering Wheel
Make any steering wheel adjustments before you
start driving.
3
WARNING
Adjusting the steering wheel po sition while
driving may cause you to lose control of the
vehicle and be seriously injured in a crash.
Adjust the steering wheel only when the
vehicle is stopped.
To adjustTo lock
Lever
Page 147 of 469
146Controls
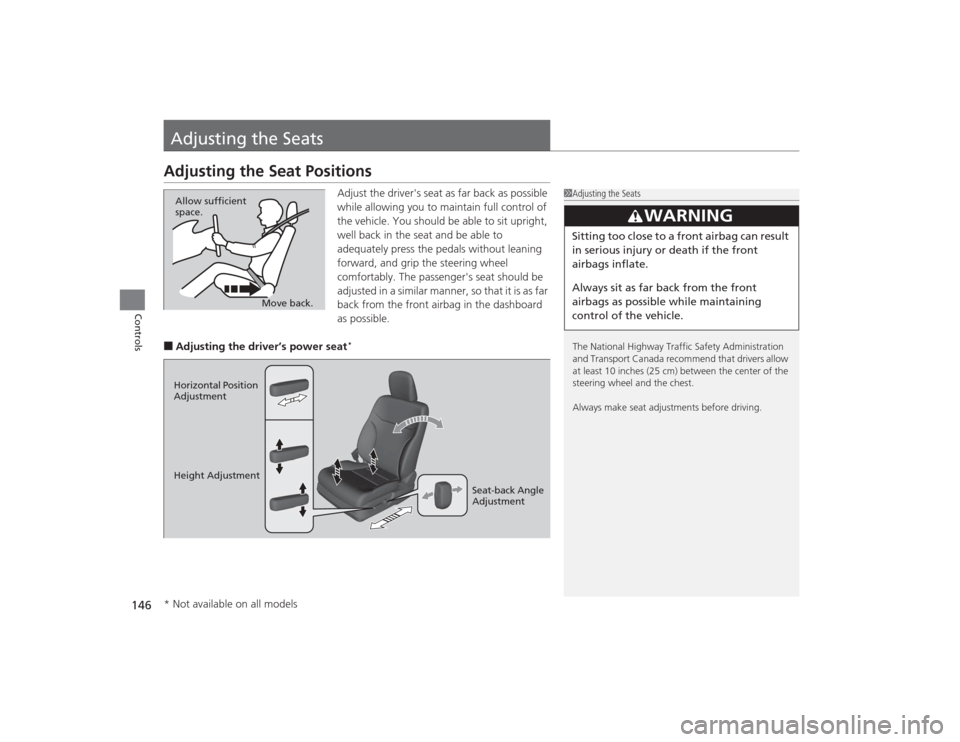
Adjusting the SeatsAdjusting the Seat Positions
Adjust the driver's seat as far back as possible
while allowing you to maintain full control of
the vehicle. You should be able to sit upright,
well back in the seat and be able to
adequately press the pedals without leaning
forward, and grip the steering wheel
comfortably. The passenger's seat should be
adjusted in a similar manner, so that it is as far
back from the front airbag in the dashboard
as possible.
■Adjusting the driver’s power seat
*
1Adjusting the Seats
The National Highway Traffic Safety Administration
and Transport Canada recommend that drivers allow
at least 10 inches (25 cm) between the center of the
steering wheel and the chest.
Always make seat adjustments before driving.
3
WARNING
Sitting too close to a front airbag can result
in serious injury or death if the front
airbags inflate.
Always sit as far back from the front
airbags as possible while maintaining
control of the vehicle.
Move back.
Allow sufficient
space.
Horizontal Position
Adjustment
Height Adjustment
Seat-back Angle
Adjustment* Not available on all models