brake HONDA CIVIC COUPE 1998 Owners Manual
[x] Cancel search | Manufacturer: HONDA, Model Year: 1998, Model line: CIVIC COUPE, Model: HONDA CIVIC COUPE 1998Pages: 251, PDF Size: 2.04 MB
Page 51 of 251
Instruments and Controls
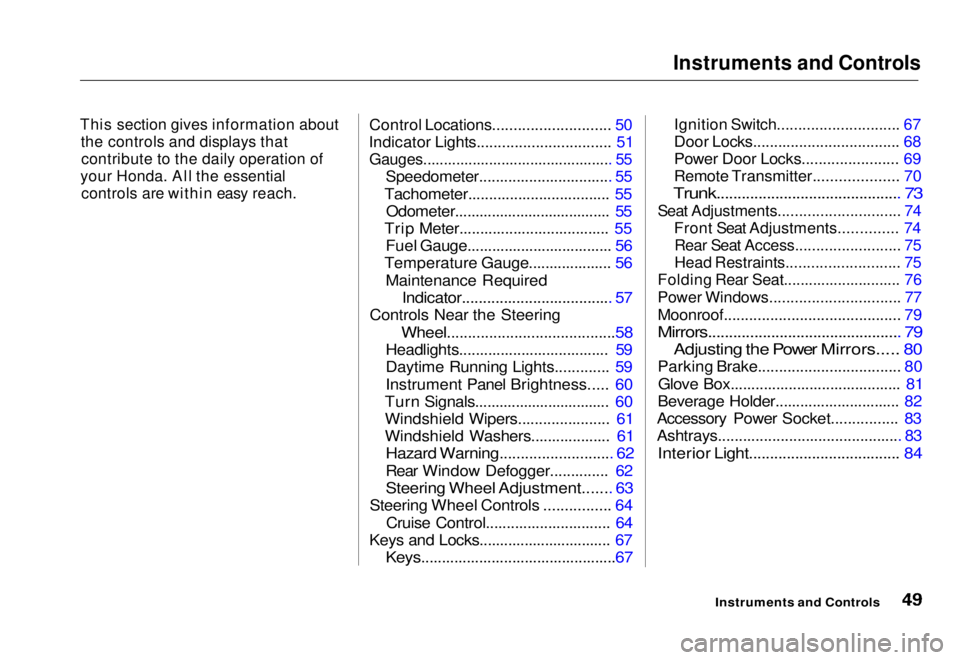
This section gives information about the controls and displays that
contribute to the daily operation of
your Honda. All the essential
controls are within easy reach.
Control Locations............................ 50
Indicator Lights................................ 51
Gauges.............................................. 55
Speedometer................................ 55
Tachometer.................................. 55 Odometer...................................... 55
Trip Meter.................................... 55 Fuel Gauge................................... 56
Temperature Gauge.................... 56
Maintenance Required
Indicator.................................... 57
Controls Near the Steering
Wheel........................................58
Headlights.................................... 59
Daytime Running Lights............. 59
Instrument Panel Brightness..... 60
Turn Signals................................. 60
Windshield Wipers...................... 61
Windshield Washers................... 61
Hazard Warning........................... 62
Rear Window Defogger.............. 62
Steering Wheel Adjustment....... 63
Steering Wheel Controls ................ 64
Cruise Control.............................. 64
Keys and Locks................................ 67
Keys...............................................67
Ignition Switch............................. 67
Door Locks................................... 68
Power Door Locks....................... 69
Remote Transmitter.................... 70
Trunk............................................ 73
Seat Adjustments............................. 74
Front Seat Adjustments.............. 74
Rear Seat Access......................... 75
Head Restraints........................... 75
Folding Rear Seat............................ 76
Power Windows............................... 77
Moonroof.......................................... 79
Mirrors.............................................. 79
Adjusting the Power Mirrors..... 80
Parking Brake.................................. 80
Glove Box......................................... 81
Beverage Holder.............................. 82
Accessory Power Socket................ 83
Ashtrays............................................ 83
Interior Light.................................... 84
Instruments and ControlsMain Menu s t
Page 53 of 251
Indicator Lights
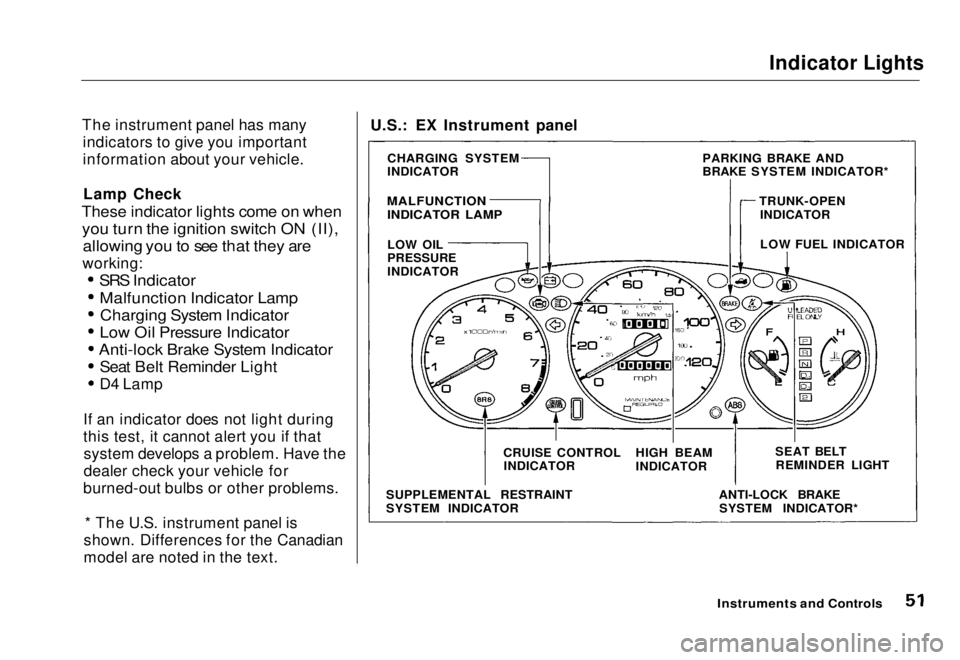
The instrument panel has many indicators to give you important
information about your vehicle.
Lamp Check
These indicator lights come on when
you turn the ignition switch ON (II), allowing you to see that they are
working:
SRS Indicator
Malfunction Indicator LampCharging System Indicator
Low Oil Pressure Indicator
Anti-lock Brake System Indicator
Seat Belt Reminder Light
D4 Lamp
If an indicator does not light during
this test, it cannot alert you if that system develops a problem. Have the
dealer check your vehicle for
burned-out bulbs or other problems.
* The U.S. instrument panel is
shown. Differences for the Canadian
model are noted in the text.
Instruments and Controls
U.S.: EX Instrument panel
CHARGING SYSTEM
INDICATOR
MALFUNCTION
INDICATOR LAMP
LOW OIL
PRESSURE
INDICATOR
SUPPLEMENTAL RESTRAINT
SYSTEM INDICATOR CRUISE CONTROL
INDICATOR HIGH BEAM
INDICATOR
ANTI-LOCK BRAKESYSTEM INDICATOR* SEAT BELT
REMINDER LIGHT
LOW FUEL INDICATOR
PARKING BRAKE AND
BRAKE SYSTEM INDICATOR*
TRUNK-OPENINDICATORMain Menu Table of Contents s t
Page 54 of 251
Indicator Lights
* Differences in the indicators for Canadian models are noted in the text.
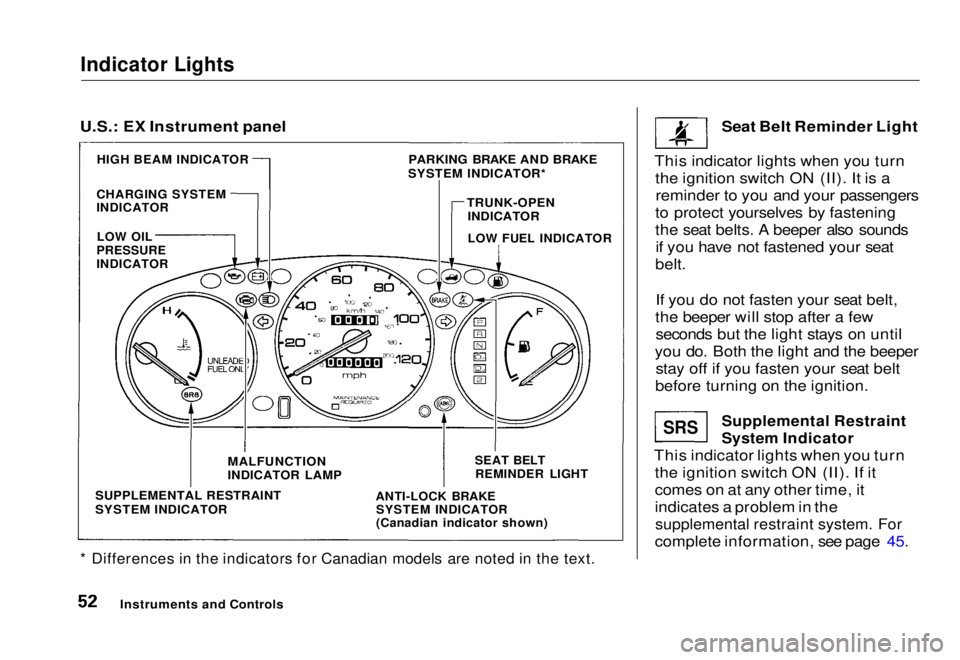
Seat Belt Reminder Light
This indicator lights when you turn the ignition switch ON (II). It is areminder to you and your passengers
to protect yourselves by fastening
the seat belts. A beeper also sounds if you have not fastened your seat
belt.
If you do not fasten your seat belt,
the beeper will stop after a few seconds but the light stays on until
you do. Both the light and the beeper stay off if you fasten your seat belt
before turning on the ignition.
Supplemental Restraint
System Indicator
This indicator lights when you turn the ignition switch ON (II). If it
comes on at any other time, it
indicates a problem in the
supplemental restraint system. For
complete information, see page 45.
Instruments and Controls
SRS
U.S.: EX Instrument panel
PARKING BRAKE AND BRAKE
SYSTEM INDICATOR*
HIGH BEAM INDICATOR
CHARGING SYSTEM
INDICATOR
TRUNK-OPEN
INDICATOR
LOW FUEL INDICATOR
LOW OIL
PRESSURE
INDICATOR
SUPPLEMENTAL RESTRAINT
SYSTEM INDICATOR
MALFUNCTION
INDICATOR LAMP
ANTI-LOCK BRAKE
SYSTEM INDICATOR
(Canadian indicator shown)
SEAT BELT
REMINDER LIGHTMain Menu Table of Contents s t
Page 55 of 251
Indicator Lights
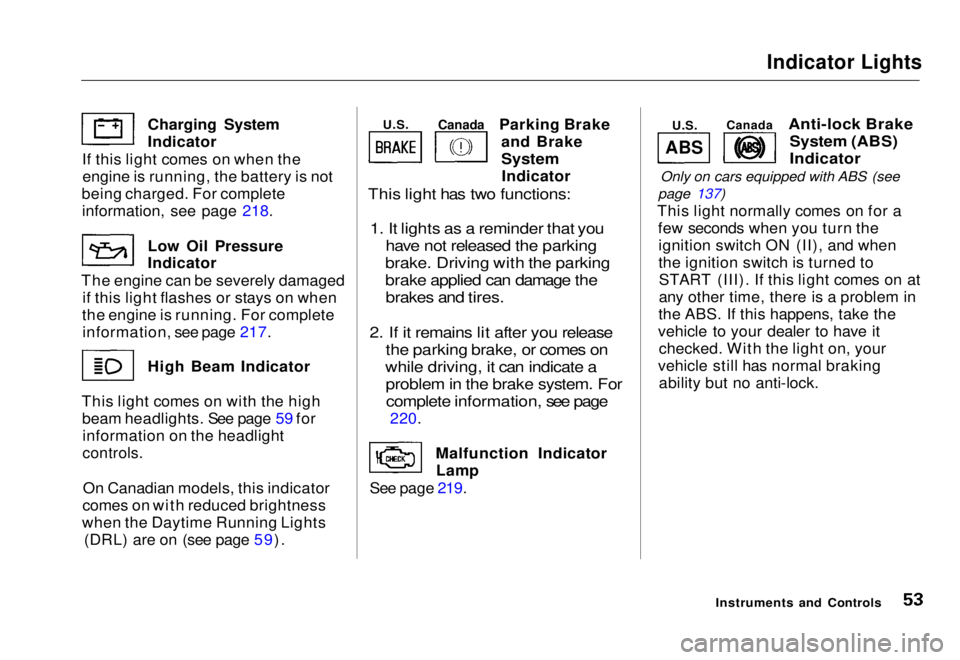
Parking Brake and Brake
System
Indicator
This light has two functions:
1. It lights as a reminder that you have not released the parking
brake. Driving with the parking
brake applied can damage the brakes and tires.
2. If it remains lit after you release the parking brake, or comes on
while driving, it can indicate a problem in the brake system. Forcomplete information, see page
220.
Malfunction Indicator Lamp
See page 219.
Anti-lock Brake
System (ABS)
Indicator
Only on cars equipped with ABS (see
page 137)
This light normally comes on for a few seconds when you turn theignition switch ON (II), and when
the ignition switch is turned toSTART (III). If this light comes on at
any other time, there is a problem in
the ABS. If this happens, take the
vehicle to your dealer to have it checked. With the light on, your
vehicle still has normal braking ability but no anti-lock.
Instruments and Controls
Charging System Indicator
If this light comes on when the engine is running, the battery is not
being charged. For complete
information
,
see page 218.
Low Oil
Pressure
Indicator
The engine can be severely damaged if this light flashes or stays on when
the engine is running. For complete information, see page 217. High Beam Indicator
This light comes on with the high beam headlights. See page 59 forinformation on the headlight
controls.
On Canadian models, this indicator
comes on with reduced brightness
when the Daytime Running Lights (DRL) are on (see page 59).
ABS
U.S.
Canada
U.S.
CanadaMain Menu Table of Contents s t
Page 61 of 251
Controls Near the Steering Wheel
Headlights
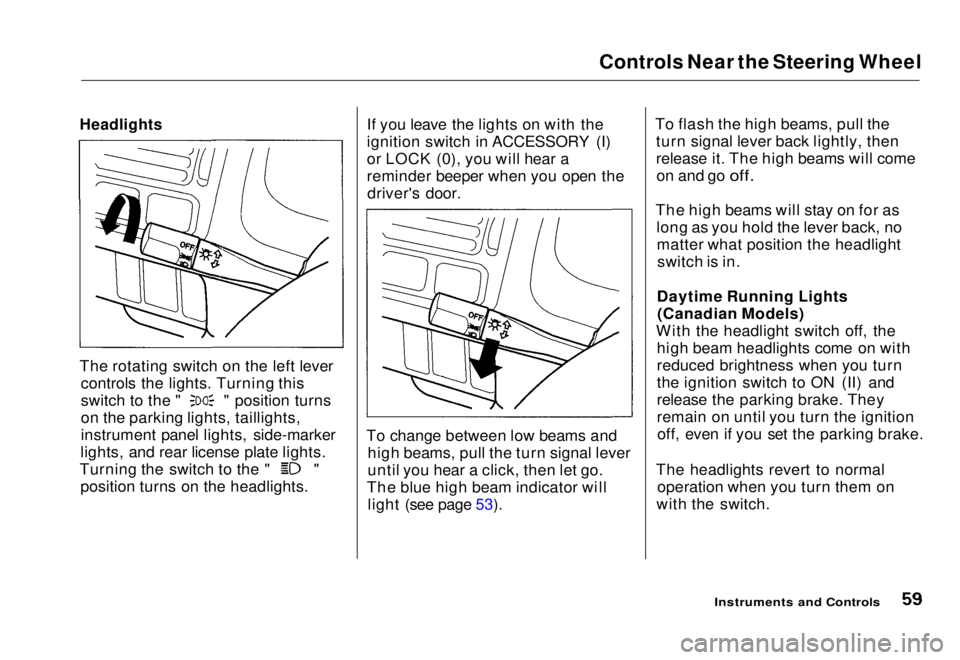
The rotating switch on the left lever controls the lights. Turning this switch to the " " position turns
on the parking lights, taillights,
instrument panel lights, side-marker
lights, and rear license plate lights. Turning the switch to the " "
position turns on the headlights. If you leave the lights on with the
ignition switch in ACCESSORY (I)
or LOCK (0), you will hear a
reminder beeper when you open the
driver's door.
To change between low beams and high beams, pull the turn signal lever
until you hear a click, then let go.
The blue high beam indicator will light (see page 53). To flash the high beams, pull the
turn signal lever back lightly, then
release it. The high beams will comeon and go
off.
The high beams will stay on for as long as you hold the lever back, nomatter what position the headlightswitch is in.
Daytime Running Lights (Canadian Models)
With the headlight switch off, the high beam headlights come on with
reduced brightness when you turn
the ignition switch to ON (II) and
release the parking brake. They
remain on until you turn the ignitionoff, even if you set the parking brake.
The headlights revert to normal operation when you turn them on
with the switch.
Instruments and ControlsMain Menu Table of Contents s t
Page 67 of 251
Steering Wheel Controls
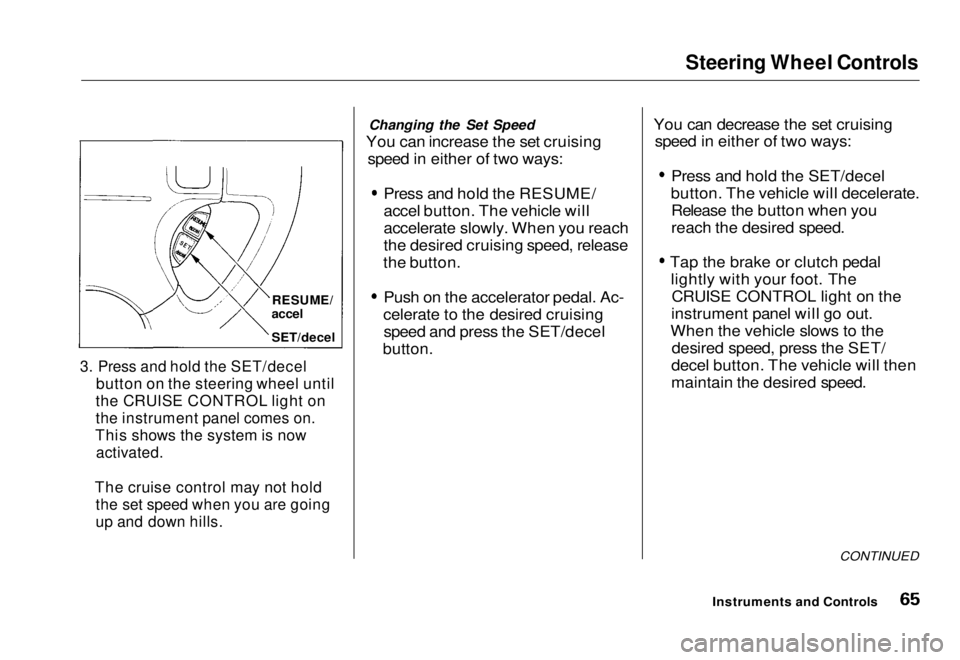
3. Press and hold the SET/decel
button on the steering wheel until
the CRUISE CONTROL light on
the instrument panel comes on.
This shows the system is now
activated.
The cruise control may not hold
the set speed when you are going
up and down hills.
Changing the Set Speed
You can increase the set cruising speed in either of two ways:
Press and hold the RESUME/
accel button. The vehicle will
accelerate slowly. When you reach
the desired cruising speed, release
the button. Push on the accelerator pedal. Ac-
celerate to the desired cruising speed and press the SET/decel
button.
You can decrease the set cruising
speed in either of two ways:
Press and hold the SET/decel
button. The vehicle will decelerate. Release the button when you
reach the desired speed.
Tap the brake or clutch pedal lightly with your foot. The
CRUISE CONTROL light on the
instrument panel will go out.
When the vehicle slows to the desired speed, press the SET/
decel button. The vehicle will then
maintain the desired speed.
CONTINUED
Instruments and Controls
RESUME/
accel
SET/decelMain Menu Table of Contents s t
Page 68 of 251
Steering Wheel Controls
Even with the cruise control turned
on, you can still use the accelerator
pedal to speed up for passing. After
completing the pass, take your foot
off the accelerator pedal. The vehicle
will return to the set cruising speed.
Resting your foot on the brake or
clutch pedal will cause the cruise
control to cancel.
Cancelling the Cruise Control
You can cancel the cruise control in any of these ways:
Tap the brake or clutch pedal.Press the SET/decel and RE-
SUME/accel buttons at the same
time.
Press the Cruise Control Master
Switch.
When you tap the brake or clutch pedal, or press the SET and RE-SUME buttons at the same time, theCRUISE CONTROL light on the
instrument panel will go out and the
vehicle will begin to slow down. You can use the accelerator pedal in the
normal way.
If you use the brake or clutch pedal
to cancel cruise control, the system
remembers the previously-set cruising speed. To return to that speed, accelerate to above 25 mph
(40 km/h) and press the RESUME/
accel button until the CRUISE CON-
TROL light comes on. The vehicle will accelerate to the same cruising
speed as before.
If you cancel cruise control by
pressing the SET and RESUME
buttons at the same time, the
previously-set cruising speed is erased. To use the cruise control,
accelerate to the desired cruisingspeed and press the SET/decel
button.
Pressing the Cruise Control MasterSwitch turns the system completely
off and erases the previous cruising
speed from memory. To use the
system again, refer to Using the
Cruise Control.
Instruments and ControlsMain Menu Table of Contents s t
Page 79 of 251
Folding Rear Seat, Power Windows
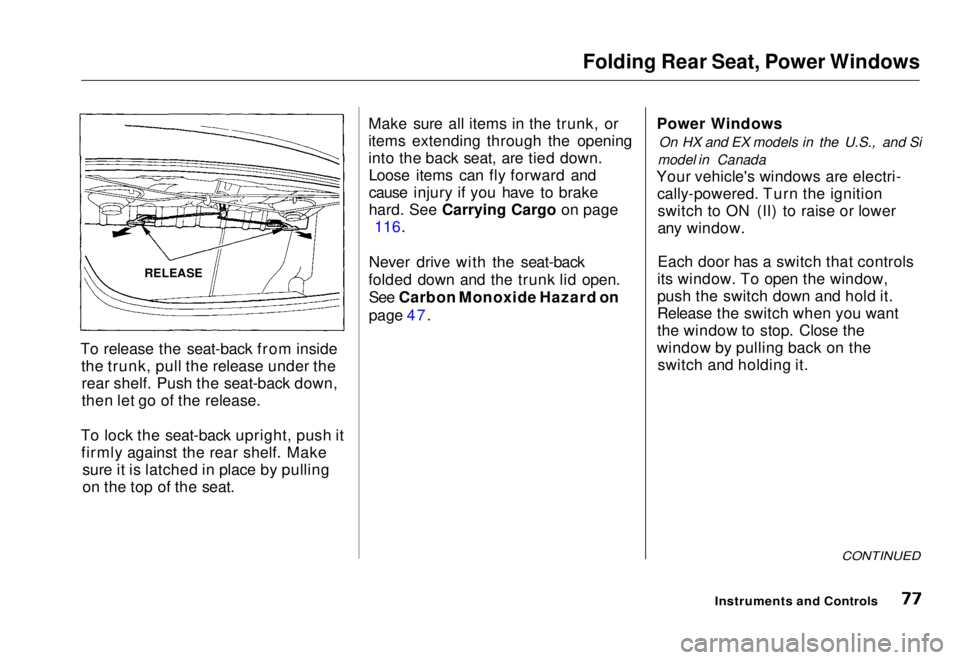
To release the seat-back from inside the trunk, pull the release under therear shelf. Push the seat-back down,
then let go of the release.
To lock the seat-back upright, push it firmly against the rear shelf. Make sure it is latched in place by pulling
on the top of the seat. Make sure all items in the trunk, or
items extending through the opening
into the back seat, are tied down.
Loose items can fly forward and
cause injury if you have to brake
hard
.
See Carrying Cargo on page
116.
Never drive with the seat-back
folded down and the trunk lid open. See Carbon Monoxide Hazard on
page 47. Power Windows
On HX and EX models in the U.S., and Si
model in Canada
Your vehicle's windows are electri- cally-powered. Turn the ignitionswitch to ON (II) to raise or lower
any window.
Each door has a switch that controls
its window. To open the window,
push the switch down and hold it.
Release the switch when you want
the window to stop. Close the
window by pulling back on the switch and holding it.
CONTINUED
Instruments and Controls
RELEASEMain Menu Table of Contents s t
Page 82 of 251
Mirrors, Parking Brake
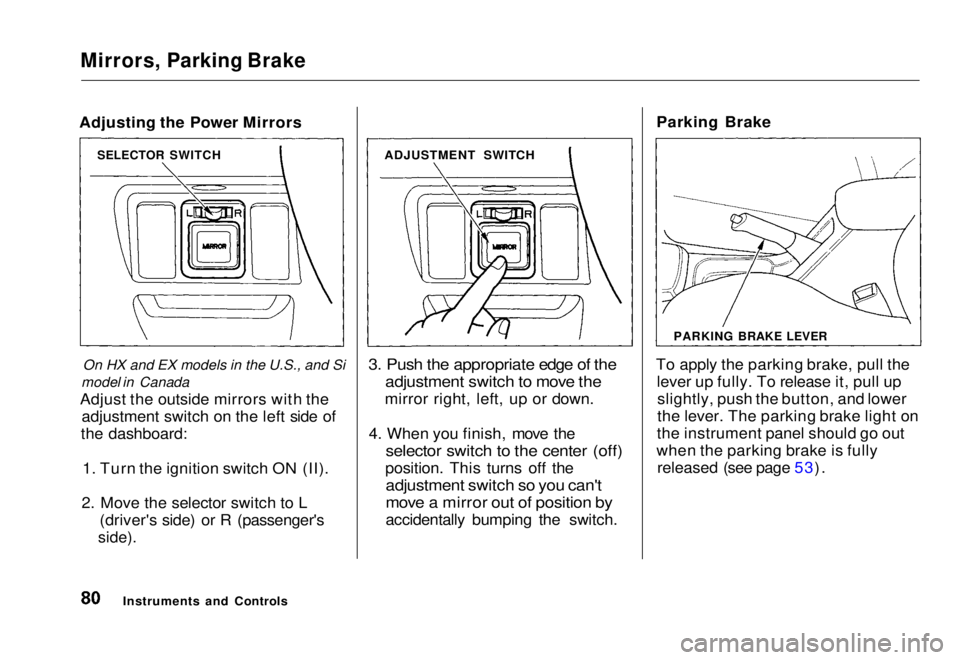
Adjusting the Power Mirrors
On HX and EX models in the U.S., and Si
model in Canada
Adjust the outside mirrors with the adjustment switch on the left side of
the dashboard:
1. Turn the ignition switch ON (II).
2. Move the selector switch to L (driver's side) or R (passenger's
side).
3. Push the appropriate edge of the
adjustment switch to move the
mirror right, left, up or down.
4. When you finish, move the
selector switch to the center (off)
position. This turns off the
adjustment switch so you can't
move a mirror out of position by
accidentally bumping the switch. Parking Brake
To apply the parking brake, pull the lever up fully. To release it, pull upslightly, push the button, and lower
the lever. The parking brake light on
the instrument panel should go out
when the parking brake is fully released (see page 53).
Instruments and Controls
SELECTOR SWITCH
ADJUSTMENT SWITCH
PARKING BRAKE LEVERMain Menu Table of Contents s t
Page 83 of 251
Parking Brake, Glove Box
Driving the vehicle with the parking brake applied can damage the rear
brakes and axles.
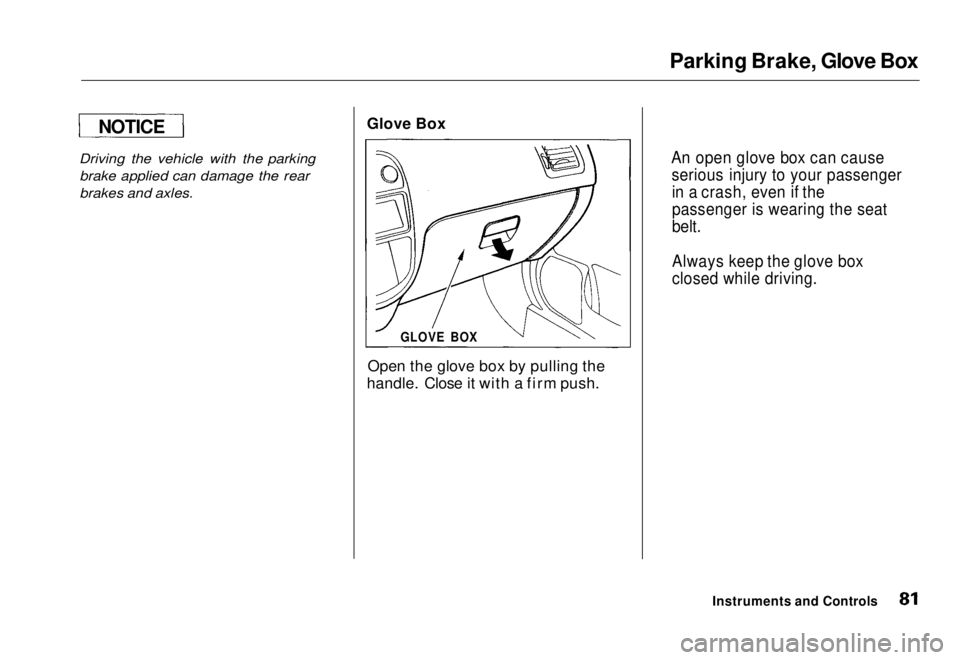
Glove Box
Open the glove box by pulling the
handle. Close it with a firm push.
Instruments and Controls
NOTICE
An open glove box can causeserious injury to your passengerin a crash, even if the
passenger is wearing the seat
belt.
Always keep the glove box
closed while driving.
GLOVE BOXMain Menu Table of Contents s t