driver seat adjustment HONDA CIVIC COUPE 1998 Owners Manual
[x] Cancel search | Manufacturer: HONDA, Model Year: 1998, Model line: CIVIC COUPE, Model: HONDA CIVIC COUPE 1998Pages: 251, PDF Size: 2.04 MB
Page 77 of 251

Seat Adjustments
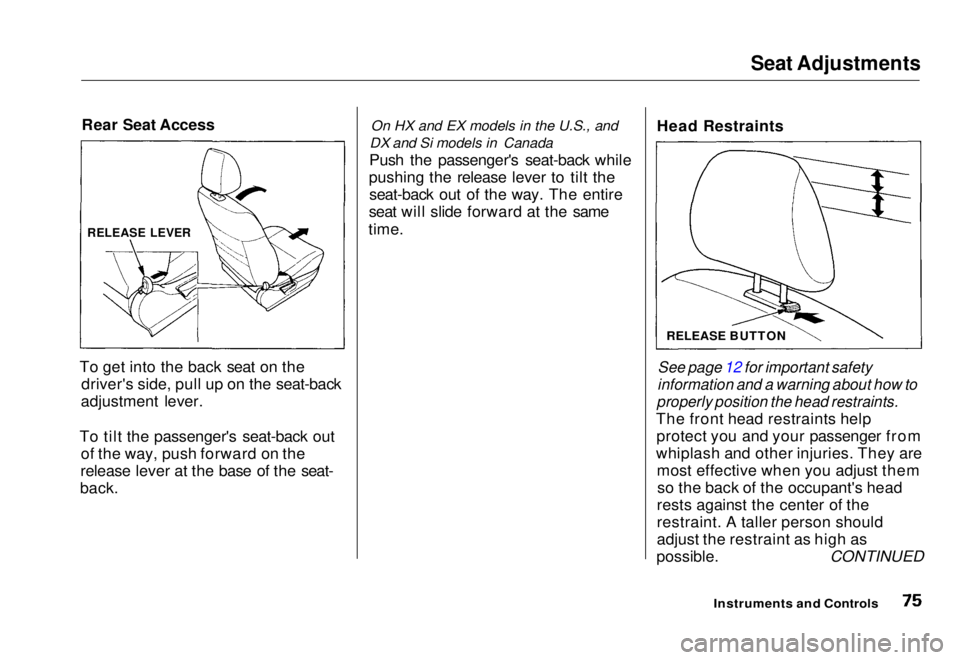
Rear Seat Access
To get into the back seat on the driver's side, pull up on the seat-back
adjustment lever.
To tilt the passenger's seat-back out of the way, push forward on the
release lever at the base of the seat-
back. On HX and EX models in the U.S., and
DX and Si models in Canada
Push the passenger's seat-back while
pushing the release lever to tilt the seat-back out of the way. The entire
seat will slide forward at the same
time. Head Restraints
See page 12 for important safety
information and a warning about how to
properly position the head restraints.
The front head restraints help protect you and your passenger from
whiplash and other injuries. They are most effective when you adjust themso the back of the occupant's head
rests against the center of the
restraint. A taller person should
adjust the restraint as high as
possible. CONTINUED
Instruments and Controls
RELEASE LEVER
RELEASE BUTTONMain Menu Table of Contents s t
Page 78 of 251

Seat Adjustments, Folding Rear Seat
The front head restraints adjust for height. You need both hands to
adjust the restraint. Do not attempt
to adjust it while driving. To raise it, pull upward. To lower the restraint,
push the release button sideways and push the restraint down.
To remove a head restraint for cleaning or repair, pull it up as far as
it will go. Push the release buttonand pull the restraint out of the seat-
back. Folding Rear Seat
The back of the rear seat folds down to give you direct access to the
trunk. Each side folds down sepa-
rately. With only half the seat folded,
you can still carry a passenger in the
back seat.
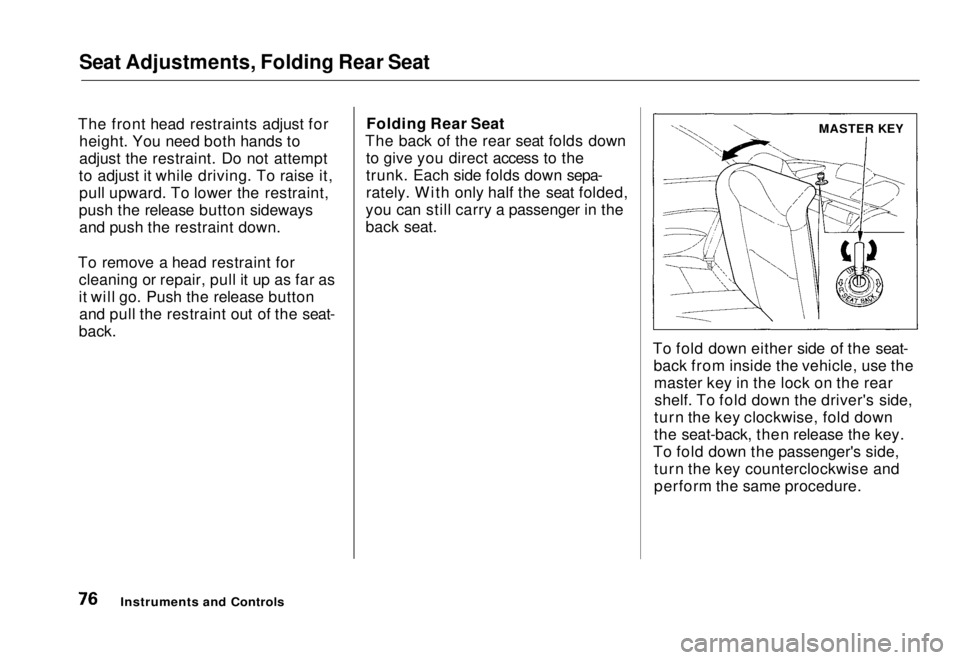
To fold down either side of the seat-back from inside the vehicle, use themaster key in the lock on the rearshelf. To fold down the driver's side,
turn the key clockwise, fold down
the seat-back, then release the key.
To fold down the passenger's side, turn the key counterclockwise and
perform the same procedure.
Instruments and Controls
MASTER KEYMain Menu Table of Contents s t
Page 189 of 251

Lights
Headlight Aiming
The headlights were properly aimed when your vehicle was new. Youshould check their aim if you
regularly carry heavy items in the
trunk. Each headlight assembly has
horizontal and vertical adjustment
indicators. These are set to their "0"
positions after the headlights are aimed at the factory.
To check these settings: 1. Make sure the fuel tank is full. Park the vehicle on level ground.
2. The driver or someone who weighs the same should be sittingin the driver's seat for all checks
and adjustments.
Load the trunk with the items you
normally carry.
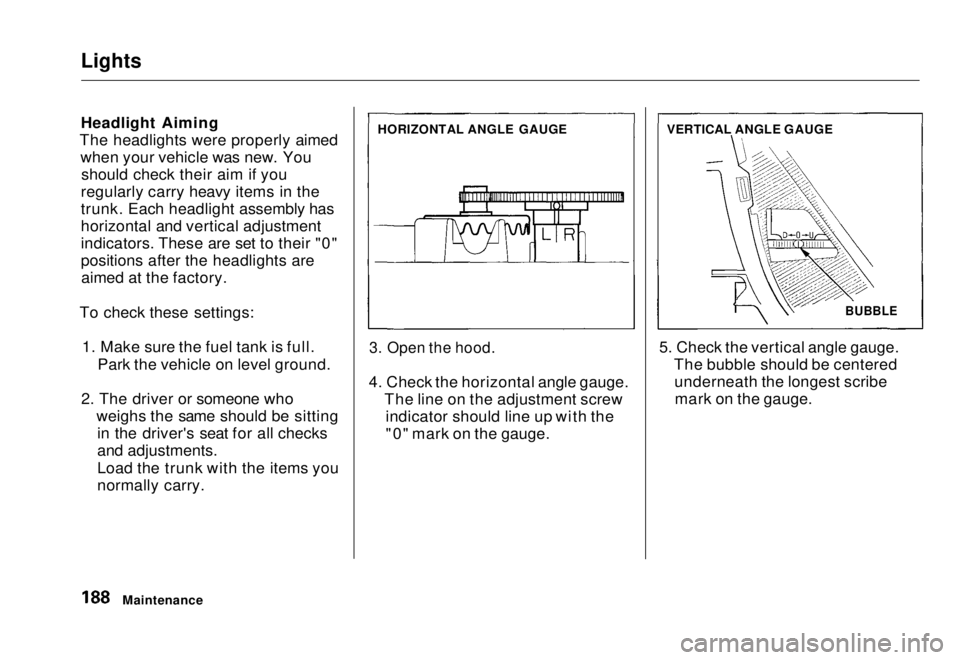
3. Open the hood.
4. Check the horizontal angle gauge. The line on the adjustment screwindicator should line up with the
"0" mark on the gauge. 5. Check the vertical angle gauge.
The bubble should be centeredunderneath the longest scribemark on the gauge.
Maintenance HORIZONTAL ANGLE GAUGE
VERTICAL ANGLE GAUGE
BUBBLEMain Menu Table of Contents s t