ignition HONDA CIVIC COUPE 1998 Owners Manual
[x] Cancel search | Manufacturer: HONDA, Model Year: 1998, Model line: CIVIC COUPE, Model: HONDA CIVIC COUPE 1998Pages: 251, PDF Size: 2.04 MB
Page 24 of 251
Protecting Children
If A Child Requires Close
Attention Many parents say they prefer to put
an infant or small child in the front
passenger seat so they can watch the child, or because the child requires
attention.
Placing a child in the front seat
exposes them to hazards from the airbag, and paying close attention to
a child distracts the driver from the
important tasks of driving, creating serious safety risks.
If a child requires physical attention or frequent visual contact, westrongly recommend that another
adult ride with the child in the back
seat. The back seat is far safer for a
child than the front. Additional Safety Precaution
Do not leave children alone in your
vehicle. Leaving children without
adult supervision is illegal in most states and can be very hazardous. For
example, infants and small children left in a vehicle on a hot day can die
from heatstroke. And children left
alone with the key in the ignition can
accidentally set the vehicle in
motion, possibly injuring themselves
or others.
Driver and Passenger SafetyMain Menu Table of Contents s t
Page 42 of 251
Additional Information About Your Seat Belts
Seat Belt System Components
Your seat belt system includes lap/ shoulder belts in the front seats and
the outer back seats, and a lap belt in
the center back seat.
The system also includes alight on the instrument
panel to remind you and your passengers to fasten your belts. If
the driver's seat belt is not fastened
before the ignition is turned ON (II),
the light will come on and a beeper
will also sound. The beeper will stop after a few seconds, but the light willstay on until the driver's seat belt is
fastened.
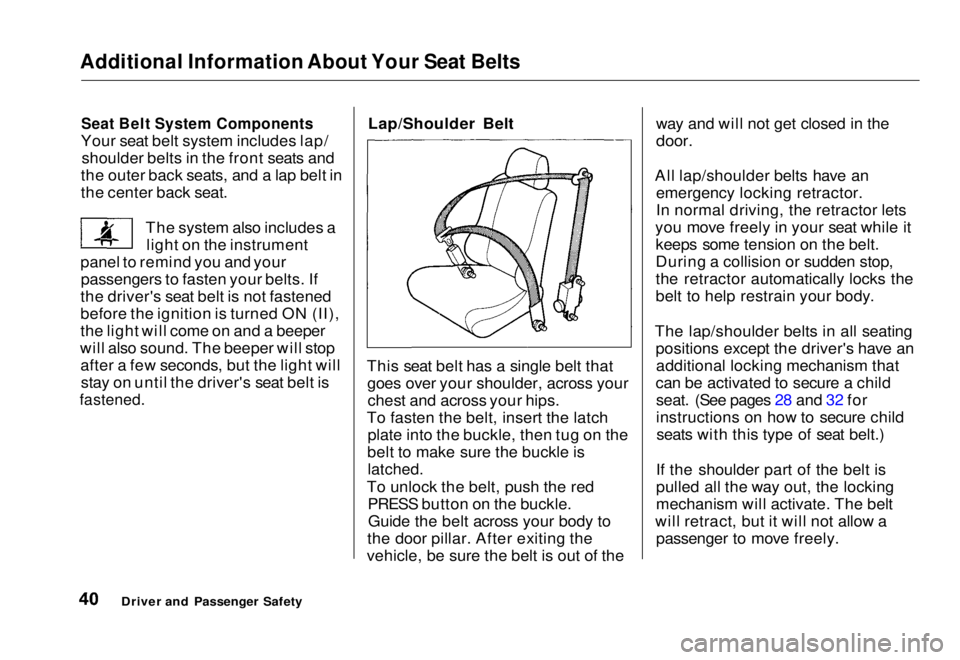
Lap/Shoulder Belt
This seat belt has a single belt that goes over your shoulder, across yourchest and across your hips.
To fasten the belt, insert the latch plate into the buckle, then tug on the
belt to make sure the buckle is
latched.
To unlock the belt, push the red PRESS button on the buckle.Guide the belt across your body to
the door pillar. After exiting the
vehicle, be sure the belt is out of the way and will not get closed in the
door.
All lap/shoulder belts have an emergency locking retractor.
In normal driving, the retractor lets
you move freely in your seat while it keeps some tension on the belt.
During a collision or sudden stop,
the retractor automatically locks the
belt to help restrain your body.
The lap/shoulder belts in all seating positions except the driver's have anadditional locking mechanism that
can be activated to secure a child seat. (See pages 28 and 32 for
instructions on how to secure childseats with this type of seat belt.)
If the shoulder part of the belt is
pulled all the way out, the locking
mechanism will activate. The belt
will retract, but it will not allow a passenger to move freely.
Driver and Passenger SafetyMain Menu Table of Contents s t
Page 45 of 251
Additional Information About Your SRS
SRS Components
Your Supplemental Restraint System (SRS) includes:
Two frontal airbags. The driver'sairbag is stored in the center of
the steering wheel; the front
passenger's airbag is stored in thedashboard. Both are marked
"SRS".
Sensors that can detect a severe
frontal collision. A sophisticated electronic system
that continually monitors thesensors, control unit, the airbag
activators, and all related wiring
when the ignition is ON (II). An indicator light on the
instrument panel to alert you to a
possible problem with the system (see page 45). Emergency backup power in case
your vehicle's electrical system is disconnected in a crash.
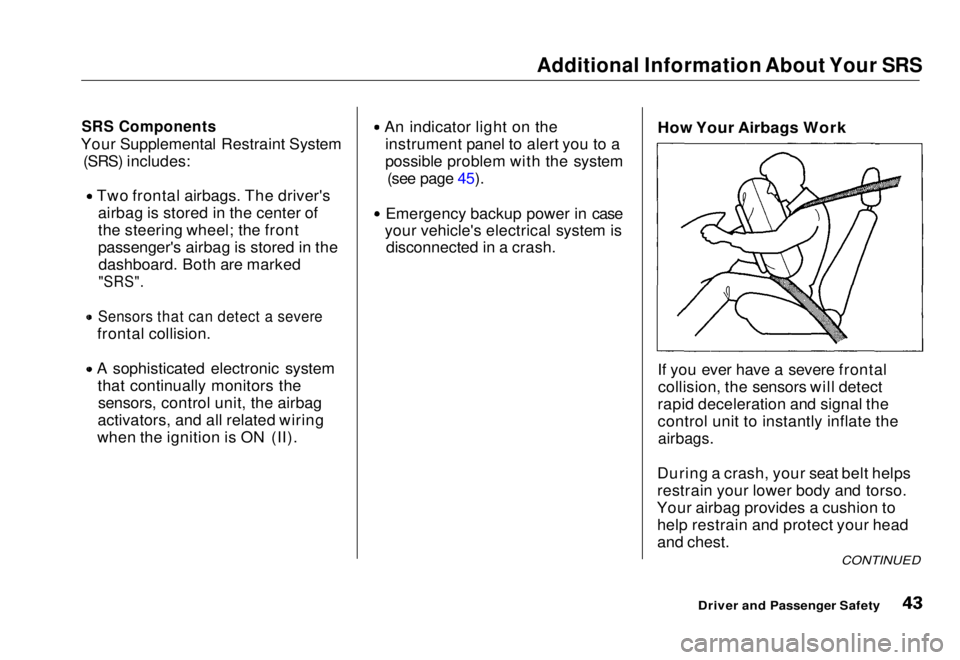
How Your Airbags Work
If you ever have a severe frontal
collision, the sensors will detect
rapid deceleration and signal the
control unit to instantly inflate the
airbags.
During a crash, your seat belt helps
restrain your lower body and torso.
Your airbag provides a cushion to help restrain and protect your head
and chest.
CONTINUED
Driver and Passenger SafetyMain Menu Table of Contents s t
Page 47 of 251
Additional Information About Your SRS
How Your SRS Indicator Light
Works The purpose of the SRSindicator light is to alert
you to a potential problem with your Supplemental Restraint System.
When you turn the ignition ON (II), this indicator will light up briefly
then go out. This tells you that thesystem is working properly.
However, if the light comes on at any
other time, you should have yoursystem checked by your dealer. For
example:
If the SRS indicator light does not
come on after you turn the ignition
ON (II). If the light stays on after the
engine starts. If the light comes on or flashes on
and off while you drive.
If you see any of these indications,
your airbags may not deploy when you need them. See your Honda dealer as soon as possible. SRS Service
Your Supplemental Restraint System is virtually maintenance-free, and
there are no parts you can safelyservice. However, you must have
your vehicle serviced if:
Your airbags ever inflate. The
airbags and
the control unit must
be replaced. Do not try to remove or replace the airbags yourself.
This must be done by a Honda dealer or a knowledgeable body
shop.
The SRS indicator light alerts you
to a problem. Take your vehicle to
an authorized Honda dealer as soon as possible. If you ignore this
indication, the airbags might not
inflate when you need them.
Driver and Passenger Safety
SRS
Ignoring the SRS indicator light
can result in serious injury or death if the airbags do notinflate when needed.
Have your vehicle checked by a
dealer as soon as possible if
the SRS light alerts you to a potential problem.Main Menu Table of Contents s t
Page 51 of 251
Instruments and Controls
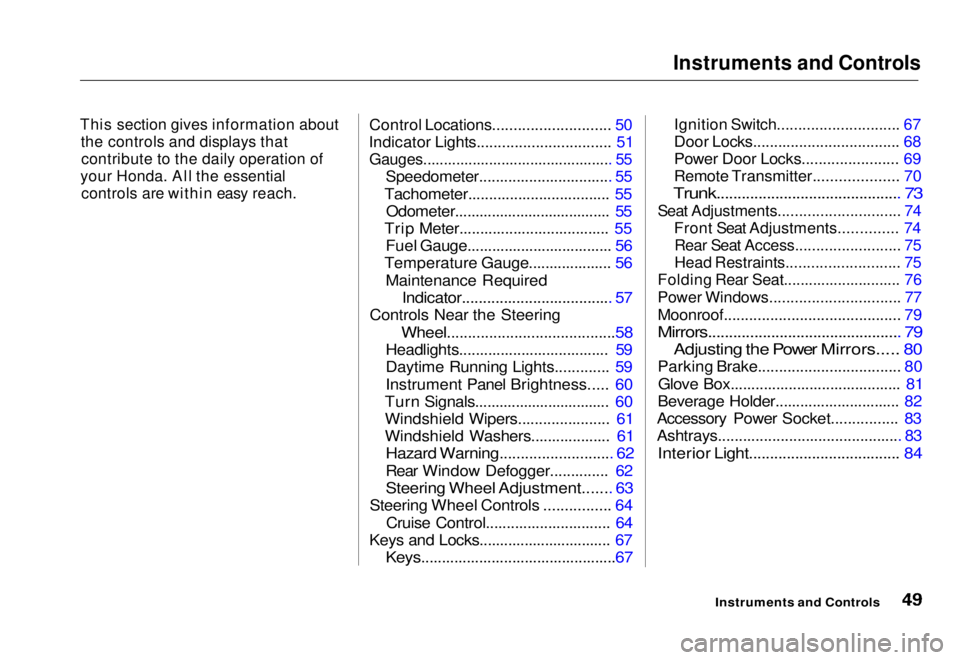
This section gives information about the controls and displays that
contribute to the daily operation of
your Honda. All the essential
controls are within easy reach.
Control Locations............................ 50
Indicator Lights................................ 51
Gauges.............................................. 55
Speedometer................................ 55
Tachometer.................................. 55 Odometer...................................... 55
Trip Meter.................................... 55 Fuel Gauge................................... 56
Temperature Gauge.................... 56
Maintenance Required
Indicator.................................... 57
Controls Near the Steering
Wheel........................................58
Headlights.................................... 59
Daytime Running Lights............. 59
Instrument Panel Brightness..... 60
Turn Signals................................. 60
Windshield Wipers...................... 61
Windshield Washers................... 61
Hazard Warning........................... 62
Rear Window Defogger.............. 62
Steering Wheel Adjustment....... 63
Steering Wheel Controls ................ 64
Cruise Control.............................. 64
Keys and Locks................................ 67
Keys...............................................67
Ignition Switch............................. 67
Door Locks................................... 68
Power Door Locks....................... 69
Remote Transmitter.................... 70
Trunk............................................ 73
Seat Adjustments............................. 74
Front Seat Adjustments.............. 74
Rear Seat Access......................... 75
Head Restraints........................... 75
Folding Rear Seat............................ 76
Power Windows............................... 77
Moonroof.......................................... 79
Mirrors.............................................. 79
Adjusting the Power Mirrors..... 80
Parking Brake.................................. 80
Glove Box......................................... 81
Beverage Holder.............................. 82
Accessory Power Socket................ 83
Ashtrays............................................ 83
Interior Light.................................... 84
Instruments and ControlsMain Menu s t
Page 53 of 251
Indicator Lights
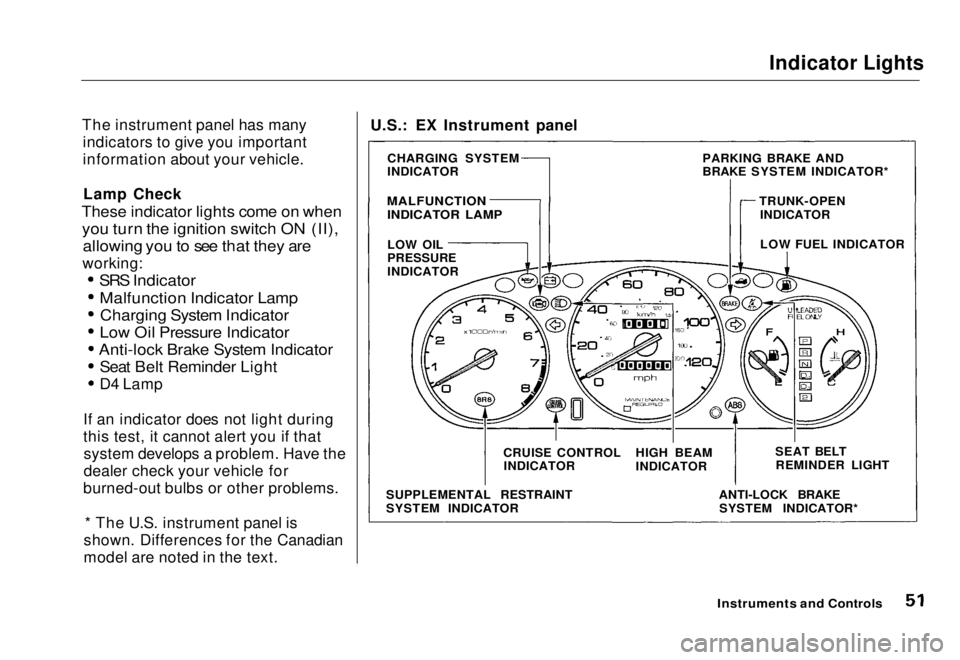
The instrument panel has many indicators to give you important
information about your vehicle.
Lamp Check
These indicator lights come on when
you turn the ignition switch ON (II), allowing you to see that they are
working:
SRS Indicator
Malfunction Indicator LampCharging System Indicator
Low Oil Pressure Indicator
Anti-lock Brake System Indicator
Seat Belt Reminder Light
D4 Lamp
If an indicator does not light during
this test, it cannot alert you if that system develops a problem. Have the
dealer check your vehicle for
burned-out bulbs or other problems.
* The U.S. instrument panel is
shown. Differences for the Canadian
model are noted in the text.
Instruments and Controls
U.S.: EX Instrument panel
CHARGING SYSTEM
INDICATOR
MALFUNCTION
INDICATOR LAMP
LOW OIL
PRESSURE
INDICATOR
SUPPLEMENTAL RESTRAINT
SYSTEM INDICATOR CRUISE CONTROL
INDICATOR HIGH BEAM
INDICATOR
ANTI-LOCK BRAKESYSTEM INDICATOR* SEAT BELT
REMINDER LIGHT
LOW FUEL INDICATOR
PARKING BRAKE AND
BRAKE SYSTEM INDICATOR*
TRUNK-OPENINDICATORMain Menu Table of Contents s t
Page 54 of 251
Indicator Lights
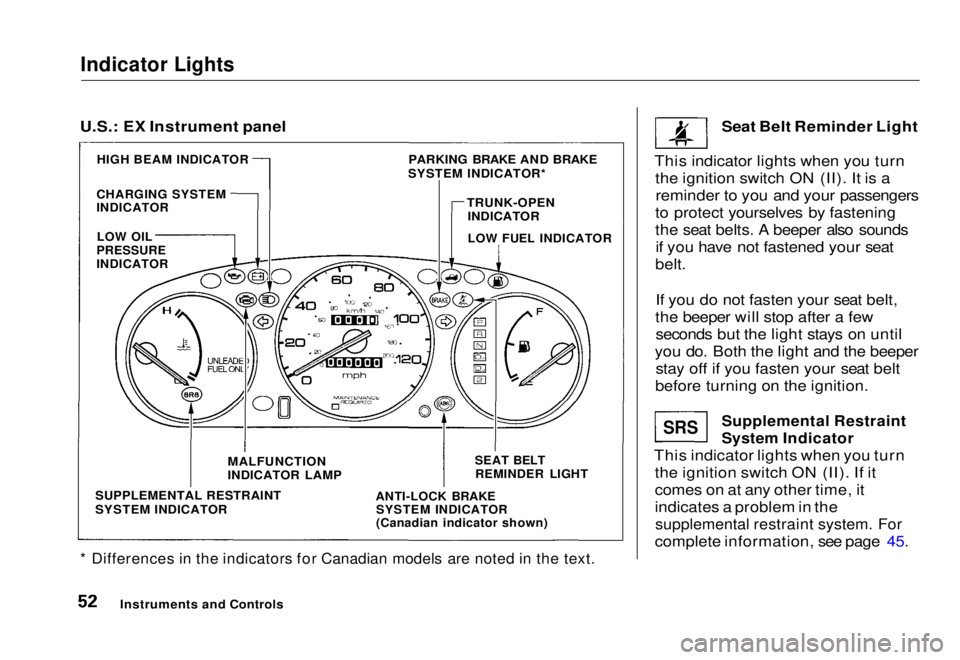
* Differences in the indicators for Canadian models are noted in the text.
Seat Belt Reminder Light
This indicator lights when you turn the ignition switch ON (II). It is areminder to you and your passengers
to protect yourselves by fastening
the seat belts. A beeper also sounds if you have not fastened your seat
belt.
If you do not fasten your seat belt,
the beeper will stop after a few seconds but the light stays on until
you do. Both the light and the beeper stay off if you fasten your seat belt
before turning on the ignition.
Supplemental Restraint
System Indicator
This indicator lights when you turn the ignition switch ON (II). If it
comes on at any other time, it
indicates a problem in the
supplemental restraint system. For
complete information, see page 45.
Instruments and Controls
SRS
U.S.: EX Instrument panel
PARKING BRAKE AND BRAKE
SYSTEM INDICATOR*
HIGH BEAM INDICATOR
CHARGING SYSTEM
INDICATOR
TRUNK-OPEN
INDICATOR
LOW FUEL INDICATOR
LOW OIL
PRESSURE
INDICATOR
SUPPLEMENTAL RESTRAINT
SYSTEM INDICATOR
MALFUNCTION
INDICATOR LAMP
ANTI-LOCK BRAKE
SYSTEM INDICATOR
(Canadian indicator shown)
SEAT BELT
REMINDER LIGHTMain Menu Table of Contents s t
Page 55 of 251
Indicator Lights
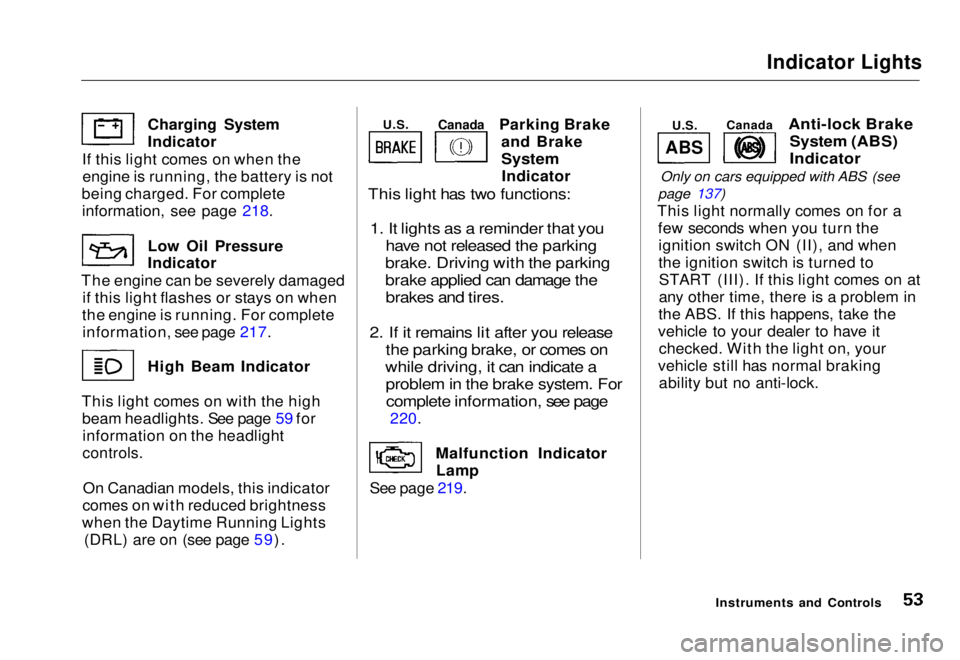
Parking Brake and Brake
System
Indicator
This light has two functions:
1. It lights as a reminder that you have not released the parking
brake. Driving with the parking
brake applied can damage the brakes and tires.
2. If it remains lit after you release the parking brake, or comes on
while driving, it can indicate a problem in the brake system. Forcomplete information, see page
220.
Malfunction Indicator Lamp
See page 219.
Anti-lock Brake
System (ABS)
Indicator
Only on cars equipped with ABS (see
page 137)
This light normally comes on for a few seconds when you turn theignition switch ON (II), and when
the ignition switch is turned toSTART (III). If this light comes on at
any other time, there is a problem in
the ABS. If this happens, take the
vehicle to your dealer to have it checked. With the light on, your
vehicle still has normal braking ability but no anti-lock.
Instruments and Controls
Charging System Indicator
If this light comes on when the engine is running, the battery is not
being charged. For complete
information
,
see page 218.
Low Oil
Pressure
Indicator
The engine can be severely damaged if this light flashes or stays on when
the engine is running. For complete information, see page 217. High Beam Indicator
This light comes on with the high beam headlights. See page 59 forinformation on the headlight
controls.
On Canadian models, this indicator
comes on with reduced brightness
when the Daytime Running Lights (DRL) are on (see page 59).
ABS
U.S.
Canada
U.S.
CanadaMain Menu Table of Contents s t
Page 58 of 251
Gauges
U.S.: EX Instrument panel
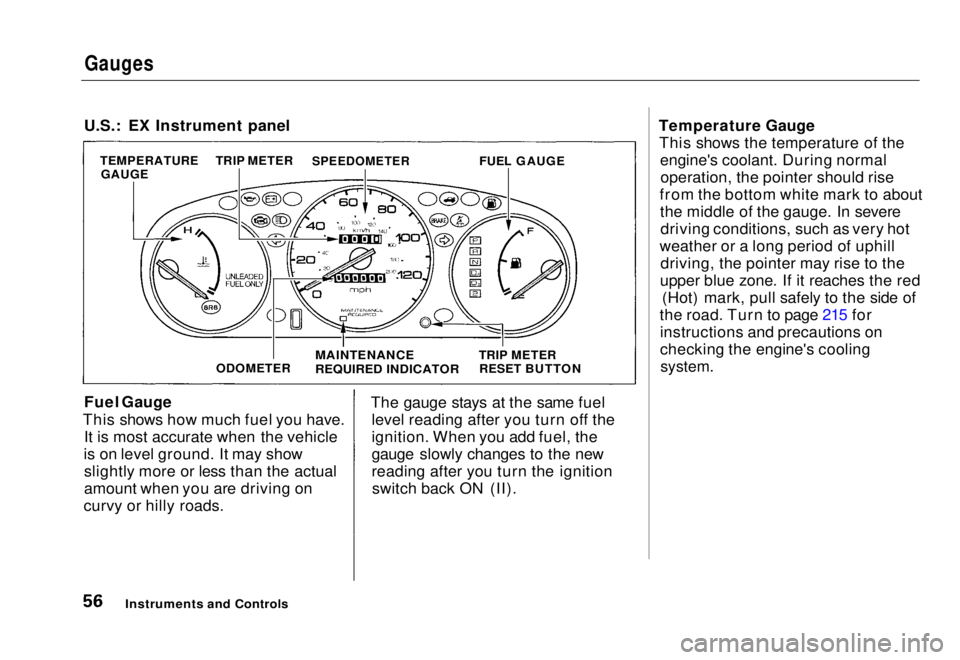
Fuel Gauge
This shows how much fuel you have. It is most accurate when the vehicle
is on level ground. It may show slightly more or less than the actual
amount when you are driving on
curvy or hilly roads. The gauge stays at the same fuel
level reading after you turn off the
ignition. When you add fuel, the
gauge slowly changes to the new
reading after you turn the ignitionswitch back ON (II). Temperature Gauge
This shows the temperature of the engine's coolant. During normaloperation, the pointer should rise
from the bottom white mark to about the middle of the gauge. In severedriving conditions, such as very hot
weather or a long period of uphill driving, the pointer may rise to the
upper blue zone. If it reaches the red (Hot) mark, pull safely to the side of
the road. Turn to page 215 for instructions and precautions on
checking the engine's cooling
system.
Instruments and Controls
TEMPERATURE
GAUGE TRIP METER
SPEEDOMETER
FUEL GAUGE
ODOMETER
MAINTENANCE
REQUIRED INDICATOR
TRIP METER
RESET BUTTONMain Menu Table of Contents s t
Page 61 of 251
Controls Near the Steering Wheel
Headlights
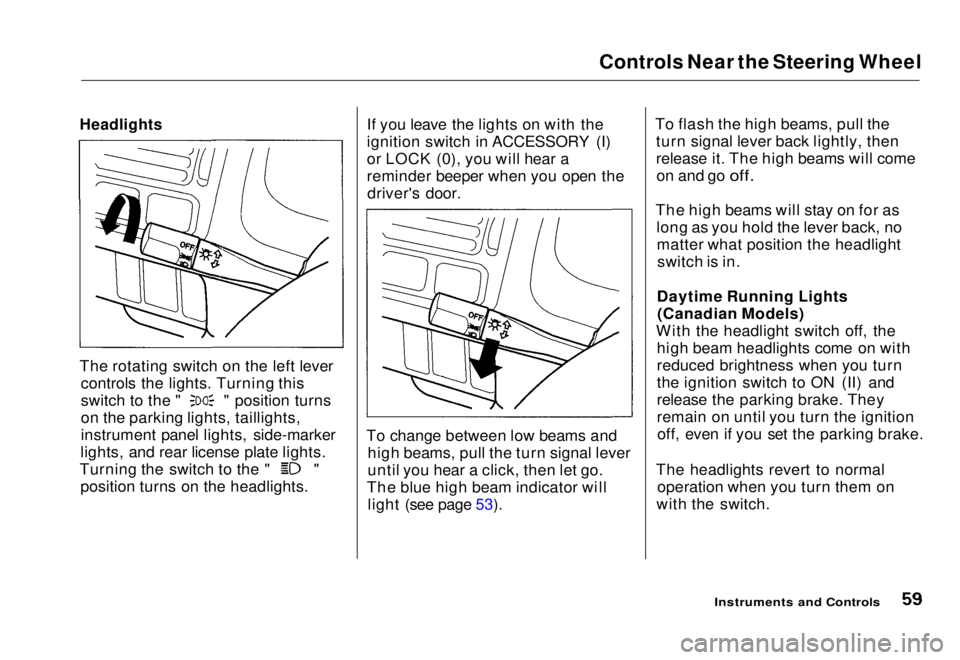
The rotating switch on the left lever controls the lights. Turning this switch to the " " position turns
on the parking lights, taillights,
instrument panel lights, side-marker
lights, and rear license plate lights. Turning the switch to the " "
position turns on the headlights. If you leave the lights on with the
ignition switch in ACCESSORY (I)
or LOCK (0), you will hear a
reminder beeper when you open the
driver's door.
To change between low beams and high beams, pull the turn signal lever
until you hear a click, then let go.
The blue high beam indicator will light (see page 53). To flash the high beams, pull the
turn signal lever back lightly, then
release it. The high beams will comeon and go
off.
The high beams will stay on for as long as you hold the lever back, nomatter what position the headlightswitch is in.
Daytime Running Lights (Canadian Models)
With the headlight switch off, the high beam headlights come on with
reduced brightness when you turn
the ignition switch to ON (II) and
release the parking brake. They
remain on until you turn the ignitionoff, even if you set the parking brake.
The headlights revert to normal operation when you turn them on
with the switch.
Instruments and ControlsMain Menu Table of Contents s t