engine coolant HONDA CIVIC COUPE 1999 Owners Manual
[x] Cancel search | Manufacturer: HONDA, Model Year: 1999, Model line: CIVIC COUPE, Model: HONDA CIVIC COUPE 1999Pages: 269, PDF Size: 2.42 MB
Page 59 of 269
Gauges
Fuel Gauge
This shows how much fuel you have. It is most accurate when the car is on
level ground. It may show slightlymore or less than the actual amount
when you are driving on curvy or hilly roads. The gauge stays at the same fuel
level reading after you turn off the
ignition. When you add fuel, the
gauge slowly changes to the new
reading after you turn the ignitionswitch back ON (II). Temperature Gauge
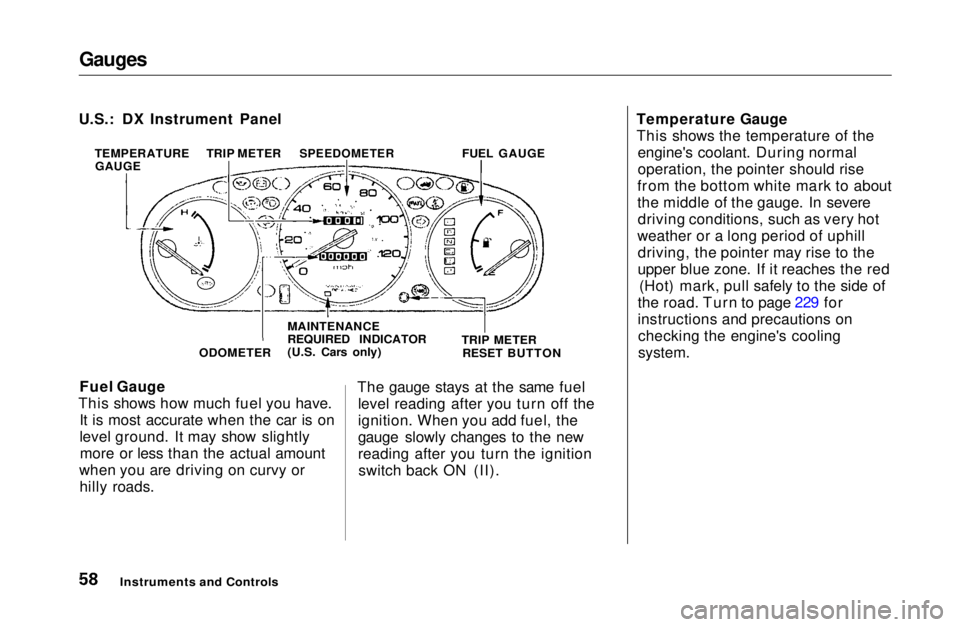
This shows the temperature of the
engine's coolant. During normal
operation, the pointer should rise
from the bottom white mark to about
the middle of the gauge. In severe driving conditions, such as very hot
weather or a long period of uphill driving, the pointer may rise to the
upper blue zone. If it reaches the red (Hot) mark, pull safely to the side of
the road. Turn to page 229 for
instructions and precautions on checking the engine's cooling
system.
Instruments and Controls
U.S.: DX Instrument Panel
TEMPERATUREGAUGE TRIP METER
SPEEDOMETER
FUEL GAUGE
ODOMETER MAINTENANCE
REQUIRED INDICATOR
(U.S. Cars only)
TRIP METER
RESET BUTTONMain Menu Table of Contents s t
Page 91 of 269
Heating and Cooling
Vent Controls
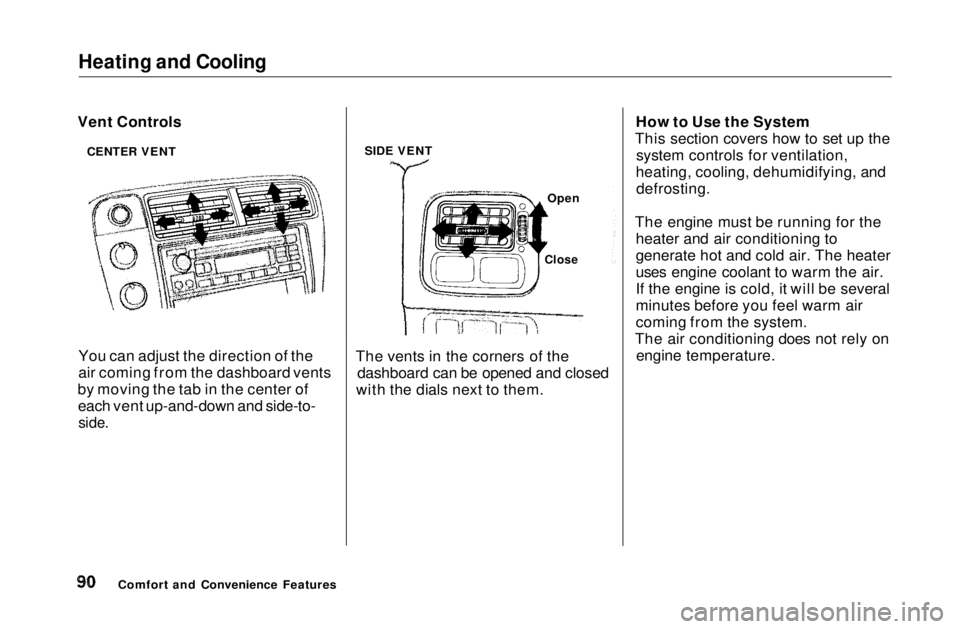
You can adjust the direction of the
air coming from the dashboard vents
by moving the tab in the center of each vent up-and-down and side-to-
side.
The vents in the corners of the
dashboard can be opened and closed
with the dials next to them. How to Use the System
This section covers how to set up the system controls for ventilation,
heating, cooling, dehumidifying, and defrosting.
The engine must be running for the heater and air conditioning to
generate hot and cold air. The heater
uses engine coolant to warm the air.
If the engine is cold, it will be several
minutes before you feel warm air
coming from the system.
The air conditioning does not rely on engine temperature.
Comfort and Convenience Features
CENTER VENT
SIDE VENT
Open
CloseMain Menu Table of Contents s t
Page 93 of 269
Heating and Cooling
To Cool with A/C
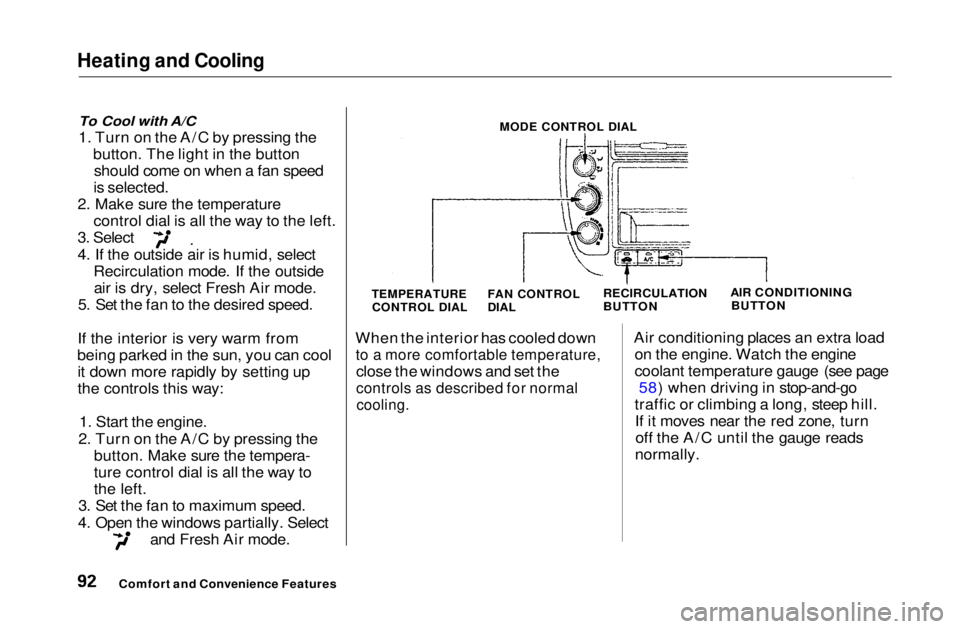
1. Turn on the A/C by pressing the button. The light in the buttonshould come on when a fan speed
is selected.
2. Make sure the temperature control dial is all the way to the left. 3. Select
4. If the outside air is humid, select
Recirculation mode. If the outsideair is dry, select Fresh Air mode.
5. Set the fan to the desired speed.
If the interior is very warm from
being parked in the sun, you can cool it down more rapidly by setting up
the controls this way:
1. Start the engine.
2. Turn on the A/C by pressing the button. Make sure the tempera-
ture control dial is all the way to
the left.
3. Set the fan to maximum speed.
4. Open the windows partially. Select and Fresh Air mode.
MODE CONTROL DIAL
TEMPERATURE
CONTROL DIAL
FAN CONTROL
DIAL
RECIRCULATION
BUTTON AIR CONDITIONING
BUTTON
When the interior has cooled down
to a more comfortable temperature,
close the windows and set the
controls as described for normal
cooling.
Air conditioning places an extra load
on the engine. Watch the engine
coolant temperature gauge (see page 58) when driving in stop-and-go
traffic or climbing a long, steep hill. If it moves near the red zone, turnoff the A/C until the gauge reads
normally.
Comfort and Convenience FeaturesMain Menu Table of Contents s t
Page 96 of 269

Heating and Cooling
These settings direct all the air flow to the defroster vents at the base of
the windshield and the side windowdefroster vents. The air flow will get
warmer and clear the windows faster as the engine warms up. You can
close the side vents with the dial
beside each vent. This will send
more warm air to the windshield defroster vents.
For safety, make sure you have a
clear view through all the windows
before driving away. To Turn Everything Off
To shut off the system temporarily,
turn the fan speed and temperature
control dials all the way to the left.
You should shut the system completely off only for the first few
minutes of driving in cold weather,
until the engine coolant warms up enough to operate the heater. Keep
the fan on at all other times so stale air does not build up in the interior.
Comfort and Convenience FeaturesMain Menu Table of Contents s t
Page 123 of 269

Before Driving
Before you begin driving your Honda,
you should know what gasoline to use, and how to check the levels of
important fluids. You also need to
know how to properly store luggage or packages. The information in this
section will help you. If you plan to
add any accessories to your car,
please read the information in this section first. Break-in Period.............................. 124
Gasoline.......................................... 124
Service Station Procedures .......... 125 Filling the Fuel Tank................. 125Opening the Hood..................... 126 Oil Check................................127
Engine Coolant Check.......... 128
Fuel Economy................................ 129
Vehicle Condition...................... 129Driving Habits............................ 129
Accessories and Modifications.... 130 Carrying Cargo.............................. 132
Before DrivingMain Menu s t
Page 128 of 269
Service Station Procedures
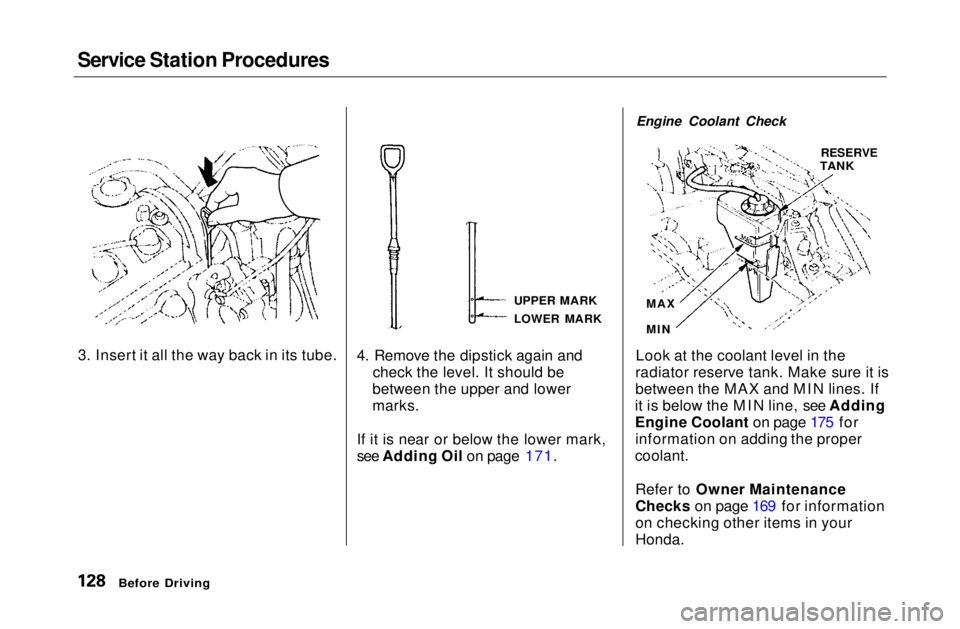
4. Remove the dipstick again andcheck the level. It should be
between the upper and lower
marks.
If it is near or below the lower mark,
see Adding Oil on page 171. Engine Coolant Check
Look at the coolant level in the
radiator reserve tank. Make sure it is
between the MAX and MIN lines. If
it is below the MIN line, see Adding
Engine Coolant on page 175 for information on adding the proper
coolant.
Refer to Owner Maintenance
Checks on page 169 for information
on checking other items in your
Honda.
Before Driving
3. Insert it all the way back in its tube.
UPPER MARK
LOWER MARKRESERVE
TANK
MAX
MINMain Menu Table of Contents s t
Page 156 of 269
Maintenance
This section explains why it is important to keep your car wellmaintained and to follow basic
maintenance safety precautions.
This section also includes Maintenance Schedules for normal
driving and severe driving conditions,
a Maintenance Record, and instruc-
tions for simple maintenance tasks
you may want to take care of yourself.
If you have the skills and tools to per-form more complex maintenance
tasks on your Honda, you may want
to purchase the Service Manual. See
page 263 for information on how to obtain a copy, or see your Honda
dealer.
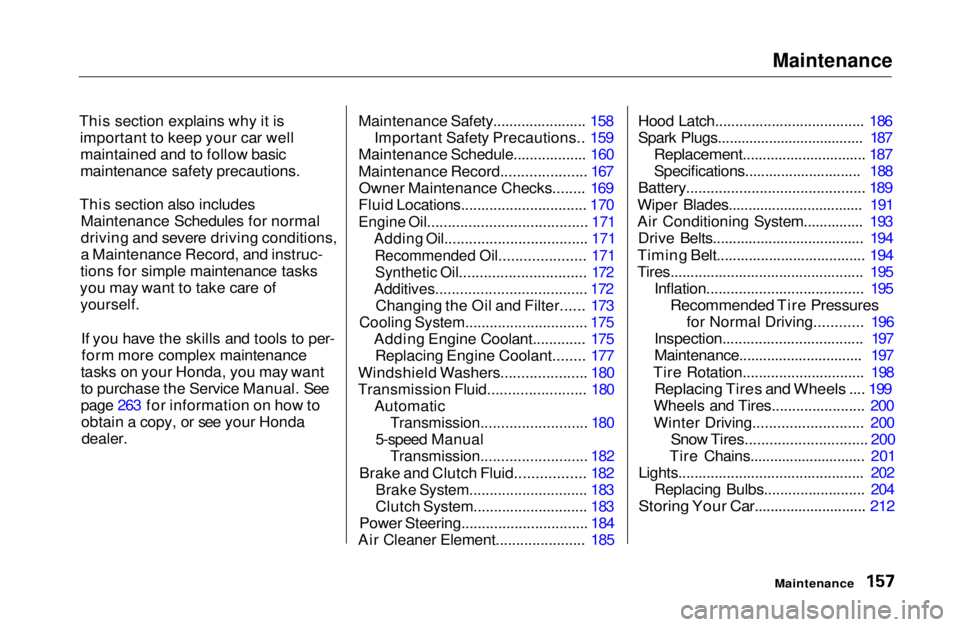
Maintenance Safety....................... 158
Important Safety Precautions.. 159
Maintenance Schedule.................. 160
Maintenance Record..................... 167 Owner Maintenance Checks........ 169
Fluid Locations............................... 170
Engine Oil....................................... 171
Adding Oil................................... 171
Recommended Oil..................... 171Synthetic Oil............................... 172
Additives..................................... 172
Changing the Oil and Filter...... 173
Cooling System.............................. 175
Adding Engine Coolant............. 175Replacing Engine Coolant........ 177
Windshield Washers..................... 180
Transmission Fluid........................ 180
Automatic
Transmission.......................... 180
5-speed Manual
Transmission.......................... 182
Brake and Clutch Fluid................. 182
Brake System............................. 183
Clutch System............................ 183
Power Steering............................... 184
Air Cleaner Element...................... 185 Hood Latch..................................... 186
Spark Plugs..................................... 187
Replacement............................... 187
Specifications............................. 188
Battery............................................ 189
Wiper Blades.................................. 191
Air Conditioning System............... 193 Drive Belts...................................... 194
Timing Belt..................................... 194
Tires................................................ 195 Inflation....................................... 195
Recommended Tire Pressures
for Normal Driving............ 196
Inspection................................... 197
Maintenance............................... 197
Tire Rotation.............................. 198
Replacing Tires and Wheels .... 199
Wheels and Tires....................... 200
Winter Driving........................... 200
Snow Tires.............................. 200
Tire Chains............................. 201
Lights.............................................. 202 Replacing Bulbs......................... 204
Storing Your Car............................ 212
MaintenanceMain Menu s t
Page 168 of 269
Owner Maintenance Checks
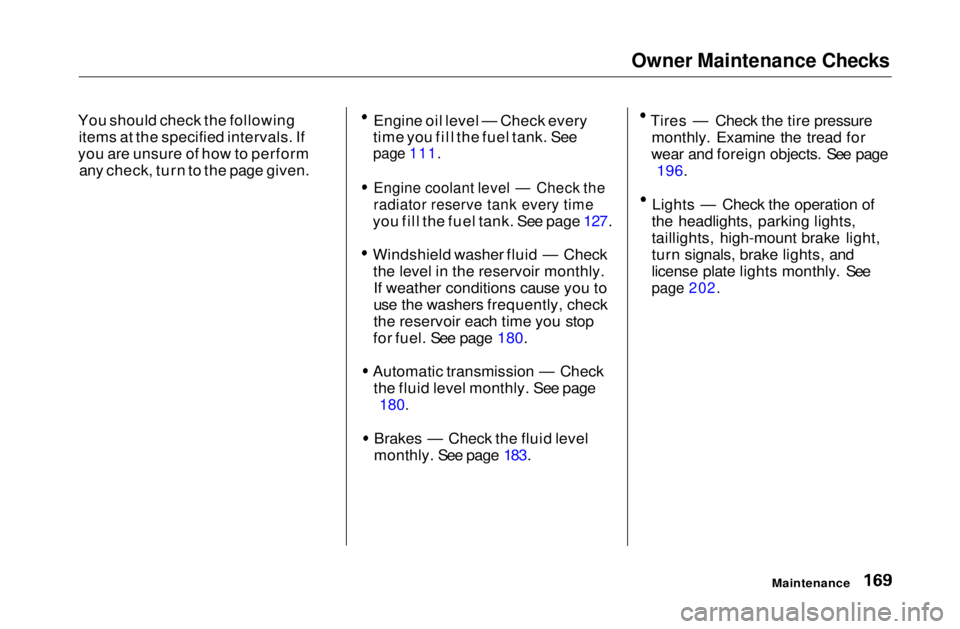
You should check the following items at the specified intervals. If
you are unsure of how to perform any check, turn to the page given. Engine oil level — Check every
time you fill the fuel tank. See
page 111. Engine coolant level — Check the
radiator reserve tank every time
you fill the fuel tank. See page 127. Windshield washer fluid — Check
the level in the reservoir monthly.If weather conditions cause you to
use the washers frequently, check
the reservoir each time you stop
for fuel. See page 180. Automatic transmission — Check
the fluid level monthly. See page
180.
Brakes — Check the fluid level
monthly. See page 183.Tires — Check the tire pressure
monthly. Examine the tread for
wear and foreign objects. See page 196. Lights — Check the operation of
the headlights, parking lights,
taillights, high-mount brake light,
turn signals, brake lights, and
license plate lights monthly. See
page 202.
MaintenanceMain Menu Table of Contents s t
Page 169 of 269
Fluid Locations
Maintenance
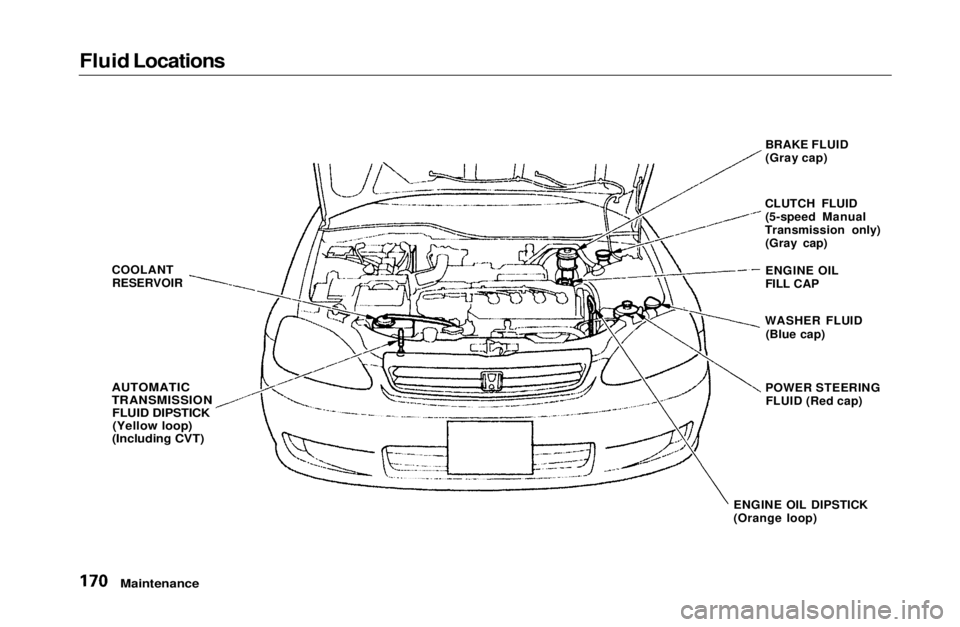
COOLANT
RESERVOIR
AUTOMATIC
TRANSMISSION
FLUID DIPSTICK(Yellow loop)
(Including CVT)
BRAKE FLUID
(Gray cap)
CLUTCH FLUID (5-speed Manual
Transmission only) (Gray cap)
ENGINE OIL DIPSTICK
(Orange loop) ENGINE OIL
FILL CAP
WASHER FLUID (Blue cap)
POWER STEERING FLUID (Red cap)Main Menu Table of Contents s t
Page 174 of 269
Cooling System
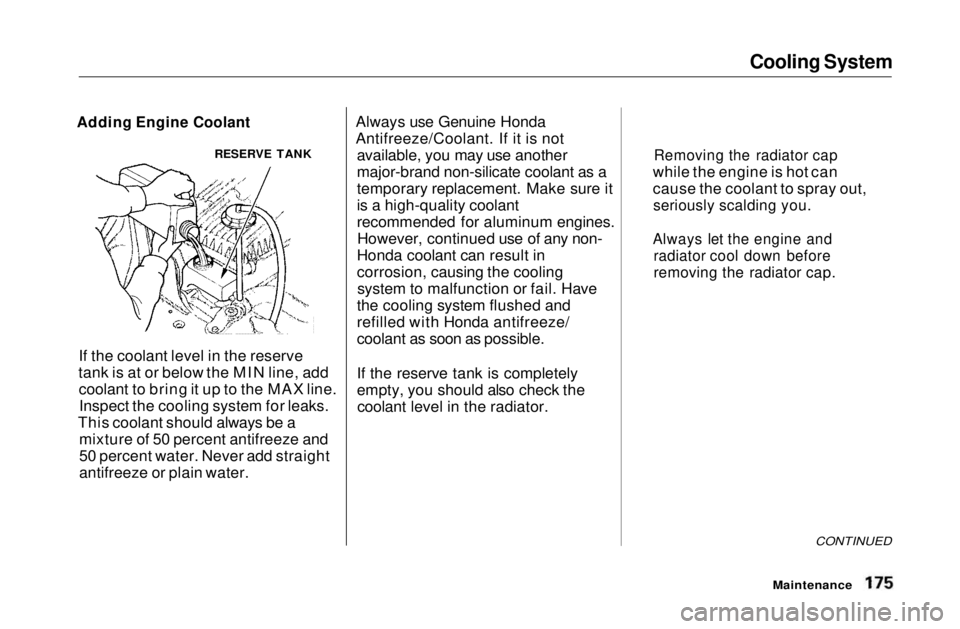
If the coolant level in the reserve
tank is at or below the MIN line, add coolant to bring it up to the MAX line.Inspect the cooling system for leaks.
This coolant should always be a mixture of 50 percent antifreeze and
50 percent water. Never add straight
antifreeze or plain water. Always use Genuine Honda
Antifreeze/Coolant. If it is not
available, you may use another
major-brand non-silicate coolant as a
temporary replacement. Make sure it
is a high-quality coolant
recommended for aluminum engines.However, continued use of any non-
Honda coolant can result in
corrosion, causing the cooling system to malfunction or fail. Have
the cooling system flushed and
refilled with Honda antifreeze/
coolant as soon as possible.
If the reserve tank is completely
empty, you should also check the coolant level in the radiator.
CONTINUED
Maintenance
Adding Engine Coolant
RESERVE TANK
Removing the radiator cap
while the engine is hot can
cause the coolant to spray out,
seriously scalding you.
Always let the engine and radiator cool down before
removing the radiator cap.Main Menu Table of Contents s t