dead battery HONDA CIVIC HYBRID 2012 9.G Owners Manual
[x] Cancel search | Manufacturer: HONDA, Model Year: 2012, Model line: CIVIC HYBRID, Model: HONDA CIVIC HYBRID 2012 9.GPages: 313, PDF Size: 8.65 MB
Page 22 of 313

Quick Reference Guide21
Handling the Unexpected
(P271)
Flat Tire
(P273)
● Park in a safe location and replace the
flat tire with the compact spare tire in the
trunk.
Indicators Come On (P285)
●Identify the indicator and consult the
owner's manual.
Engine Won't Start
(P279)
● If the battery is dead, jump start using a
booster battery.
Blown Fuse
(P289)
● Check for a blown fuse if an electrical
device does not operate.
Overheating
(P283)
● Park in a safe location. If you do not see
steam under the hood, open the hood,
and let the engine cool down.
Emergency Towing
(P292)
● Call a professional towing service if you
need to tow your vehicle.
Page 106 of 313
105
uuLocking and Unlocking the Doors uLocking/Unlocking the Doors from the Outside
Continued
Controls
Locking/Unlocking the Doors from the Outside
■
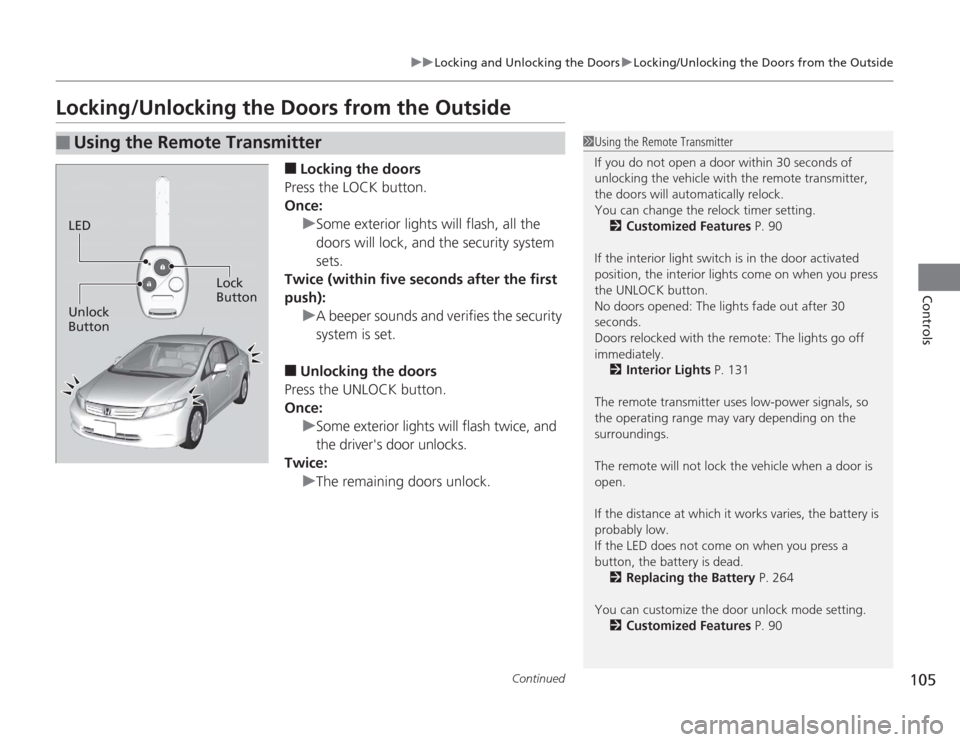
Locking the doors
Press the LOCK button.
Once: uSome exterior lights will flash, all the
doors will lock, and the security system
sets.
Twice (within five seconds after the first
push):
uA beeper sounds and verifies the security
system is set.
■
Unlocking the doors
Press the UNLOCK button.
Once: uSome exterior lights will flash twice, and
the driver's door unlocks.
Twice:
uThe remaining doors unlock.
■
Using the Remote Transmitter
1Using the Remote Transmitter
If you do not open a door within 30 seconds of
unlocking the vehicle with the remote transmitter,
the doors will automatically relock.
You can change the relock timer setting.
2 Customized Features P. 90
If the interior light switch is in the door activated
position, the interior lights come on when you press
the UNLOCK button.
No doors opened: The lights fade out after 30
seconds.
Doors relocked with the remote: The lights go off
immediately. 2 Interior Lights P. 131
The remote transmitter uses low-power signals, so
the operating range may vary depending on the
surroundings.
The remote will not lock the vehicle when a door is
open.
If the distance at which it works varies, the battery is
probably low.
If the LED does not come on when you press a
button, the battery is dead. 2 Replacing the Battery P. 264
You can customize the door unlock mode setting. 2 Customized Features P. 90
LED
Unlock
Button Lock
Button
Page 115 of 313
uuSecurity System uSecurity System Alarm
114Controls
■
Setting the securi ty system alarm
The security system alarm automatically sets when the following conditions have
been met:
• The ignition switch is in LOCK
(0
, and the key has been removed from the
ignition switch.
• The hood and trunk are closed.
• All doors are locked with the key or the remote transmitter.
■
When the security system alarm sets
The security system indicator in the instrument panel blinks. When the blinking
interval changes after about 15 second s, the security system is set.
■
To cancel the security system alarm
The security system is canceled when the vehicle is unlocked using the key or remote
transmitter, or the ignition switch is turned to ON
(w
. The security system indicator
goes off at the same time.
■
The panic button on the remote
transmitter
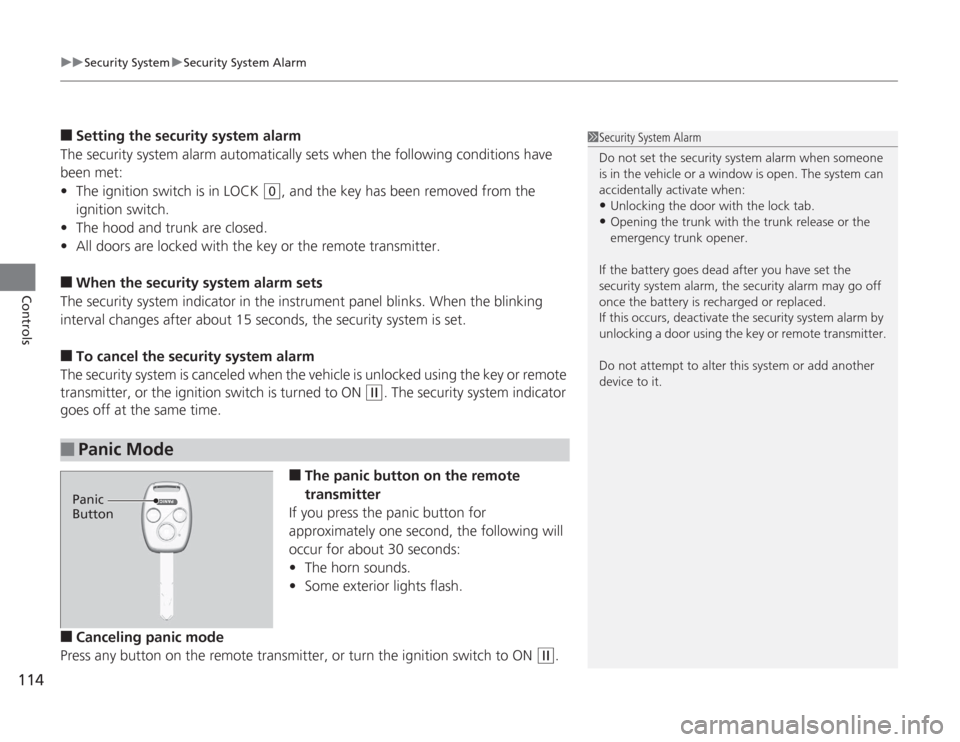
If you press the panic button for
approximately one second, the following will
occur for about 30 seconds:
• The horn sounds.
• Some exterior lights flash.
■
Canceling panic mode
Press any button on the remote transmitter, or turn the ignition switch to ON
(w
.
■
Panic Mode
1 Security System Alarm
Do not set the security system alarm when someone
is in the vehicle or a window is open. The system can
accidentally activate when:•Unlocking the door with the lock tab.•Opening the trunk with th e trunk release or the
emergency trunk opener.
If the battery goes dead after you have set the
security system alarm, the security alarm may go off
once the battery is recharged or replaced.
If this occurs, deactivate the security system alarm by
unlocking a door using the key or remote transmitter.
Do not attempt to alter this system or add another
device to it.
Panic
Button
Page 145 of 313
144
uuAudio System uAuxiliary Input Jack
Features
Auxiliary Input JackUse the jack to connect standard audio devices.
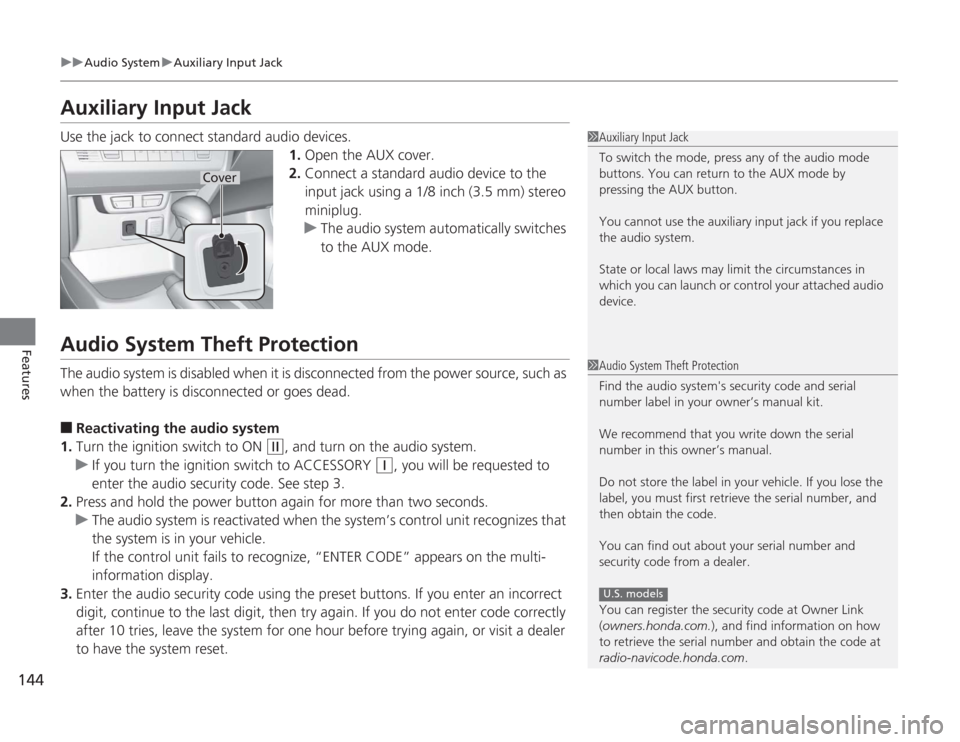
1.Open the AUX cover.
2. Connect a standard audio device to the
input jack using a 1/8 inch (3.5 mm) stereo
miniplug.
u The audio system automatically switches
to the AUX mode.Audio System Theft ProtectionThe audio system is disabled when it is disconnected from the power source, such as
when the battery is disconnected or goes dead.■
Reactivating the audio system
1. Turn the ignition switch to ON
(w
, and turn on the audio system.
u If you turn the ignition switch to ACCESSORY
(q
, you will be requested to
enter the audio security code. See step 3.
2. Press and hold the power button again for more than two seconds.
u The audio system is reactivated when the system’s control unit recognizes that
the system is in your vehicle.
If the control unit fails to recognize, “ENTER CODE” appears on the multi-
information display.
3. Enter the audio security code using the preset buttons. If you enter an incorrect
digit, continue to the last digit, then try again. If you do not enter code correctly
after 10 tries, leave the system for one hour before trying again, or visit a dealer
to have the system reset.
1Auxiliary Input Jack
To switch the mode, press any of the audio mode
buttons. You can return to the AUX mode by
pressing the AUX button.
You cannot use the auxiliary input jack if you replace
the audio system.
State or local laws may limit the circumstances in
which you can launch or control your attached audio
device.
Cover
1Audio System Theft Protection
Find the audio system's security code and serial
number label in your owner’s manual kit.
We recommend that you write down the serial
number in this owner’s manual.
Do not store the label in your vehicle. If you lose the
label, you must first retrieve the serial number, and
then obtain the code.
You can find out about your serial number and
security code from a dealer.
You can register the security code at Owner Link
(owners.honda.com. ), and find information on how
to retrieve the serial number and obtain the code at
radio-navicode.honda.com .
U.S. models
Page 264 of 313
263
Maintenance
12 Volt BatteryChecking the 12 Volt Battery
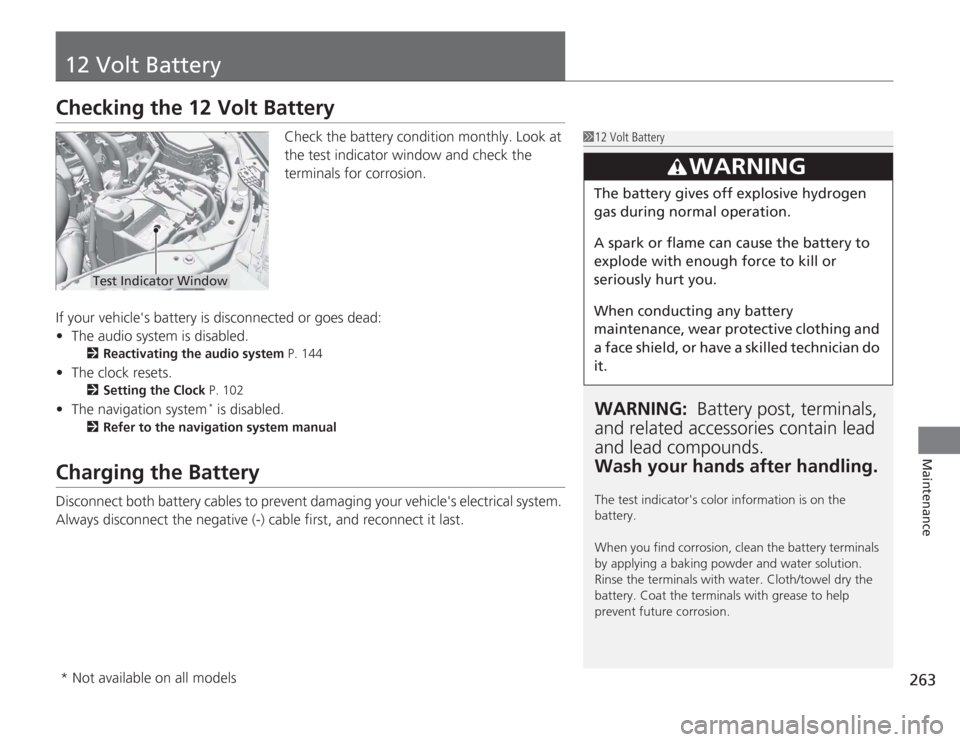
Check the battery condition monthly. Look at
the test indicator window and check the
terminals for corrosion.
If your vehicle's battery is disconnected or goes dead:
• The audio system is disabled.
2 Reactivating the audio system P. 144
•The clock resets.
2 Setting the Clock P. 102
•The navigation system
* is disabled.
2 Refer to the navigation system manual
Charging the BatteryDisconnect both battery cables to prevent damaging your vehicle's electrical system.
Always disconnect the negative (-) cab le first, and reconnect it last.
112 Volt BatteryWARNING: Battery post, terminals,
and related accessori es contain lead
and lead compounds.
Wash your hands after handling.The test indicator's color information is on the
battery.
When you find corrosion, clean the battery terminals
by applying a baking powder and water solution.
Rinse the terminals with water. Cloth/towel dry the
battery. Coat the terminals with grease to help
prevent future corrosion.
3
WARNING
The battery gives off explosive hydrogen
gas during normal operation.
A spark or flame can cause the battery to
explode with enough force to kill or
seriously hurt you.
When conducting any battery
maintenance, wear protective clothing and
a face shield, or have a skilled technician do
it.
Test Indicator Window
* Not available on all models
Page 280 of 313
279
Handling the Unexpected
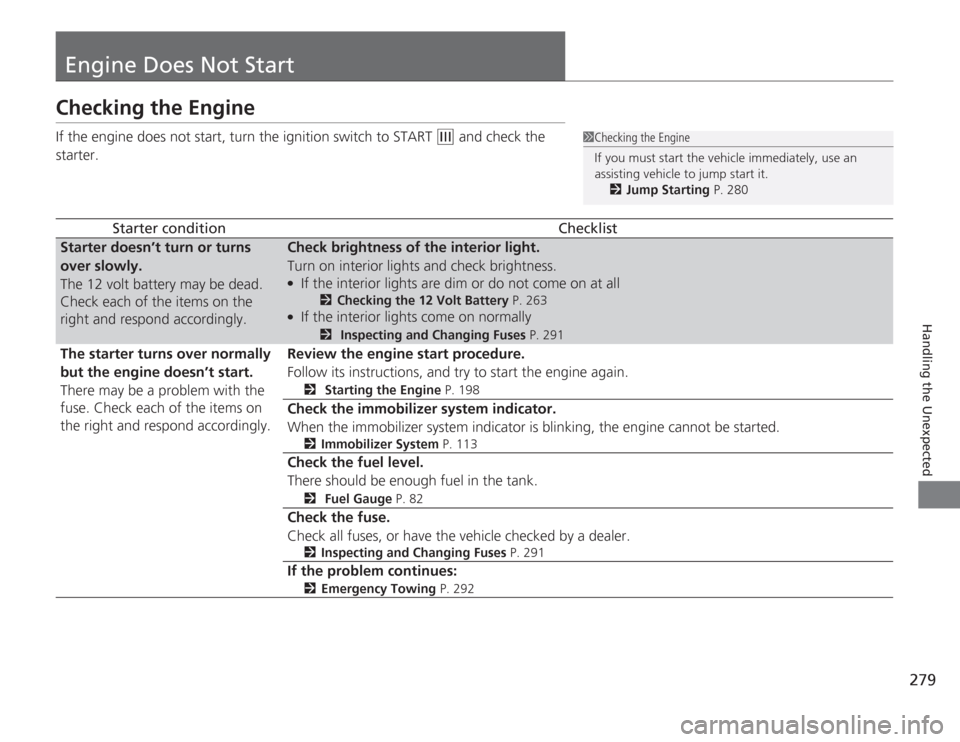
Engine Does Not StartChecking the EngineIf the engine does not start, turn the ignition switch to START
(e
and check the
starter.
Starter condition
Checklist
Starter doesn’t turn or turns
over slowly.
The 12 volt battery may be dead.
Check each of the items on the
right and respond accordingly.
Check brightness of the interior light.
Turn on interior lights and check brightness.●
If the interior lights are dim or do not come on at all
2 Checking the 12 Volt Battery P. 263
●
If the interior lights come on normally
2 Inspecting and Changing Fuses P. 291
The starter turns over normally
but the engine doesn’t start.
There may be a problem with the
fuse. Check each of the items on
the right and respond accordingly.
Review the engine start procedure.
Follow its instructions, and try to start the engine again.
2 Starting the Engine P. 198
Check the immobilizer system indicator.
When the immobilizer system indicator is blinking, the engine cannot be started.
2Immobilizer System P. 113
Check the fuel level.
There should be enough fuel in the tank.
2 Fuel Gauge P. 82
Check the fuse.
Check all fuses, or have the vehicle checked by a dealer.
2Inspecting and Changing Fuses P. 291
If the problem continues:
2Emergency Towing P. 292
1Checking the Engine
If you must start the vehicle immediately, use an
assisting vehicle to jump start it.
2 Jump Starting P. 280
Page 300 of 313
299
Continued
Information
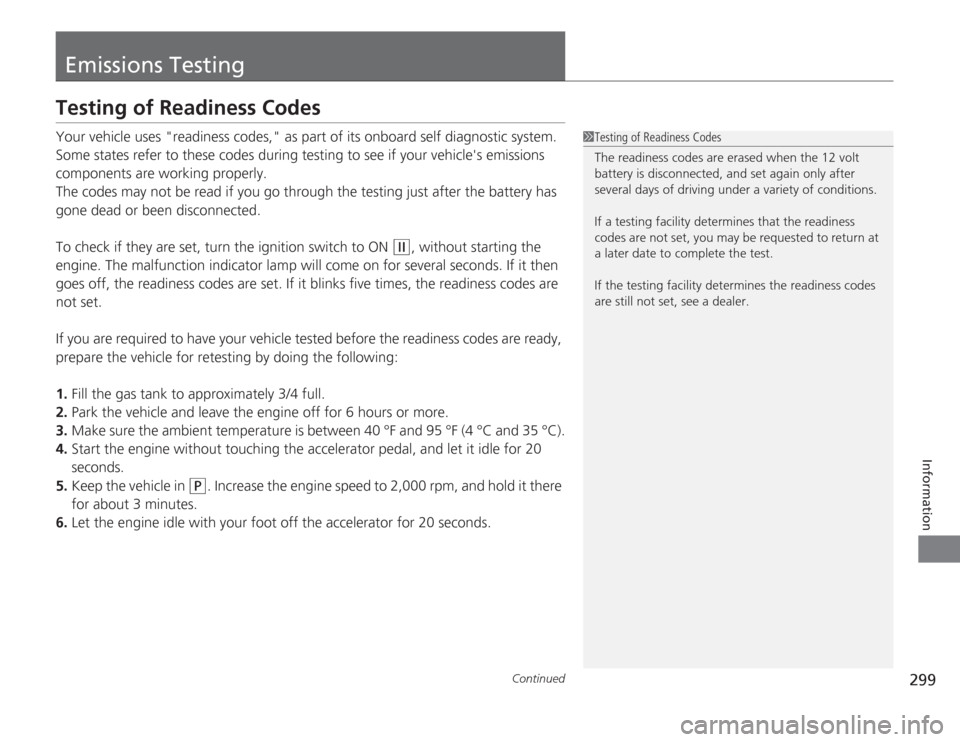
Emissions TestingTesting of Readiness CodesYour vehicle uses "readiness codes," as part of its onboard self diagnostic system.
Some states refer to these codes during testing to see if your vehicle's emissions
components are working properly.
The codes may not be read if you go through the testing just after the battery has
gone dead or been disconnected.
To check if they are set, turn the ignition switch to ON
(w
, without starting the
engine. The malfunction indicator lamp will come on for several seconds. If it then
goes off, the readiness codes are set. If it blinks five times, the readiness codes are
not set.
If you are required to have your vehicle tested before the readiness codes are ready,
prepare the vehicle for retesting by doing the following:
1. Fill the gas tank to approximately 3/4 full.
2. Park the vehicle and leave the engine off for 6 hours or more.
3. Make sure the ambient temperature is between 40 °F and 95 °F (4 °C and 35 °C).
4. Start the engine without touching the accelerator pedal, and let it idle for 20
seconds.
5. Keep the vehicle in
(P
. Increase the engine speed to 2,000 rpm, and hold it there
for about 3 minutes.
6. Let the engine idle with your foot off the accelerator for 20 seconds.
1Testing of Readiness Codes
The readiness codes are erased when the 12 volt
battery is disconnected, and set again only after
several days of driving under a variety of conditions.
If a testing facility dete rmines that the readiness
codes are not set, you may be requested to return at
a later date to complete the test.
If the testing faci lity determines the readiness codes
are still not set, see a dealer.
Page 307 of 313
306INDEX
Fluid ........................................................ 245
Foot Brake ............................................... 214
Indicator ............................................ 70, 287
Parking Brake .......................................... 213
Brightness Control (In strument Panel).... 122
Bulb Replacement ..................................... 247
Back-Up Light and Rear Turn Signal Light ...................................................... 250
Brake/Taillight and Rear Si de Marker
Bulbs ..................................................... 250
Bulb Specifications ................................... 294
Front Turn Signal/Parking/Side Marker Light ...................................................... 249
Headlights ............................................... 247
High-Mount Brake Light .......................... 251
Rear License Plate Light............................ 251
Side Turn Signal/Emergency Indicator....... 249
CCarbon Monoxide Gas ................................ 66
Carrying Cargo .................................. 193, 195
CD Player ................................................... 151
Certification Label .................................... 296
Changing Bulbs ......................................... 247
Charging System Indicator ................. 71, 285
Child Safety ................................................. 54
Childproof Door Locks ............................. 108
Emergency Trunk Opener ........................ 112
Child Seat .................................................... 54
Booster Seats ............................................. 65 Child Seat for Infants................................. 56
Child Seat for Small Children ..................... 57
Installing a Child Seat with a Lap/Shoulder
Seat Belt .................................................. 61
Larger Children ......................................... 64
Rear-facing Child Seat ............................... 56
Selecting a Child Seat ................................ 58
Using a Tether ........................................... 63
Childproof Door Locks ............................. 108
Cleaning the Exterior ............................... 268
Cleaning the Interior ................................ 266
Climate Control System ............................ 137
Changing the Mode ................................ 137
Defrosting the Windshield and
Windows ............................................... 138
Dust and Pollen Filter............................... 265
Recirculation and Fresh Air Mode ............ 137
Sensors ................................................... 139
Using Automatic Climate Control ............ 137
Clock .......................................................... 102
Coat Hook ................................................. 135
Compact Spare Tire .......................... 273, 295
Console Compartment ............................. 132
Controls ..................................................... 101
Coolant (Engine) ...................................... 242
Adding to the Radiator ............................ 243
Adding to the Reserve Tank..................... 242
High Temperature Indicator ....................... 78
Low Temperature Indicator........................ 78
Overheating ............................................ 283
Creep Aid System ..................................... 200 Creeping
................................................... 202
Cruise Control .......................................... 205
Indicator ................................................... 79
Cup Holders .............................................. 133
Customer Service Information ................ 304
Customized Features ................................. 90
DDaytime Running Lights .......................... 120
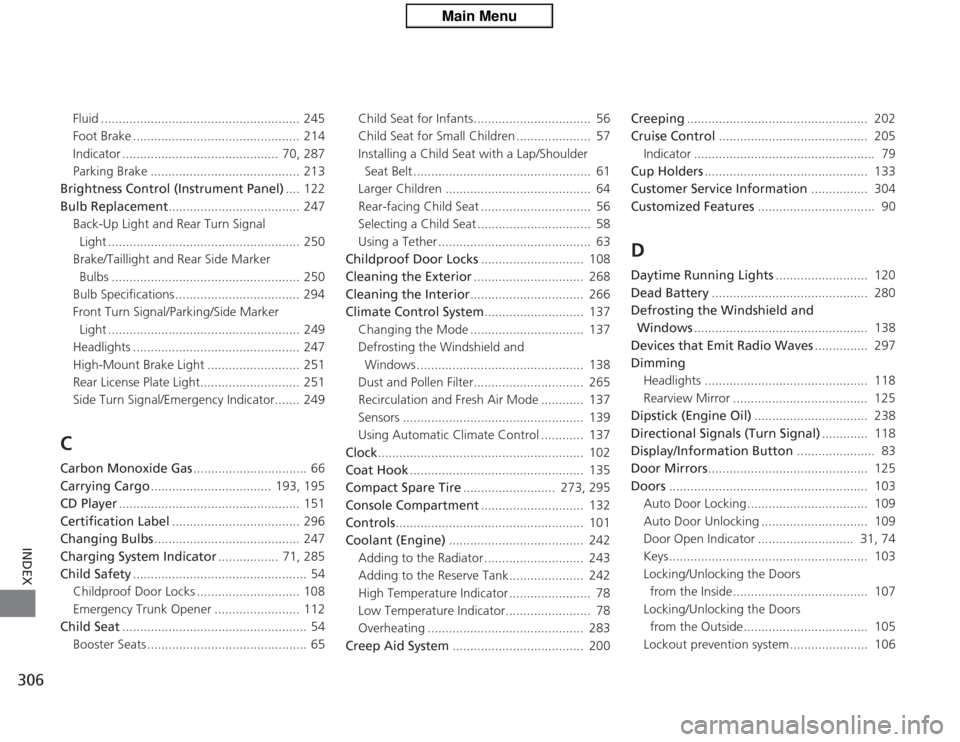
Dead Battery ............................................ 280
Defrosting the Windshield and Windows ................................................. 138
Devices that Emit Radio Waves ............... 297
Dimming Headlights .............................................. 118
Rearview Mirror ...................................... 125
Dipstick (Engine Oil) ................................ 238
Directional Signals (Turn Signal) ............. 118
Display/Information Button ...................... 83
Door Mirrors ............................................. 125
Doors ........................................................ 103
Auto Door Locking.................................. 109
Auto Door Unlocking .............................. 109
Door Open Indicator ........................... 31, 74
Keys........................................................ 103
Locking/Unlocking the Doors
from the Inside...................................... 107
Locking/Unlocking the Doors from the Outside................................... 105
Lockout prevention system...................... 106