battery light HONDA CIVIC SEDAN 2013 Owner's Manual (in English)
[x] Cancel search | Manufacturer: HONDA, Model Year: 2013, Model line: CIVIC SEDAN, Model: HONDA CIVIC SEDAN 2013Pages: 368, PDF Size: 43.54 MB
Page 3 of 368
Contents
Child Safety P. 50Exhaust Gas Hazard P. 62 Safety Labels P. 63
Opening and Closing the Trunk P. 109 Security Sy stem P. 112 Opening and Closing the Windows P. 114
Operating the Switches Around the Steering Wheel P. 117 Adjusting the Mirrors P. 126
Interior Lights/Interior Convenience Items P. 135 Heating and Cooling
* P. 142
Audio Error Messages P. 175 General Information on the Audio System P. 178
When Driving P. 223Braking P. 241 Parking Your Vehicle P. 245
Accessories and Modifications P. 251
Maintenance Under the Hood P. 265 Replacing Light Bulbs P. 282
Checking and Maintaining Tires P. 297 Battery P. 306 Remote Transmitter Care* P. 307
Cleaning P. 309
Engine Does Not Start P. 330 Jump Starting P. 331 Shift Lever Does Not Move P. 334
Fuses P. 341 Emergency Towing P. 344
Devices that Emit Radio Waves P. 351 Reporting Safety Defects P. 352
Authorized Manuals P. 357 Customer Service Information P. 358
Quick Reference GuideP. 2
Safe DrivingP. 25
Instrument PanelP. 65
ControlsP. 97
FeaturesP. 149
DrivingP. 213
MaintenanceP. 253
Handling the UnexpectedP. 313
InformationP. 345
IndexP. 359
Page 20 of 368
18
Quick Reference Guide
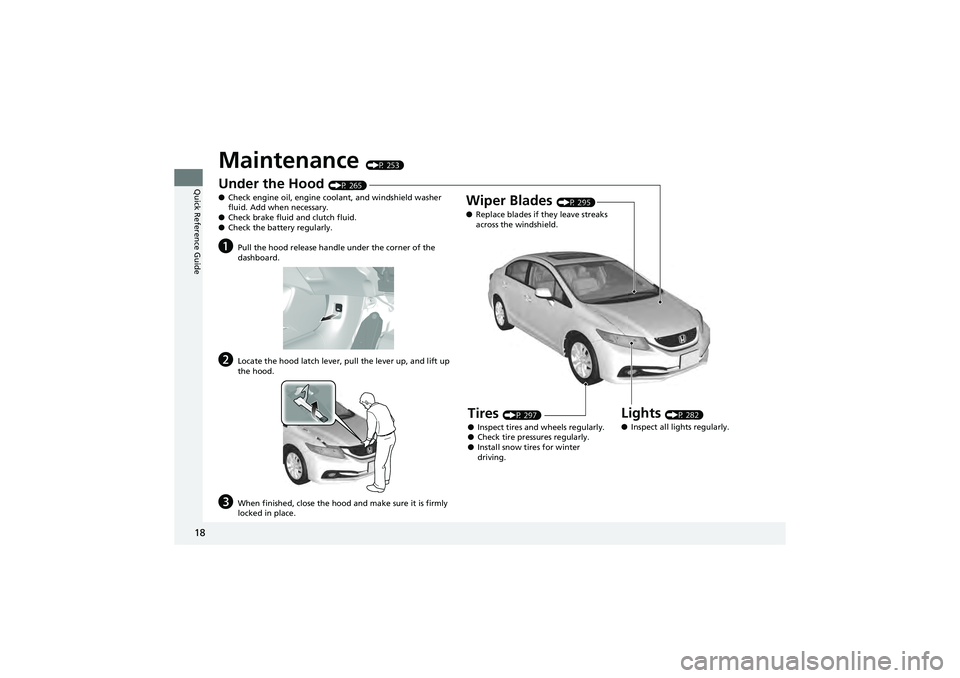
Maintenance (P 253)
Under the Hood (P 265)
● Check engine oil, engine coolant, and windshield washer
fluid. Add when necessary.
● Check brake fluid and clutch fluid.
● Check the battery regularly.
aPull the hood release handle under the corner of the
dashboard.
bLocate the hood latch lever, pull the lever up, and lift up
the hood.
cWhen finished, clos e the hood and make su re it is firmly
locked in place.
Lights (P 282)
● Inspect all lights regularly.
Wiper Blades (P 295)
● Replace blades if they leave streaks
across the windshield.
Tires (P 297)
● Inspect tires and wheels regularly.
● Check tire pre ssures regularly.
● Install snow tires for winter
driving.
Page 101 of 368
99Continued
Controls
Locking and Unlocking the Doors
Key Types and Functions
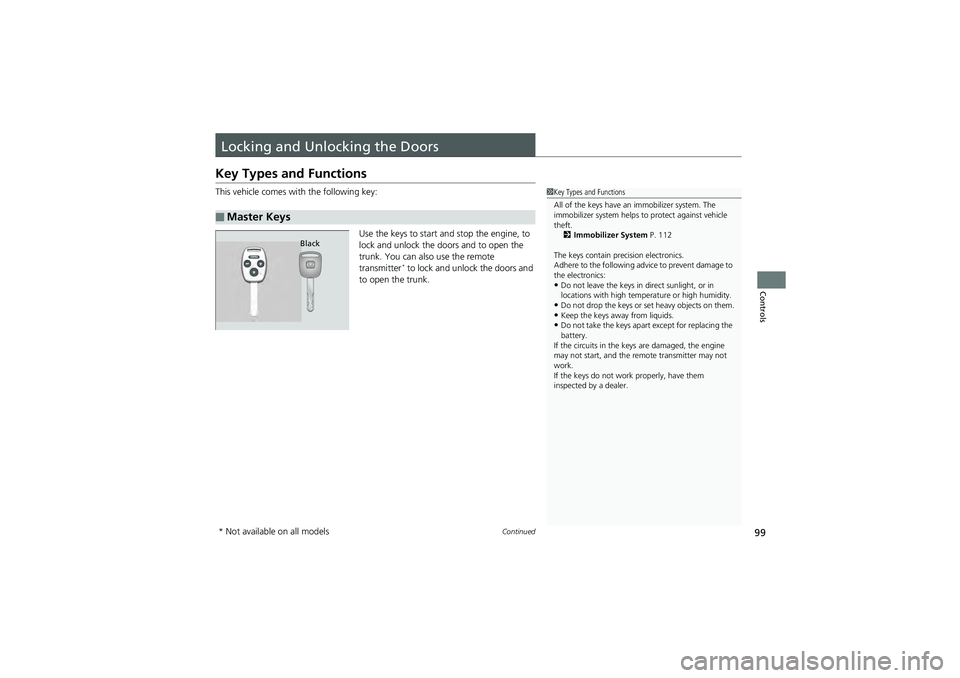
This vehicle comes with the following key:Use the keys to start and stop the engine, to
lock and unlock the doors and to open the
trunk. You can also use the remote
transmitter
* to lock and unlock the doors and
to open the trunk.
■Master Keys
1 Key Types and Functions
All of the keys have an immobilizer system. The
immobilizer system helps to protect against vehicle
theft.
2 Immobilizer System P. 112
The keys contain precision electronics.
Adhere to the following advice to prevent damage to
the electronics:
•Do not leave the keys in direct sunlight, or in
locations with high temperature or high humidity.
•Do not drop the keys or set heavy objects on them.•Keep the keys away from liquids.•Do not take the keys apar t except for replacing the
battery.
If the circuits in the keys are damaged, the engine
may not start, and the re mote transmitter may not
work.
If the keys do not work properly, have them
inspected by a dealer.
Black
* Not available on all models
Page 103 of 368
101
uuLocking and Unlocking the Doors uLocking/Unlocking the Doors from the Outside
Continued
Controls
Locking/Unlocking the Doors from the Outside
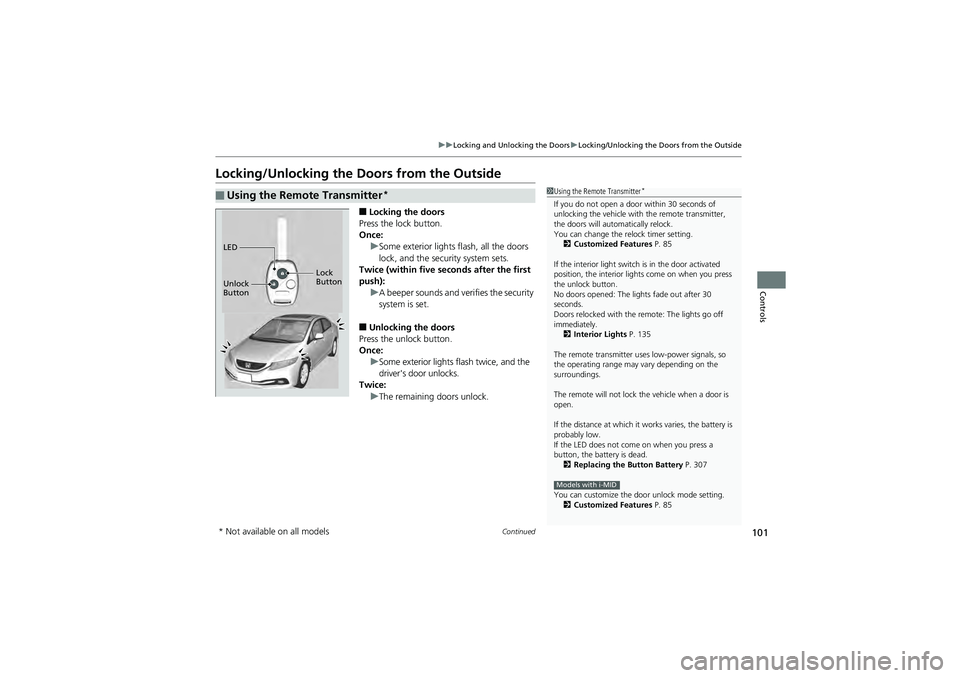
■Locking the doors
Press the lock button.
Once: uSome exterior lights flash, all the doors
lock, and the security system sets.
Twice (within five seconds after the first
push):
uA beeper sounds and verifies the security
system is set.
■Unlocking the doors
Press the unlock button.
Once:
uSome exterior lights flash twice, and the
driver's door unlocks.
Twice: uThe remaining doors unlock.
■Using the Remote Transmitter*1Using the Remote Transmitter*
If you do not open a door within 30 seconds of
unlocking the vehicle with the remote transmitter,
the doors will automatically relock.
You can change the re lock timer setting.
2 Customized Features P. 85
If the interior light switch is in the door activated
position, the interior lights come on when you press
the unlock button.
No doors opened: The lights fade out after 30
seconds.
Doors relocked with the remote: The lights go off
immediately. 2 Interior Lights P. 135
The remote transmitter uses low-power signals, so
the operating range may vary depending on the
surroundings.
The remote will not lock the vehicle when a door is
open.
If the distance at which it works varies, the battery is
probably low.
If the LED does not come on when you press a
button, the battery is dead. 2 Replacing the Button Battery P. 307
You can customize the door unlock mode setting. 2 Customized Features P. 85
Models with i-MID
LED
Unlock
Button Lock
Button
* Not available on all models
Page 115 of 368

113
uuSecurity System uSecurity System Alarm*
Controls
■Setting the security system alarm
The security system alarm automatically se ts when the following conditions have
been met:
• The ignition switch is in LOCK
(0, and the key has b een removed from the
ignition switch.
• The hood and trunk are closed.
• All doors are locked with the key or the remote transmitter.
■When the security system alarm sets
The security system indicato r in the instrument panel blinks. When the blinking
interval changes after about 15 seco nds, the security system is set.
■To cancel the security system alarm
The security system is cancel ed when the vehicle is unlocked using the key or remote
transmitter, or the ignition switch is turned to ON
(w. The security system indicator
goes off at the same time.
■The PANIC button on the remote
transmitter
If you press the PANIC button for
approximately one seco nd, the following will
occur for about 30 seconds:
• The horn sounds.
• Some exterior lights flash.
■Canceling panic mode
Press any button on the remote transmitter, or turn the ignition switch to ON
(w.
■Panic Mode
1Security System Alarm*
Do not set the security sy stem alarm when someone
is in the vehicle or a window is open. The system can
accidentally activate when:
•Unlocking the door with the lock tab.•Opening the trunk with the trunk release or the
emergency trunk opener.
If the battery goes dead after you have set the
security system alarm, the security alarm may go off
once the battery is recharged or replaced.
If this occurs, deactivate the security system alarm by
unlocking a door using the key or remote transmitter.
Do not attempt to alter th is system or add another
device to it.
PANIC
Button
* Not available on all models
Page 120 of 368

118
uuOperating the Switches Around the Steering Wheel uTurn Signals
Controls
Turn Signals
The turn signals can be used when the ignition
switch is in ON
(w.
■One-touch turn signal
When you lightly push up or down and release
the turn signal lever, th e exterior turn signals
and turn signal indica tor blink three times.
This feature can be used when signaling for a
lane change.
Light Switches
Rotating the light swit ch turns the lights on
and off, regardless of the position of the
ignition switch.
■High beams
Push the lever forward until you hear a click.
■Low beams
When in high beams, pull the lever back to
return to low beams.
■Flashing the high beams
Pull the lever back, and release it.
Right Turn
Left Turn
■Manual Operation1 Light Switches
If you remove the key from the ignition switch while
the lights are on, a chime sounds when the driver’s
door is opened.
When the lights are on, the lights on indicator in the
instrument panel will be on.
2 Lights On Indicator P. 72
Do not leave the lights on when the engine is off
because it will cause th e battery to discharge.
If you sense that the level of the headlights is
abnormal, have the vehicle inspected by a dealer.
High Beams
Flashing the high beams
Low Beams
Turns on parking, side marker,
tail, and rear license plate lights
Turns on headlights, parking, side
marker, tail, and rear license plate
lights
Page 141 of 368
Continued139
uuInterior Lights/Inter ior Convenience Items uInterior Convenience Items
Controls
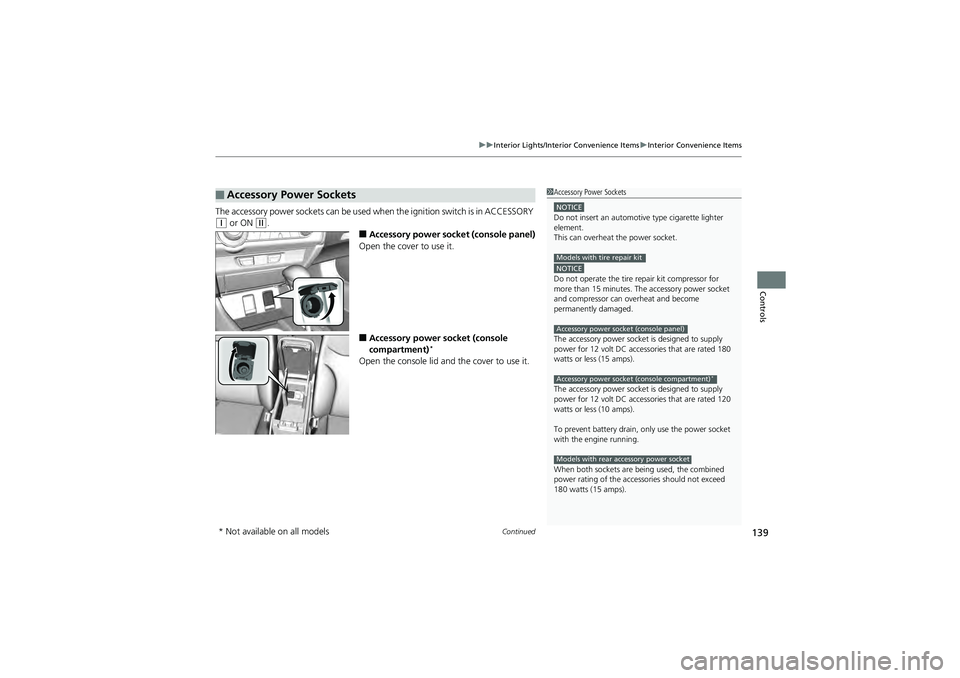
The accessory power sockets can be used when the ignition switch is in ACCESSORY
(q or ON (w.
■Accessory power socket (console panel)
Open the cover to use it.
■Accessory power socket (console
compartment)*
Open the console lid and the cover to use it.
■Accessory Power Sockets1 Accessory Power Sockets
NOTICEDo not insert an automotive type cigarette lighter
element.
This can overheat the power socket.
NOTICEDo not operate the tire re pair kit compressor for
more than 15 minutes. The accessory power socket
and compressor can ov erheat and become
permanently damaged.
The accessory power socket is designed to supply
power for 12 volt DC accessories that are rated 180
watts or less (15 amps).
The accessory power socket is designed to supply
power for 12 volt DC accessories that are rated 120
watts or less (10 amps).
To prevent battery drain, only use the power socket
with the engine running.
When both sockets are being used, the combined
power rating of the accessories should not exceed
180 watts (15 amps).
Models with tire repair kit
Accessory power socket (console panel)
Accessory power socket (console compartment)*
Models with rear accessory power socket
* Not available on all models
Page 143 of 368
141
uuInterior Lights/Inter ior Convenience Items uInterior Convenience Items
Controls
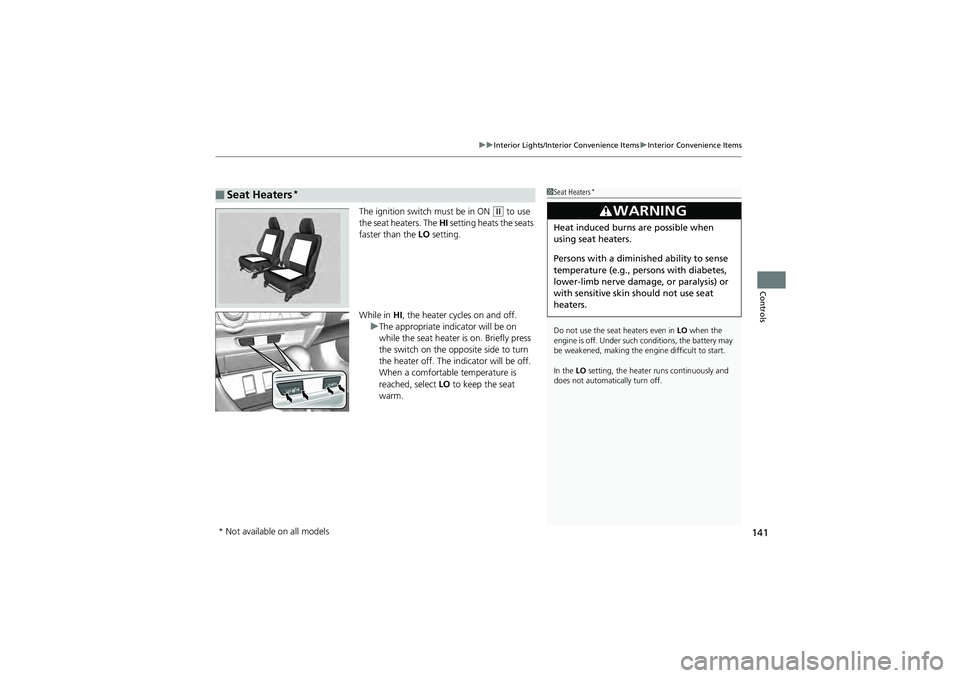
The ignition switch must be in ON (w to use
the seat heaters. The HI setting heats the seats
faster than the LO setting.
While in HI , the heater cycles on and off.
u The appropriate indicator will be on
while the seat heater is on. Briefly press
the switch on the opposite side to turn
the heater off. The indicator will be off.
When a comfortable temperature is
reached, select LO to keep the seat
warm.
■Seat Heaters*1 Seat Heaters*
Do not use the seat heaters even in LO when the
engine is off. Under such conditions, the battery may
be weakened, making the engine difficult to start.
In the LO setting, the heater runs continuously and
does not automatically turn off.
3WARNING
Heat induced burns are possible when
using seat heaters.
Persons with a diminished ability to sense
temperature (e.g., persons with diabetes,
lower-limb nerve damage, or paralysis) or
with sensitive skin should not use seat
heaters.
* Not available on all models
Page 225 of 368
223Continued
Driving
When Driving
Starting the Engine
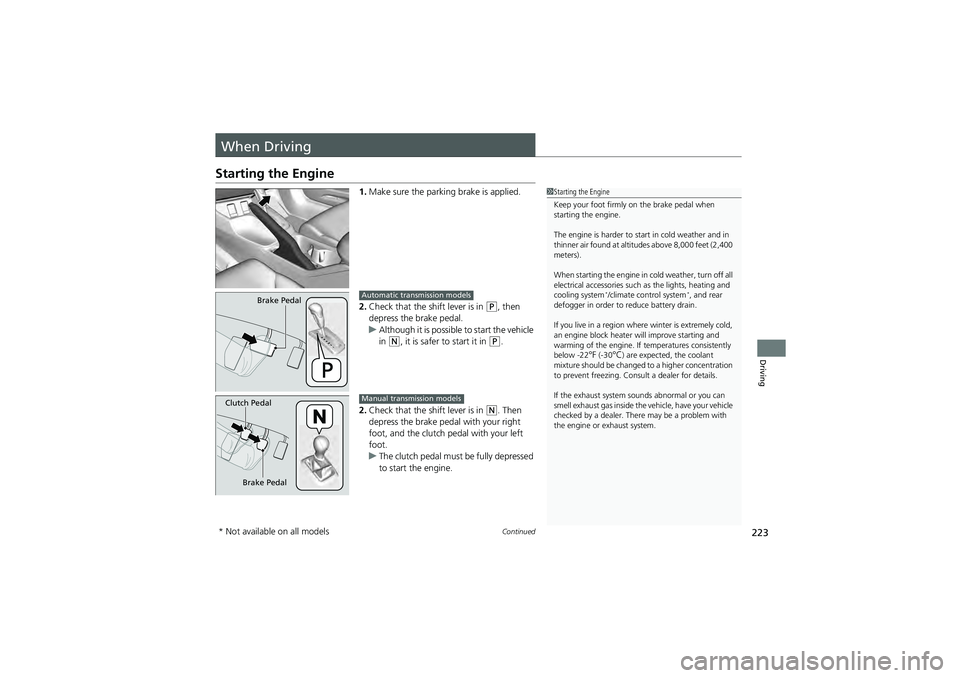
1.Make sure the parking brake is applied.
2. Check that the shift lever is in
(P, then
depress the brake pedal.
u Although it is possible to start the vehicle
in
(N, it is safer to start it in (P.
2. Check that the shift lever is in
(N. Then
depress the brake peda l with your right
foot, and the clutch pedal with your left
foot.
u The clutch pedal must be fully depressed
to start the engine.
1Starting the Engine
Keep your foot firmly on the brake pedal when
starting the engine.
The engine is harder to start in cold weather and in
thinner air found at altit udes above 8,000 feet (2,400
meters).
When starting the engine in cold weather, turn off all
electrical accessories such as the lights, heating and
cooling system
*/climate control system*, and rear
defogger in order to reduce battery drain.
If you live in a region where winter is extremely cold,
an engine block heater will improve starting and
warming of the engine. If temperatures consistently
below -22
°F (-30°C) are expected, the coolant
mixture should be changed to a higher concentration
to prevent freezing. Cons ult a dealer for details.
If the exhaust system s ounds abnormal or you can
smell exhaust gas inside the vehicle, have your vehicle
checked by a dealer. There may be a problem with
the engine or exhaust system.
Brake PedalAutomatic transmission models
Brake Pedal
Clutch Pedal
Manual transmission models
* Not available on all models
Page 255 of 368
253
Maintenance
This chapter discusses basic maintenance.
Before Performing MaintenanceInspection and Maintenance ............ 254
Safety When Performing Maintenance..... 255Parts and Fluids Used in Maintenance Service ........................................... 256
Maintenance Minder
TM..................... 257
Maintenance Under the Hood
Maintenance Items Under the Hood ..... 265Opening the Hood ........................... 267
Recommended Engine Oil ................ 268
Oil Check ......................................... 269
Adding Engine Oil ............................ 271
Changing the Engine Oil and Oil Filter ..... 272
Engine Coolant ................................ 275
Transmission Fluid ............................ 277
Brake/Clutch Fluid ............................ 280
Refilling Window Washer Fluid......... 281
Replacing Light Bulbs ....................... 282
Checking and Maintaining Wiper
Blades .......................................... 295
Checking and Maintaining Tires
Checking Tires ................................. 297
Tire and Loading Information Label ...... 298Tire Labeling .................................... 298DOT Tire Quality Grading (U.S. Vehicles)....... 300Wear Indicators................................ 302 Tire Service Life ................................ 302
Tire and Wheel Replacement ........... 303
Tire Rotation .................................... 304
Winter Tires ..................................... 305
Battery ............................................... 306
Remote Transmitter Care
*
Replacing the Button Battery ........... 307
Heating and Cooling System*/Climate
Control System* Maintenance ....... 308
Cleaning
Interior Care .................................... 309
Exterior Care.................................... 311
* Not available on all models