towing HONDA CLARITY ELECTRIC 2018 Owner's Manual (in English)
[x] Cancel search | Manufacturer: HONDA, Model Year: 2018, Model line: CLARITY ELECTRIC, Model: HONDA CLARITY ELECTRIC 2018Pages: 559, PDF Size: 27.8 MB
Page 6 of 559
Contents
This owner’s manual should be considered a permanent part of the
vehicle and should remain with the vehicle when it is sold.
This owner’s manual covers all models of your vehicle. You may find
descriptions of equipment and features that are not on your
particular model.
Images throughout this owner’s manual (including the front cover)
represent features and equipment that are available on some, but
not all, models. Your particular mo del may not have some of these
features.
The information and specifications in cluded in this publication were
in effect at the time of approval for printing. Honda Motor Co., Ltd.
reserves the right, however, to discontinue or change specifications
or design at any time without notice and without incurring any
obligation.2 Safe Driving P. 39
For Safe Driving P. 40 Seat Belts P. 44 Airbags P. 52
2Instrument Panel P. 81
Indicators P. 82 Gauges and Driver Information Interface P. 116
2Controls P. 129
Clock P. 130 Locking and Unlocking the Doors P. 131
Operating the Switches Around the Steering Wheel P. 152
Interior Lights/Interior Convenience Items P. 176
2 Features P. 195
Audio System P. 196 Audio System Basic Operation P. 202
Customized Features P. 296 HomeLink® Universal Transceiver P. 322
2 Driving P. 359
Before Driving P. 360 Towing a Trailer P. 365
Multi-View Rear Camera P. 438 Charging P. 440
2 Maintenance P. 457
Before Performing Maintenance P. 458 Maintenance MinderTM P. 461
Checking and Maintaining Wiper Blades P. 472
Climate Control System Main tenance P. 487 Cleaning P. 488
2Handling the Unexpected P. 497
If a Tire Goes Flat P. 498 Handling of the Jack P. 510
Indicator, Coming On/Blinking P. 518 Fuses P. 524
When You Cannot Disengage the Charging Connector P. 533
2Information P. 535
Specifications P. 536 Identification Numbers P. 538
Warranty Coverages P. 541 Authorized Manuals P. 543
18 CLARITY ELECTRIC CSS-31TRV6100.book 4 ページ 2018年2月5日 月曜日 午後12時0分
Page 7 of 559
Contents
Child Safety P. 67Safety Labels P. 80
Opening and Closing the Trunk P. 144 Security System P. 147 Opening and Closing the Windows P. 150
Adjusting the Mirrors P. 167 Adjusting the Seats P. 169
Climate Control System P. 186
Audio Error Messages P. 274 General Information on the Audio System P. 278
Bluetooth ® HandsFreeLink ® P. 325
When Driving P. 366 Braking P. 420Parking Your Vehicle P. 436
Energy Economy P. 456
Maintenance Under the Hood P. 465 Replacing Light Bulbs P. 470
Checking and Maintaining Tires P. 475 12-Volt Battery P. 484 Remote Transmitter Care P. 486
Accessories and Modifications P. 494
Power System Won’t Start P. 511 Jump Starting P. 514 Overheating P. 517
Emergency Towing P. 531 When You Cannot Open the Charge Lid P. 532
When You Cannot Open the Trunk P. 534
Devices that Emit Radio Waves P. 539 Reporting Safety Defects P. 540
Customer Service Information P. 544
Quick Reference GuideP. 6
Safe DrivingP. 39
Instrument PanelP. 81
ControlsP. 129
FeaturesP. 195
DrivingP. 359
MaintenanceP. 457
Handling the UnexpectedP. 497
InformationP. 535
IndexP. 546
18 CLARITY ELECTRIC CSS-31TRV6100.book 5 ページ 2018年2月5日 月曜日 午後12時0分
Page 37 of 559
Quick Reference Guide
35
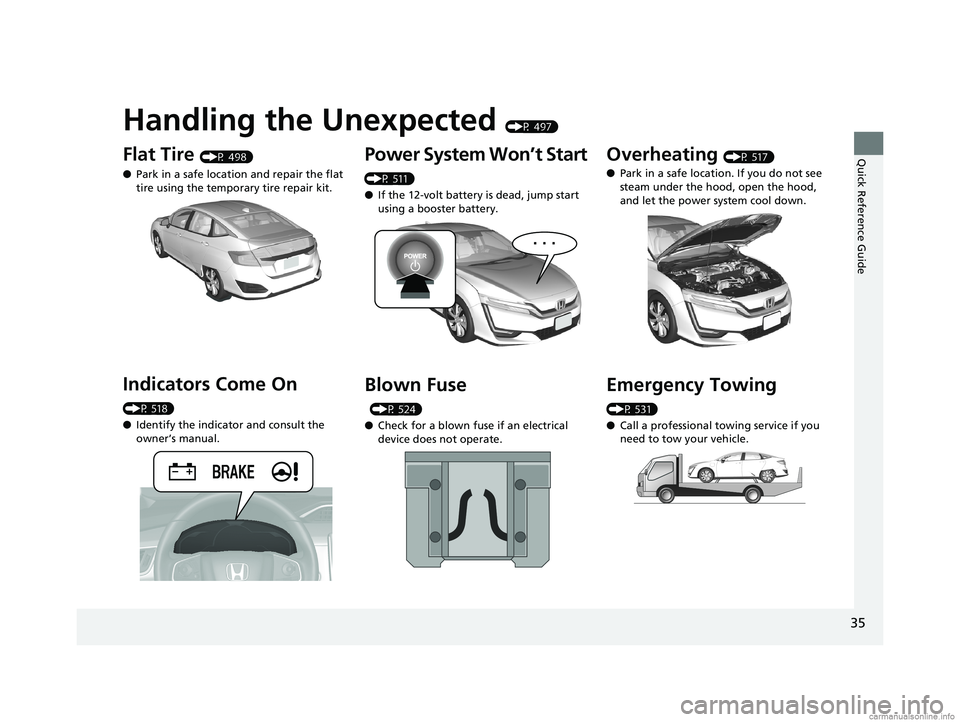
Handling the Unexpected (P 497)
Flat Tire (P 498)
● Park in a safe location and repair the flat
tire using the temporary tire repair kit.
Indicators Come On
(P 518)
●Identify the indica tor and consult the
owner’s manual.
Power System Won’t Start
(P 511)
● If the 12-volt battery is dead, jump start
using a booster battery.
Blown Fuse
(P 524)
● Check for a blown fuse if an electrical
device does not operate.
Overheating (P 517)
● Park in a safe location. If you do not see
steam under the hood, open the hood,
and let the power system cool down.
Emergency Towing
(P 531)
●Call a professional towing service if you
need to tow your vehicle.
18 CLARITY ELECTRIC CSS-31TRV6100.book 35 ページ 2018年2月5日 月曜日 午後12時0分
Page 50 of 559
uuSeat Belts uFastening a Seat Belt
48
Safe Driving
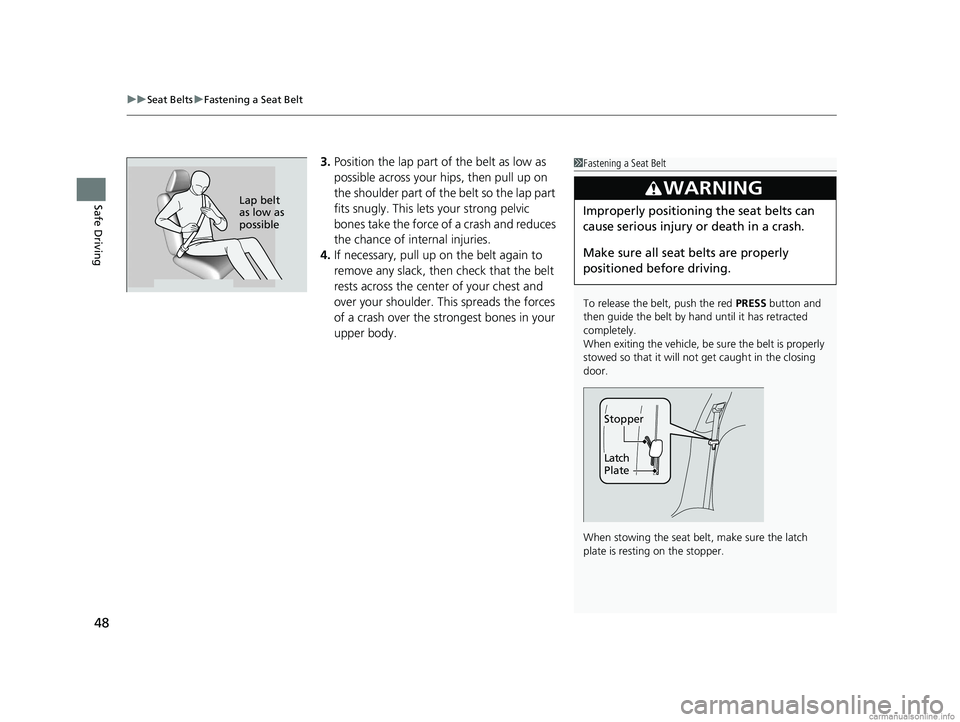
3. Position the lap part of the belt as low as
possible across your hips, then pull up on
the shoulder part of the belt so the lap part
fits snugly. Th is lets your strong pelvic
bones take the force of a crash and reduces
the chance of internal injuries.
4. If necessary, pull up on the belt again to
remove any slack, then check that the belt
rests across the center of your chest and
over your shoulder. Th is spreads the forces
of a crash over the strongest bones in your
upper body.1 Fastening a Seat Belt
To release the belt, push the red PRESS button and
then guide the belt by hand until it has retracted
completely.
When exiting the vehicle, be sure the belt is properly
stowed so that it will not get caught in the closing
door.
When stowing the seat be lt, make sure the latch
plate is resting on the stopper.
3WARNING
Improperly positioning the seat belts can
cause serious injury or death in a crash.
Make sure all seat belts are properly
positioned be fore driving.
Latch
Plate
Stopper
Lap belt
as low as
possible
18 CLARITY ELECTRIC CSS-31TRV6100.book 48 ページ 2018年2月5日 月曜日 午後12時0分
Page 361 of 559
359
Driving
This chapter discusses driving and charging.
Before Driving................................... 360
Towing a Trailer ................................ 365
When Driving Turning on the Power ...................... 366
Precautions While Driving................. 369
Transmission .................................... 370
Shifting ............................................ 371
ECON Mode .................................... 377
SPORT Mode.................................... 378
Deceleration Paddle Selector ............ 379
Acoustic Vehicle Al erting System ...... 382
Front Sensor Camera ....................... 383
Road Departure Mi tigation (RDM)
System ........................................ 385
Adaptive Cruise Control (ACC) with Low
Speed Follow (LSF) ......................... 389
Lane Keeping Assist System (LKAS)...... 404Vehicle Stability Assist ® (VSA ®), aka
Electronic Stability Control (ESC),
System ....................................... 411
Agile Handling Assist ....................... 413Tire Pressure Monitoring System (TPMS) .. 414Tire Pressure Monitoring System (TPMS) -
Required Federal Explanation ......... 416
LaneWatchTM....................................... 418Braking Brake System ................................... 420
Anti-lock Brake System (ABS) ........... 426 Brake Assist System ......................... 427
Collision Mitigation Braking System
TM
(CMBSTM) ....................................... 428
Parking Your Vehicle When Stopped ................................ 436
Multi-View Rear Camera .................. 438
Charging ............................................ 440
Before Charging .............................. 440
Charge the High Voltage battery using a
Level 1, 2 or SAE J1772 DC charger ...441
Control Box ..................................... 448
High Voltage Battery........................ 453
Using a Timer .................................. 454
Energy Economy ............................... 456
18 CLARITY ELECTRIC CSS-31TRV6100.book 359 ページ 2018年2月5日 月曜日 午後12時0分
Page 365 of 559
363
uuBefore Driving uMaximum Load Limit
Continued
Driving
Maximum Load Limit
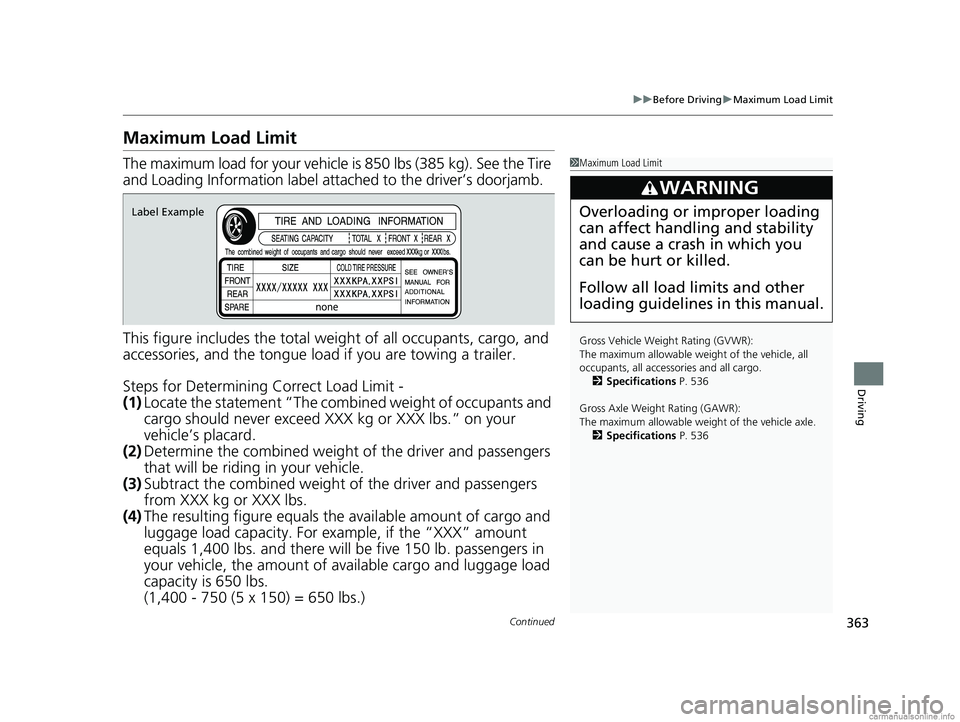
The maximum load for your vehicle is 850 lbs (385 kg). See the Tire
and Loading Information label atta ched to the driver’s doorjamb.
This figure includes the total weig ht of all occupants, cargo, and
accessories, and the tongue load if you are towing a trailer.
Steps for Determining Correct Load Limit -
(1) Locate the statement “The comb ined weight of occupants and
cargo should never exceed XXX kg or XXX lbs.” on your
vehicle’s placard.
(2) Determine the combined weight of the driver and passengers
that will be riding in your vehicle.
(3) Subtract the combined weight of the driver and passengers
from XXX kg or XXX lbs.
(4) The resulting figure equals the available amount of cargo and
luggage load capacity. For example, if the “XXX” amount
equals 1,400 lbs. and there will be five 150 lb. passengers in
your vehicle, the am ount of available cargo and luggage load
capacity is 650 lbs.
(1,400 - 750 (5 x 150) = 650 lbs.)1 Maximum Load Limit
Gross Vehicle Weight Rating (GVWR):
The maximum allowable weight of the vehicle, all
occupants, all accesso ries and all cargo.
2 Specifications P. 536
Gross Axle Weight Rating (GAWR):
The maximum allowable weight of the vehicle axle. 2 Specifications P. 536
3WARNING
Overloading or improper loading
can affect handling and stability
and cause a crash in which you
can be hurt or killed.
Follow all load limits and other
loading guidelines in this manual.Label Example
18 CLARITY ELECTRIC CSS-31TRV6100.book 363 ページ 2018年2月5日 月曜日 午後12時0分
Page 366 of 559
364
uuBefore Driving uMaximum Load Limit
Driving
(5) Determine the combined weight of luggage and cargo being
loaded on the vehicle. That we ight may not safely exceed the
available cargo and luggage load capacity calculated in step 4.
(6) If your vehicle will be towing a tra iler, load from your trailer will
be transferred to your vehicl e. Consult this manual to
determine how this reduces the available cargo and luggage
load capacity of your vehicle.
In addition, the total weight of the vehicle, all occupants,
accessories, cargo, and trailer tongue load must not exceed the
Gross Vehicle Weight Rating (GVW R) or the Gross Axle Weight
Rating (GAWR). Both are on a label on the driver’s doorjamb.
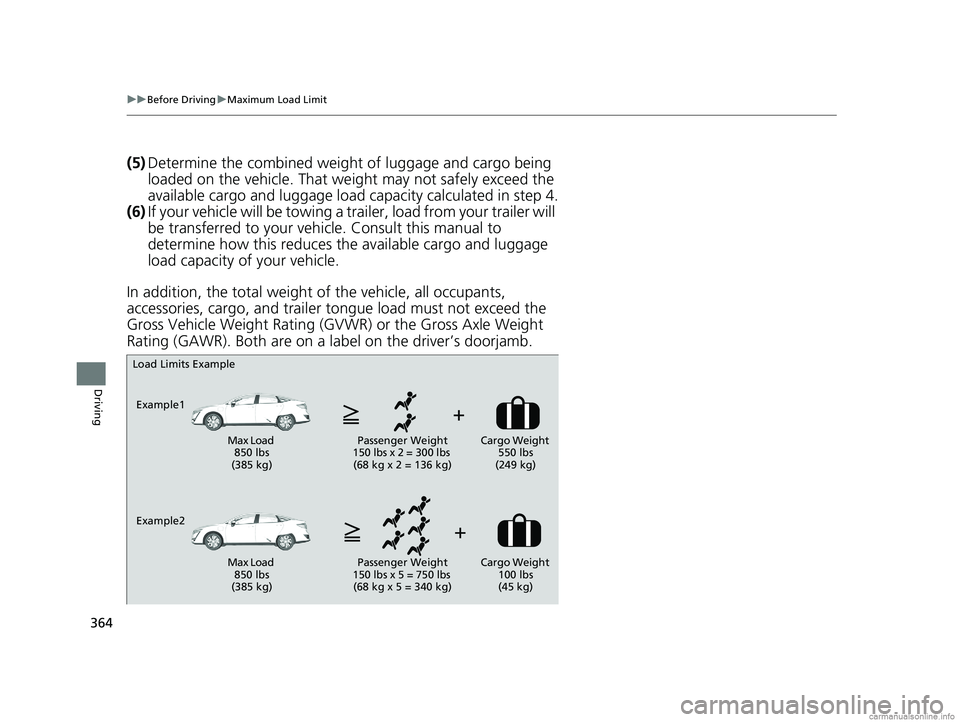
Load Limits Example
Example1 Max Load 850 lbs
(385 kg) Passenger Weight
150 lbs x 2 = 300 lbs (68 kg x 2 = 136 kg) Cargo Weight
550 lbs
(249 kg)
Example2 Max Load 850 lbs
(385 kg) Passenger Weight
150 lbs x 5 = 750 lbs (68 kg x 5 = 340 kg) Cargo Weight
100 lbs
(45 kg)
18 CLARITY ELECTRIC CSS-31TRV6100.book 364 ページ 2018年2月5日 月曜日 午後12時0分
Page 367 of 559
365
Driving
Towing a Trailer
Your vehicle is not designed to tow a trailer. Attempting to do so can void your
warranties.
Towing Your Vehicle
Your vehicle is not designed to be towed behind a motor home. If your vehicle needs
to be towed in an emergency, refer to the emergency towing information.
2Emergency Towing P. 531
18 CLARITY ELECTRIC CSS-31TRV6100.book 365 ページ 2018年2月5日 月曜日 午後12時0分
Page 499 of 559
497
Handling the Unexpected
This chapter explains how to handle unexpected troubles.
If a Tire Goes FlatTemporarily Repairi ng a Flat Tire....... 498
Handling of the Jack ......................... 510
Power System Won’t Start Checking the Procedure ................... 511
If the Smart Entry Remote Battery is Weak .......................................... 512
Emergency Power System Off........... 513
Jump Starting .................................... 514
Overheating How to Handle Overheating ............. 517 Indicator, Coming On/Blinking
If the 12-Volt Battery Charging System Indicator Comes On ....................... 518
If the Brake System Indicator (Red) Comes On or Blinks ....................................... 519
If the Electric Power Steering (EPS) System
Indicator Comes On ........................... 520If the Brake System Indicator (Red) Comes On or Blinks at the Same Time
When the Brake System Indicator
(Amber) Comes On ...................... 521
If the Low Tire Pressure/TPMS Indicator
Comes On or Blinks........................ 522 If the Transmission System Indicator Blinks
along with the Warning Message .... 523
Fuses
Fuse Locations ................................. 524
Inspecting and Changing Fuses ........ 530
Emergency Towing ........................... 531
When You Cannot Open the Charge
Lid ................................................. 532
When You Cannot Disengage the Charging
Connector.................................................533When You Cannot Open the Trunk .. 534
18 CLARITY ELECTRIC CSS-31TRV6100.book 497 ページ 2018年2月5日 月曜日 午後12時0分
Page 507 of 559
505
uuIf a Tire Goes Flat uTemporarily Repairing a Flat Tire
Continued
Handling the Unexpected
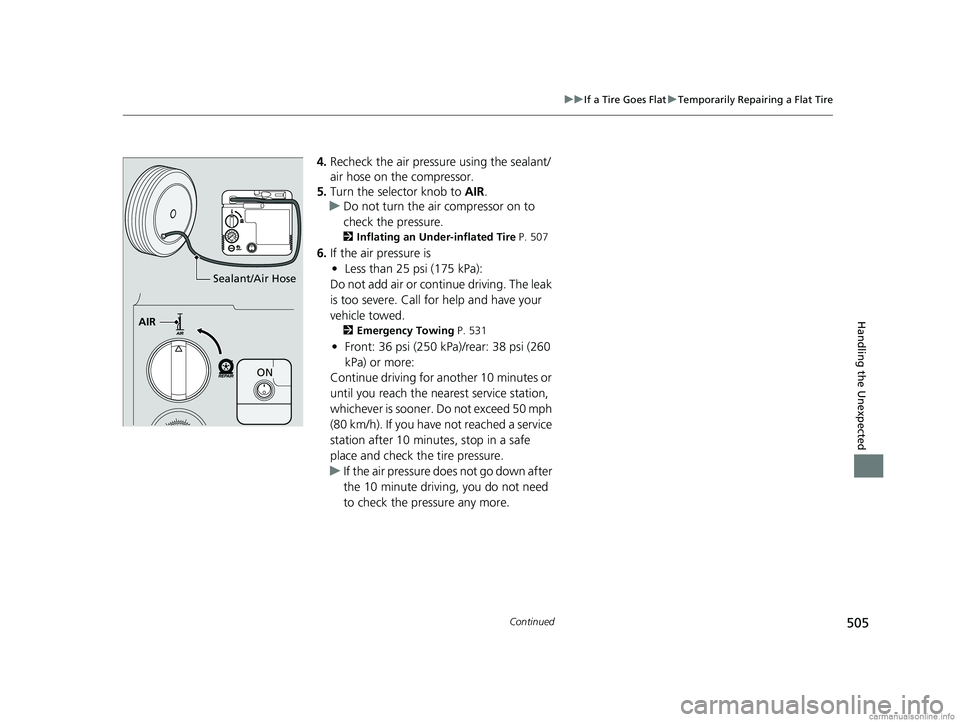
4. Recheck the air pressu re using the sealant/
air hose on the compressor.
5. Turn the selector knob to AIR.
u Do not turn the air compressor on to
check the pressure.
2 Inflating an Under-inflated Tire P. 507
6.If the air pressure is
• Less than 25 psi (175 kPa):
Do not add air or continue driving. The leak
is too severe. Call for help and have your
vehicle towed.
2 Emergency Towing P. 531
•Front: 36 psi (250 kPa)/rear: 38 psi (260
kPa) or more:
Continue driving for another 10 minutes or
until you reach the nearest service station,
whichever is sooner. Do not exceed 50 mph
(80 km/h). If you have not reached a service
station after 10 minutes, stop in a safe
place and check th e tire pressure.
u If the air pressure do es not go down after
the 10 minute driving, you do not need
to check the pressure any more.
AIR
ON
Sealant/Air Hose
18 CLARITY ELECTRIC CSS-31TRV6100.book 505 ページ 2018年2月5日 月曜日 午後12時0分