display HONDA CLARITY PLUG-IN 2020 (in English) Owner's Guide
[x] Cancel search | Manufacturer: HONDA, Model Year: 2020, Model line: CLARITY PLUG-IN, Model: HONDA CLARITY PLUG-IN 2020Pages: 595, PDF Size: 30.43 MB
Page 133 of 595
131
uuGauges and Driver Information Interface uDriver Information Interface
Continued
Instrument Panel
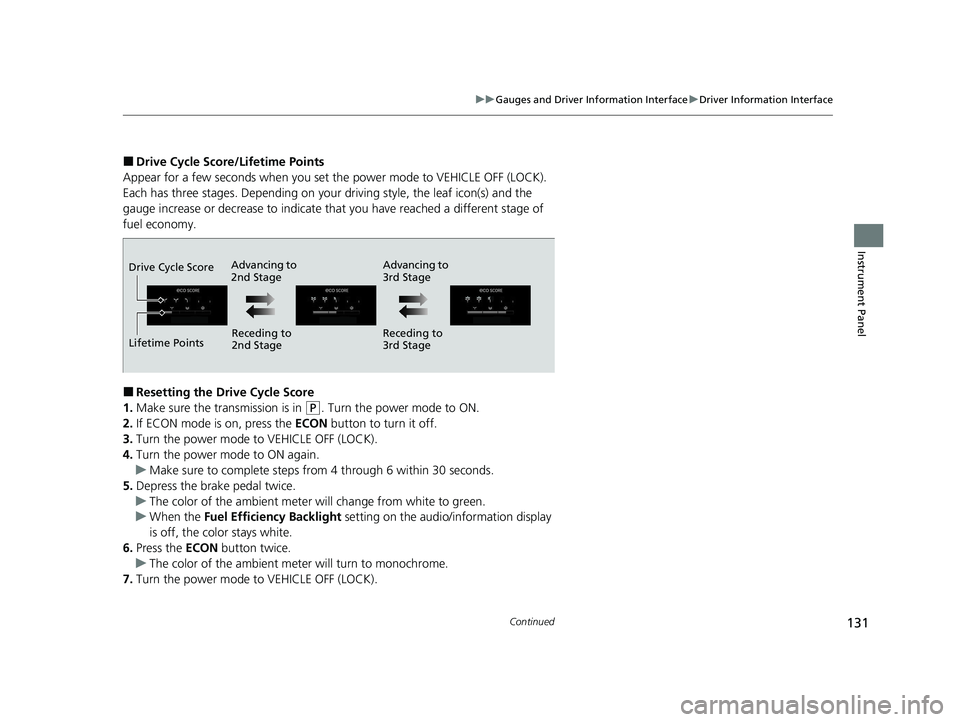
■Drive Cycle Score/Lifetime Points
Appear for a few seconds when you set the power mode to VEHICLE OFF (LOCK).
Each has three stages. Depending on your driving style, the leaf icon(s) and the
gauge increase or decrease to indicate that you have reached a different stage of
fuel economy.
■Resetting the Drive Cycle Score
1. Make sure the transmission is in
(P. Turn the power mode to ON.
2. If ECON mode is on, press the ECON button to turn it off.
3. Turn the power mode to VEHICLE OFF (LOCK).
4. Turn the power mode to ON again.
u Make sure to complete steps fro m 4 through 6 within 30 seconds.
5. Depress the brake pedal twice.
u The color of the ambient meter wi ll change from white to green.
u When the Fuel Efficiency Backlight setting on the audio/information display
is off, the color stays white.
6. Press the ECON button twice.
u The color of the ambient mete r will turn to monochrome.
7. Turn the power mode to VEHICLE OFF (LOCK).
Advancing to
2nd Stage Advancing to
3rd Stage
Receding to
2nd Stage Receding to
3rd Stage
Lifetime Points Drive Cycle Score
20 CLARITY PHEV-31TRW6200.book 131 ページ 2019年9月24日 火曜日 午後12時9分
Page 134 of 595
uuGauges and Driver Information Interface uDriver Information Interface
132
Instrument Panel
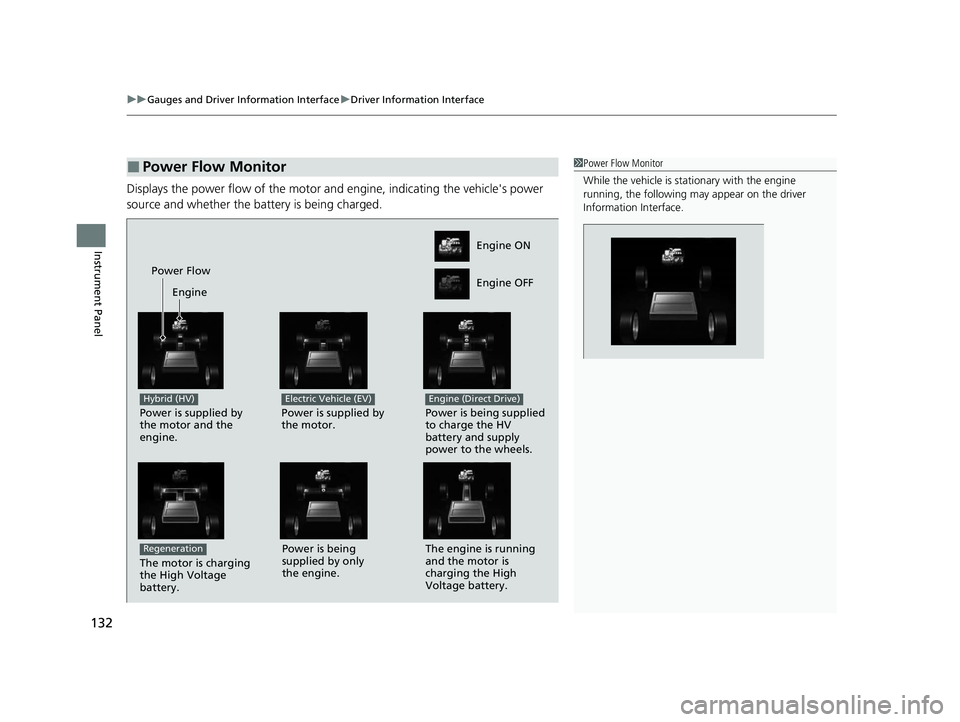
Displays the power flow of the motor an d engine, indicating the vehicle's power
source and whether the battery is being charged.
■Power Flow Monitor1 Power Flow Monitor
While the vehicle is stat ionary with the engine
running, the following ma y appear on the driver
Information Interface.
Engine ON
Engine OFF
Power Flow
Engine
Power is supplied by
the motor and the
engine.
Hybrid (HV)
Power is supplied by
the motor.
Electric Vehicle (EV)
Power is being supplied
to charge the HV
battery and supply
power to the wheels.
Engine (Direct Drive)
The motor is charging
the High Voltage
battery.
RegenerationPower is being
supplied by only
the engine. The engine is running
and the motor is
charging the High
Voltage battery.
20 CLARITY PHEV-31TRW6200.book 132 ページ 2019年9月24日 火曜日 午後12時9分
Page 138 of 595
136
Controls
Clock
Adjusting the Clock
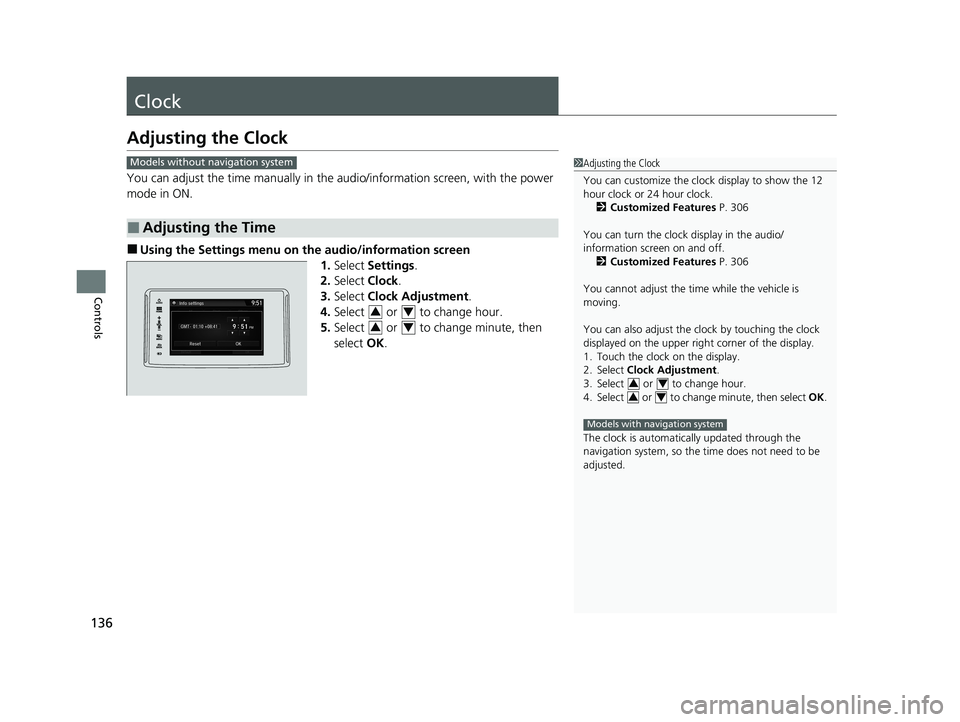
You can adjust the time manually in the audio/information screen, with the power
mode in ON.
■Using the Settings menu on the audio/information screen
1.Select Settings .
2. Select Clock.
3. Select Clock Adjustment .
4. Select or to change hour.
5. Select or to change minute, then
select OK.
■Adjusting the Time
1Adjusting the Clock
You can customize the clock display to show the 12
hour clock or 24 hour clock.
2 Customized Features P. 306
You can turn the clock display in the audio/
information screen on and off. 2 Customized Features P. 306
You cannot adjust the time while the vehicle is
moving.
You can also adjust the clock by touching the clock
displayed on the upper right corner of the display.
1. Touch the clock on the display.
2. Select Clock Adjustment .
3. Select or to change hour.
4. Select or to change minute, then select OK.
The clock is automatica lly updated through the
navigation system, so the ti me does not need to be
adjusted.
34
34
Models with navigation system
Models without navigation system
34
34
20 CLARITY PHEV-31TRW6200.book 136 ページ 2019年9月24日 火曜日 午後12時9分
Page 170 of 595
168
uuOperating the Switches Around the Steering Wheel uBrightness Control
Controls
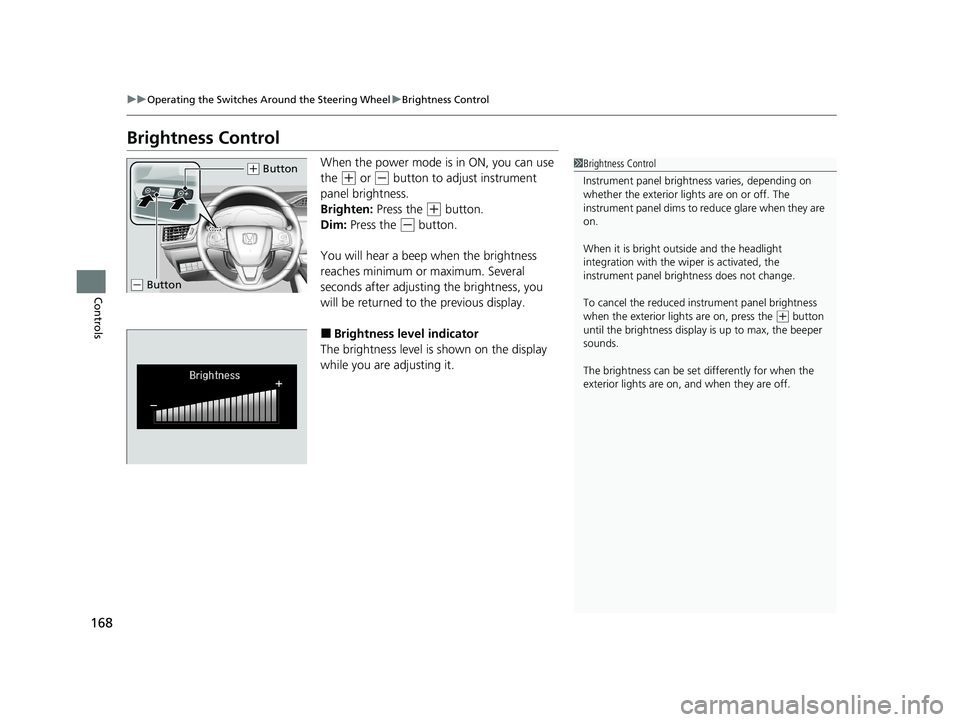
Brightness Control
When the power mode is in ON, you can use
the
(+ or (- button to adjust instrument
panel brightness.
Brighten: Press the
(+ button.
Dim: Press the
(- button.
You will hear a beep when the brightness
reaches minimum or maximum. Several
seconds after adjusting the brightness, you
will be returned to the previous display.
■Brightness level indicator
The brightness level is shown on the display
while you are adjusting it.
1 Brightness Control
Instrument panel brightne ss varies, depending on
whether the exterior lights are on or off. The
instrument panel dims to reduce glare when they are
on.
When it is bright out side and the headlight
integration with the wi per is activated, the
instrument panel bri ghtness does not change.
To cancel the reduced in strument panel brightness
when the exterior lights are on, press the
( + button
until the brightness display is up to max, the beeper
sounds.
The brightness can be set differently for when the
exterior lights are on, and when they are off.
( + Button
(- Button
20 CLARITY PHEV-31TRW6200.book 168 ページ 2019年9月24日 火曜日 午後12時9分
Page 195 of 595
193Continued
Controls
Climate Control System
Using Automatic Climate Control
The automatic climate control system maintains the interior temperature you select.
The system also selects the proper mix of heat ed or cooled air that raises or lowers
the interior temperature to your pr eference as quickly as possible.1Using Automatic Climate Control
Press the CLIMATE button to display A/C, MODE,
fan control information on the audio/information
screen to operate manually. Select ic on to turn on or
off A/C , change the vent mode , or change the fan
speed.
If any buttons/icons are pressed while using the
climate control system in auto, the function of the
button/icon that was presse d will take priority.
The AUTO indicator will go off, but functions
unrelated to the button/icon that was pressed will be
controlled automatically.
To prevent cold air from bl owing in from outside, the
fan may operate at low speed for a while after the
AUTO button has been pressed.
If the interior is very warm, you can cool it down
more rapidly by partial ly opening the windows,
turning the system on auto, and setting the
temperature to low. Change the fresh air mode to
recirculation mode until the temperature cools down.
When you set the temperature to the lower or upper
limit, Lo or Hi is displayed.
Pressing the button switches the climate
control system between on and off. When turned on,
the system returns to your last selection.
20 CLARITY PHEV-31TRW6200.book 193 ページ 2019年9月24日 火曜日 午後12時9分
Page 197 of 595
Continued195
uuClimate Control System uUsing Automatic Climate Control
Controls
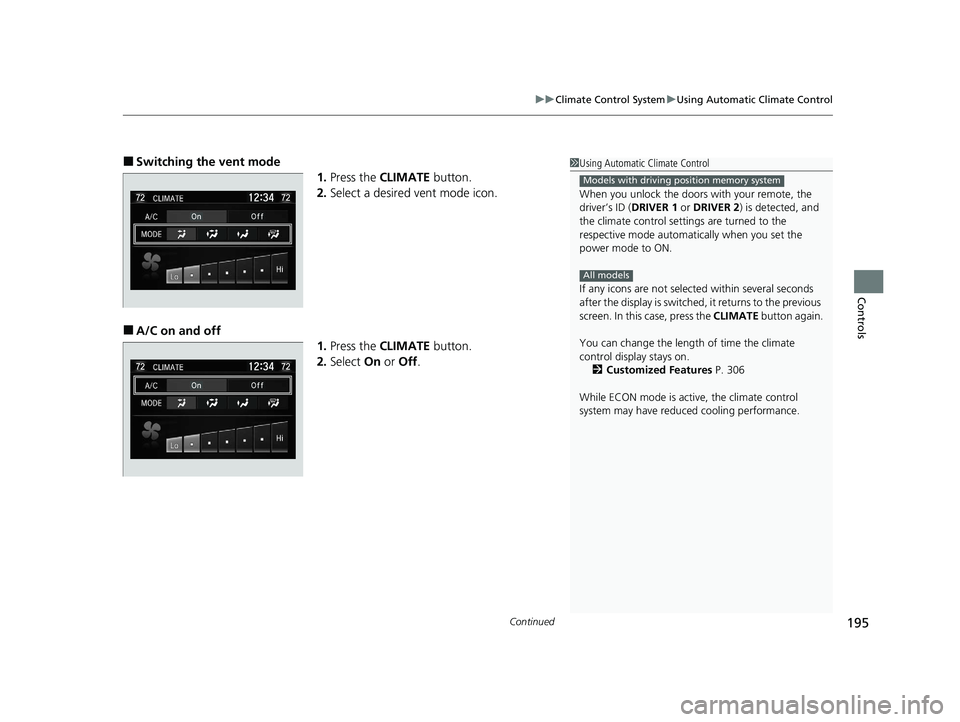
■Switching the vent mode
1.Press the CLIMATE button.
2. Select a desired vent mode icon.
■A/C on and off
1.Press the CLIMATE button.
2. Select On or Off .
1Using Automatic Climate Control
When you unlock the doors with your remote, the
driver’s ID (DRIVER 1 or DRIVER 2) is detected, and
the climate control settings are turned to the
respective mode automatically when you set the
power mode to ON.
If any icons are not select ed within several seconds
after the display is switched, it returns to the previous
screen. In this case, press the CLIMATE button again.
You can change the length of time the climate
control display stays on. 2 Customized Features P. 306
While ECON mode is active, the climate control
system may have reduced cooling performance.
Models with driving position memory system
All models
20 CLARITY PHEV-31TRW6200.book 195 ページ 2019年9月24日 火曜日 午後12時9分
Page 205 of 595
203
Features
This chapter describes how to operate technology features.
Audio SystemAbout Your Audio System ................ 204
USB Ports ......................................... 205
Audio System Theft Protection ......... 206
Audio Remote Controls .................... 207
Audio System Basic Operation ........ 210
Audio/Information Screen ................ 211
Adjusting the Sound ........................ 236
Display Setup ................................... 237
Voice Control Operation .................. 239
Playing AM/FM Radio ....................... 243
Playing SiriusXM ® Radio
*................. 247 Playing an iPod ................................ 255
Song By Voice
TM (SBV) ...................... 258
Playing Pandora ®*1........................... 262
Playing a USB Flash Drive ................. 264
Playing Bluetooth ® Audio................. 267
HondaLink ®..................................... 269
Wi-Fi Connection ............................. 274
Siri Eyes Free .................................... 276
Apple CarPlay .................................. 277
Android Auto................................... 280
Audio Error Messages ...................... 284
General Information on the Audio
System
............................................. 288
Customized Features............................306
HomeLink® Universal Transceiver*......334
Bluetooth ® HandsFreeLink® ............. 337
*1: Available only on U.S. models.
* Not available on all models
20 CLARITY PHEV-31TRW6200.book 203 ページ 2019年9月24日 火曜日 午後12時9分
Page 207 of 595
205
uuAudio System uUSB Ports
Features
USB Ports
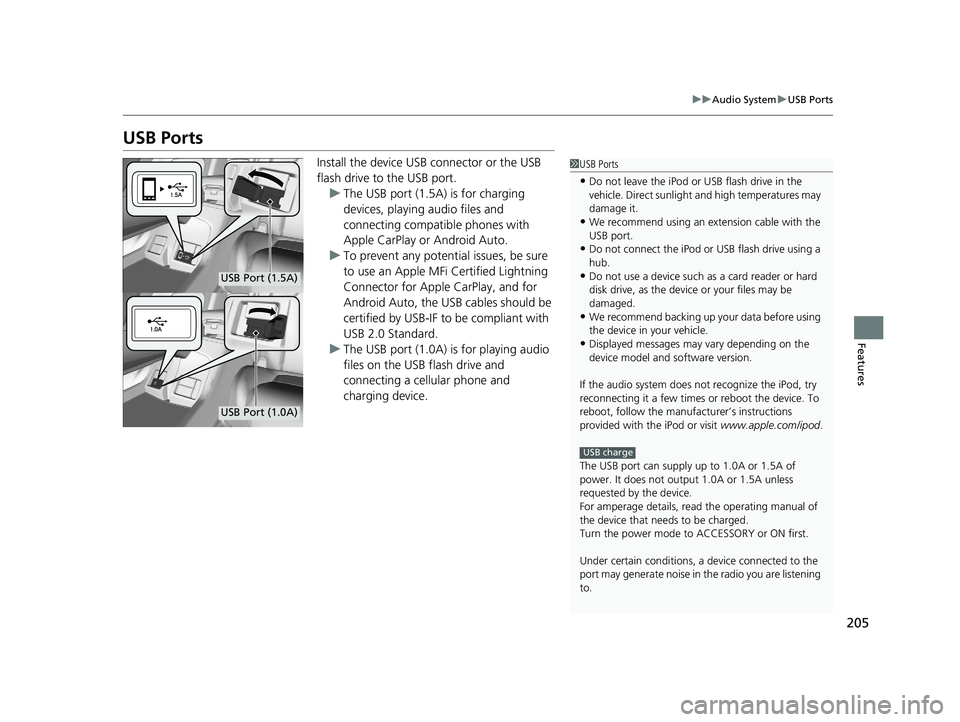
Install the device USB connector or the USB
flash drive to the USB port.
u The USB port (1.5A) is for charging
devices, playing audio files and
connecting compatib le phones with
Apple CarPlay or Android Auto.
u To prevent any potenti al issues, be sure
to use an Apple MFi Certified Lightning
Connector for Apple CarPlay, and for
Android Auto, the USB cables should be
certified by USB-IF to be compliant with
USB 2.0 Standard.
u The USB port (1.0A) is for playing audio
files on the USB flash drive and
connecting a cellular phone and
charging device.1USB Ports
•Do not leave the iPod or USB flash drive in the
vehicle. Direct sunlight and high temperatures may
damage it.
•We recommend using an ex tension cable with the
USB port.
•Do not connect the iPod or USB flash drive using a
hub.
•Do not use a device such as a card reader or hard
disk drive, as the device or your files may be
damaged.
•We recommend backing up yo ur data before using
the device in your vehicle.
•Displayed messages may vary depending on the
device model and software version.
If the audio system does not recognize the iPod, try
reconnecting it a few times or reboot the device. To
reboot, follow the manufac turer’s instructions
provided with the iPod or visit www.apple.com/ipod.
The USB port can supply up to 1.0A or 1.5A of
power. It does not output 1.0A or 1.5A unless
requested by the device.
For amperage details, read the operating manual of
the device that ne eds to be charged.
Turn the power mode to ACCESSORY or ON first.
Under certain condi tions, a device connected to the
port may generate noise in the radio you are listening
to.
USB charge
USB Port (1.5A)
USB Port (1.0A)
20 CLARITY PHEV-31TRW6200.book 205 ページ 2019年9月24日 火曜日 午後12時9分
Page 208 of 595
206
uuAudio System uAudio System Theft Protection
Features
Audio System Theft Protection
The audio system is disabled when it is disconnected from the power source, such as
when the 12-volt battery is disconnected or goes dead. In certain conditions, the
system may display a code entry screen. If this occurs, reactivate the audio system.
■Reactivating the audio system
1. Set the power mode to ON.
2. Turn on the audio system.
3. Select and hold the audio system power icon for more than two seconds.
u The audio system is reac tivated when the audio co ntrol unit establishes a
connection with the vehicle control unit. If the control unit fails to recognize
the audio unit, you must go to an authorized Honda Clarity Plug-In Hybrid
dealer and have the audio unit checked.
20 CLARITY PHEV-31TRW6200.book 206 ページ 2019年9月24日 火曜日 午後12時9分
Page 209 of 595
207
uuAudio System uAudio Remote Controls
Continued
Features
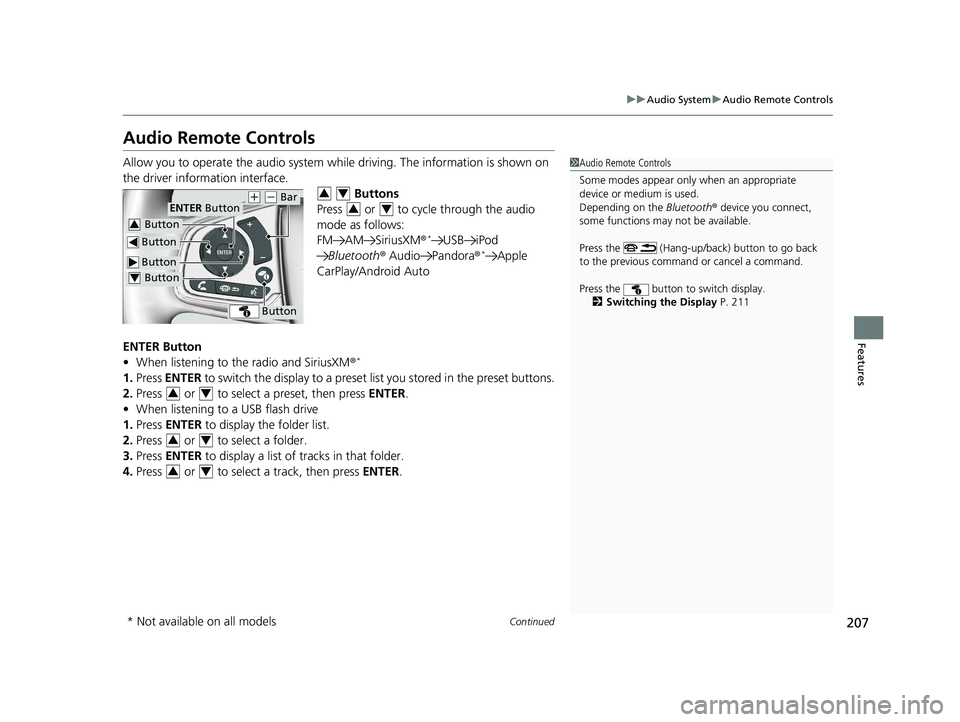
Audio Remote Controls
Allow you to operate the audio system whil e driving. The information is shown on
the driver information interface. Buttons
Press or to cycle through the audio
mode as follows:
FM AM SiriusXM ®
*USB iPod
Bluetooth ® Audio Pandora ®*Apple
CarPlay/Android Auto
ENTER Button
• When listening to the radio and SiriusXM ®
*
1.Press ENTER to switch the disp lay to a preset list you stored in the preset buttons.
2. Press or to select a preset, then press ENTER.
• When listening to a USB flash drive
1. Press ENTER to display the folder list.
2. Press or to select a folder.
3. Press ENTER to display a list of tracks in that folder.
4. Press or to select a track, then press ENTER.
1Audio Remote Controls
Some modes appear only when an appropriate
device or medium is used.
Depending on the Bluetooth® device you connect,
some functions may not be available.
Press the (Hang-up/back) button to go back
to the previous command or cancel a command.
Press the button to switch display. 2 Switching the Display P. 211
Button
ENTER Button
Button
(+ (- Bar
Button
Button3
Button4
34
34
34
34
34
* Not available on all models
20 CLARITY PHEV-31TRW6200.book 207 ページ 2019年9月24日 火曜日 午後12時9分