warning HONDA CLARITY PLUG-IN 2021 (in English) Repair Manual
[x] Cancel search | Manufacturer: HONDA, Model Year: 2021, Model line: CLARITY PLUG-IN, Model: HONDA CLARITY PLUG-IN 2021Pages: 596, PDF Size: 30.45 MB
Page 462 of 596
460
Driving
Charging
Before Charging
Check the following items before you start charging your vehicle.
•Make sure to use a dedicated and properly grounded circuit, that is rated for at
least 15 amps.
u Have an electrician inspect the outlet you are using to see if it meets these
criteria.
• Make sure you plug the charging cable dire ctly into the wall outlet dedicated to
vehicle charging.
u Do not use extension cords, adaptors , or multi-outlet plugs between the
charging cable and the outlet.
• Make sure the charging cable is fully uncoiled before use.
• Make sure the control box, charging connec tor, and charging cable are free from
any damage, including cracks or frays.
u If you find any damage to th e devices, contact a dealer.
• Make sure the charging conn ector and inlet are clean.
u If you find any contamination or foreig n object in the connector or inlet,
contact a dealer.
• Make sure the charging cable is dry.
u Check that there is no water in the i mmediate area, and that your hands are
dry.
Note: Outlet needs to be in good shape. Worn or damaged outlet will not make
good contact with the plug. Ensure that the plug is fully inserted and does not come
out of the outlet after installation. A loos e connection will cause excessive heat build
up within the plug and damage it.
■Safety Checklist
1 Charging
3WARNING
Using a 120 volt wall outle t that is rated less
than 15 amps or one that is powering other
devices can cause a fire, seriously injuring
you or others.
When using the 120 volt charger, use a
dedicated and properly grounded circuit
rated 15 amps or more. Consult an
electrician if yo u are not sure.
21 CLARITY PHEV CSS-31TRW6300.book 460 ページ 2020年5月19日 火曜日 午前10時46分
Page 463 of 596
461
uuCharging uCharge the High Voltage battery using a Level 1 or 2 charger
Continued
Driving
Charge the High Voltage battery using a Level 1 or 2
charger
There are two ways to charge the High Volt age battery; by using the Level 1 120 volt
(15 amp) charger supplied with the vehicle plugged into a standard three-prong wall
outlet, or by using a professionally inst alled Level 2 240 volt (32 amp) charger.
*1:
Charging time varies depending on conditions, such as the remaining battery level and the ambient
temperature.
The suggested full charging time in this table indicates the hours it may likely take
for the High Voltage batte ry to be fully charged.
Charging withSuggested full charging time
AC 240 V
(Level 2)2.5 hours*1
AC 120 V(Level 1)12 hours*1
1 Charging
When the battery warming system is activated, the
battery may take longer to charge.
When the 12-volt battery is disconnected, vehicle
charging is not possible. After reconnecting the
battery, turn the power system on, then turn it off.
Confirm that charging is possible.
2 Turning on the Power P. 380
3WARNING
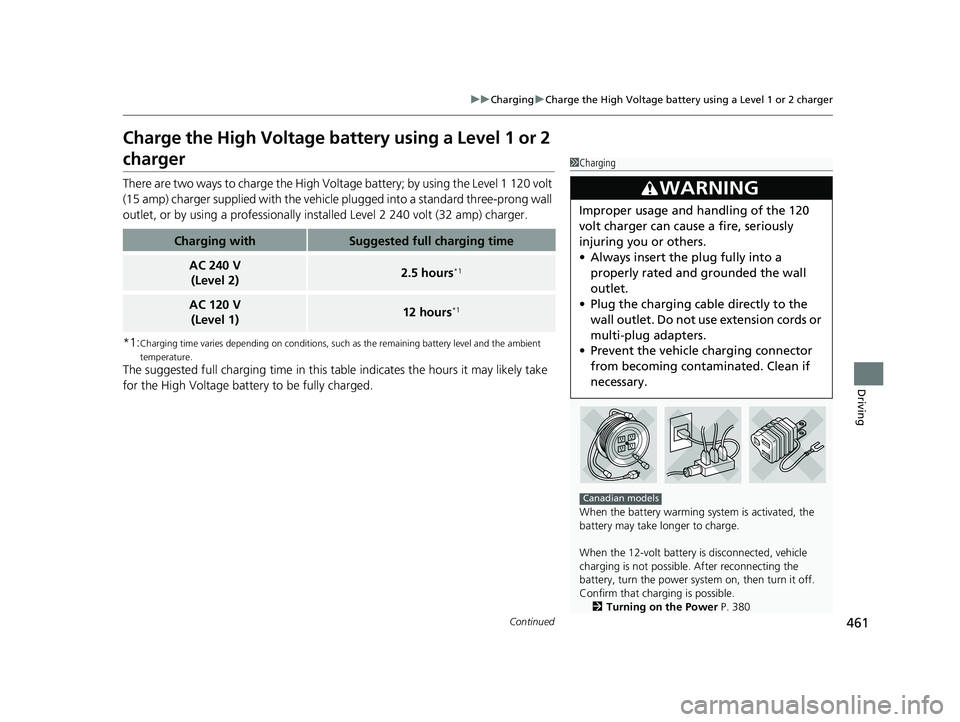
Improper usage and handling of the 120
volt charger can cause a fire, seriously
injuring you or others.
•Always insert the plug fully into a
properly rated and grounded the wall
outlet.
• Plug the charging cable directly to the
wall outlet. Do not use extension cords or
multi-plug adapters.
• Prevent the vehicle charging connector
from becoming contaminated. Clean if
necessary.
Canadian models
21 CLARITY PHEV CSS-31TRW6300.book 461 ページ 2020年5月19日 火曜日 午前10時46分
Page 464 of 596
uuCharging uCharge the High Voltage battery using a Level 1 or 2 charger
462
Driving
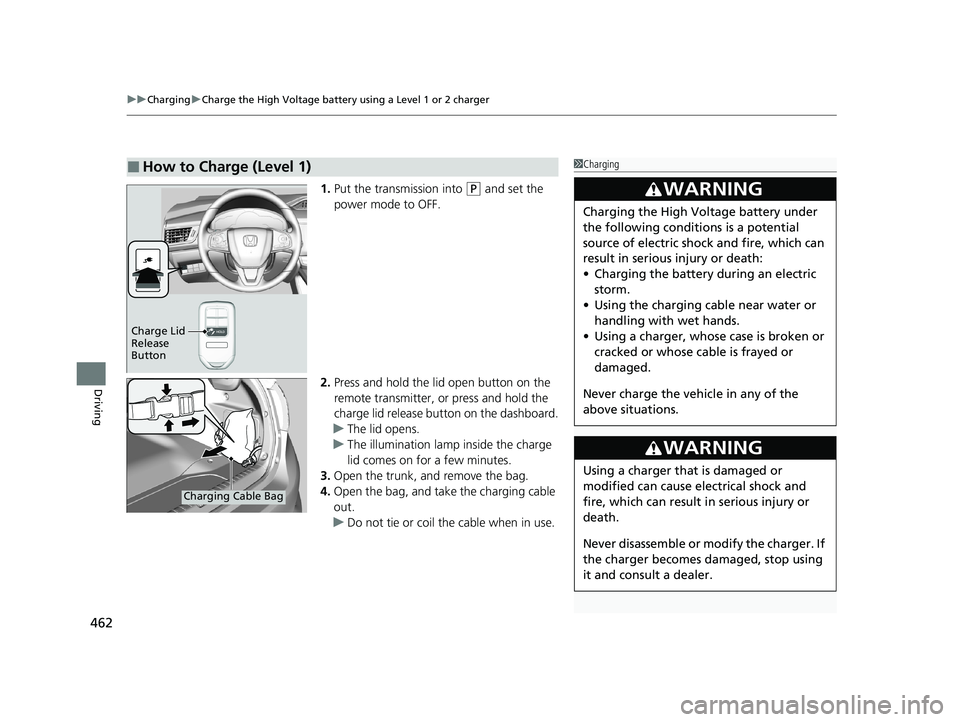
1. Put the transmission into (P and set the
power mode to OFF.
2. Press and hold the lid open button on the
remote transmitter, or press and hold the
charge lid release button on the dashboard.
u The lid opens.
u The illumination lamp inside the charge
lid comes on for a few minutes.
3. Open the trunk, and remove the bag.
4. Open the bag, and take the charging cable
out.
u Do not tie or coil the cable when in use.
■How to Charge (Level 1)1Charging
3WARNING
Charging the High Vo ltage battery under
the following conditions is a potential
source of electric shock and fire, which can
result in serious injury or death:
• Charging the battery during an electric
storm.
• Using the charging cable near water or
handling with wet hands.
• Using a charger, whose case is broken or
cracked or whose cable is frayed or
damaged.
Never charge the vehi cle in any of the
above situations.
3WARNING
Using a charger that is damaged or
modified can cause electrical shock and
fire, which can result in serious injury or
death.
Never disassemble or modify the charger. If
the charger becomes damaged, stop using
it and consult a dealer.
Charge Lid
Release
Button
Charging Cable Bag
21 CLARITY PHEV CSS-31TRW6300.book 462 ページ 2020年5月19日 火曜日 午前10時46分
Page 469 of 596
467
uuCharging uControl Box
Continued
Driving
Control Box
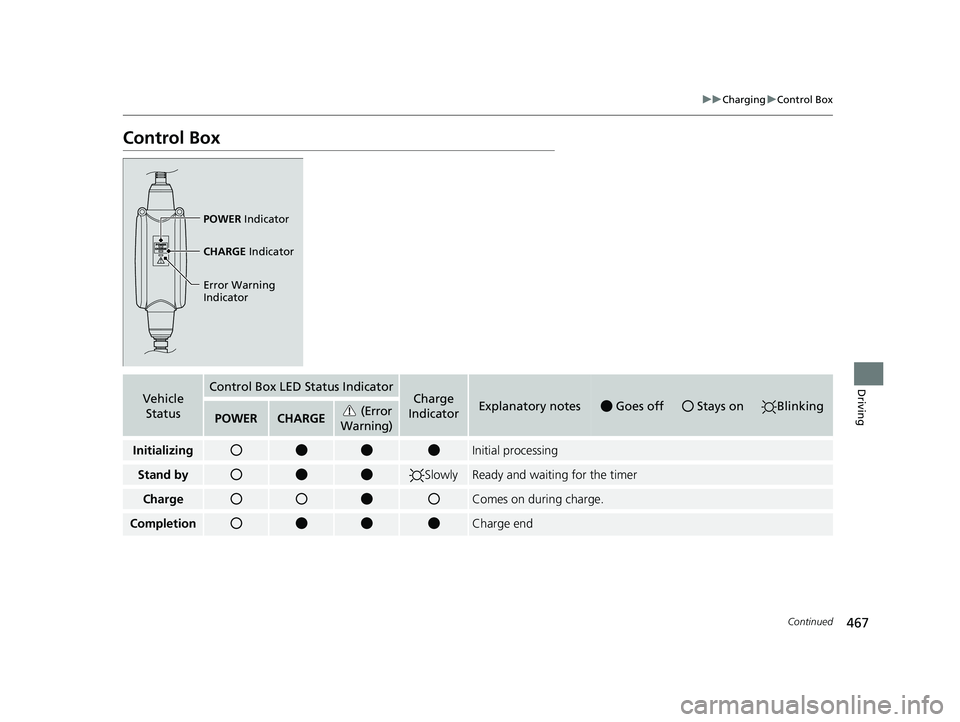
POWER Indicator
CHARGE Indicator
Error Warning
Indicator
Vehicle StatusControl Box LED Status IndicatorCharge
IndicatorExplanatory notesGoes offStays onBlinkingPOWERCHARGE (Error
Warning)
InitializingInitial processing
Stand bySlowlyReady and waiting for the timer
ChargeComes on during charge.
CompletionCharge end
21 CLARITY PHEV CSS-31TRW6300.book 467 ページ 2020年5月19日 火曜日 午前10時46分
Page 470 of 596
468
uuCharging uControl Box
Driving
Vehicle
StatusControl Box LED Status IndicatorCharge
IndicatorExplanatory notesGoes offStays onBlinkingPOWERCHARGE (Error
Warning)
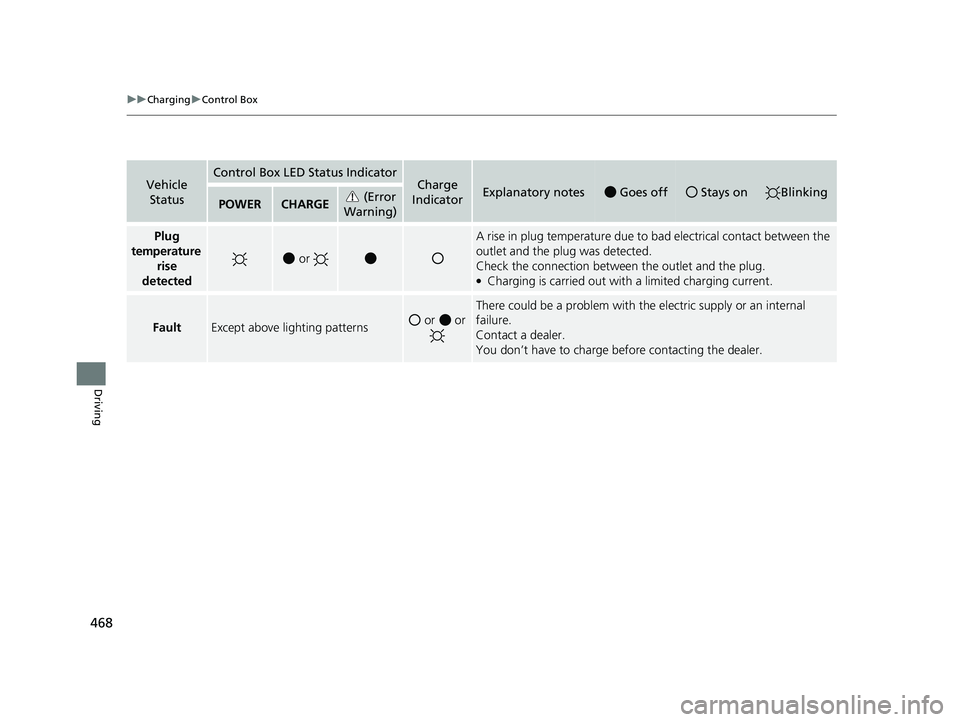
Plug
temperature rise
detected
or
A rise in plug temperature due to bad electrical contact between the
outlet and the plug was detected.
Check the connection between the outlet and the plug.
●Charging is carried out with a limited charging current.
FaultExcept above lighting patterns or or
There could be a problem with the electric supply or an internal
failure.
Contact a dealer.
You don’t have to charge before contacting the dealer.
21 CLARITY PHEV CSS-31TRW6300.book 468 ページ 2020年5月19日 火曜日 午前10時46分
Page 481 of 596
479
uuBefore Performing Maintenance uSafety When Performing Maintenance
Continued
Maintenance
Safety When Performing Maintenance
Some of the most important safe ty precautions are given here.
However, we cannot warn you of every conceivable hazard that can arise in
performing maintenance. Only you can decide whether you should perform a given
task.
• To reduce the possibility of fire or explos ion, keep cigarettes, sparks, and flames
away from the 12-volt battery, all High Volt age system, and all fuel related parts.
• Never leave rags, towels, or other flammable objects under the hood.
u Heat from the engine and exhaust can ignite them, causing a fire.
• To clean parts, use a co mmercially available degreaser or parts cleaner, not
gasoline.
• Wear eye protection and pr otective clothing when working with the 12-volt
battery or compressed air.
• Engine exhaust contains carbon monoxide, which is poisonous and can kill you.
u Only operate the engine if th ere is sufficient ventilation.
■Maintenance Safety
1Safety When Performing Maintenance
3WARNING
Improperly maintaining this vehicle or
failing to correct a pr oblem before driving
can cause a crash in which you can be
seriously hurt or killed.
Always follow the inspection and
maintenance recommendations according
to the schedules in this owner’s manual.
3WARNING
Failure to properly follow maintenance
instructions and prec autions can cause you
to be seriously hurt or killed.
Always follow the procedures and
precautions in this owner’s manual.
21 CLARITY PHEV CSS-31TRW6300.book 479 ページ 2020年5月19日 火曜日 午前10時46分
Page 484 of 596
482
uuMaintenance MinderTMuTo Use Maintenance MinderTM
Maintenance
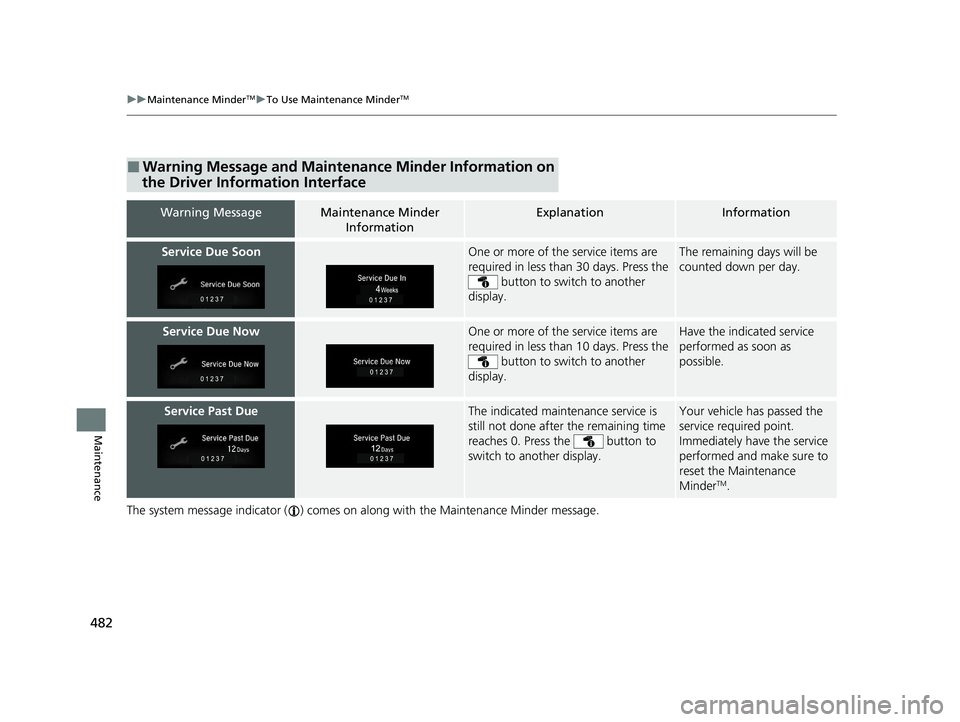
The system message indicator ( ) comes on along with the Maintenance Minder message.
■Warning Message and Maintenance Minder Information on
the Driver Information Interface
Warning MessageMaintenance Minder
InformationExplanationInformation
Service Due SoonOne or more of the service items are
required in less than 30 days. Press the button to switch to another
display.The remaining days will be
counted down per day.
Service Due NowOne or more of the service items are
required in less than 10 days. Press the button to switch to another
display.Have the indicated service
performed as soon as
possible.
Service Past DueThe indicated maintenance service is
still not done after the remaining time
reaches 0. Press the button to
switch to another display.Your vehicle has passed the
service required point.
Immediately have the service
performed and make sure to
reset the Maintenance
Minder
TM.
21 CLARITY PHEV CSS-31TRW6300.book 482 ページ 2020年5月19日 火曜日 午前10時46分
Page 497 of 596
495
uuMaintenance Under the Hood uEngine Coolant
Maintenance
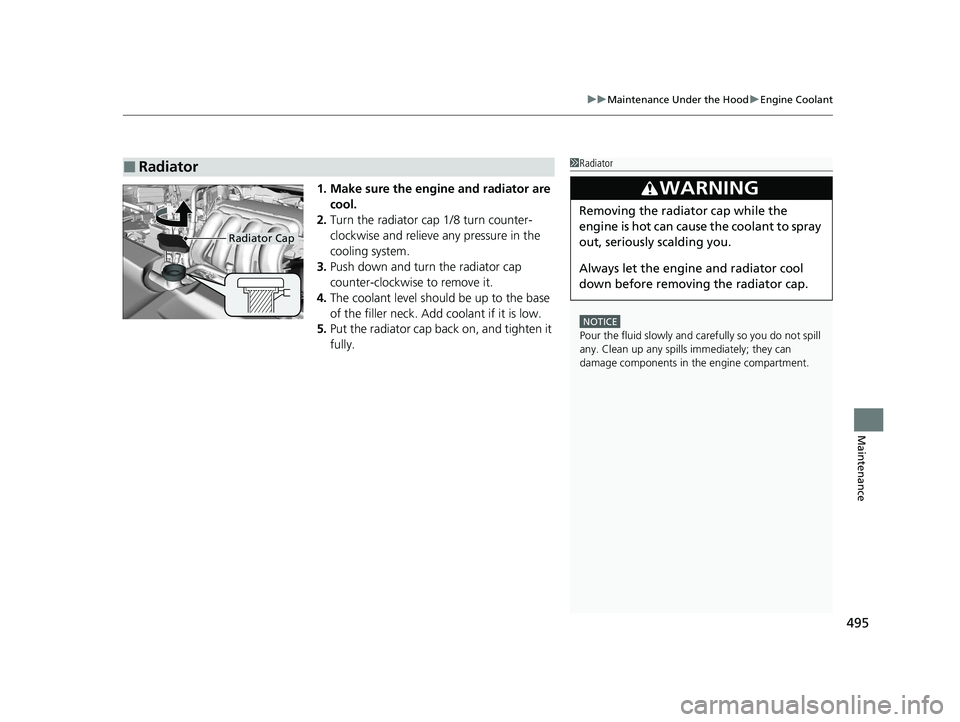
1. Make sure the engine and radiator are
cool.
2. Turn the radiator cap 1/8 turn counter-
clockwise and relieve any pressure in the
cooling system.
3. Push down and turn the radiator cap
counter-clockwise to remove it.
4. The coolant level should be up to the base
of the filler neck. Add coolant if it is low.
5. Put the radiator cap back on, and tighten it
fully.
■Radiator1Radiator
NOTICE
Pour the fluid slowly and ca refully so you do not spill
any. Clean up any spills immediately; they can
damage components in the engine compartment.
3WARNING
Removing the radiator cap while the
engine is hot can cause the coolant to spray
out, seriously scalding you.
Always let the engine and radiator cool
down before removing the radiator cap.
Radiator Cap
21 CLARITY PHEV CSS-31TRW6300.book 495 ページ 2020年5月19日 火曜日 午前10時46分
Page 507 of 596
505
Maintenance
Checking and Maintaining Tires
Checking Tires
To safely operate your vehicle, your tires must be of the proper type and size, in
good condition with adequate tread, and properly inflated.
■Inflation guidelines
Properly inflated tires provide the best combination of handling, tread life, and
comfort. Refer to the driver’s doorjamb labe l or specifications page for the specified
pressure.
Underinflated tires wear unev enly, adversely affect handling and fuel economy, and
are more likely to fail from overheating.
Overinflated tires make your vehicle ride ha rshly, are more prone to road hazards,
and wear unevenly.
Every day before you drive, look at each of the tires. If one looks lower than the
others, check the pressure with a tire gauge.
At least once a month or before long trips , use a gauge to measure the pressure in
all tires. Even tires in good condition can lose 1–2 psi (10–20 kPa, 0.1–0.2 kgf/cm
2)
per month.
■Inspection guidelines
Every time you check inflation, also examine the tires and valve stems.
Look for:
• Bumps or bulges on the side or in the tr ead. Replace the tire if you find any cuts,
splits, or cracks in the side of the tire . Replace it if you see fabric or cord.
• Remove any foreign objects and inspect for air leaks.
• Uneven tread wear. Have a deal er check the wheel alignment.
• Excessive tread wear.
2 Wear Indicators P. 510
•Cracks or other damage around valve stem.
1Checking Tires
Measure the air pressure when tires are cold. This
means the vehicle has been parked for at least three
hours, or driven less than 1 mile (1.6 km). If
necessary, add or releas e air until the specified
pressure is reached.
If checked when hot, tire pressure can be as much as
4–6 psi (30–40 kPa, 0.3–0.4 kgf/cm
2) higher than if
checked when cold.
Whenever tire pressure is adjusted, you must
calibrate the TPMS. 2 TPMS Calibration P. 431
Have a dealer check the tires if you feel a consistent
vibration while driving. Ne w tires and any that have
been removed and reinst alled should be properly
balanced.
3WARNING
Using tires that are excessively worn or
improperly inflated can cause a crash in
which you can be seriously hurt or killed.
Follow all instruction s in this owner’s
manual regarding tire inflation and
maintenance.
21 CLARITY PHEV CSS-31TRW6300.book 505 ページ 2020年5月19日 火曜日 午前10時46分
Page 511 of 596
509
uuChecking and Maintaining Tires uDOT Tire Quality Grading (U.S. Vehicles)
Maintenance
The traction grades, from highest to lowest, are AA, A, B, and C.
Those grades represent the tire’s ability to stop on wet pavement
as measured under controlled conditions on specified
government test surfaces of asph alt and concrete. A tire marked
C may have poor traction performance.
The temperature grades are A (the highest), B, and C,
representing the tire’s resistance to the generation of heat and its
ability to dissipate heat when te sted under controlled conditions
on a specified indoor laboratory test wheel. Sustained high
temperature can cause the material of the tire to degenerate and
reduce tire life, and ex cessive temperature can lead to sudden tire
failure. The grade C corresponds to a level of performance which
all passenger car tires must meet under the Federal Motor Vehicle
Safety Standard No. 109. Grades B and A represent higher levels
of performance on the laboratory test wheel than the minimum
required by law.
■Traction
■Temperature
1 Traction
Warning: The traction grade
assigned to this tire is based on
straight-ahead braking traction tests,
and does not include acceleration,
cornering, hydroplaning, or peak
traction characteristics.
1Temperature
Warning: The temperature grade for
this tire is establishe d for a tire that is
properly inflated and not
overloaded. Excessive speed,
underinflation, or excessive loading,
either separately or in combination,
can cause heat buildup and possible
tire failure.
21 CLARITY PHEV CSS-31TRW6300.book 509 ページ 2020年5月19日 火曜日 午前10時46分