Repair HONDA CR-V 2001 RD1-RD3 / 1.G Owners Manual
[x] Cancel search | Manufacturer: HONDA, Model Year: 2001, Model line: CR-V, Model: HONDA CR-V 2001 RD1-RD3 / 1.GPages: 326, PDF Size: 4.58 MB
Page 1 of 326
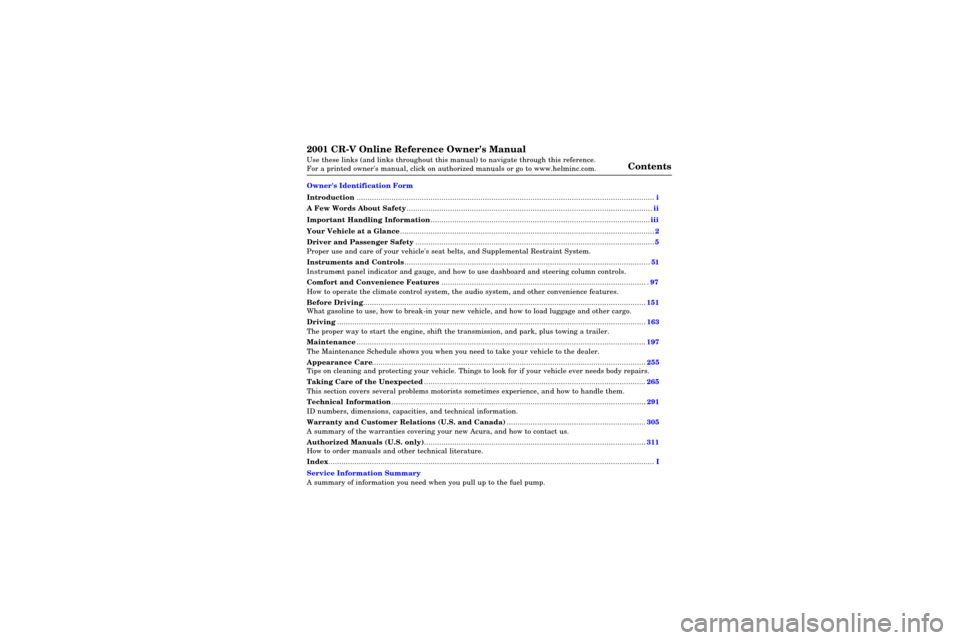
2001 CR-V Online Reference Owner's Manual
Use these links (and links throughout this manual) to navigate through\
this reference.
For a printed owner's manual, click on authorized manuals or go to www.h\
elminc.com. Contents
Introduction ........................................................................\
................................................................. i
A Few Words About Safety........................................................................\
........................................ .ii
Important Handling Information........................................................................\
.............................iii
Your Vehicle at a Glance........................................................................\
............................................ .2
Driver and Passenger Safety ........................................................................\
......................................5
Proper use and care of your vehicle's seat belts, and Supplemental Restr\
aint System.
Instruments and Controls........................................................................\
........................................ .51
Instrument panel indicator and gauge, and how to use dashboard and steering colu\
mn controls.
Comfort and Convenience Features ........................................................................\
..................... ..97
How to operate the climate control system, the audio system, and other c\
onvenience features.
Before Driving........................................................................\
..........................................................151
What gasoline to use, how to break-in your new vehicle, and how to load luggage and other cargo.
Driving ........................................................................\
..................................................................... .163
The proper way to start the engine, shift the transmission, and park, pl\
us towing a trailer.
Maintenance........................................................................\
.............................................................197
The Maintenance Schedule shows you when you need to take yo ur vehicle to the dealer.
Appearance Care........................................................................\
..................................................... .255
Tips on cleaning and protecting your vehicle. Things to look for if your\
vehicle ever needs body repairs.
Taking Care of the Unexpected........................................................................\
..............................265
This section covers several problems motorists sometimes experience, a nd how to handle them.
Technical Information........................................................................\
............................................ .291
ID numbers, dimensions, capacities, and technical information.
Warranty and Customer Relations (U.S. and Canada)................................................................305
A summary of the warranties covering your new Acura, and how to contact \
us.
Authorized Manuals (U.S. only)........................................................................\
..............................311
How to order manuals and other technical literature.
Index........................................................................\
........................................................................\
...... I
Service Information Summary
A summary of information you need when you pull up to the fuel pump.
Owner's Identification Form
Page 83 of 326
Seat
s
Hea d Restraint s
See page 14 for important safety
information and a warning about how to
properly position the head restraints.
Th e hea d restraint s hel p protec t yo u
an d you r passenger s fro m whiplas h
an d othe r injuries . The y ar e mos t
effectiv e whe n yo u adjust them so
th e bac k o f th e occupant' s hea d rest s
agains t th e cente r o f th e restraint . A
talle r perso n shoul d adjus t th e
restrain t a s hig h a s possible.
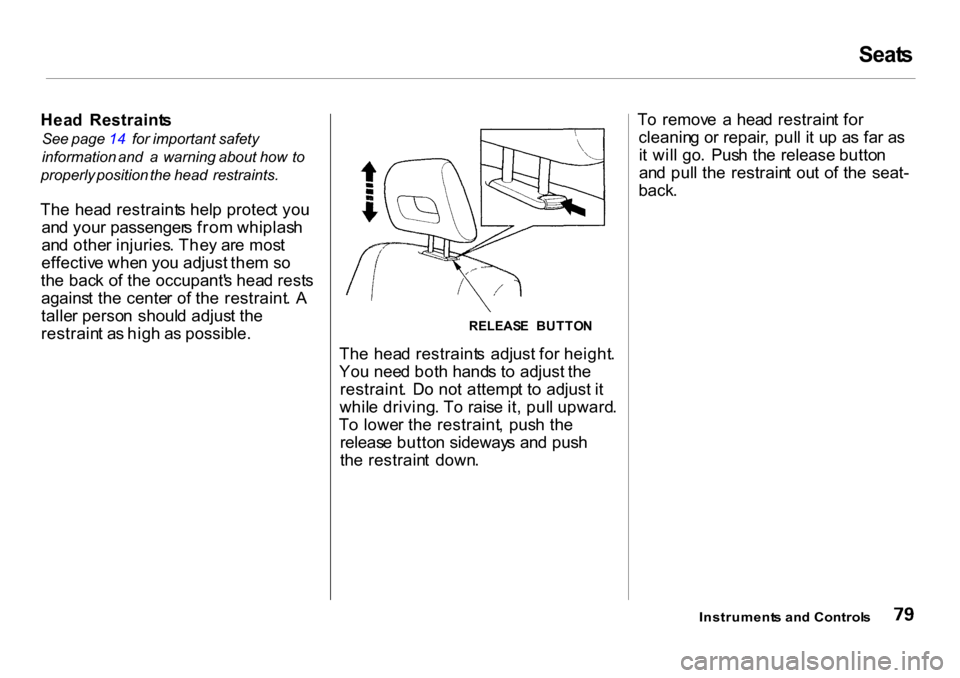
The hea d restraint s adjust for height .
Yo u nee d bot h hand s t o adjust the
restraint . D o no t attemp t t o adjust it
whil e driving . T o rais e it , pul l upward .
T o lowe r th e restraint , pus h th e
releas e butto n sideway s an d pus h
th e restrain t down . T
o remov e a hea d restrain t fo r
cleanin g o r repair , pul l i t u p a s fa r a s
i t wil l go . Pus h th e release button
an d pul l th e restrain t ou t o f th e seat-
back .
Instrument s an d Control s
RELEAS
E BUTTO N
Page 241 of 326
Tire
s
Inspectio n
Ever y tim e yo u chec k inflation , yo u
shoul d als o examin e th e tire s fo r
damage , foreig n objects , an d wear .
Yo u shoul d loo k for : Bump
s o r bulge s i n th e trea d o r
sid e o f th e tire . Replac e th e tir e i f
yo u fin d eithe r o f thes e conditions .Cuts
, splits , o r crack s i n th e sid e
o f th e tire . Replac e th e tir e i f yo u
ca n se e fabri c o r cord . Excessiv
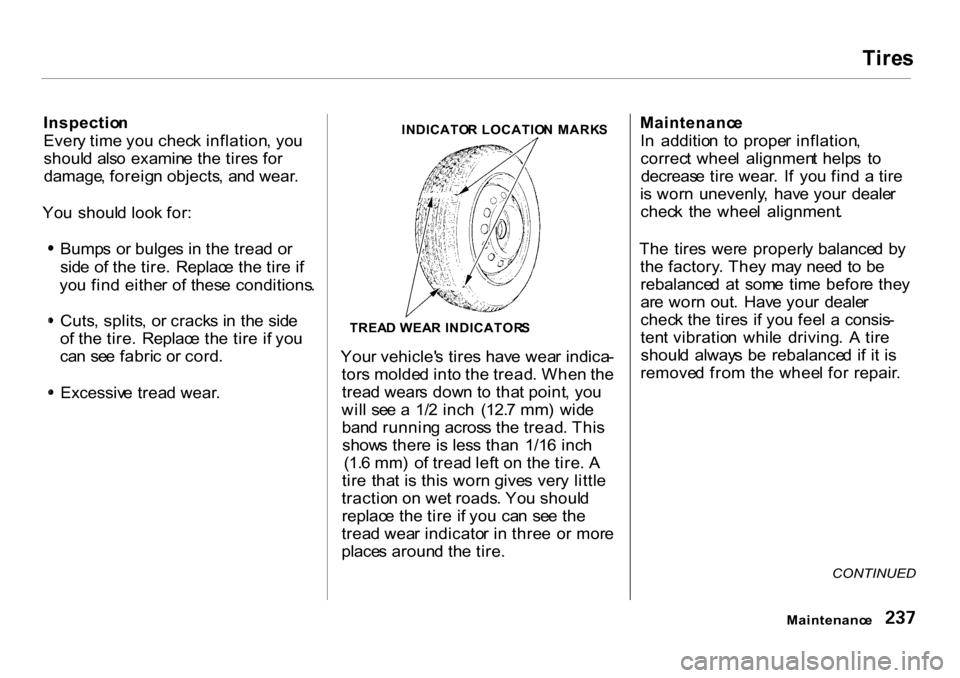
e trea d wear . INDICATO
R LOCATIO N MARK S
TREA D WEA R INDICATOR S
You r vehicle' s tire s hav e wea r indica -
tor s molde d int o th e tread . Whe n th e
trea d wear s dow n t o tha t point , yo u
wil l se e a 1/ 2 inc h (12. 7 mm ) wid e
ban d runnin g acros s th e tread . Thi s
show s ther e i s les s tha n 1/1 6 inc h
(1. 6 mm ) o f trea d lef t o n th e tire . A
tir e tha t i s thi s wor n give s ver y littl e
tractio n o n we t roads . Yo u shoul d
replac e th e tir e i f yo u ca n se e th e
trea d wea r indicato r i n thre e o r mor e
place s aroun d th e tire . Maintenanc
e
I n additio n t o prope r inflation ,
correc t whee l alignmen t help s t o
decreas e tir e wear . I f yo u fin d a tir e
i s wor n unevenly , hav e you r deale r
chec k th e whee l alignment .
Th e tire s wer e properl y balance d b y
th e factory . The y ma y nee d t o b e
rebalance d a t som e tim e befor e the y
ar e wor n out . Hav e you r deale r
chec k th e tire s i f yo u fee l a consis -
ten t vibratio n whil e driving . A tir e
shoul d alway s b e rebalance d i f i t i s
remove d fro m th e whee l fo r repair .
CONTINUED
Maintenanc e
Page 259 of 326
Appearanc
e Car e
Regula r cleanin g an d polishin g o f
you r Hond a help s t o kee p i t "new "
looking . Thi s sectio n give s yo u hint s
o n ho w to clea n you r vehicl e an d
preserv e it s appearance : th e paint ,
brightwork , wheel s an d interior . Als o
include d ar e severa l thing s yo u ca n
d o t o hel p preven t corrosion . Exterio
r Care................................. . 256
Washing..................................... . 256
Waxing....................................... 257
Aluminu m Wheels.................... . 257
Pain t Touch-up.......................... . 258
Interio r Care.................................. . 259
Carpeting................................... . 259
Floo r Mats................................. . 259
Fabric......................................... . 260
Vinyl........................................... . 260
Sea t Belts................................... . 261
Windows.................................... . 261
Ai r Fresheners.......................... . 261
Corrosio n Protection.................... . 262
Bod y Repairs................................. . 263
Appearanc e Car e
Page 262 of 326
Exterio
r Car e
Pain t Touch-u p
You r deale r ha s touch-u p pain t t o
matc h you r vehicle' s color . Th e colo r
cod e is printe d o n a sticke r o n th e
driver' s doorjamb . Tak e thi s cod e t o
you r deale r s o yo u ar e sur e t o ge t
th e correc t color . Inspec
t you r vehicl e frequentl y fo r
chip s o r scratche s i n th e paint .
Repai r the m righ t awa y t o preven t
corrosio n o f th e meta l underneath .
Us e th e touch-u p pain t onl y o n smal l
chip s an d scratches . Mor e extensiv e
pain t damag e shoul d b e repaire d b y
a professional .
Appearanc e Car e
Page 266 of 326
Corrosio
n Protectio n
Tw o factor s normall y contribut e t o
causin g corrosio n in you r vehicle :
1 . Moistur e trappe d in bod y cavities .
Dir t an d roa d sal t tha t collect s i n
hollow s o n th e undersid e o f th e
vehicl e stay s damp , promotin g
corrosio n in tha t area .
2 . Remova l o f pain t an d protectiv e
coating s fro m th e exterio r an d
undersid e o f th e vehicle . Man
y corrosion-preventiv e measure s
ar e buil t int o you r Honda . Yo u ca n
hel p kee p you r vehicl e fro m
corrodin g b y performin g som e
simpl e periodi c maintenance : Repai
r chip s an d scratche s i n th e
pain t a s soo n a s yo u discove r them . Inspec
t an d clea n ou t th e drai n
hole s i n th e botto m o f th e door s
an d body . Chec
k th e floo r covering s fo r
dampness . Carpetin g an d floo r
mat s ma y remai n dam p fo r a lon g
time , especiall y i n winter . Thi s
dampnes s ca n eventuall y caus e
th e floo r panel s t o corrode . Us
e a high-pressur e spra y t o clea n
th e undersid e o f you r vehicle . Thi s
i s especiall y importan t i n area s
tha t us e roa d sal t i n winter . I t i s
als o a goo d ide a in humi d climate s
an d area s subjec t t o sal t air .
Vehicle s equippe d wit h AB S hav e
a senso r an d wirin g a t eac h wheel .
B e carefu l no t t o damag e them . Hav
e th e corrosion-preventiv e
coating s o n th e undersid e o f you r
vehicl e inspecte d an d repaire d
periodically .
Appearanc e Car e
Page 267 of 326
Bod
y Repair s
Bod y repair s ca n affec t you r vehicle' s
resistanc e to corrosion . I f you r
vehicl e need s repair s afte r a collision ,
pa y clos e attentio n to th e part s use d
i n th e repai r an d th e qualit y o f th e
work .
Mak e sur e th e repai r facilit y use s
genuin e Hond a replacemen t bod y
parts . Som e companie s mak e shee t
meta l piece s tha t see m to duplicat e
th e origina l Hond a bod y parts , bu t
ar e actuall y inferio r i n fit , finish , an d
corrosio n resistance . Onc e installed ,
the y d o no t giv e th e sam e high -
qualit y appearance . Whe
n reportin g you r collisio n t o th e
insuranc e company , tel l the m yo u
wan t genuin e Hond a part s use d in
th e repair . Althoug h mos t insurer s
recogniz e th e qualit y o f origina l
parts , som e ma y tr y t o specif y tha t
th e repair s b e don e wit h othe r
availabl e parts . Yo u shoul d investi -
gat e thi s befor e an y repair s hav e
begun .
Tak e you r vehicl e t o you r authorize d
Hond a deale r fo r inspectio n afte r th e
repair s ar e completed . You r deale r
ca n mak e sur e tha t qualit y material s
wer e used , an d tha t corrosion -
preventiv e coating s wer e applie d t o
al l repaire d an d replace d parts .
Appearance Car e
Page 284 of 326
I
f You r Engin e Overheat s
6 . Loo k fo r an y obviou s coolan t leaks ,
suc h a s a spli t radiato r hose .
Everythin g i s stil l extremel y hot ,
s o us e caution . I f yo u fin d a leak , i t
mus t b e repaire d befor e yo u
continu e drivin g (se e Emergenc y
Towin g o n pag e 29 0).
7 . I f yo u don' t fin d a n obviou s leak ,
chec k th e coolan t leve l i n th e
radiato r reserv e tan k (se e pag e
144 ). I f th e leve l i s belo w th e
MI N mark , ad d coolan t t o halfwa y
betwee n th e MI N an d MA X marks .
8 . I f ther e wa s n o coolan t i n th e
reserv e tank , yo u ma y als o hav e t o
ad d coolan t t o th e radiator . Le t th e
engin e coo l dow n unti l th e pointe r
reache s th e middl e o f th e tempera -
tur e gauge , o r lower , befor e check -
in g th e radiator . 9
. Usin g glove s o r a larg e heav y
cloth , tur n th e radiato r ca p
counterclockwise , withou t pushin g
down , t o th e firs t stop . Thi s
release s an y remainin g pressur e i n
th e coolin g system . Afte r th e
pressur e releases , pus h dow n o n
th e ca p an d tur n it unti l i t come s
off .
10
. Star t th e engin e an d se t th e
temperatur e contro l dia l t o
maximum . Ad d coolan t t o th e
radiato r u p t o th e bas e o f th e fille r
neck . I f yo u d o no t hav e th e
prope r coolan t mixtur e available ,
yo u ca n ad d plai n water .
Remembe r t o hav e th e coolin g
syste m draine d an d refille d wit h
th e prope r mixtur e a s soo n a s yo u
can .
11 . Pu t th e radiato r ca p bac k o n
tightly . Ru n th e engin e an d watc h
th e temperatur e gauge . I f i t goe s
bac k t o th e re d mark , th e engin e
need s repair . (Se e Emergenc y
Towin g o n pag e 29 0.)
12.I f th e temperatur e stay s normal ,
chec k th e coolan t leve l i n th e
radiato r reserv e tank . I f i t ha s
gon e down , ad d coolan t t o th e
MA X mark . Pu t th e ca p bac k o n
tightly .
Takin g Car e o f th e Unexpecte d
Removin
g th e radiato r ca p
whil e th e engin e i s ho t ca n
caus e th e coolan t t o spra y out ,
seriousl y scaldin g you .
Alway s le t th e engin e an d
radiato r coo l dow n befor e
removin g th e radiato r cap .
Page 285 of 326
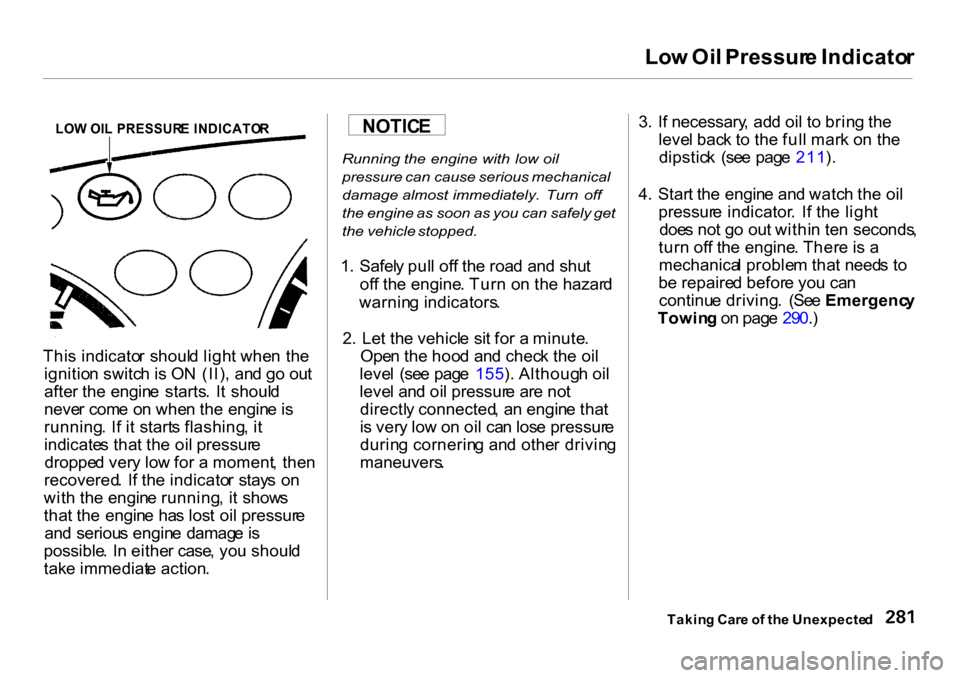
Lo
w Oi l Pressur e Indicato r
Thi s indicato r shoul d ligh t whe n th e
ignitio n switc h is O N (II) , an d g o ou t
afte r th e engin e starts . I t shoul d
neve r com e o n whe n th e engin e is
running . I f i t start s flashing , i t
indicate s tha t th e oi l pressur e
droppe d ver y lo w fo r a moment , the n
recovered . I f th e indicato r stay s o n
wit h th e engin e running , i t show s
tha t th e engin e ha s los t oi l pressur e
an d seriou s engin e damag e is
possible . I n eithe r case , yo u shoul d
tak e immediat e action .
Running
the engine with low oil
pressure can cause serious mechanical
damage almost immediately. Turn off
the engine as soon as you can safely get
the vehicle stopped.
1 . Safel y pul l of f th e roa d an d shu t
of f th e engine . Tur n o n th e hazar d
warnin g indicators .
2 . Le t th e vehicl e si t fo r a minute .
Ope n th e hoo d an d chec k th e oi l
leve l (se e pag e 155 ). Althoug h oi l
leve l an d oi l pressur e ar e no t
directl y connected , a n engin e tha t
i s ver y lo w o n oi l ca n los e pressur e
durin g cornerin g an d othe r drivin g
maneuvers .
3
. I f necessary , ad d oi l t o brin g th e
leve l bac k t o th e ful l mar k o n th e
dipstic k (se e pag e 211 ).
4 . Star t th e engin e an d watc h th e oi l
pressur e indicator . I f th e ligh t
doe s no t g o ou t withi n te n seconds ,
tur n of f th e engine . Ther e is a
mechanica l proble m tha t need s t o
b e repaire d befor e yo u ca n
continu e driving . (Se e Emergenc y
Towin g o n pag e 29 0.)
Takin g Car e o f th e Unexpecte d
NOTIC
E
LO W OI L PRESSUR E INDICATO R
Page 287 of 326
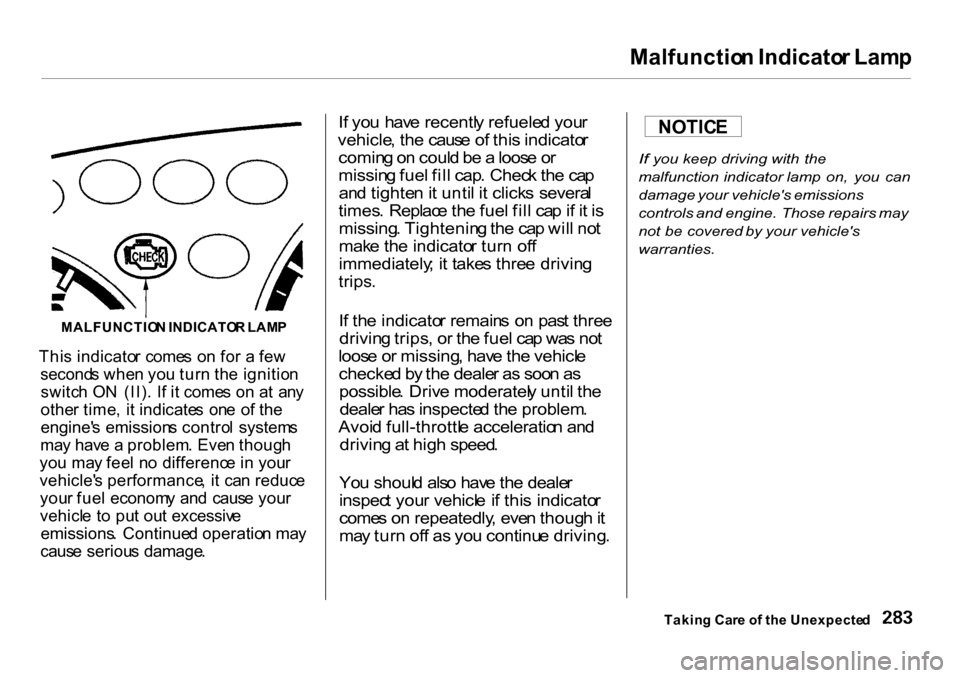
Malfunctio
n Indicato r Lam p
Thi s indicato r come s o n fo r a fe w
second s whe n yo u tur n th e ignitio n
switc h O N (II) . I f i t come s o n a t an y
othe r time , i t indicate s on e o f th e
engine' s emission s contro l system s
ma y hav e a problem . Eve n thoug h
yo u ma y fee l n o differenc e i n you r
vehicle' s performance , i t ca n reduc e
you r fue l econom y an d caus e you r
vehicl e t o pu t ou t excessiv e
emissions . Continue d operatio n ma y
caus e seriou s damage .
I
f yo u hav e recentl y refuele d you r
vehicle , th e caus e o f thi s indicato r
comin g o n coul d b e a loos e o r
missin g fue l fil l cap . Chec k th e ca p
an d tighte n it unti l i t click s severa l
times . Replac e th e fue l fil l ca p if i t i s
missing . Tightenin g th e ca p wil l no t
mak e th e indicato r tur n of f
immediately ; i t take s thre e drivin g
trips .
I f th e indicato r remain s o n pas t thre e
drivin g trips , o r th e fue l ca p wa s no t
loos e o r missing , hav e th e vehicl e
checke d b y th e deale r a s soo n a s
possible . Driv e moderatel y unti l th e
deale r ha s inspecte d th e problem .
Avoi d full-throttl e acceleratio n an d
drivin g a t hig h speed .
Yo u shoul d als o hav e th e deale r
inspec t you r vehicl e if thi s indicato r
come s o n repeatedly , eve n thoug h it
ma y tur n of f a s yo u continu e driving .
If you keep driving with the
malfunction indicator lamp on, you can
damage your vehicle's emissions
controls and engine. Those repairs may
not be covered by your vehicle's
warranties.
Takin g Car e
o
f th e Unexpecte d
NOTIC
E
MALFUNCTIO N INDICATO R LAM P