ECU HONDA CR-V 2007 RD1-RD5, RE7 / 3.G Owner's Manual
[x] Cancel search | Manufacturer: HONDA, Model Year: 2007, Model line: CR-V, Model: HONDA CR-V 2007 RD1-RD5, RE7 / 3.GPages: 352, PDF Size: 5.77 MB
Page 103 of 352
Adjust the front seats forward as
far as possible. Pull up the seat-
back angle adjustment lever and
pivot the seat-back backward until
it is level with the rear seat
cushion.
Adjust the rear seat-back to the
desired position.
Reverse this procedure to return the
front and rear seats to the upright
position. Make sure you install the
head restraints and securely lock the
seats before driving.
When you return the seat-back to its
upright position, hold the seat-back
to keep it from going up too quickly. Ea
ch rear seat-back can be folded
down separately to give more cargo
room. With either of the outer seat-
backs folded-down, you can still
carry a passenger in the rear seat.
With the center seat-back folded-
down, either outer seating position
can be used.
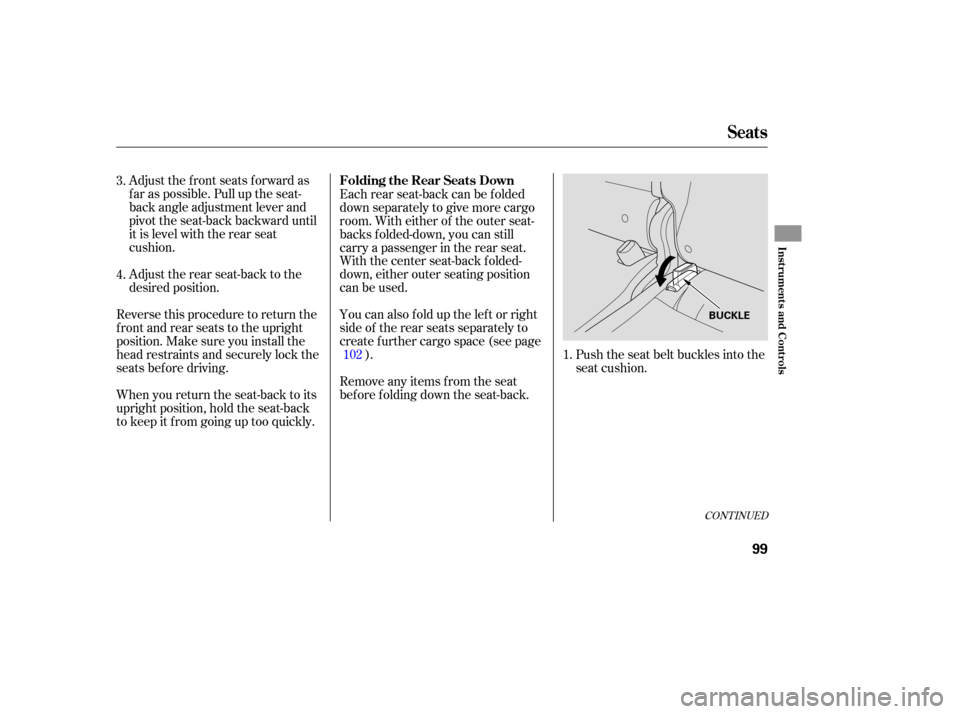
Push the seat belt buckles into the
seat cushion.
You can also fold up the left or right
side of the rear seats separately to
create further cargo space (see page
).
Remove any items from the seat
before folding down the seat-back.
3.
4.
1.
102
CONT INUED
Folding the Rear Seats Down
Seats
Inst rument s and Cont rols
99
BUCKLE
Page 104 of 352
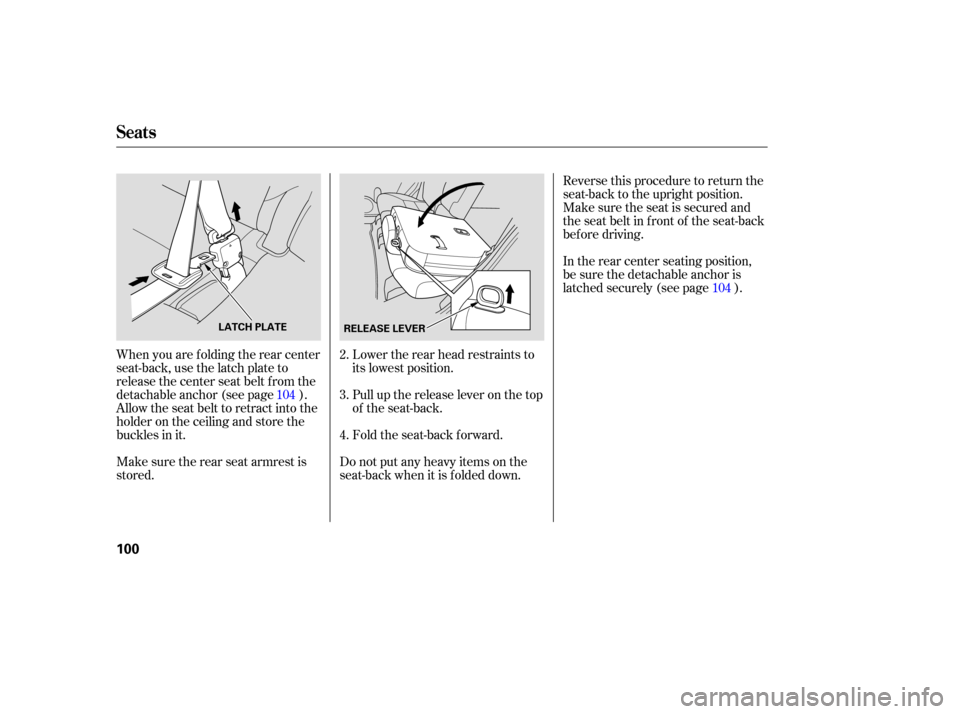
Fold the seat-back forward.
Do not put any heavy items on the
seat-back when it is folded down.
When
you are folding the rear center
seat-back, use the latch plate to
release the center seat belt from the
detachable anchor (see page ).
Allow the seat belt to retract into the
holder on the ceiling and store the
buckles in it.
Make sure the rear seat armrest is
stored. Lower
the rear head restraints to
its lowest position.
Pull up the release lever on the top
of the seat-back. Reverse
this procedure to return the
seat-b ack to the upright position.
Make sure the seat is secured and
the seat belt in front of the seat- back
befo re driving.
In the rear center seating position,
be sure the detachable anchor is
latched securely (see page ).
2.
3.
4.
104 104
Seats
100
LATCH PLATE
RELEASE LEVER
Page 105 of 352
Make sure that the folded down rear
seat does not interfere with the front
passenger’s seat-back. This will
cause the front passenger’s weight
sensors and the front passenger’s
seat belt reminder indicator to work
improperly (see pages and ).
Also check the passenger airbag of f
indicator to assure proper operation
of the passenger’s front airbag. When any seat-back is f olded down,
do not use the dual deck cargo shelf
(if equipped).
Make sure all items in the cargo area
are secured. Loose items can f ly
f orward and cause injury if you have
to brake hard (See
on page ).
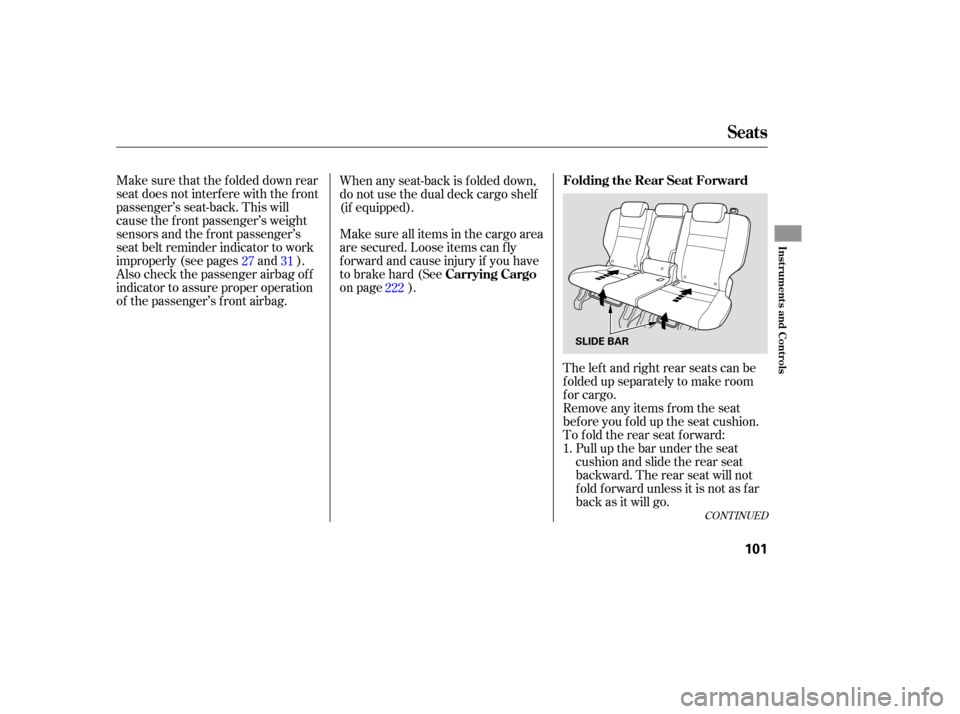
The lef t and right rear seats can be
f olded up separately to make room
for cargo.
Remove any items from the seat
beforeyoufolduptheseatcushion.
To f old the rear seat f orward:Pull up the bar under the seat
cushion and slide the rear seat
backward. The rear seat will not
fold forward unless it is not as far
back as it will go.
27 31
222
1.
CONT INUED
Seats
Carrying CargoFolding the Rear Seat Forward
Inst rument s and Cont rols
101
SLIDE BAR
Page 106 of 352
Followsteps1through4onpagef or f olding down the seat-
back.
Lower the center seat-back bef ore
f olding the passenger’s side seat
forward.
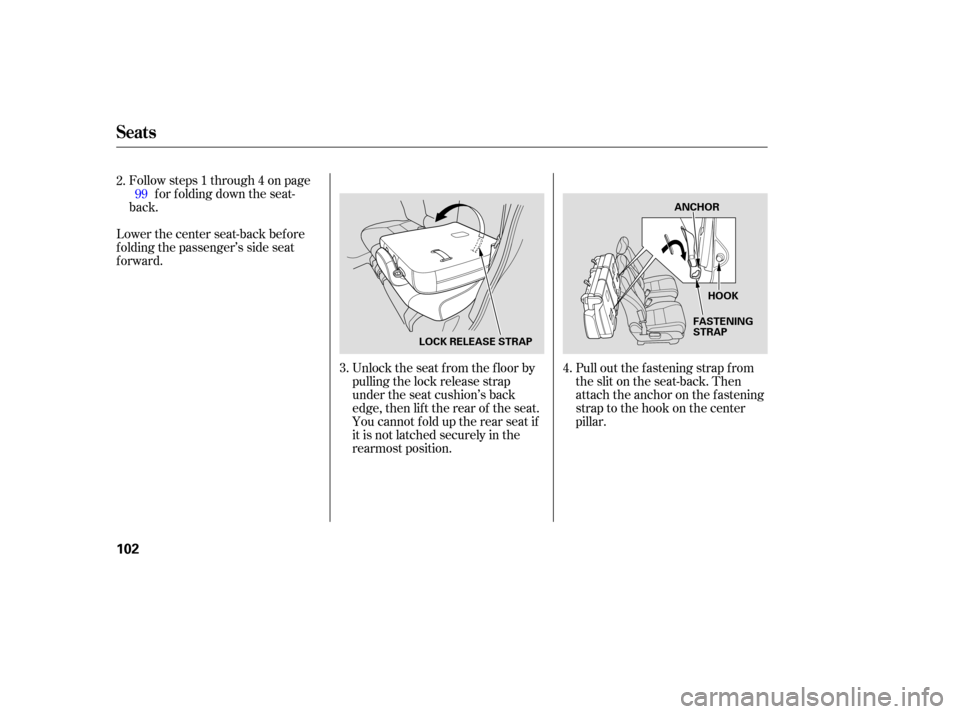
Unlock the seat f rom the f loor by
pulling the lock release strap
under the seat cushion’s back
edge, then lif t the rear of the seat.
You cannot fold up the rear seat if
it is not latched securely in the
rearmost position.Pull out the f astening strap f rom
the slit on the seat-back. Then
attach the anchor on the fastening
strap to the hook on the center
pillar.
2.
3.
99
4.
Seats
102
LOCK RELEASE STRAPANCHOR
HOOK
FASTENING
STRAP
Page 107 of 352
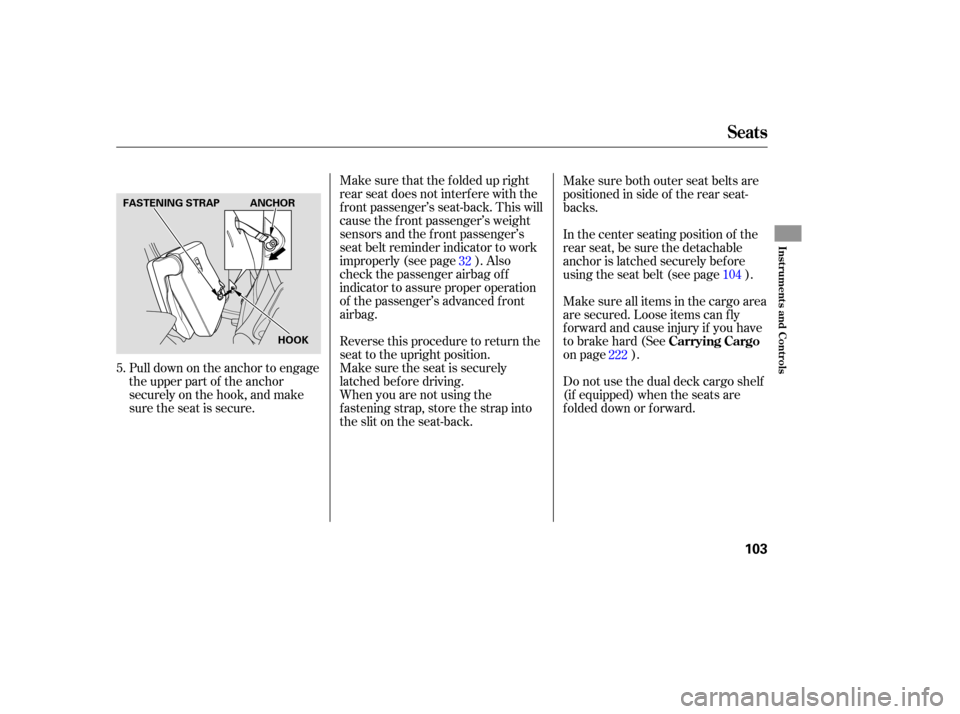
Pull down on the anchor to engage
the upper part of the anchor
secu rely on the hook, and make
sure the seat is secure. Make
sure that the folded up right
rear seat does not interfere with the
front passenger’s seat-back. This will
cause the front passenger’s weight
sensors and the front passenger’s
seat belt reminder indicator to work
improperly (see page ). Also
check the passenger airbag off
indicator to assu re proper operation
of the passenger’s advanced front
airbag.
Reverse this procedure to return the
seat to the upright position.
Make sure the seat is securely
latched before driving.
When you are not using the
fastening strap, store the strap into
the slit on the seat-back. Make
sure both outer seat belts are
positioned in side of the rear seat-
backs.
In the center seating position of the
rear seat, be sure the deta chable
anchor is latched securely bef ore
using the seat belt (see page ).
Make sure all items in the cargo area
are secured. Loose items can f ly
f orward and cause injury if you have
to brake hard (See
on page ).
Do not use the dual deck cargo shelf
(if equipped) when the seats are
folded down or forward.
5. 104
222
32
Seats
Carrying Cargo
Inst rument s and Cont rols
103
HOOK
ANCHOR
FASTENING STRAP
Page 108 of 352
Tug on the seat belt to verify that
the detachable anchor is securely
latched. Make sure the seat belt is
not twisted.
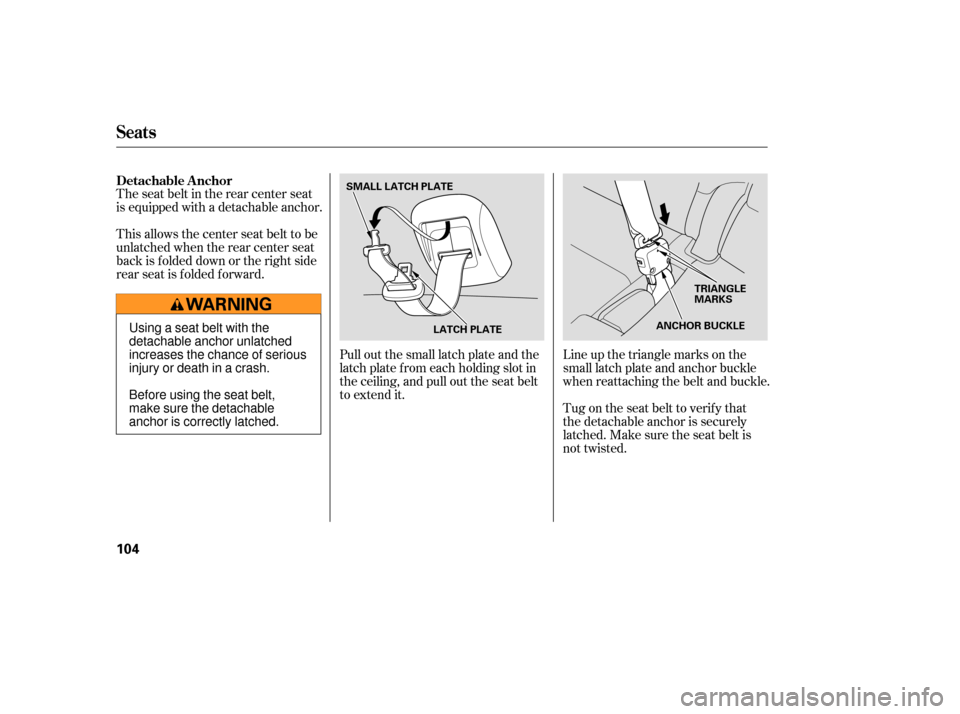
The seat belt in the rear center seat
is equipped with a detachable anchor.
Pull out the small latch plate and the
latch plate f rom each holding slot in
the ceiling, and pull out the seat belt
to extend it.Line up the triangle marks on the
small latch plate and anchor buckle
when reattaching the belt and buckle.
This allows the center seat belt to be
unlatched when the rear center seat
back is f olded down or the right side
rear seat is folded forward. Detachable Anchor
Seats
104
TRIANGLE
MARKS
ANCHOR BUCKLE
SMALL LATCH PLATE
LATCH PLATE
Using a seat belt with the
detachable anchor unlatched
increases the chance of serious
injury or death in a crash.
Before using the seat belt,
make sure the detachable
anchor is correctly latched.
Page 115 of 352
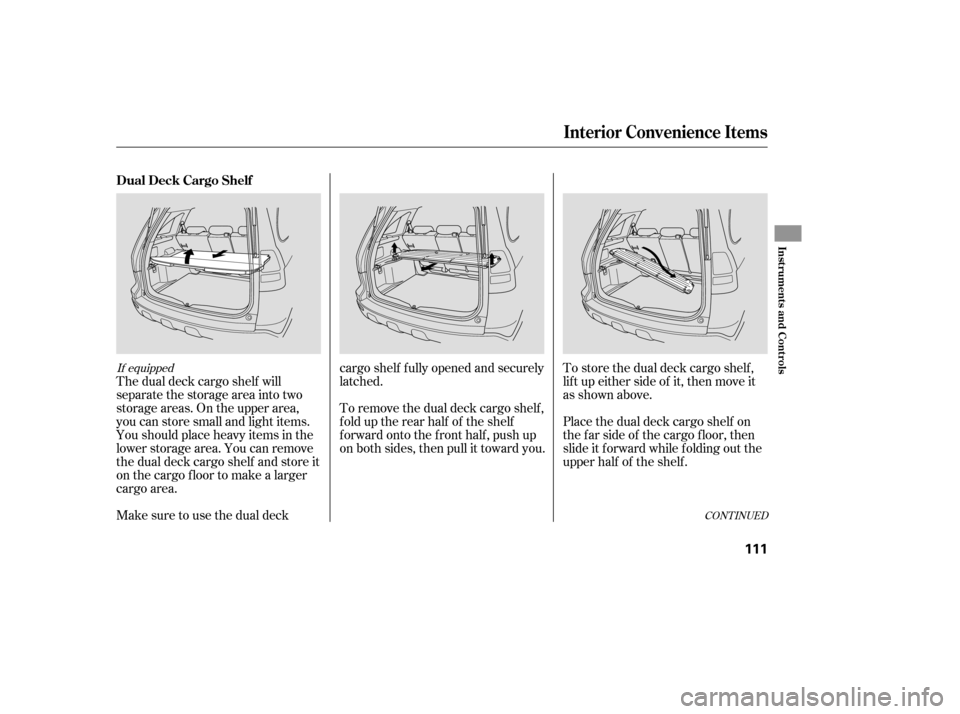
The dual deck cargo shelf will
separate the storage area into two
storage areas. On the upper area,
you can store small and light items.
Youshouldplaceheavyitemsinthe
lower storage area. You can remove
the dual deck cargo shelf and store it
on the cargo f loor to make a larger
cargo area.To store the dual deck cargo shelf ,
lif t up either side of it, then move it
as shown above.
Make sure to use the dual deck cargo shelf f ully opened and securely
latched.
To remove the dual deck cargo shelf ,
f old up the rear half of the shelf
forward onto the front half, push up
on both sides, then pull it toward you.
Place the dual deck cargo shelf on
the f ar side of the cargo f loor, then
slide it f orward while f olding out the
upperhalfoftheshelf.
If equipped
CONT INUED
Interior Convenience Items
Dual Deck Cargo Shelf
Inst rument s and Cont rols
111
Page 116 of 352
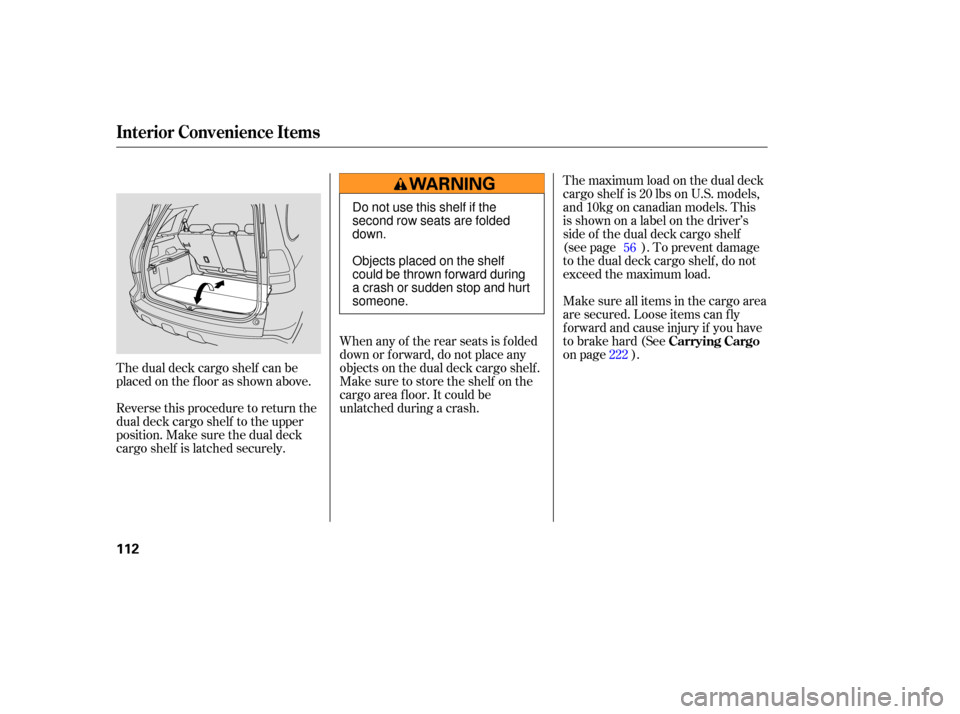
The dual deck cargo shelf can be
placed on the floor as shown above.
Reverse this procedure to return the
dual deck cargo shelf to the upper
position. Make sure the dual deck
cargo shelf is latched securely. The
maximum load on the dual deck
cargo shelf is 20 lbs on U.S. model s,
and10kgoncanadianmodels.This
isshownonalabelonthedriver’s
side of the dual deck cargo shelf
(see page ). To prevent damage
to the dual deck cargo shelf , do not
exceed the maximum load.
Make sure all items in the cargo area
are secured. Loose items can f ly
f orward and cause injury if you have
to brake hard (See
on page ).
When any of the rear seats is folded
down or f orward, do not place any
objects on the dual deck cargo shelf .
Make sure to store the shelf on the
cargo area f loor. It could be
unlatched during a crash. 56
222
Interior Convenience Items
Carrying Cargo
112
Do not use this shelf if the
second row seats are folded
down.
Objects placed on the shelf
could be thrown forward during
a crash or sudden stop and hurt
someone.
Page 127 of 352

The heating and air conditioning
system in your vehicle provides a
comf ortable driving environment in
all weather conditions.
The standard audio system has
many f eatures. This section
describes those f eatures and how to
use them.
Your vehicle has an anti-theft audio
system that requires a code number
to enable it.
The security system helps to
discourage vandalism and thef t of
your vehicle..............
Vents, Heating, and A/C . 124
................................
Audio System .129
..........
Playing the AM/FM Radio . 131
.................................
Playing a Disc .135
........
Disc Player Error Messages . 142
...........
Playing the AM/FM Radio . 143
.
Playing the XM
Satellite Radio . 147
..................................
Playing Discs .152
........
Disc Player Error Messages . 159
...........
Playing the AM/FM Radio . 160
.
Playing the XM
Satellite Radio . 166
..................................
Playing a disc .172
....................................
CD Changer .181
...........................
Playing a PC card .188
............
AM/FM Radio Reception . 200
..................
Protecting Your Discs . 202
................
Remote Audio Controls . 203
.................
Radio Thef t Protection . 205
..........................
Setting the Clock .206
............................
Security System .207
...
Rearview Camera and Monitor . 208
...............................
Cruise Control .209
LX model
EX and EX-L models without navigation system
EX-L Models with navigation system
Features
Features
123
Page 211 of 352
If equipped
Once the security system is set,
opening any door without using the
key or the remote transmitter, the
hood, or the tailgate will cause the
system to alarm. The
security system will not set if
the hood, tailgate, or any of the
doors are not fully closed. If the
system will not set, check the doors
and the tailgate. You can also check
the open monitor on the instrument
panel (see page ), to see if the
doors and the tailgate are f ully
closed. Since it is not part of the
monitor display, manually check the
hood.
Use the remote transmitter
to quickly check that the hood, the
tailgate, and all doors are closed.
Push the lock button twice within 5
seconds. There should be an audible
conf irmation beep.
Do not attempt to alter this system
or add other devices to it.
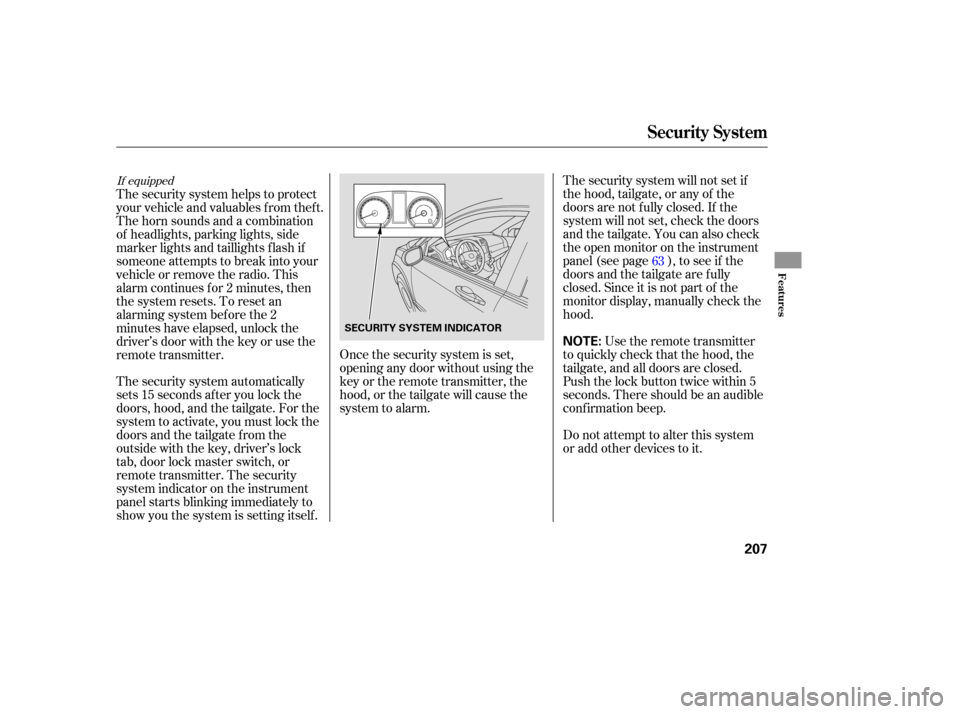
The security system helps to protect
your vehicle and valuables f rom thef t.
The horn sounds and a combination
of headlights, parking lights, side
marker lights and taillights f lash if
someone attempts to break into your
vehicleorremovetheradio.This
alarm continues f or 2 minutes, then
the system resets. To reset an
alarming system before the 2
minutes have elapsed, unlock the
driver’s door with the key or use the
remote transmitter.
The security system automatically
sets 15 seconds after you lock the
doors, hood, and the tailgate. For the
system to activate, you must lock the
doorsandthetailgatefromthe
outside with the key, driver’s lock
tab, door lock master switch, or
remote transmitter. The security
system indicator on the instrument
panel starts blinking immediately to
show you the system is setting itself . 63
Security System
Features
207
NOTE:
SECURITY SYSTEM INDICATOR