engine HONDA CR-V 2012 RM1, RM3, RM4 / 4.G Owner's Manual
[x] Cancel search | Manufacturer: HONDA, Model Year: 2012, Model line: CR-V, Model: HONDA CR-V 2012 RM1, RM3, RM4 / 4.GPages: 361, PDF Size: 7.25 MB
Page 119 of 361
118
uuOperating the Switches Around the Steering WheeluRear Defogger/Heated Door Mirror*
Button
Controls
Rear Defogger/Heated Door Mirror *
Button
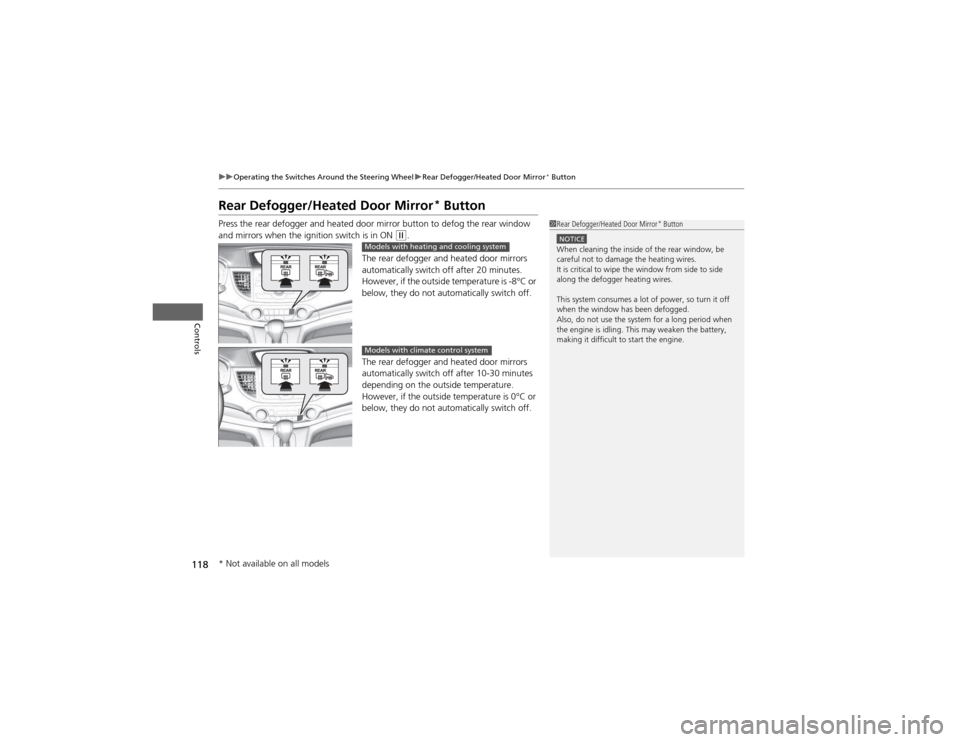
Press the rear defogger and heated door mirror button to defog the rear window
and mirrors when the ignition switch is in ON
(w .
The rear defogger and heated door mirrors
automatically switch off after 20 minutes.
However, if the outside temperature is -8°C or
below, they do not automatically switch off.
The rear defogger and heated door mirrors
automatically switch off after 10-30 minutes
depending on the outside temperature.
However, if the outside temperature is 0°C or
below, they do not automatically switch off.1Rear Defogger/Heated Door Mirror *
Button
NOTICEWhen cleaning the inside of the rear window, be careful not to damage the heating wires.
It is critical to wipe the window from side to side
along the defogger heating wires.
This system consumes a lot of power, so turn it off
when the window has been defogged.
Also, do not use the system for a long period when
the engine is idling. This may weaken the battery,
making it difficult to start the engine.Models with heating and cooling system
Models with climate control system
* Not available on all models
Page 120 of 361
119
uuOperating the Switches Around the Steering WheeluECON Button
Controls
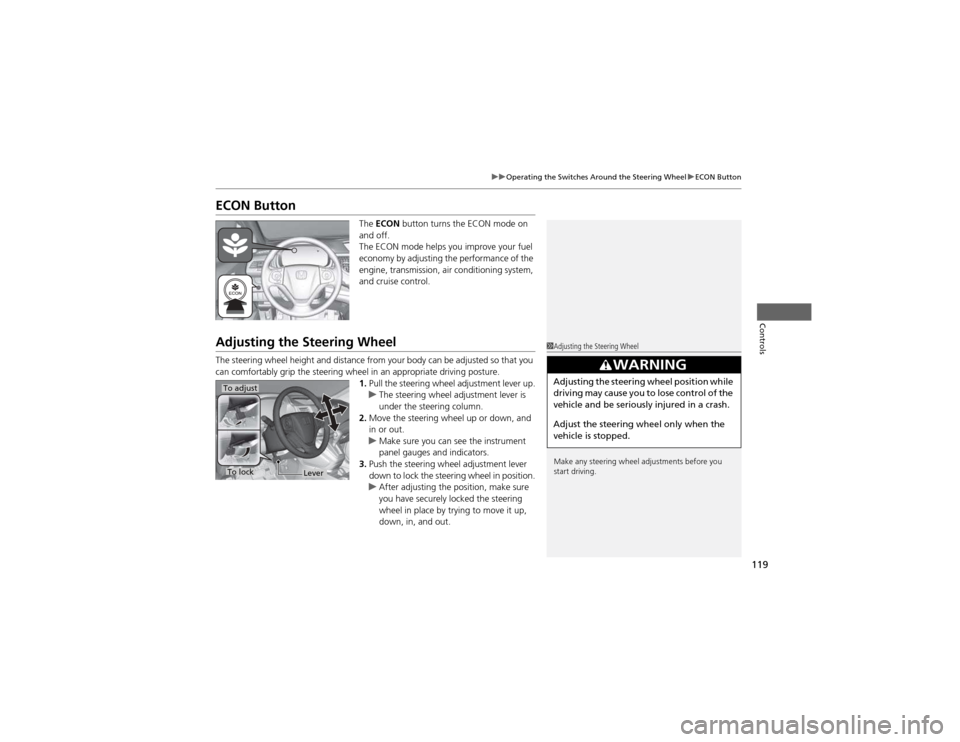
ECON ButtonThe ECON button turns the ECON mode on
and off.
The ECON mode helps you improve your fuel
economy by adjusting the performance of the
engine, transmission, air conditioning system,
and cruise control.
Adjusting the Steering Wheel
The steering wheel height and distance from your body can be adjusted so that you
can comfortably grip the steering wheel in an appropriate driving posture. 1.Pull the steering wheel adjustment lever up.
uThe steering wheel adjustment lever is
under the steering column.
2. Move the steering wheel up or down, and
in or out.
uMake sure you can see the instrument
panel gauges and indicators.
3. Push the steering wheel adjustment lever
down to lock the steering wheel in position.
uAfter adjusting the position, make sure
you have securely locked the steering
wheel in place by trying to move it up,
down, in, and out.
1Adjusting the Steering Wheel
Make any steering wheel adjustments before you
start driving.
3WARNING
Adjusting the steering wheel position while
driving may cause you to lose control of the
vehicle and be seriously injured in a crash.
Adjust the steering wheel only when the
vehicle is stopped.To adjust
To lockLever
Page 129 of 361
uuAdjusting the SeatsuAdjusting the Seat Positions
128
Controls
After all occupants have adjusted their seats and head restraints, and put on their
seat belts, it is very important that they continue to sit upright, well back in their
seats, with their feet on the floor, until the vehicle is safely parked and the engine is
off.
Sitting improperly can increase the chance of injury during a crash. For example, if
an occupant slouches, lies down, turns sideways, sits forward, leans forward or
sideways, or puts one or both feet up, the chance of injury during a crash is greatly
increased.
In addition, an occupant who is out of position in the front seat can be seriously or
fatally injured in a crash by striking interior parts of the vehicle or being struck by an inflating front airbag.
■Maintain a Proper Sitting Position1Maintain a Proper Sitting Position
3WARNING
Sitting improperly or out of position can
result in serious injury or death in a crash.
Always sit upright, well back in the seat,
with your feet on the floor.
Page 136 of 361
Continued135
uuInterior Lights/Interior Convenience ItemsuInterior Convenience Items
Controls
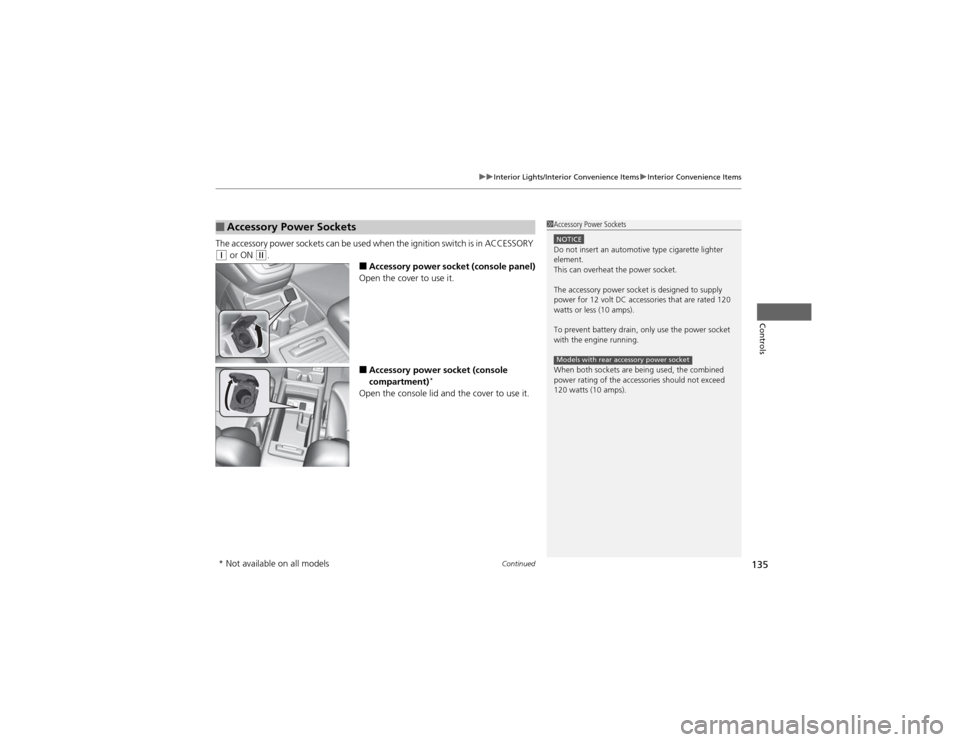
The accessory power sockets can be used when the ignition switch is in ACCESSORY (q or ON (w .
■Accessory power socket (console panel)
Open the cover to use it.
■ Accessory power socket (console
compartment) *
Open the console lid and the cover to use it.
■Accessory Power Sockets1Accessory Power Sockets
NOTICEDo not insert an automotive type cigarette lighter
element.
This can overheat the power socket.
The accessory power socket is designed to supply
power for 12 volt DC accessories that are rated 120
watts or less (10 amps).
To prevent battery drain, only use the power socket
with the engine running.
When both sockets are being used, the combined
power rating of the accessories should not exceed
120 watts (10 amps).
Models with rear accessory power socket
* Not available on all models
Page 140 of 361
Continued139
uuInterior Lights/Interior Convenience ItemsuInterior Convenience Items
Controls
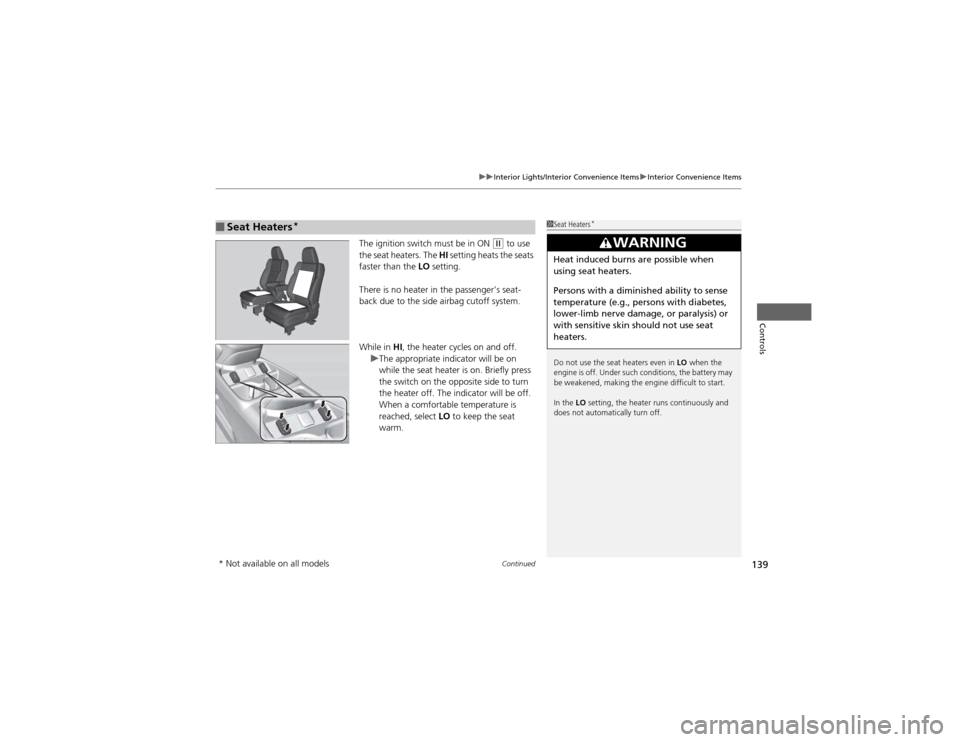
The ignition switch must be in ON (w to use
the seat heaters. The HI setting heats the seats
faster than the LO setting.
There is no heater in the passenger's seat-
back due to the side airbag cutoff system.
While in HI, the heater cycles on and off.
uThe appropriate indicator will be on
while the seat heater is on. Briefly press
the switch on the opposite side to turn
the heater off. The indicator will be off.
When a comfortable temperature is
reached, select LO to keep the seat
warm.
■Seat Heaters *1Seat Heaters
*
Do not use the seat heaters even in LO when the
engine is off. Under such conditions, the battery may
be weakened, making the engine difficult to start. In the LO setting, the heater runs continuously and
does not automatically turn off.
3WARNING
Heat induced burns are possible when
using seat heaters.
Persons with a diminish ed ability to sense
temperature (e.g., persons with diabetes,
lower-limb nerve damage, or paralysis) or
with sensitive skin should not use seat
heaters.
* Not available on all models
Page 144 of 361
Continued143
uuHeating and Cooling System*uUsing Vents, Heating and A/C
Controls
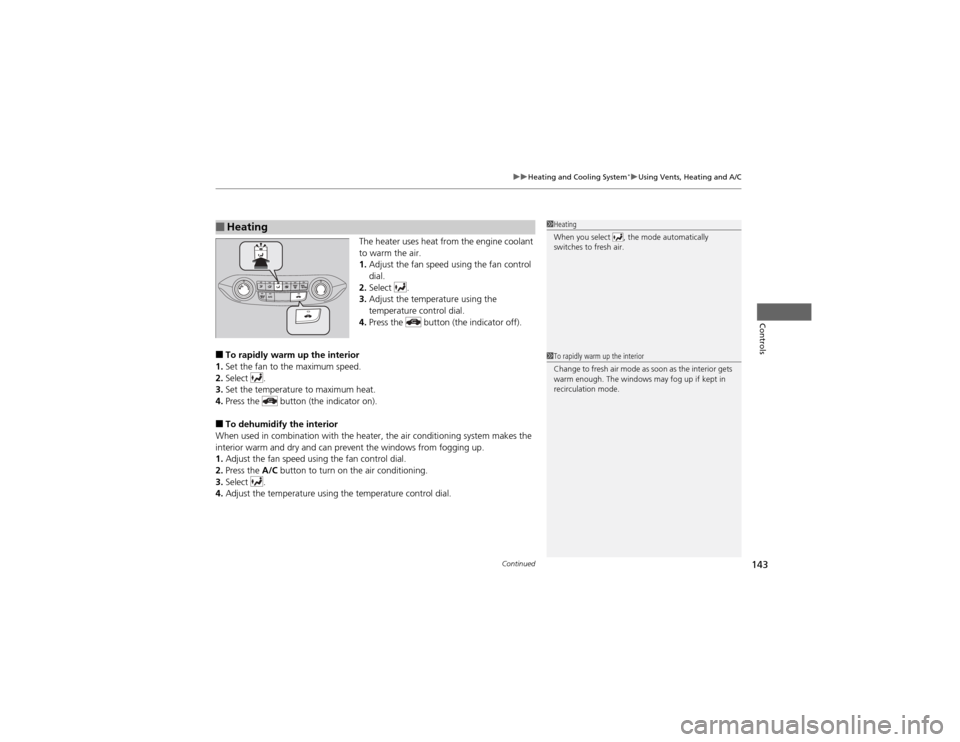
The heater uses heat from the engine coolant
to warm the air. 1.
Adjust the fan speed using the fan control
dial.
2. Select .
3. Adjust the temperature using the
temperature control dial.
4. Press the button (the indicator off).
■ To rapidly warm up the interior
1. Set the fan to the maximum speed.
2. Select .
3. Set the temperature to maximum heat.
4. Press the button (the indicator on).
■ To dehumidify the interior
When used in combination with the heater, the air conditioning system makes the
interior warm and dry and can prevent the windows from fogging up. 1. Adjust the fan speed using the fan control dial.
2. Press the A/C button to turn on the air conditioning.
3. Select .
4. Adjust the temperature using the temperature control dial.
■Heating1Heating
When you select , the mode automatically
switches to fresh air.
1To rapidly warm up the interior
Change to fresh air mode as soon as the interior gets
warm enough. The windows may fog up if kept in
recirculation mode.
Page 146 of 361
145
Continued
Controls
Climate Control System *
Using Automatic Climate Control
The automatic climate control system maintains the interior temperature you select.
The system also selects the proper mix of heated or cooled air that will as quickly as
possible, raise or lower the interior temperature to your preference.
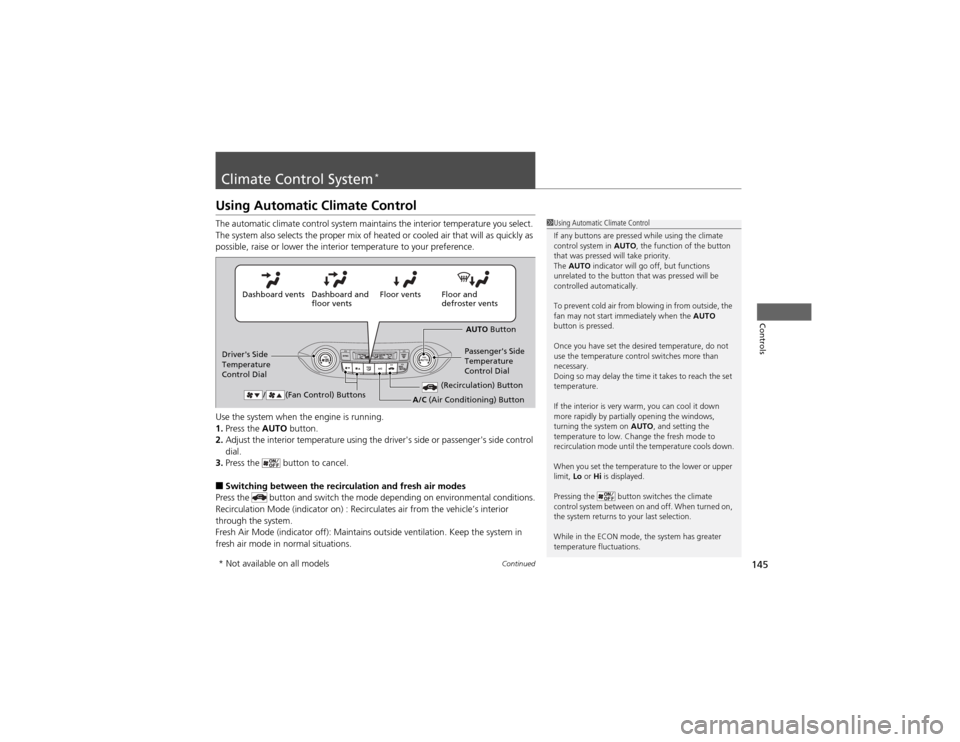
Use the system when the engine is running. 1.
Press the AUTO button.
2. Adjust the interior temperature using the driver's side or passenger's side control dial.
3. Press the button to cancel.
■ Switching between the recirculation and fresh air modes
Press the button and switch the mode depending on environmental conditions.
Recirculation Mode (indicat or on) : Recirculates air from the vehicle’s interior
through the system.
Fresh Air Mode (indicator off): Maintains outside ventilation. Keep the system in
fresh air mode in normal situations.
1Using Automatic Climate Control
If any buttons are pressed while using the climate
control system in AUTO, the function of the button
that was pressed will take priority.
The AUTO indicator will go off, but functions
unrelated to the button that was pressed will be
controlled automatically.
To prevent cold air from blowing in from outside, the
fan may not start immediately when the AUTO
button is pressed.
Once you have set the desired temperature, do not
use the temperature control switches more than necessary.
Doing so may delay the time it takes to reach the set
temperature.
If the interior is very warm, you can cool it down
more rapidly by partially opening the windows,
turning the system on AUTO, and setting the
temperature to low. Change the fresh mode to
recirculation mode until the temperature cools down.
When you set the temperature to the lower or upper
limit, Lo or Hi is displayed.
Pressing the button switches the climate
control system between on and off. When turned on,
the system returns to your last selection.
While in the ECON mode, the system has greater
temperature fluctuations.
Floor and
defroster vents
Floor vents
Dashboard and
floor vents
Dashboard vents
AUTO Button
Driver's Side
Temperature
Control Dial Passenger's Side
Temperature
Control Dial
/ (Fan Control) Buttons
(Recirculation) Button
A/C (Air Conditioning) Button
* Not available on all models
Page 226 of 361
225
Driving
This chapter discusses driving, refueling, and information on items such as accessories.
Before Driving Driving Preparation .......................... 226
Maximum Load Limit........................ 229
Towing a Trailer Towing Preparation .......................... 231
Driving Safely with a Trailer .............. 234
Towing Your Vehicle ........................ 235
Off-Highway Driving Guidelines General Information ......................... 237
Important Safety Precautions............ 237
Avoiding Trouble ............................. 238
When Driving Starting the Engine .......................... 239
Precautions While Driving................. 241 Automatic Transmission ................... 242
Shifting ............................................ 243
Cruise Control ................................. 245
VSA® (Vehicle Stability Assist), aka ESC
(Electronic Stability Control), System ...... 248
REAL TIME AWD with Intelligent Control System™ *
......................................... 250
TPMS (Tire Pressure Monitoring System) ... 250Tire Pressure Monitoring System (TPMS) -
Required Federal Explanation ......... 251
Braking Brake System ................................... 253
ABS (Anti-lock Brake System) ........... 255 Brake Assist System ......................... 256
Parking Your Vehicle When Stopped ................................ 257
Parking ............................................ 257
Multi-View Rear Camera .................. 258
Refueling
Fuel Information .............................. 259
How to Refuel ................................. 260
Fuel Economy .................................... 262
Improving Fuel Economy .................. 262
Accessories and Modifications Accessories ...................................... 263
Modifications................................... 263
* Not available on all models
Page 227 of 361
226
Driving
Before Driving
Driving Preparation
Check the following items before you start driving. •Make sure there are no obstructions on the windows, door mirrors, exterior
lights, or other parts of the vehicle.
uRemove any frost, snow, or ice.uRemove any snow on the roof, as this can slip down and obstruct your field of
vision while driving. If frozen solid, remove ice once it has softened.
uWhen removing ice from around the wheels, be sure not to damage the wheel
or wheel components.
• Make sure the hood is securely closed.
uIf the hood opens while driving, your front view will be blocked.
• Make sure the tires are in good condition.
uCheck air pressure, and check for damage and excessive wear.
2 Checking and Maintaining Tires P. 296
• Make sure there are no people or objects behind or around the vehicle.
uThere are blind spots from the inside.
■Exterior Checks1Exterior Checks
NOTICEWhen doors are frozen shut, use warm water around
the door edges to melt any ice. Do not try to force
them open, as this can damage the rubber trim
around the doors. When done, wipe dry to avoid further freezing.
Do not pour warm water into the key cylinder.
You will be unable to insert key if the water freezes in
the hole.
Heat from the engine and exhaust can ignite
flammable materials left under the hood, causing a
fire. If you've parked your vehicle for an extended
period, inspect and remove any debris that may have
collected, such as dried grass and leaves that have
fallen or have been carried in for use as a nest by a
small animal. Also check under the hood for leftover
flammable materials after you or someone else has
performed maintenance on your vehicle.
Page 232 of 361
231
Continued
Driving
Towing a Trailer
Towing Preparation
Your vehicle can tow a trailer if you carefully observe the load limits, use the proper
equipment, and follow the towing guidelines. Check the load limits before driving.
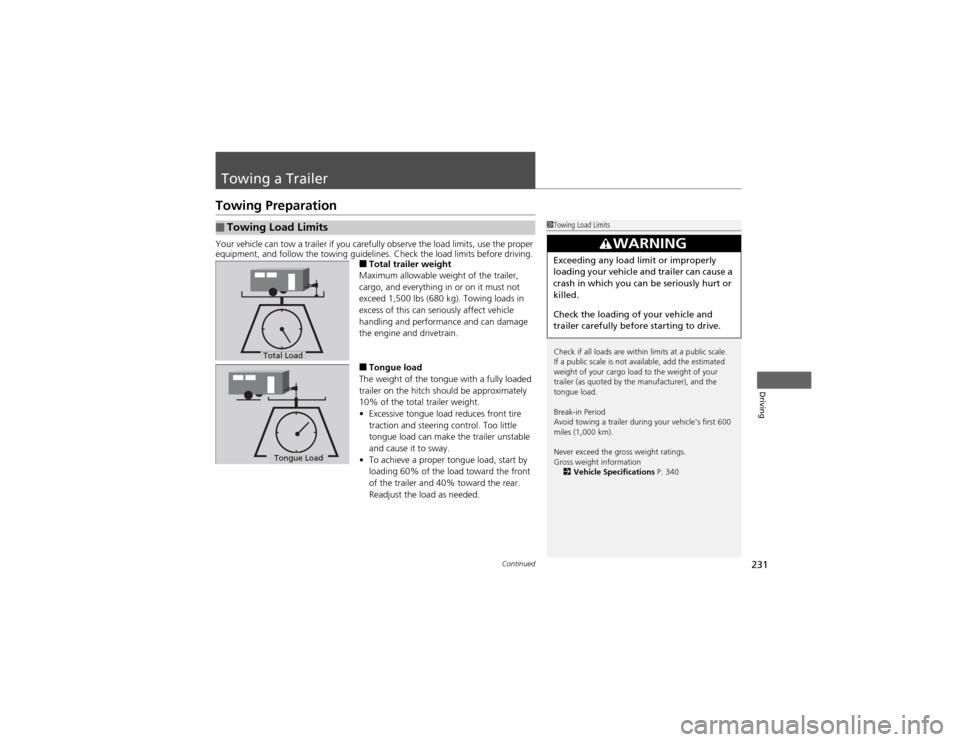
■Total trailer weight
Maximum allowable weight of the trailer,
cargo, and everything in or on it must not
exceed 1,500 lbs (680 kg). Towing loads in
excess of this can seriously affect vehicle
handling and performance and can damage
the engine and drivetrain.
■ Tongue load
The weight of the tongue with a fully loaded
trailer on the hitch should be approximately
10% of the total trailer weight. • Excessive tongue load reduces front tire
traction and steering control. Too little
tongue load can make the trailer unstable
and cause it to sway.
• To achieve a proper tongue load, start by
loading 60% of the load toward the front
of the trailer and 40% toward the rear.
Readjust the load as needed.
■Towing Load Limits1Towing Load Limits
Check if all loads are within limits at a public scale.
If a public scale is not available, add the estimated
weight of your cargo load to the weight of your
trailer (as quoted by the manufacturer), and the
tongue load.
Break-in Period
Avoid towing a trailer during your vehicle's first 600
miles (1,000 km).
Never exceed the gross weight ratings.
Gross weight information
2 Vehicle Specifications P. 340
3WARNING
Exceeding any load limit or improperly
loading your vehicle and trailer can cause a
crash in which you can be seriously hurt or
killed.
Check the loading of your vehicle and
trailer carefully before starting to drive.
Total Load
Tongue LoadTongue Load