Steering wheel lock HONDA CR-V 2013 RM1, RM3, RM4 / 4.G Owners Manual
[x] Cancel search | Manufacturer: HONDA, Model Year: 2013, Model line: CR-V, Model: HONDA CR-V 2013 RM1, RM3, RM4 / 4.GPages: 361, PDF Size: 6.58 MB
Page 12 of 361
11
Quick Reference Guide
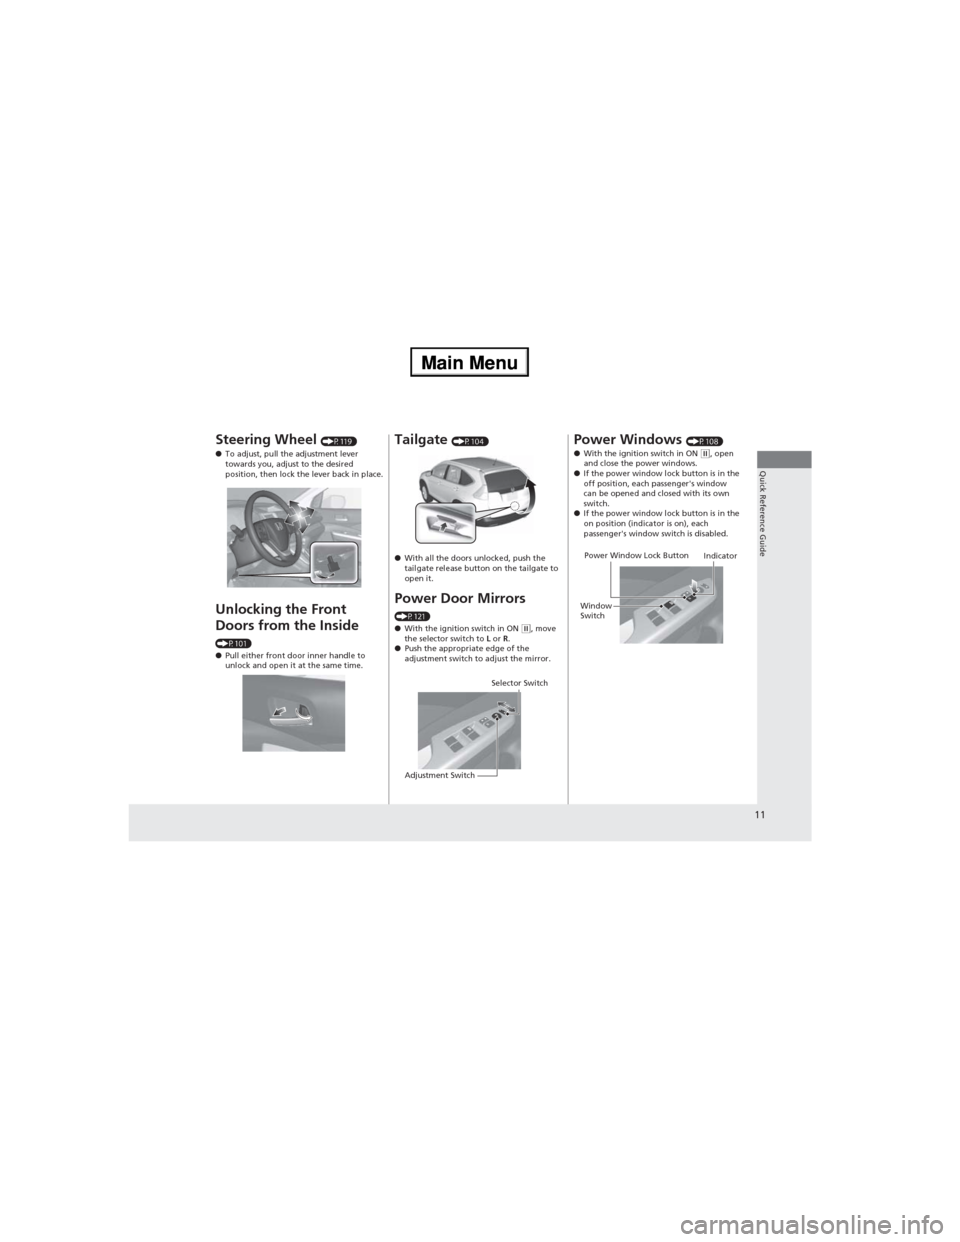
Steering Wheel (P119)
●To adjust, pull the adjustment lever
towards you, adjust to the desired
position, then lock the lever back in place.
Unlocking the Front
Doors from the Inside
(P101)
●Pull either front door inner handle to
unlock and open it at the same time.
Tailgate (P104)
●With all the doors unlocked, push the
tailgate release button on the tailgate to
open it.
Power Door Mirrors
(P121)
●With the ignition switch in ON (w, move
the selector switch to L or R.
●Push the appropriate edge of the
adjustment switch to adjust the mirror.
Selector Switch
Adjustment Switch
Power Windows (P108)
●With the ignition switch in ON (w, open
and close the power windows.
●If the power window lock button is in the
off position, each passenger's window
can be opened and closed with its own
switch.
●If the power window lock button is in the
on position (indicator is on), each
passenger's window switch is disabled.
Power Window Lock Button
Window
SwitchIndicator
Page 20 of 361
19
Quick Reference Guide
What to Do If
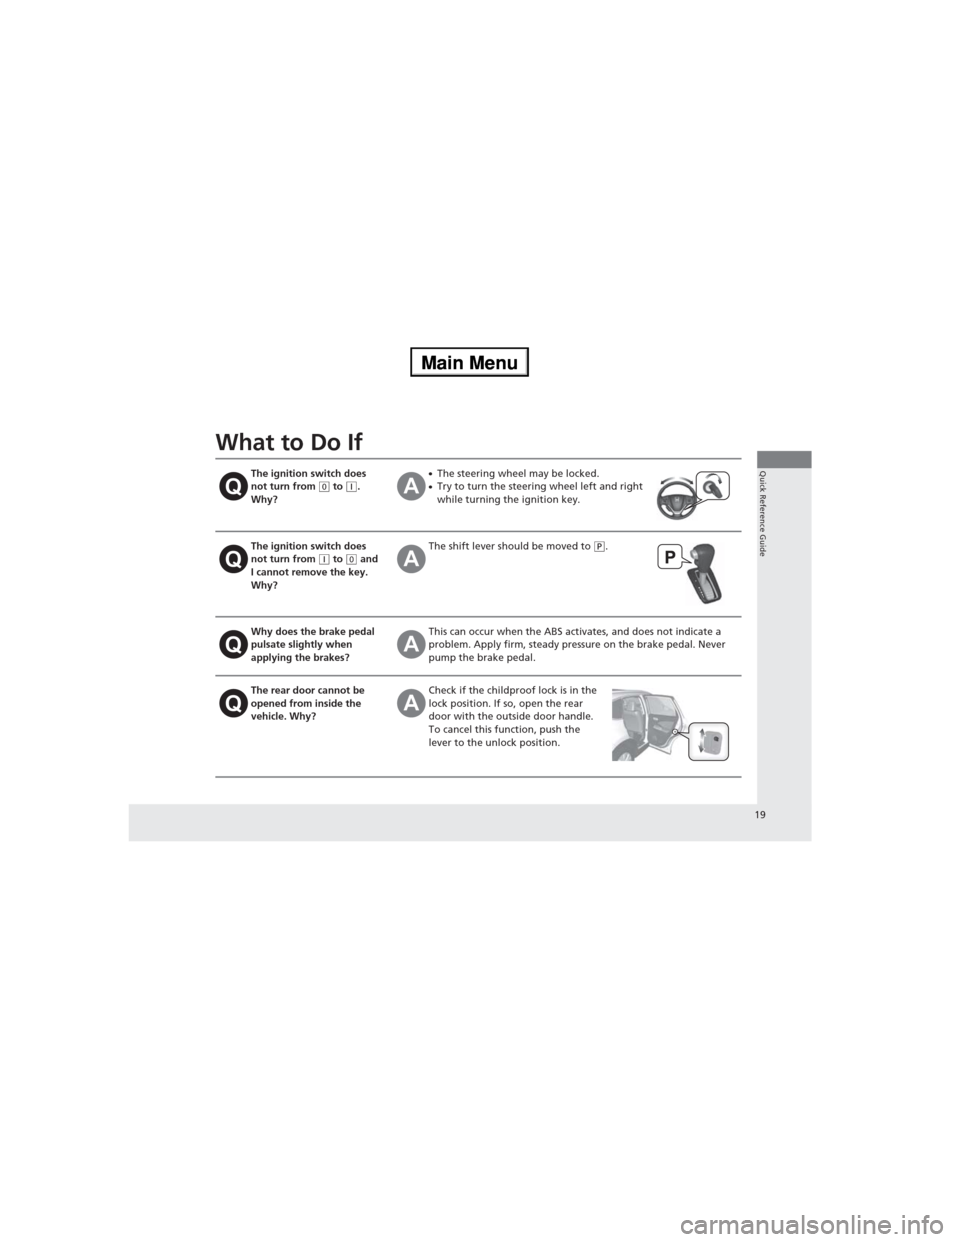
The ignition switch does
not turn from (0 to (q.
Why?●The steering wheel may be locked.●Try to turn the steering wheel left and right
while turning the ignition key.
The ignition switch does
not turn from (q to (0 and
I cannot remove the key.
Why?The shift lever should be moved to (P.
Why does the brake pedal
pulsate slightly when
applying the brakes?This can occur when the ABS activates, and does not indicate a
problem. Apply firm, steady pressure on the brake pedal. Never
pump the brake pedal.
The rear door cannot be
opened from inside the
vehicle. Why?Check if the childproof lock is in the
lock position. If so, open the rear
door with the outside door handle.
To cancel this function, push the
lever to the unlock position.
Page 96 of 361
95
Controls
This chapter explains how to operate the various controls necessary for driving.
Clock.................................................... 96
Locking and Unlocking the Doors
Key Types and Functions .................... 97
Locking/Unlocking the Doors from the
Outside ............................................ 99
Locking/Unlocking the Doors from the
Inside ............................................. 101
Childproof Door Locks ..................... 102
Auto Door Locking/Unlocking .......... 103
Opening and Closing the Tailgate... 104
Security System................................ 106
Immobilizer System .......................... 106
Security System Alarm
*.................... 106Opening and Closing the Windows..... 108
Opening and Closing the Moonroof*.. 110Operating the Switches Around the
Steering Wheel
Ignition Switch ................................. 111
Turn Signals ..................................... 112
Light Switches.................................. 112
Fog Lights
*...................................... 114
Daytime Running Lights ................... 114
Wipers and Washers ........................ 115
Brightness Control ........................... 117
Rear Defogger/Heated Door Mirror
*
Button ........................................... 118
Adjusting the Steering Wheel........... 119Adjusting the Mirrors....................... 120
Interior Rearview Mirror ................... 120
Power Door Mirrors ......................... 121
Adjusting the Seats.......................... 122
Adjusting the Seat Positions ............. 122
Interior Lights/Interior Convenience
Items................................................ 132
Interior Lights .................................. 132
Interior Convenience Items .............. 133
Heating and Cooling System*......... 142
Using Vents, Heating and A/C.......... 142
Climate Control System*.................. 145
Using Automatic Climate Control .... 145
Automatic Climate Control Sensors ... 148
* Not available on all models
Page 112 of 361
111
Controls
Operating the Switches Around the Steering Wheel
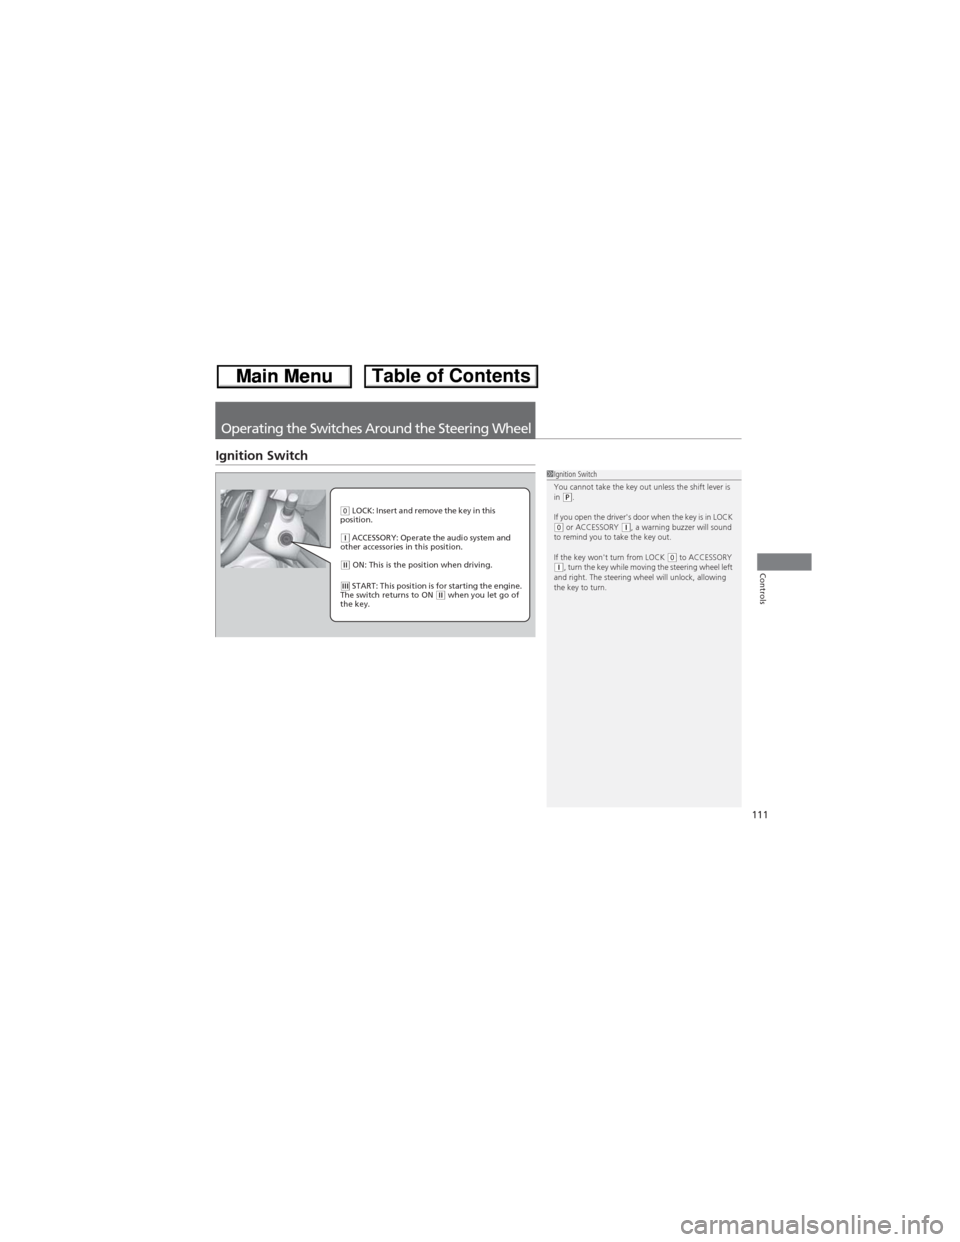
Ignition Switch
1Ignition Switch
You cannot take the key out unless the shift lever is
in
(P.
If you open the driver's door when the key is in LOCK
(0 or ACCESSORY (q, a warning buzzer will sound
to remind you to take the key out.
If the key won't turn from LOCK
(0 to ACCESSORY (q, turn the key while moving the steering wheel left
and right. The steering wheel will unlock, allowing
the key to turn.
(0 LOCK: Insert and remove the key in this
position.
(q ACCESSORY: Operate the audio system and
other accessories in this position.
(w ON: This is the position when driving.
(e START: This position is for starting the engine.
The switch returns to ON (w when you let go of
the key.
Page 114 of 361
113
uuOperating the Switches Around the Steering WheeluLight Switches
Controls
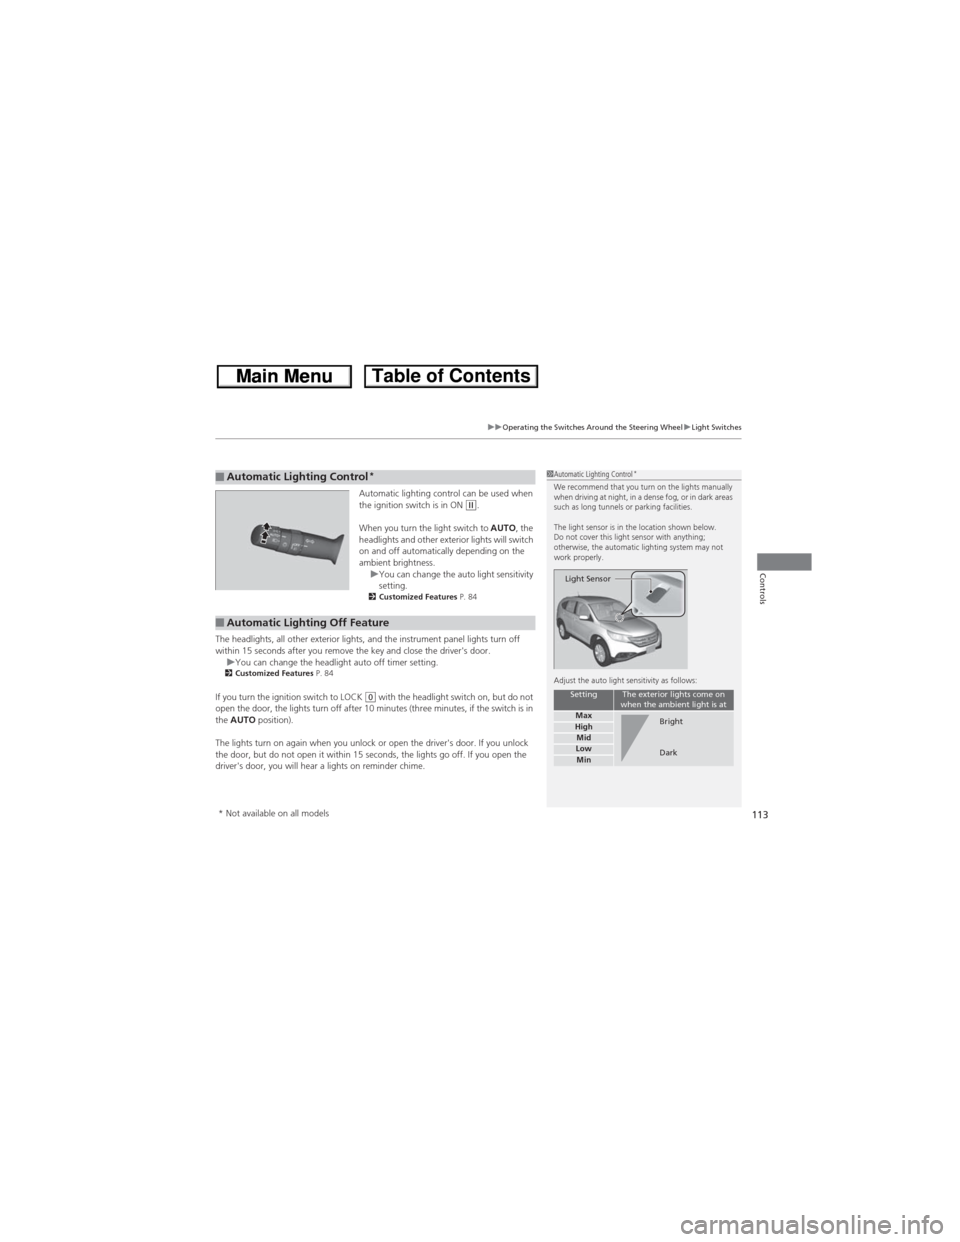
Automatic lighting control can be used when
the ignition switch is in ON (w.
When you turn the light switch to AUTO, the
headlights and other exterior lights will switch
on and off automatically depending on the
ambient brightness.
uYou can change the auto light sensitivity
setting.
2Customized Features P. 84
The headlights, all other exterior lights, and the instrument panel lights turn off
within 15 seconds after you remove the key and close the driver's door.
uYou can change the headlight auto off timer setting.
2Customized Features P. 84
If you turn the ignition switch to LOCK (0 with the headlight switch on, but do not
open the door, the lights turn off after 10 minutes (three minutes, if the switch is in
the AUTO position).
The lights turn on again when you unlock or open the driver's door. If you unlock
the door, but do not open it within 15 seconds, the lights go off. If you open the
driver's door, you will hear a lights on reminder chime.
■Automatic Lighting Control*1Automatic Lighting Control*We recommend that you turn on the lights manually
when driving at night, in a dense fog, or in dark areas
such as long tunnels or parking facilities.
The light sensor is in the location shown below.
Do not cover this light sensor with anything;
otherwise, the automatic lighting system may not
work properly.
Adjust the auto light sensitivity as follows:
SettingThe exterior lights come on
when the ambient light is at
MaxHighMidLowMin
Light Sensor
Bright
Dark
■Automatic Lighting Off Feature
* Not available on all models
Page 117 of 361
uuOperating the Switches Around the Steering WheeluWipers and Washers
116
Controls
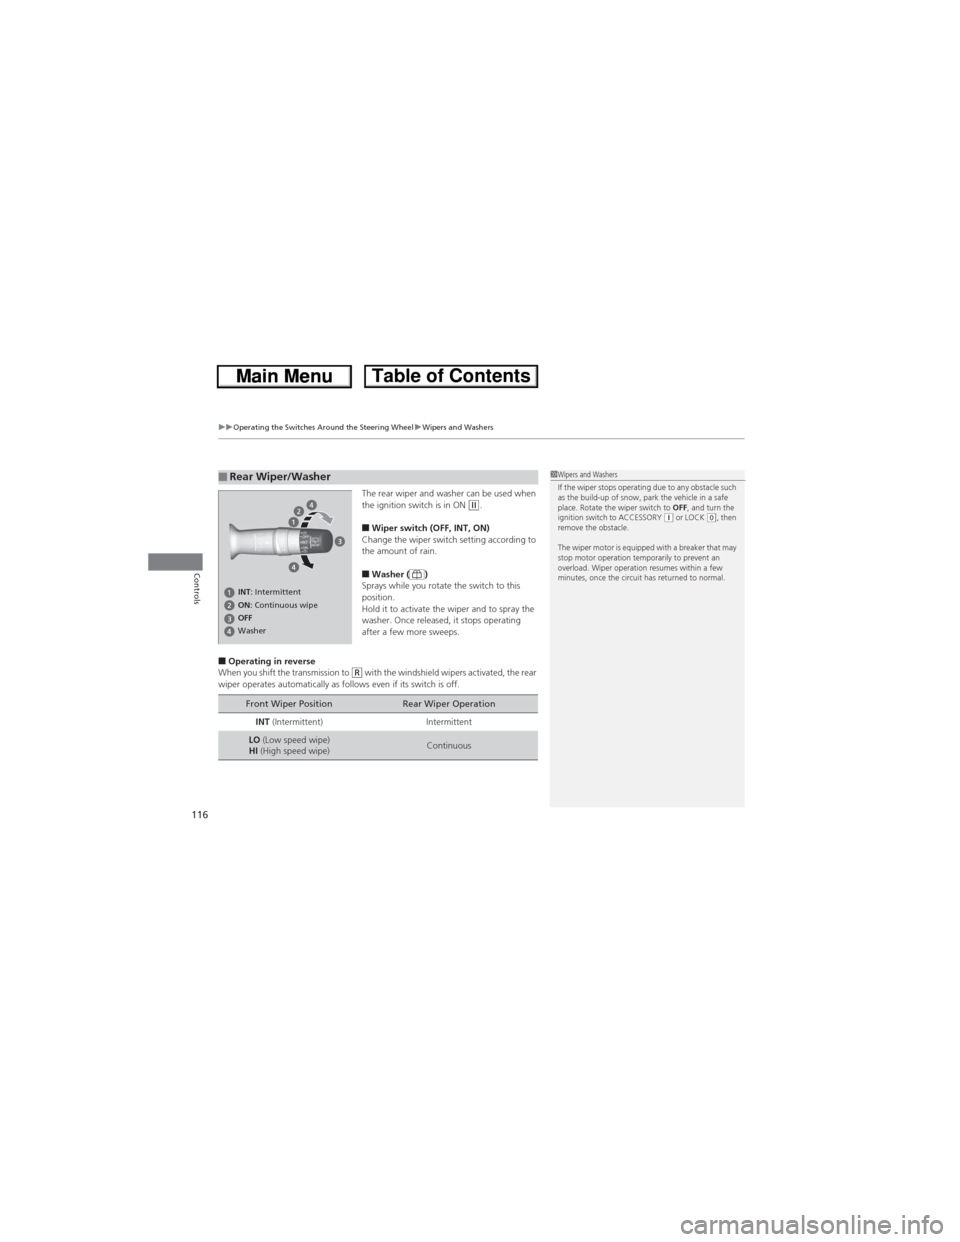
The rear wiper and washer can be used when
the ignition switch is in ON (w.
■Wiper switch (OFF, INT, ON)
Change the wiper switch setting according to
the amount of rain.
■Washer ( )
Sprays while you rotate the switch to this
position.
Hold it to activate the wiper and to spray the
washer. Once released, it stops operating
after a few more sweeps.
■Operating in reverse
When you shift the transmission to (R with the windshield wipers activated, the rear
wiper operates automatically as follows even if its switch is off.
■Rear Wiper/Washer1Wipers and Washers
If the wiper stops operating due to any obstacle such
as the build-up of snow, park the vehicle in a safe
place. Rotate the wiper switch to OFF, and turn the
ignition switch to ACCESSORY
(q or LOCK (0, then
remove the obstacle.
The wiper motor is equipped with a breaker that may
stop motor operation temporarily to prevent an
overload. Wiper operation resumes within a few
minutes, once the circuit has returned to normal.
INT: Intermittent
OFF ON: Continuous wipe
Washer
Front Wiper PositionRear Wiper Operation
INT (Intermittent)Intermittent
LO (Low speed wipe)
HI (High speed wipe)Continuous
Page 120 of 361
119
uuOperating the Switches Around the Steering WheeluAdjusting the Steering Wheel
Controls
Adjusting the Steering Wheel
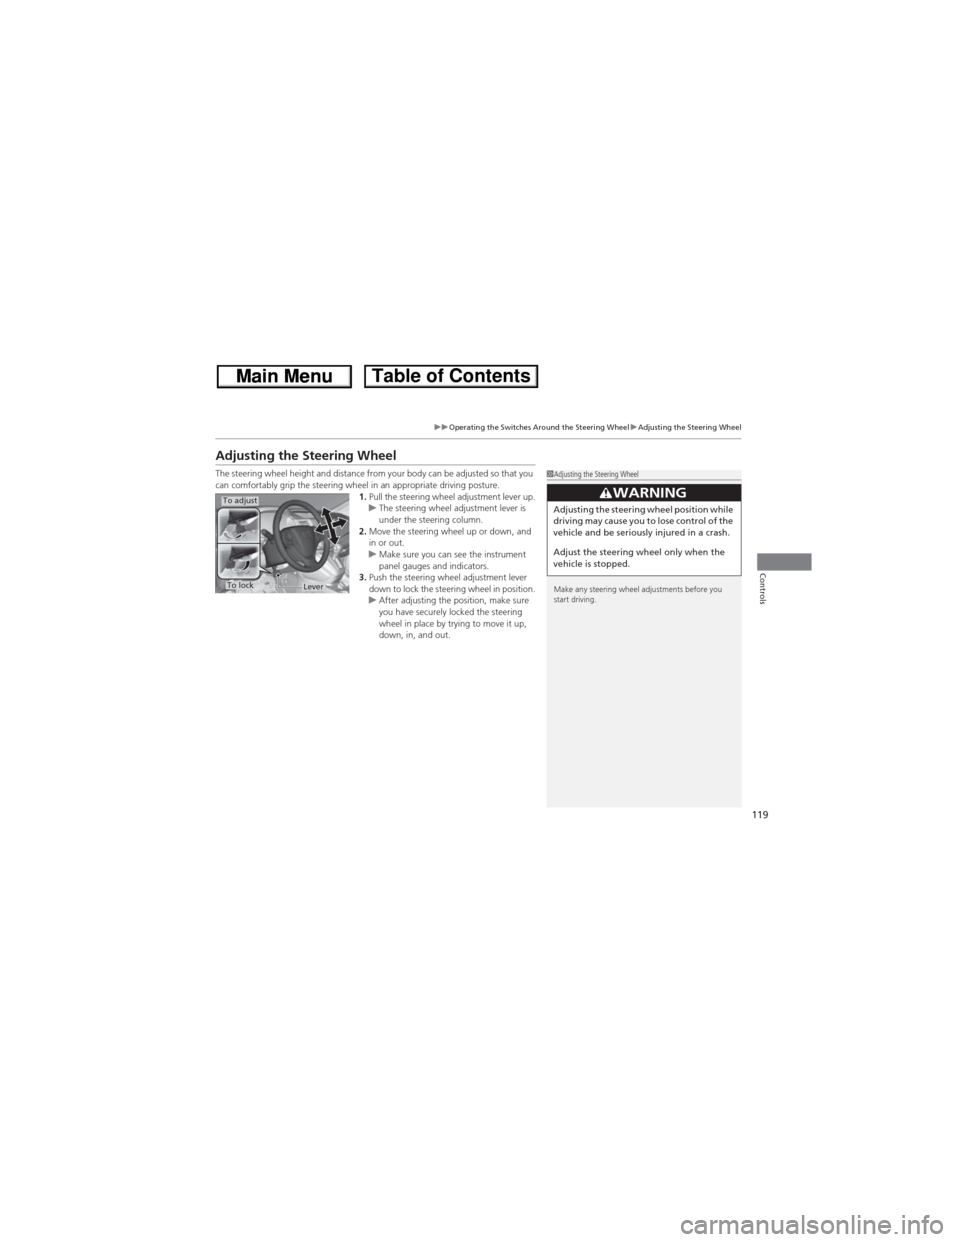
The steering wheel height and distance from your body can be adjusted so that you
can comfortably grip the steering wheel in an appropriate driving posture.
1.Pull the steering wheel adjustment lever up.
uThe steering wheel adjustment lever is
under the steering column.
2.Move the steering wheel up or down, and
in or out.
uMake sure you can see the instrument
panel gauges and indicators.
3.Push the steering wheel adjustment lever
down to lock the steering wheel in position.
uAfter adjusting the position, make sure
you have securely locked the steering
wheel in place by trying to move it up,
down, in, and out.1Adjusting the Steering Wheel
Make any steering wheel adjustments before you
start driving.
3WARNINGAdjusting the steering wheel position while
driving may cause you to lose control of the
vehicle and be seriously injured in a crash.
Adjust the steering wheel only when the
vehicle is stopped.To adjust
To lockLever
Page 154 of 361
153
Features
Audio System Basic Operation
To use the audio system, the ignition switch must be in ACCESSORY (q or ON (w.
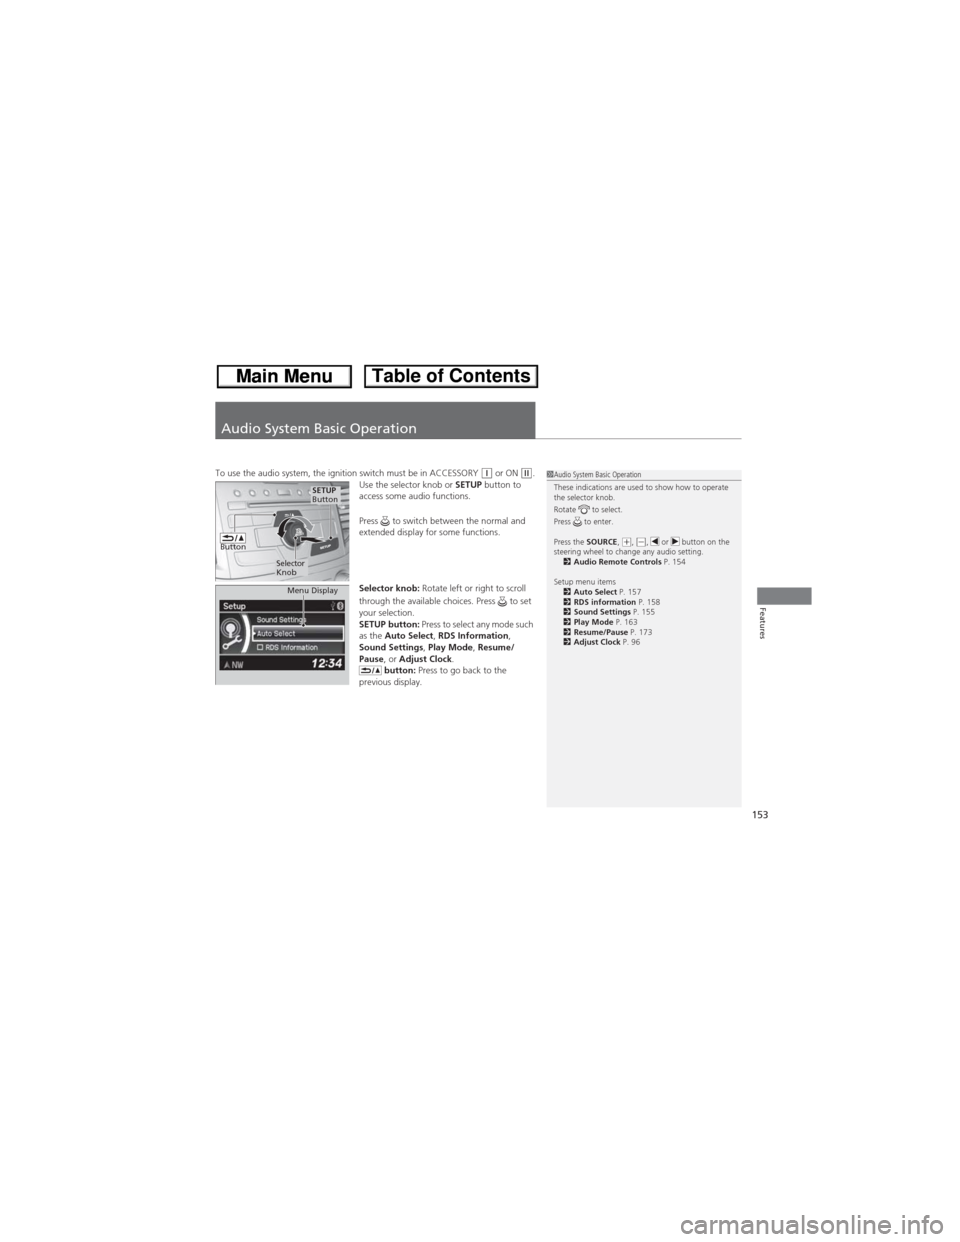
Use the selector knob or SETUP button to
access some audio functions.
Press to switch between the normal and
extended display for some functions.
Selector knob: Rotate left or right to scroll
through the available choices. Press to set
your selection.
SETUP button: Press to select any mode such
as the Auto Select, RDS Information,
Sound Settings, Play Mode, Resume/
Pause, or Adjust Clock.
button: Press to go back to the
previous display.1Audio System Basic Operation
These indications are used to show how to operate
the selector knob.
Rotate to select.
Press to enter.
Press the SOURCE,
(+, (-, or button on the
steering wheel to change any audio setting.
2Audio Remote Controls P. 154
Setup menu items
2Auto Select P. 157
2RDS information P. 158
2Sound Settings P. 155
2Play Mode P. 163
2Resume/Pause P. 173
2Adjust Clock P. 96
Button
Selector
Knob
SETUP
Button
Menu Display
Page 228 of 361
Continued227
uuBefore DrivinguDriving Preparation
Driving
•Store or secure all items on board properly.
uCarrying too much cargo, or improperly storing it, can affect your vehicle's
handling, stability, stopping distance, and tires, and make it unsafe.
2Maximum Load Limit P. 229•Do not pile items higher than the seat height.
uThey can block your view and may be thrown forward in the event of sudden
braking.
•Do not place anything in the front seat footwells. Make sure to secure the floor
mat.
uAn object or unsecured floor mat can interfere with your brake and accelerator
pedal operation while driving.
•If you have any animals on board, do not let them move around in the vehicle.
uThey may interfere with driving and a crash could occur.
•Securely close and lock all doors and the tailgate.
2Locking/Unlocking the Doors from the Inside P. 101•Adjust your seating position properly.
uAdjust the head restraint, too.
2Adjusting the Seats P. 122
2Adjusting the Head Restraints P. 125
•Adjust the mirrors and steering wheel properly for your driving.
uAdjust them while sitting in the proper driving position.
2Adjusting the Steering Wheel P. 119
2Adjusting the Mirrors P. 120
■Interior Checks1Interior Checks
The headlight aim is set by the factory, and does not
need to be adjusted. However, if you regularly carry
heavy items in the cargo area or tow a trailer, have
the aiming readjusted at a dealer or by a qualified
technician.
Page 236 of 361
235
uuTowing a TraileruTowing Your Vehicle
Continued
Driving
Towing Your Vehicle
Your vehicle can be towed behind a motorhome.
Perform the following procedure before towing your vehicle.
1.Check the transmission fluid level.
uMake sure the fluid level is between the upper and lower marks.
2.Start the engine.
3.Depress the brake pedal. Move the shift lever through all its positions.
4.Shift to
(D and hold for five seconds, then to (N. Let the engine run for three
minutes, then turn it off.
5.Release the parking brake.
6.Leave the ignition switch in ACCESSORY
(q.
uMake sure the steering wheel does not lock.
7.Turn off all the electric devices. Do not use any accessory power sockets.
uThis can prevent the battery from running down.
■When Your Vehicle is Towed Behind a Motorhome
1Towing Your VehicleNOTICEFailure to follow the recommended instructions
exactly will result in severe automatic transmission
damage. If you cannot shift the transmission or start
the engine, your vehicle must be transported on a
flat-bed truck or trailer.
Do not exceed 65 mph (100 km/h).
To avoid damage to the AWD system, your vehicle
must be towed with all four wheels on the ground.
Consult your towing parts sales or rental agency if
any other items are recommended or required for
your towing situation.
If you tow your vehicle behind a motorhome, the
transmission fluid must be changed every 2 years or
30,000 miles (48,000 km), whichever comes first.
AWD models
1When Your Vehicle is Towed Behind a MotorhomeNOTICESevere transmission damage will occur if the vehicle is
shifted from (R to (N and then towed with the drive
wheels on the ground.