change time HONDA CR-V 2013 RM1, RM3, RM4 / 4.G Owners Manual
[x] Cancel search | Manufacturer: HONDA, Model Year: 2013, Model line: CR-V, Model: HONDA CR-V 2013 RM1, RM3, RM4 / 4.GPages: 361, PDF Size: 6.58 MB
Page 1 of 361
Contents
This owner’s manual should be considered a permanent part of the
vehicle and should remain with the vehicle when it is sold.
This owner’s manual covers all models of your vehicle. You may find
descriptions of equipment and features that are not on your
particular model.
Images throughout this owner’s manual (including the front cover)
represent features and equipment that are available on some, but
not all, models. Your particular model may not have some of these
features.
This owner’s manual is for vehicles sold in the United States and
Canada.
The information and specifications included in this publication were
in effect at the time of approval for printing. Honda Motor Co., Ltd.
reserves the right, however, to discontinue or change specifications
or design at any time without notice and without incurring any
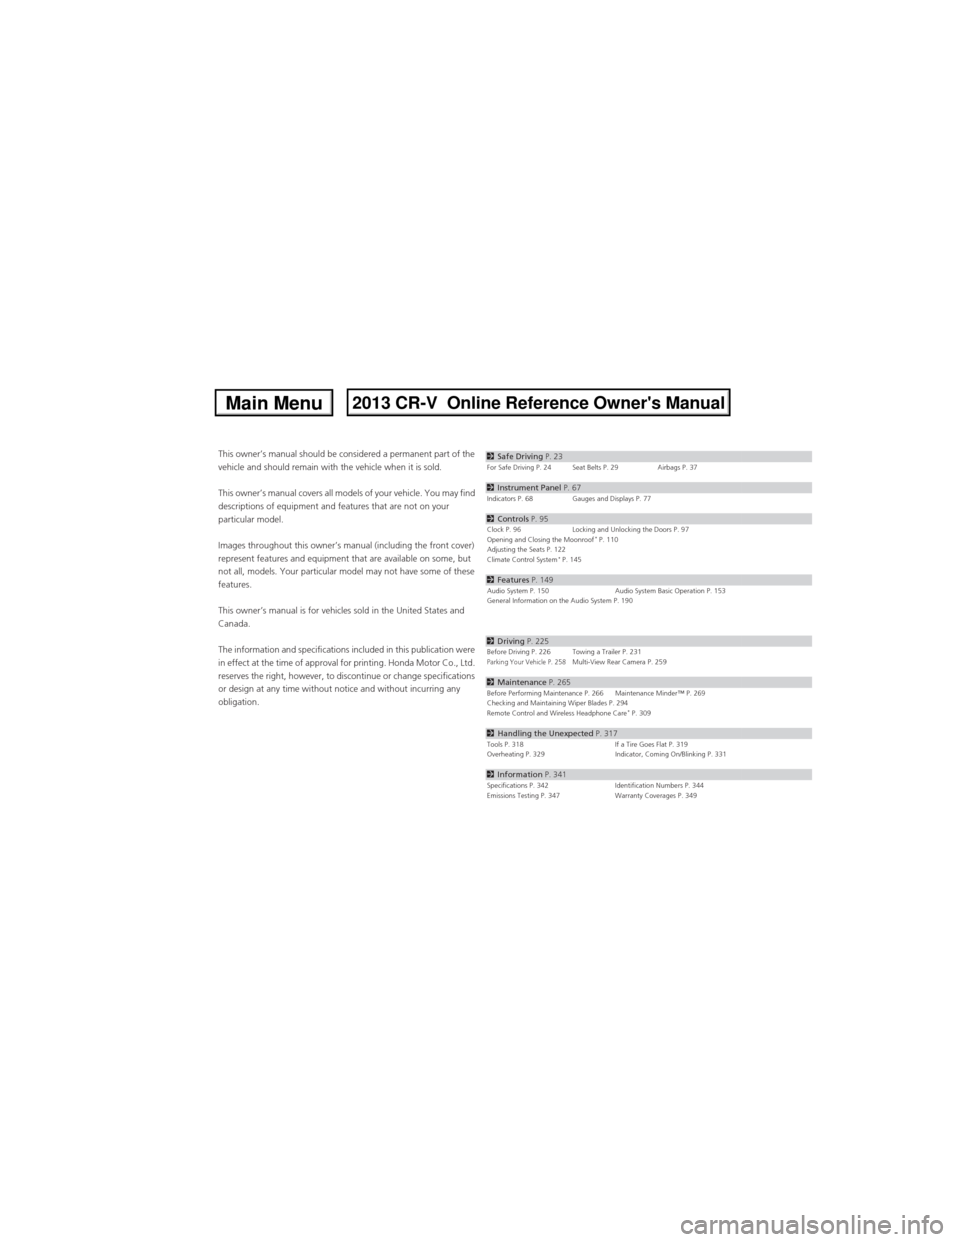
obligation.2Safe Driving P. 23For Safe Driving P. 24 Seat Belts P. 29 Airbags P. 37
2Instrument Panel P. 67Indicators P. 68 Gauges and Displays P. 77
2Controls P. 95Clock P. 96 Locking and Unlocking the Doors P. 97
Opening and Closing the Moonroof* P. 110
Adjusting the Seats P. 122
Climate Control System
* P. 145
2Features P. 149Audio System P. 150 Audio System Basic Operation P. 153
General Information on the Audio System P. 190
2Driving P. 225Before Driving P. 226 Towing a Trailer P. 231Parking Your Vehicle P. 258Multi-View Rear Camera P. 259
2Maintenance P. 265Before Performing Maintenance P. 266 Maintenance Minder™ P. 269
Checking and Maintaining Wiper Blades P. 294
Remote Control and Wireless Headphone Care
* P. 309
2Handling the Unexpected P. 317Tools P. 318 If a Tire Goes Flat P. 319
Overheating P. 329 Indicator, Coming On/Blinking P. 331
2Information P. 341Specifications P. 342 Identification Numbers P. 344
Emissions Testing P. 347 Warranty Coverages P. 349
Page 79 of 361
78
uuGauges and DisplaysuInformation Display
Instrument Panel
Information Display
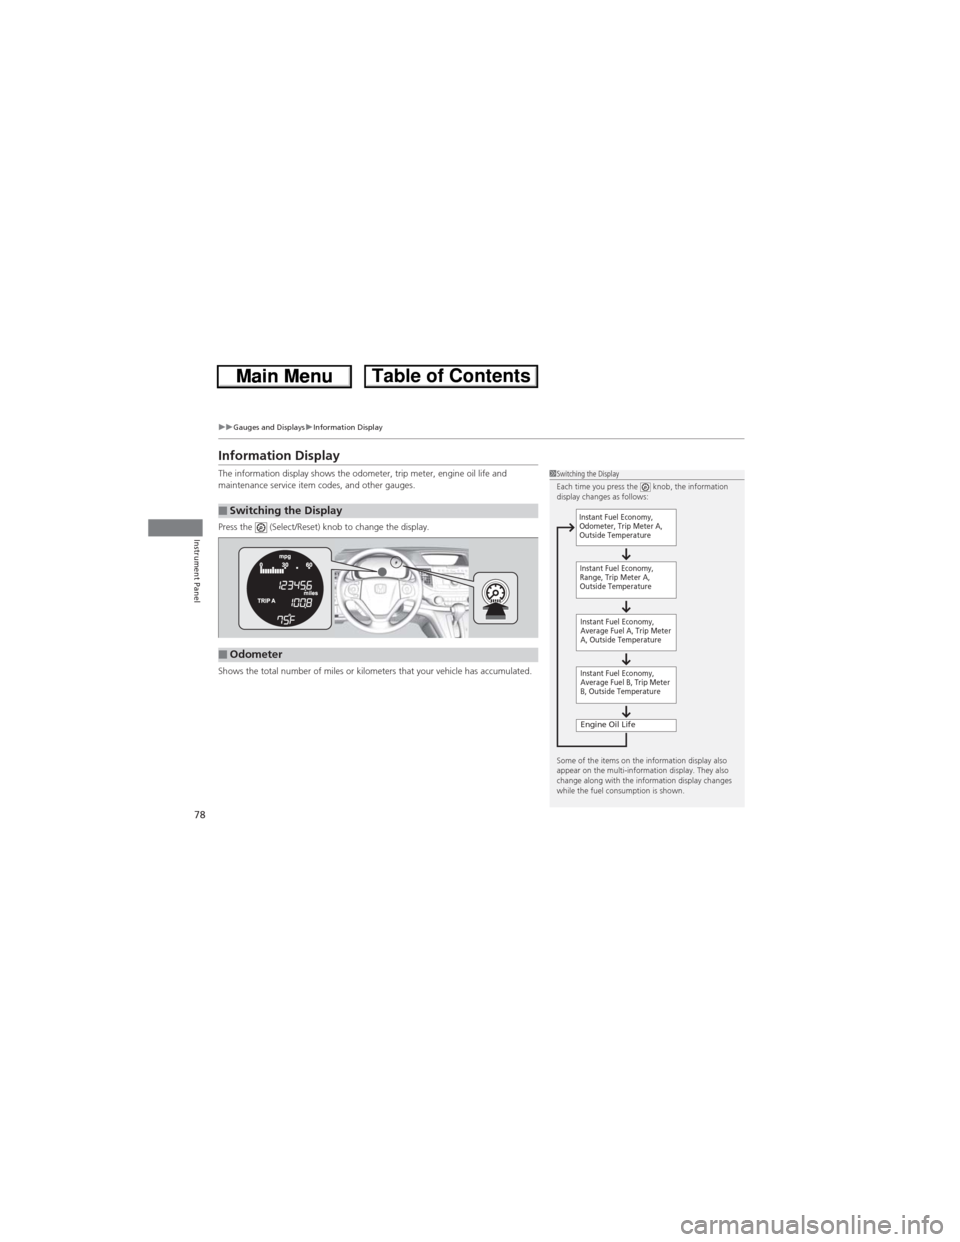
The information display shows the odometer, trip meter, engine oil life and
maintenance service item codes, and other gauges.
Press the (Select/Reset) knob to change the display.
Shows the total number of miles or kilometers that your vehicle has accumulated.
■Switching the Display
1Switching the Display
Each time you press the knob, the information
display changes as follows:
Some of the items on the information display also
appear on the multi-information display. They also
change along with the information display changes
while the fuel consumption is shown.
Instant Fuel Economy,
Average Fuel A, Trip Meter
A, Outside Temperature
Engine Oil Life
Instant Fuel Economy,
Average Fuel B, Trip Meter
B, Outside Temperature Instant Fuel Economy,
Odometer, Trip Meter A,
Outside Temperature
Instant Fuel Economy,
Range, Trip Meter A,
Outside Temperature
■Odometer
Page 83 of 361
uuGauges and DisplaysuMulti-Information Display
82
Instrument Panel
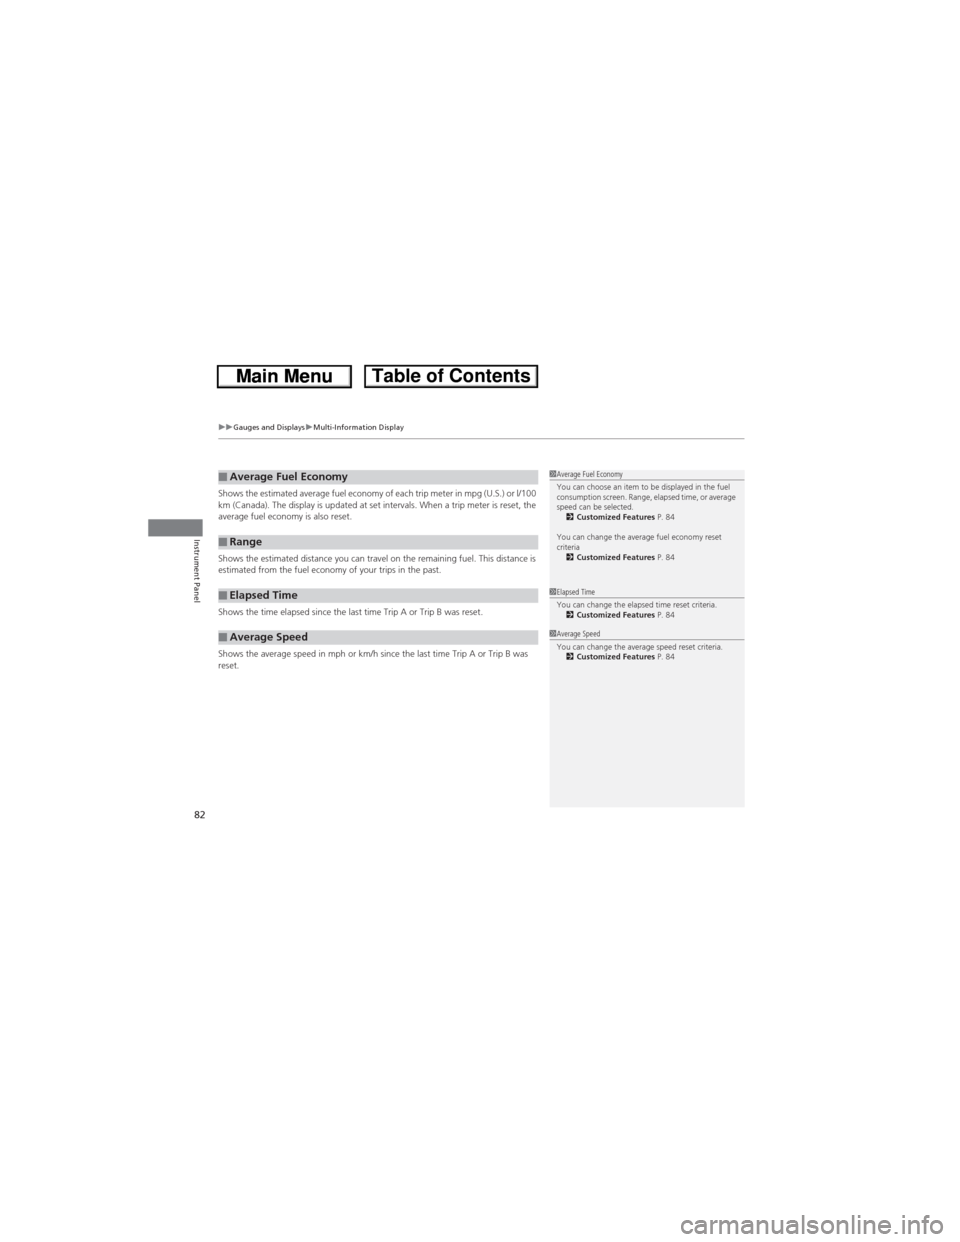
Shows the estimated average fuel economy of each trip meter in mpg (U.S.) or l/100
km (Canada). The display is updated at set intervals. When a trip meter is reset, the
average fuel economy is also reset.
Shows the estimated distance you can travel on the remaining fuel. This distance is
estimated from the fuel economy of your trips in the past.
Shows the time elapsed since the last time Trip A or Trip B was reset.
Shows the average speed in mph or km/h since the last time Trip A or Trip B was
reset.■Average Fuel Economy
■Range
■Elapsed Time
■Average Speed
1Average Fuel Economy
You can choose an item to be displayed in the fuel
consumption screen. Range, elapsed time, or average
speed can be selected.
2Customized Features P. 84
You can change the average fuel economy reset
criteria
2Customized Features P. 84
1Elapsed Time
You can change the elapsed time reset criteria.
2Customized Features P. 84
1Average Speed
You can change the average speed reset criteria.
2Customized Features P. 84
Page 88 of 361
87
uuGauges and DisplaysuMulti-Information Display
Continued
Instrument Panel
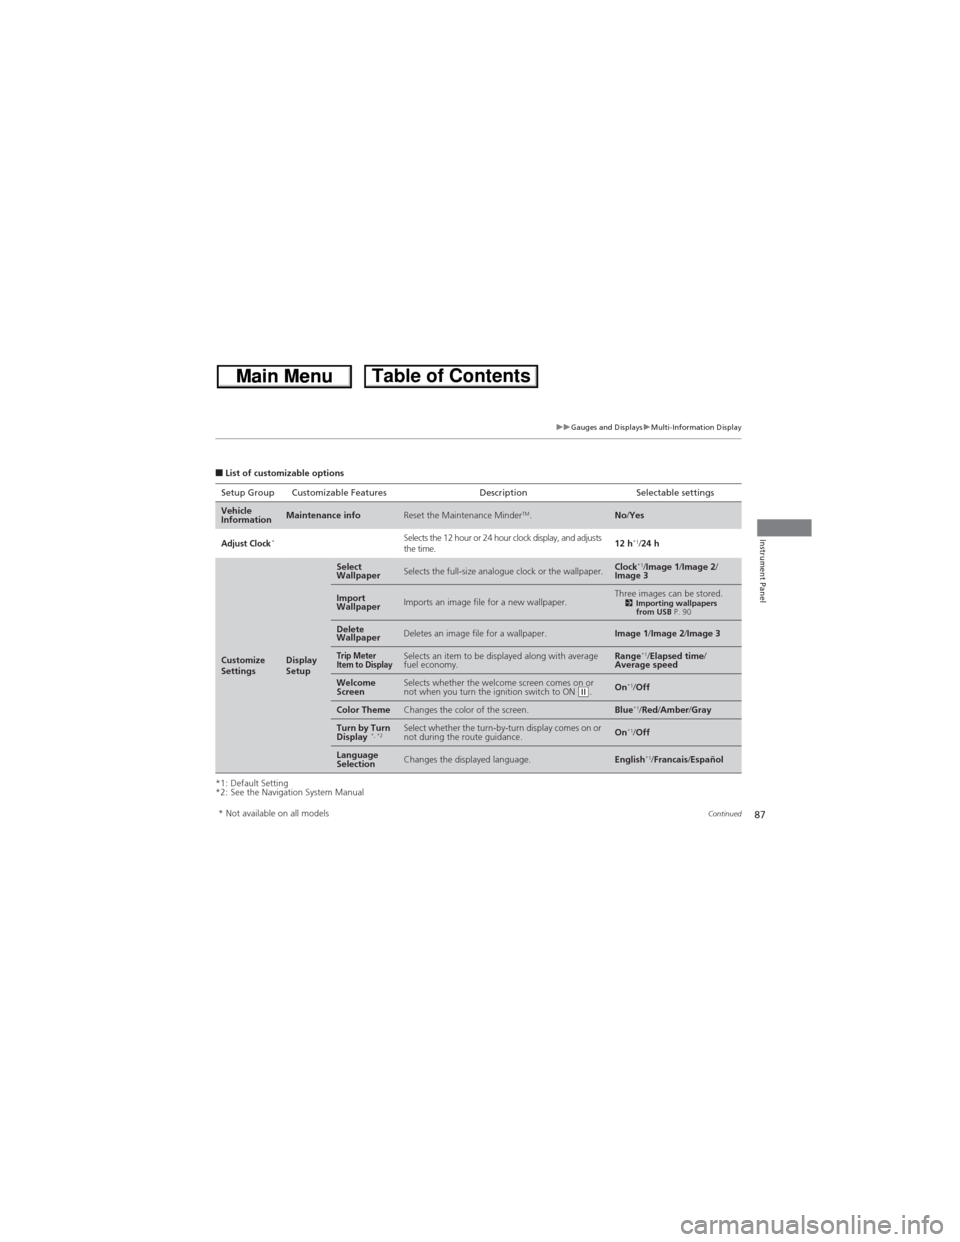
■List of customizable options
*1: Default Setting
*2: See the Navigation System ManualSetup Group Customizable Features Description Selectable settings
Vehicle
InformationMaintenance infoReset the Maintenance MinderTM.No/Yes
Adjust Clock*Selects the 12 hour or 24 hour clock display, and adjusts
the time.12 h*1/24 h
Customize
SettingsDisplay
Setup
Select
WallpaperSelects the full-size analogue clock or the wallpaper.Clock*1/Image 1/Image 2/
Image 3
Import
WallpaperImports an image file for a new wallpaper.Three images can be stored.2Importing wallpapers
from USB P. 90
Delete
WallpaperDeletes an image file for a wallpaper.Image 1/Image 2/Image 3
Trip Meter
Item to DisplaySelects an item to be displayed along with average
fuel economy.Range*1/Elapsed time/
Average speed
Welcome
ScreenSelects whether the welcome screen comes on or
not when you turn the ignition switch to ON (w.On*1/Off
Color ThemeChanges the color of the screen.Blue*1/Red/Amber/Gray
Turn by Turn
Display *, *2Select whether the turn-by-turn display comes on or
not during the route guidance.On*1/Off
Language
SelectionChanges the displayed language.English*1/Francais/Español
* Not available on all models
Page 89 of 361
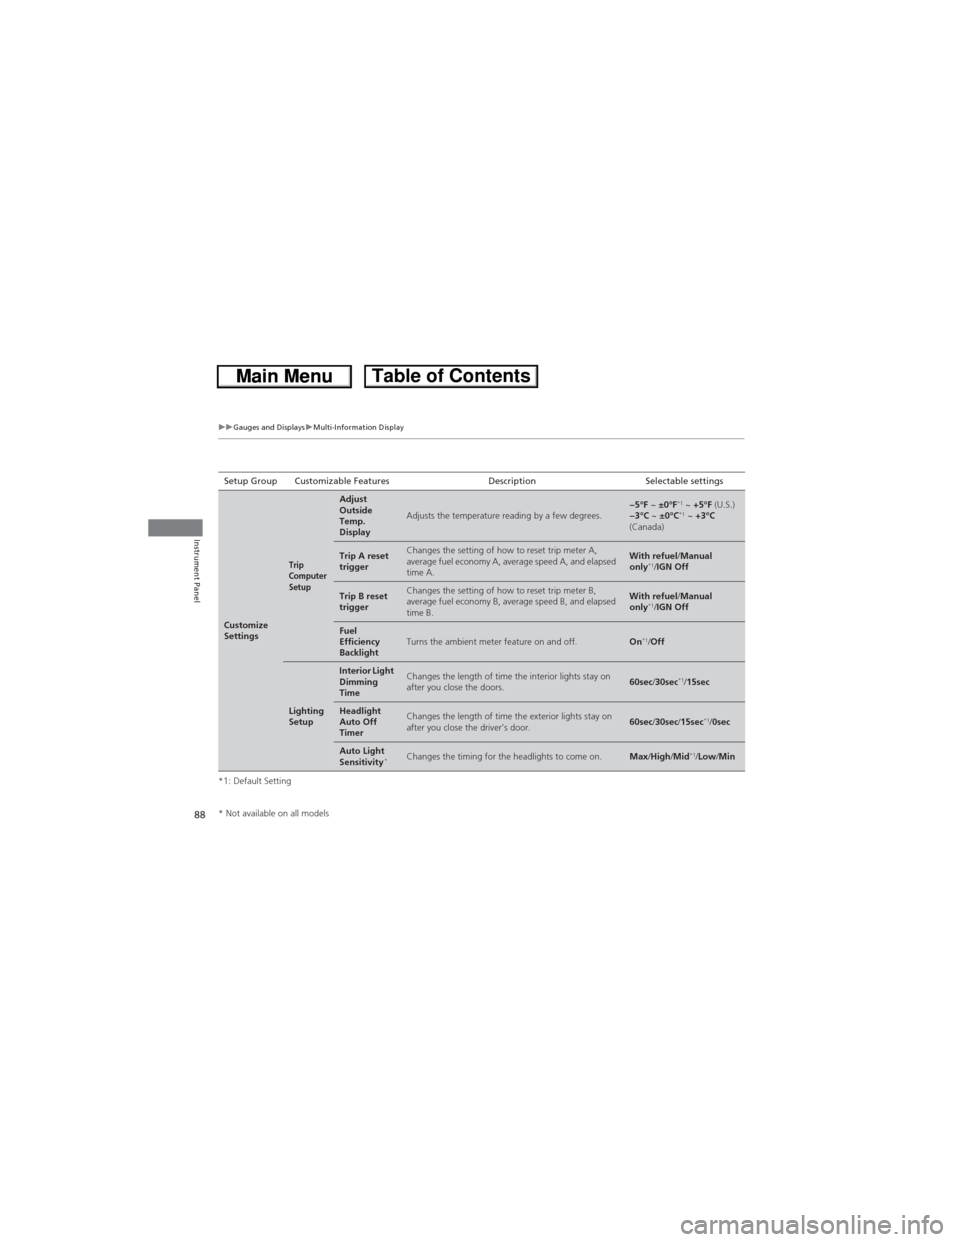
88
uuGauges and DisplaysuMulti-Information Display
Instrument Panel
*1: Default SettingSetup Group Customizable Features Description Selectable settings
Customize
Settings
Trip
Computer
Setup
Adjust
Outside
Temp.
Display
Adjusts the temperature reading by a few degrees.−5°F ~ ±0°F*1 ~ +5°F (U.S.)
−3°C ~ ±0°C*1 ~ +3°C
(Canada)
Trip A reset
triggerChanges the setting of how to reset trip meter A,
average fuel economy A, average speed A, and elapsed
time A.With refuel/Manual
only*1/IGN Off
Trip B reset
triggerChanges the setting of how to reset trip meter B,
average fuel economy B, average speed B, and elapsed
time B.With refuel/Manual
only*1/IGN Off
Fuel
Efficiency
BacklightTurns the ambient meter feature on and off.On*1/Off
Lighting
Setup
Interior Light
Dimming
TimeChanges the length of time the interior lights stay on
after you close the doors.60sec/30sec*1/15sec
Headlight
Auto Off
TimerChanges the length of time the exterior lights stay on
after you close the driver’s door.60sec/30sec/15sec*1/0sec
Auto Light
Sensitivity*Changes the timing for the headlights to come on.Max/High/Mid*1/Low/Min
* Not available on all models
Page 90 of 361
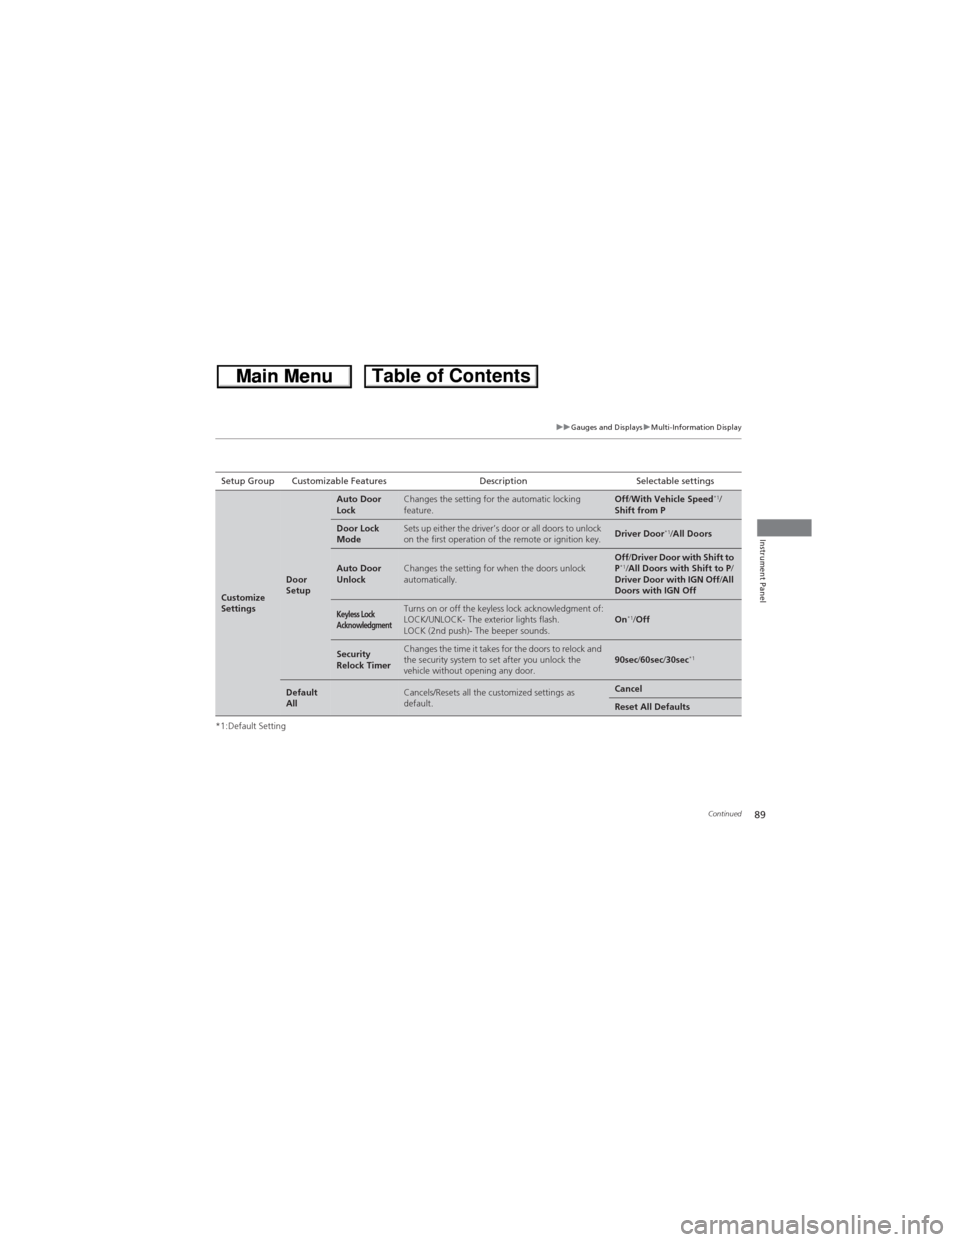
89
uuGauges and DisplaysuMulti-Information Display
Continued
Instrument Panel
*1:Default SettingSetup Group Customizable Features Description Selectable settings
Customize
Settings
Door
Setup
Auto Door
LockChanges the setting for the automatic locking
feature.Off/With Vehicle Speed*1/
Shift from P
Door Lock
ModeSets up either the driver’s door or all doors to unlock
on the first operation of the remote or ignition key.Driver Door*1/All Doors
Auto Door
UnlockChanges the setting for when the doors unlock
automatically.Off/Driver Door with Shift to
P*1/All Doors with Shift to P/
Driver Door with IGN Off/All
Doors with IGN Off
Keyless Lock
AcknowledgmentTurns on or off the keyless lock acknowledgment of:
LOCK/UNLOCK- The exterior lights flash.
LOCK (2nd push)- The beeper sounds.On*1/Off
Security
Relock TimerChanges the time it takes for the doors to relock and
the security system to set after you unlock the
vehicle without opening any door.90sec/60sec/30sec*1
Default
AllCancels/Resets all the customized settings as
default.Cancel
Reset All Defaults
Page 97 of 361
96
Controls
Clock
Adjusting the Clock
You can adjust the time in the clock display with the ignition switch in ON (w.
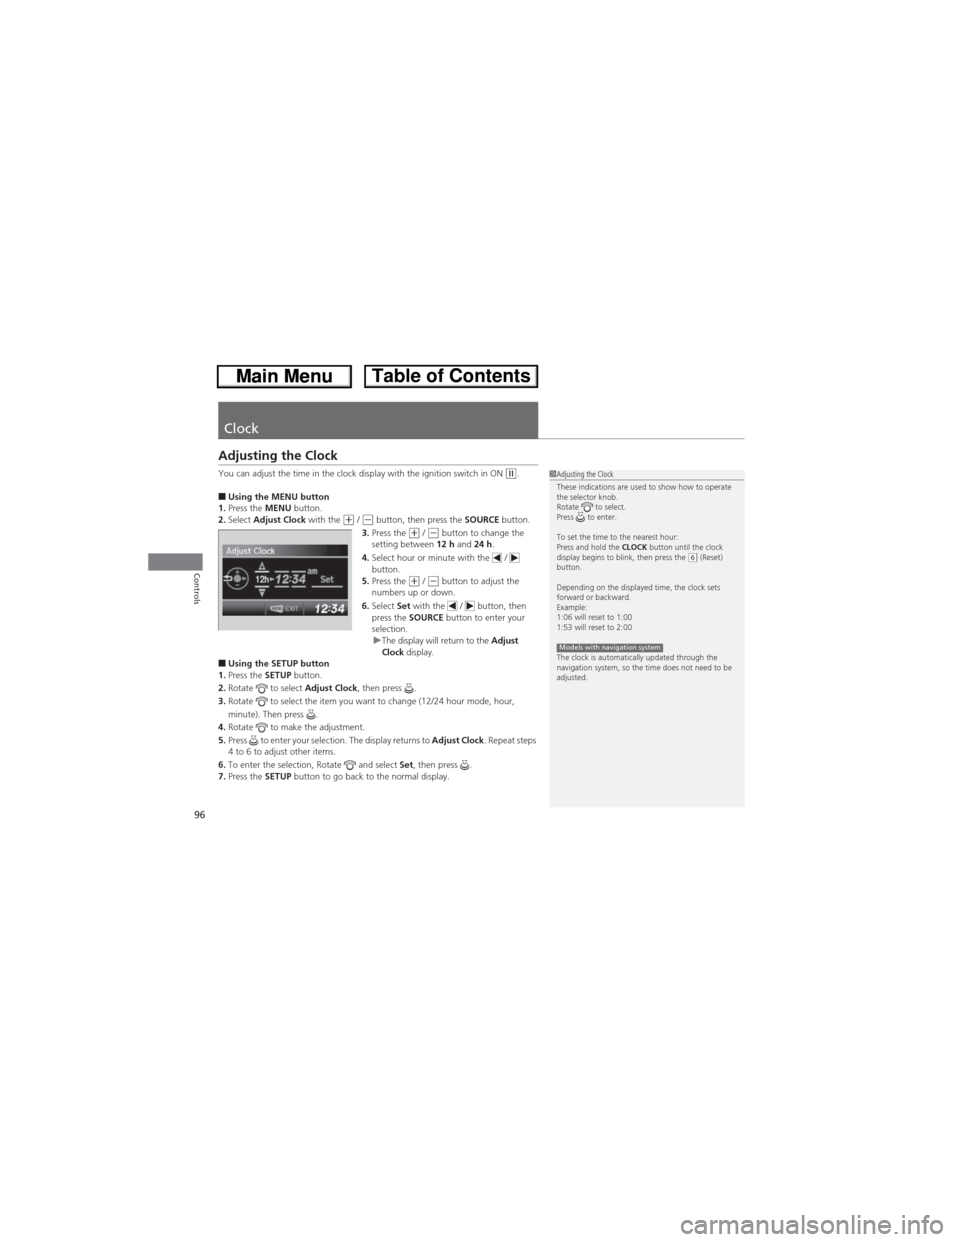
■Using the MENU button
1.Press the MENU button.
2.Select Adjust Clock with the
(+ / (- button, then press the SOURCE button.
3.Press the (+ / (- button to change the
setting between 12 h and 24 h.
4.Select hour or minute with the /
button.
5.Press the
(+ / (- button to adjust the
numbers up or down.
6.Select Set with the / button, then
press the SOURCE button to enter your
selection.
uThe display will return to the Adjust
Clock display.
■Using the SETUP button
1.Press the SETUP button.
2.Rotate to select Adjust Clock, then press .
3.Rotate to select the item you want to change (12/24 hour mode, hour,
minute). Then press .
4.Rotate to make the adjustment.
5.Press to enter your selection. The display returns to Adjust Clock. Repeat steps
4 to 6 to adjust other items.
6.To enter the selection, Rotate and select Set, then press .
7.Press the SETUP button to go back to the normal display.
1Adjusting the Clock
These indications are used to show how to operate
the selector knob.
Rotate to select.
Press to enter.
To set the time to the nearest hour:
Press and hold the CLOCK button until the clock
display begins to blink, then press the
(6 (Reset)
button.
Depending on the displayed time, the clock sets
forward or backward.
Example:
1:06 will reset to 1:00
1:53 will reset to 2:00
The clock is automatically updated through the
navigation system, so the time does not need to be
adjusted.
Models with navigation system
Page 100 of 361
99
uuLocking and Unlocking the DoorsuLocking/Unlocking the Doors from the Outside
Continued
Controls
Locking/Unlocking the Doors from the Outside
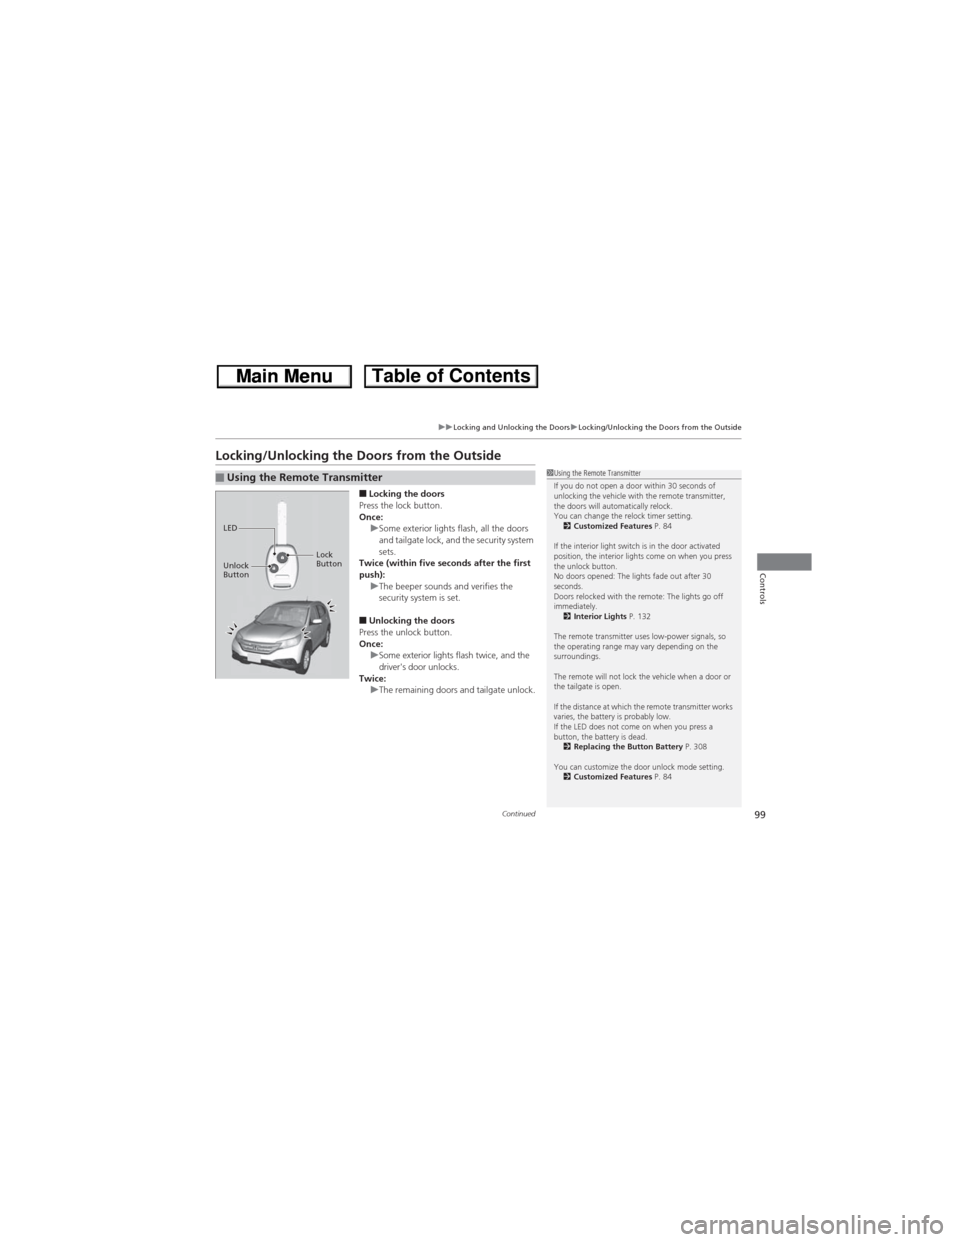
■Locking the doors
Press the lock button.
Once:
uSome exterior lights flash, all the doors
and tailgate lock, and the security system
sets.
Twice (within five seconds after the first
push):
uThe beeper sounds and verifies the
security system is set.
■Unlocking the doors
Press the unlock button.
Once:
uSome exterior lights flash twice, and the
driver's door unlocks.
Twice:
uThe remaining doors and tailgate unlock.
■Using the Remote Transmitter1Using the Remote Transmitter
If you do not open a door within 30 seconds of
unlocking the vehicle with the remote transmitter,
the doors will automatically relock.
You can change the relock timer setting.
2Customized Features P. 84
If the interior light switch is in the door activated
position, the interior lights come on when you press
the unlock button.
No doors opened: The lights fade out after 30
seconds.
Doors relocked with the remote: The lights go off
immediately.
2Interior Lights P. 132
The remote transmitter uses low-power signals, so
the operating range may vary depending on the
surroundings.
The remote will not lock the vehicle when a door or
the tailgate is open.
If the distance at which the remote transmitter works
varies, the battery is probably low.
If the LED does not come on when you press a
button, the battery is dead.
2Replacing the Button Battery P. 308
You can customize the door unlock mode setting.
2Customized Features P. 84
LED
Unlock
ButtonLock
Button
Page 108 of 361
107
uuSecurity SystemuSecurity System Alarm*
Controls
■Setting the security system alarm
The security system alarm automatically sets when the following conditions have
been met:
•The ignition switch is in LOCK
(0, and the key has been removed from the
ignition switch.
•The hood and tailgate are closed.
•All doors and tailgate are locked with the key or the remote transmitter.
■When the security system alarm sets
The security system alarm indicator in the instrument panel blinks. When the
blinking interval changes after about 15 seconds, the security system alarm is set.
■To cancel the security system alarm
The security system alarm is canceled when the vehicle is unlocked using the key or
remote transmitter, or the ignition switch is turned to ON
(w. The security system
alarm indicator goes off at the same time.
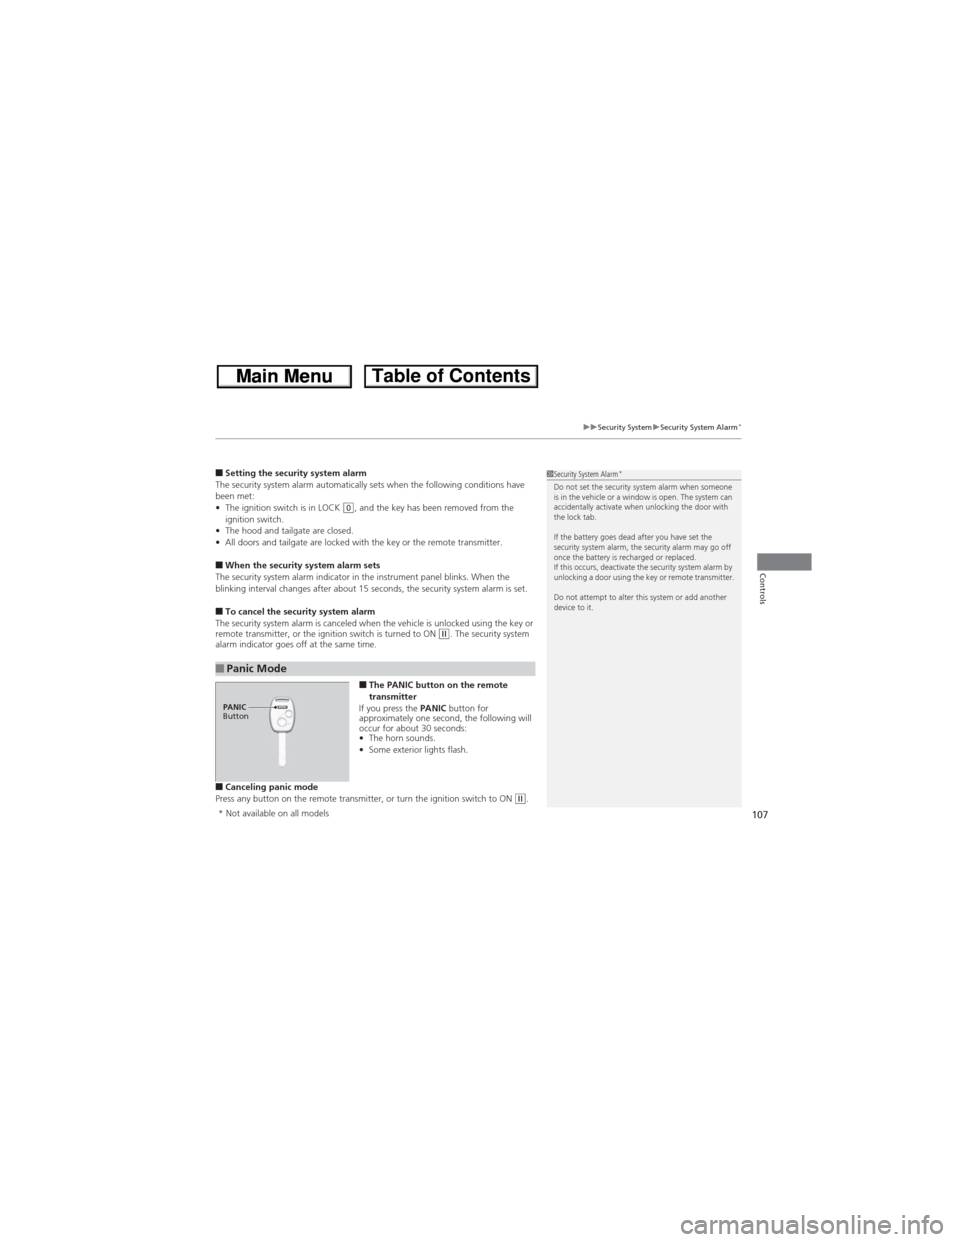
■The PANIC button on the remote
transmitter
If you press the PANIC button for
approximately one second, the following will
occur for about 30 seconds:
•The horn sounds.
•Some exterior lights flash.
■Canceling panic mode
Press any button on the remote transmitter, or turn the ignition switch to ON (w.
■Panic Mode
1Security System Alarm*Do not set the security system alarm when someone
is in the vehicle or a window is open. The system can
accidentally activate when unlocking the door with
the lock tab.
If the battery goes dead after you have set the
security system alarm, the security alarm may go off
once the battery is recharged or replaced.
If this occurs, deactivate the security system alarm by
unlocking a door using the key or remote transmitter.
Do not attempt to alter this system or add another
device to it.
PANIC
Button
* Not available on all models
Page 114 of 361
113
uuOperating the Switches Around the Steering WheeluLight Switches
Controls
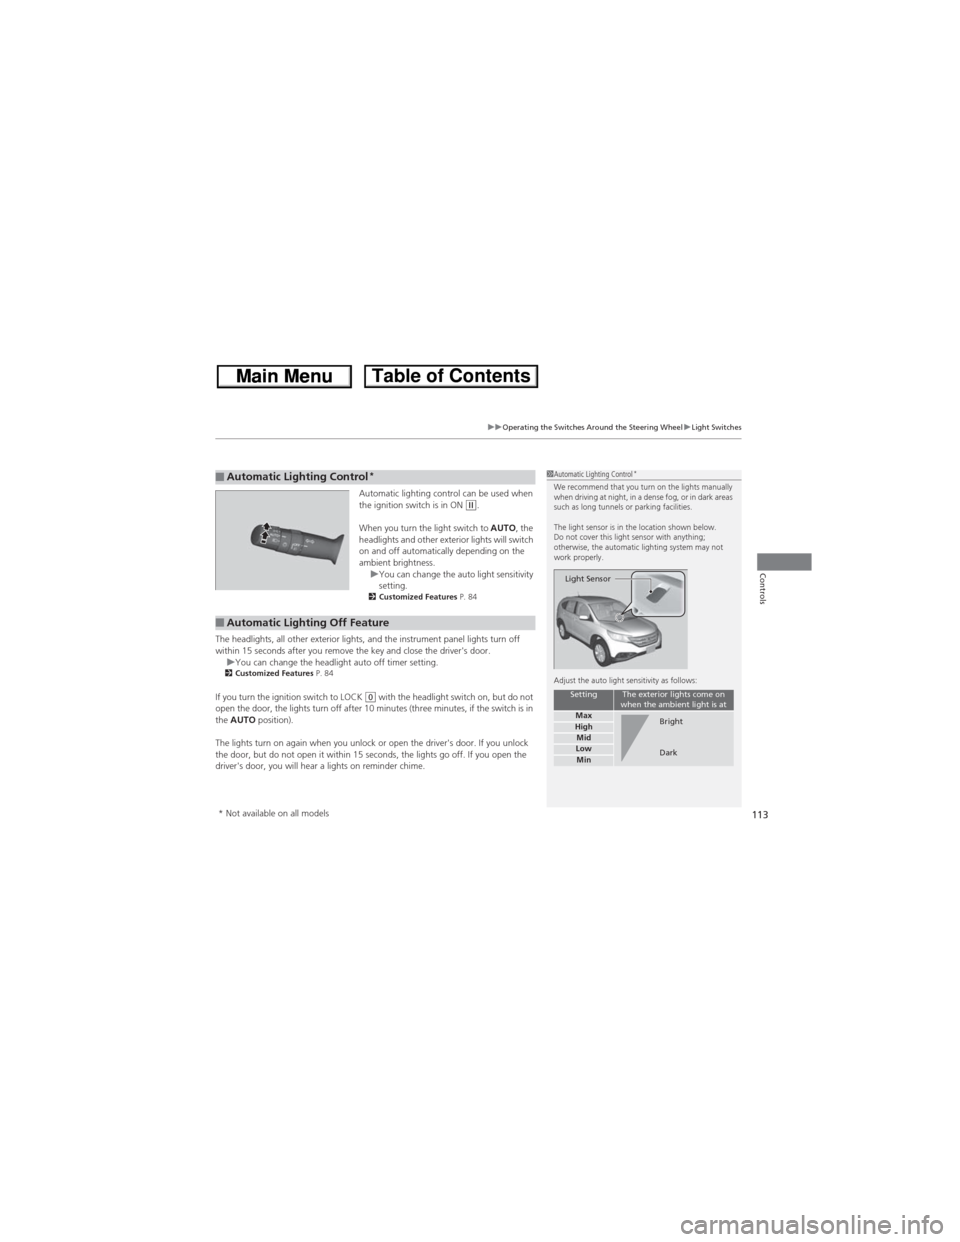
Automatic lighting control can be used when
the ignition switch is in ON (w.
When you turn the light switch to AUTO, the
headlights and other exterior lights will switch
on and off automatically depending on the
ambient brightness.
uYou can change the auto light sensitivity
setting.
2Customized Features P. 84
The headlights, all other exterior lights, and the instrument panel lights turn off
within 15 seconds after you remove the key and close the driver's door.
uYou can change the headlight auto off timer setting.
2Customized Features P. 84
If you turn the ignition switch to LOCK (0 with the headlight switch on, but do not
open the door, the lights turn off after 10 minutes (three minutes, if the switch is in
the AUTO position).
The lights turn on again when you unlock or open the driver's door. If you unlock
the door, but do not open it within 15 seconds, the lights go off. If you open the
driver's door, you will hear a lights on reminder chime.
■Automatic Lighting Control*1Automatic Lighting Control*We recommend that you turn on the lights manually
when driving at night, in a dense fog, or in dark areas
such as long tunnels or parking facilities.
The light sensor is in the location shown below.
Do not cover this light sensor with anything;
otherwise, the automatic lighting system may not
work properly.
Adjust the auto light sensitivity as follows:
SettingThe exterior lights come on
when the ambient light is at
MaxHighMidLowMin
Light Sensor
Bright
Dark
■Automatic Lighting Off Feature
* Not available on all models