change time HONDA CR-V 2014 RM1, RM3, RM4 / 4.G Navigation Manual
[x] Cancel search | Manufacturer: HONDA, Model Year: 2014, Model line: CR-V, Model: HONDA CR-V 2014 RM1, RM3, RM4 / 4.GPages: 212, PDF Size: 11.59 MB
Page 1 of 212
The information and specifications included in this publication were in effect at the time of approval for printing. Honda Motor Co., Ltd., reserves the right,
however, to discontinue or change specifications or design at any time without notice and without incurring any obligation.
Accessories Precautions
The GPS antenna is located in the dashboard. Metallic front or side window tinting can seriously degrade or obstruct GPS recept ion.
Signal noise from devices such as radar detectors, vehicle tracking devices, remote starters, and additional amplifiers can dis rupt the navigation system. If you
install any such item, install it away from the navigation display and antenna.
Important Safety Information
Avoid focusing on the screen or manually operating the system controls while driving.
Certain on-screen controls are disabled when driving, but most of the audible instructions and voice commands continue to function. Pull to the side of the road
if you need to devote more attention and time to look at the screen or access additional menus.
Route guidance may conflict with street closures, road construction, detours, and out-of-date map data.
The system itself may also have limitations. Verify route info rmation by carefully observing roads, signs, and signals. Always use your own judgment and obey
traffic laws.
2
System Limitations P. 188
NOTICE
This vehicle’s navigation display, if so equipped, includes mercury-containing compone nts. Upon removal, please reuse, recycle, or dispose of as hazardous waste.
Clean the screen with a soft, damp cloth. You may us e a mild cleaner intended for use on navigation screens.
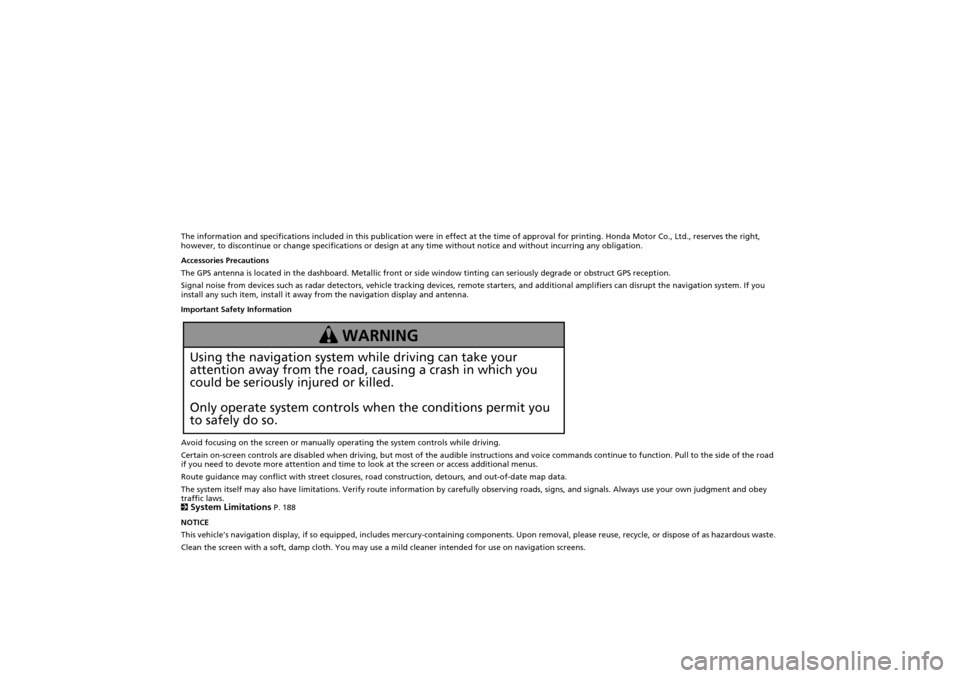
Using the navigation system while driving can take your
attention away from the road, causing a crash in which you
could be seriously injured or killed.
Only operate system controls when the conditions permit you
to safely do so.
WARNING
CR-V_KA-31T0A800.book 0 ページ 2011年7月4日 月曜日 午後1時56分
Page 15 of 212
14
Quick Reference GuideTroubleshootingFor more Information (P173)
Why does the vehicle position icon on the map “lag” a
short distance behind my actual position, especially at
intersections?
This is normal. The navigation system is unaware of the
width of intersections. Large differences in vehicle position
can indicate a temporary loss of the GPS signal.
Why does the “time to destination” display sometimes
increase even though I am getting closer to my
destination?
The “time to destination” is based on the posted road
speed signs and your actual road speed to give you a
better estimate of arrival time.
Why does my clock frequently change the time forward
and backward by one hour?
The clock setting is automatically updated based on your
GPS location. If you normally drive between two time
zones, the clock may keep adjusting the time. You can
turn this feature off.
2
Clock Adjustment P. 47
How do I specify a destination when an entered city or
street could not be found?
Try entering the street first. Some cities are lumped in with
a major metro area. In rural “unverified” areas or new
subdivisions, streets may be missing or only partially
numbered.
How do I turn on the navigation system voice guidance?
1. Press the INFO button. Select Setup. Check that
Volume is not set to Off.
2. Select Other, then Basic Settings. Set Voice
Recognition Tutor to On if you want the system to
provide confirmations and system prompts.
My battery was disconnected or went dead, and the
navigation system is asking for a code. Where do I find it?
In most cases, you do not need to enter a code. Simply
press and hold the VOL 9 (Volume/Power) button for two
seconds; the system should reactivate.
2
System Initialization P. 186
CR-V_KA-31T0A800.book 14 ページ 2011年7月4日 月曜日 午後1時56分
Page 19 of 212
18
System Setup
Start-up
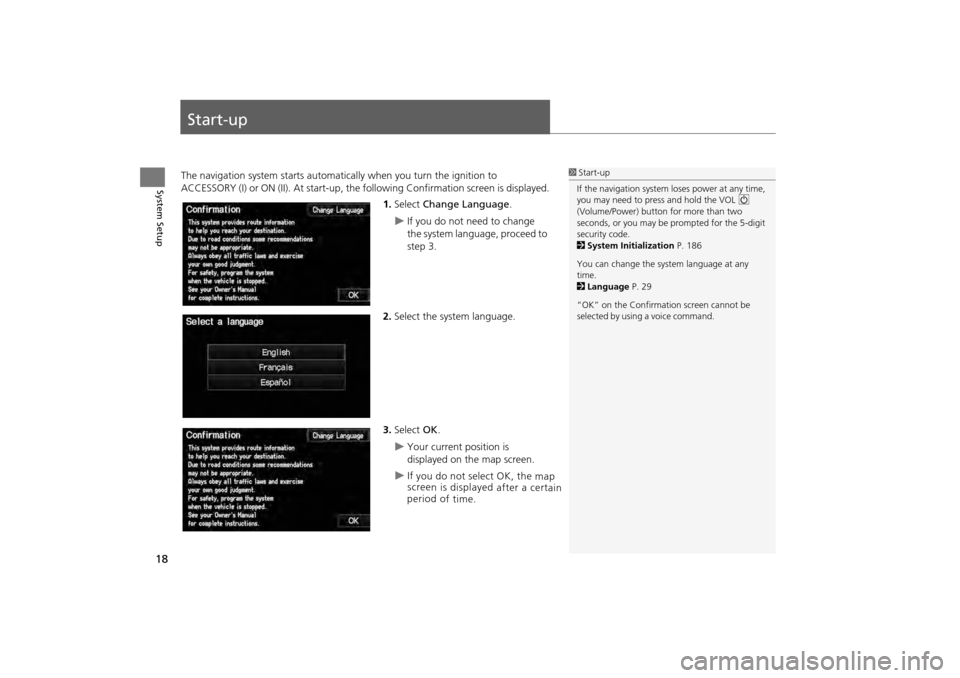
The navigation system starts automatically when you turn the ignition to
ACCESSORY (I) or ON (II). At start-up, the fo llowing Confirmation screen is displayed.
1. Select Change Language .
If you do not need to change
the system language, proceed to
step 3.
2. Select the system language.
3. Select OK.
Your current position is
displayed on the map screen.
1Start-up
If the navigation system loses power at any time,
you may need to press and hold the VOL 9
(Volume/Power) button for more than two
seconds, or you may be pr ompted for the 5-digit
security code.
2 System Initialization P. 186
You can change the system language at any
time.
2 Language P. 29
“OK” on the Confirmati on screen cannot be
selected by using a voice command.
CR-V_KA-31T0A800.book 18 ページ 2011年7月4日 月曜日 午後1時56分
I f y ou d o n ot s ele ct
O K, t he m ap
s c re en is d is p la ye d a fte r a c e rta in
p erio d o f t im e.
Page 48 of 212
47
System Setup
Clock Adjustment
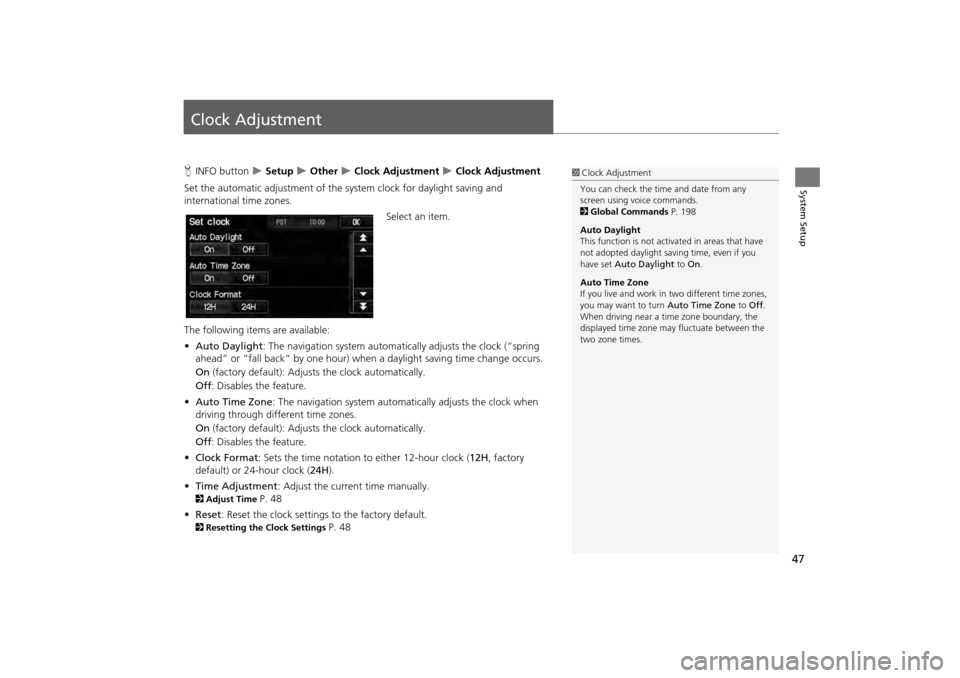
HINFO button Setup Other Clock Adjustment Clock Adjustment
Set the automatic adjustment of the sy stem clock for daylight saving and
international time zones.
Select an item.
The following items are available:
• Auto Daylight : The navigation system automati cally adjusts the clock (“spring
ahead” or “fall back” by one hour) when a daylight saving time change occurs.
On (factory default): Adjusts the clock automatically.
Off : Disables the feature.
• Auto Time Zone : The navigation syst em automatically adju sts the clock when
driving through different time zones.
On (factory default): Adjusts the clock automatically.
Off : Disables the feature.
• Clock Format : Sets the time notation to either 12-hour clock ( 12H, factory
default) or 24-hour clock ( 24H).
• Time Adjustment : Adjust the current time manually.
2Adjust Time P. 48
• Reset : Reset the clock settings to the factory default.
2Resetting the Clock Settings P. 48
1Clock Adjustment
You can check the time and date from any
screen using voice commands.
2 Global Commands P. 198
Auto Daylight
This function is not activated in areas that have
not adopted daylight saving time, even if you
have set Auto Daylight to On.
Auto Time Zone
If you live and work in two different time zones,
you may want to turn Auto Time Zone to Off.
When driving near a time zone boundary, the
displayed time zone ma y fluctuate between the
two zone times.
CR-V_KA-31T0A800.book 47 ページ 2011年7月4日 月曜日 午後1時56分
Page 79 of 212
78
Calculating the RouteChanging the Route Preference
Navigation
Changing the Route Preference
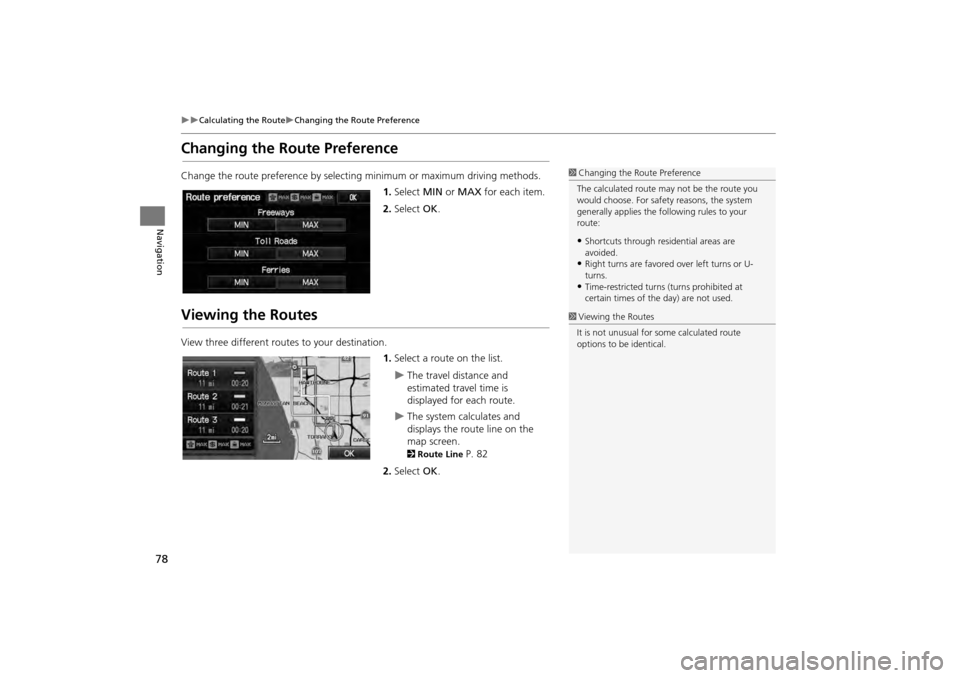
Change the route preference by selecting minimum or maximum driving methods.
1.Select MIN or MAX for each item.
2. Select OK.
Viewing the Routes
View three different routes to your destination.
1.Select a route on the list.
The travel distance and
estimated travel time is
displayed for each route.
The system calculates and
displays the route line on the
map screen.
2 Route Line P. 82
2. Select OK.
1Changing the Route Preference
The calculated route ma y not be the route you
would choose. For safety reasons, the system
generally applies the fo llowing rules to your
route:
•Shortcuts through resi dential areas are
avoided.
•Right turns are favored over left turns or U-
turns.
•Time-restricted turns (turns prohibited at
certain times of the day) are not used.
1Viewing the Routes
It is not unusual for so me calculated route
options to be identical.
CR-V_KA-31T0A800.book 78 ページ 2011年7月4日 月曜日 午後1時56分
Page 81 of 212
80
Navigation
Driving to Your Destination
This section describes how to follow the route guidance to your destination, receive
traffic information, and choose the icons displayed on the map screen.
Viewing the Route
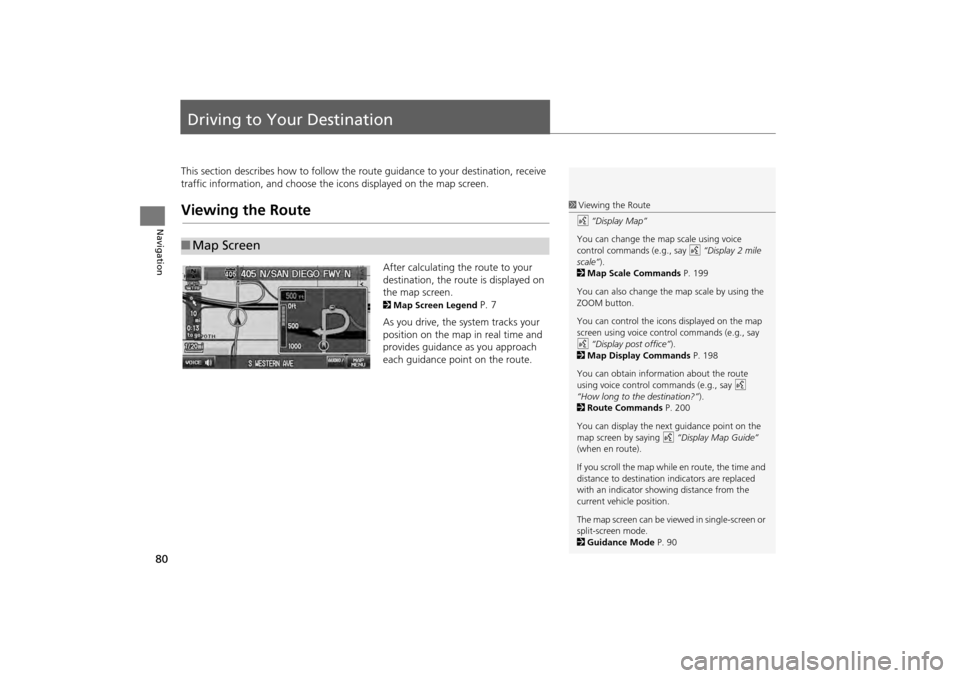
After calculating the route to your
destination, the route is displayed on
the map screen.
2Map Screen Legend P. 7
As you drive, the system tracks your
position on the map in real time and
provides guidance as you approach
each guidance point on the route.
■ Map Screen
1 Viewing the Route
d “Display Map”
You can change the map scale using voice
control commands (e.g., say d “Display 2 mile
scale” ).
2 Map Scale Commands P. 199
You can also change the map scale by using the
ZOOM button.
You can control the icons displayed on the map
screen using voice control commands (e.g., say
d “Display post office” ).
2 Map Display Commands P. 198
You can obtain information about the route
using voice control commands (e.g., say d
“How long to the destination?” ).
2 Route Commands P. 200
You can display the next guidance point on the
map screen by saying d “Display Map Guide”
(when en route).
If you scroll the map while en route, the time and
distance to destination indicators are replaced
with an indicator showing distance from the
current vehicle position.
The map screen can be viewed in single-screen or
split-screen mode.
2 Guidance Mode P. 90
CR-V_KA-31T0A800.book 80 ページ 2011年7月4日 月曜日 午後1時56分
Page 151 of 212
150
Bluetooth® HandsFreeLink®Pairing a Phone
Bluetooth ® HandsFreeLink®
Pairing a Phone
HPHONE button
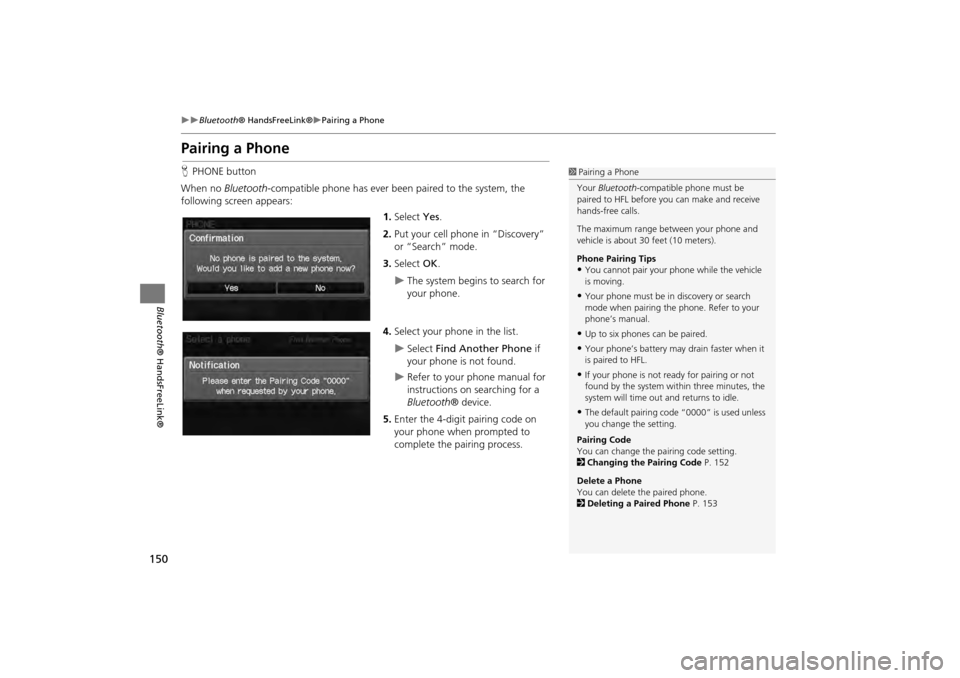
When no Bluetooth-compatible phone has ever been paired to the system, the
following screen appears:
1.Select Yes.
2. Put your cell phone in “Discovery”
or “Search” mode.
3. Select OK.
The system begins to search for
your phone.
4. Select your phone in the list.
Select Find Another Phone if
your phone is not found.
Refer to your phone manual for
instructions on searching for a
Bluetooth ® device.
5. Enter the 4-digit pairing code on
your phone when prompted to
complete the pairing process.
1Pairing a Phone
Your Bluetooth -compatible phone must be
paired to HFL before you can make and receive
hands-free calls.
The maximum range be tween your phone and
vehicle is about 30 feet (10 meters).
Phone Pairing Tips
•You cannot pair your phone while the vehicle
is moving.
•Your phone must be in discovery or search
mode when pairing the phone. Refer to your
phone’s manual.
•Up to six phones can be paired.
•Your phone’s battery may drain faster when it
is paired to HFL.
•If your phone is not r eady for pairing or not
found by the system within three minutes, the
system will time out and returns to idle.
•The default pairing code “0000” is used unless
you change the setting.
Pairing Code
You can change the pairing code setting.
2 Changing the Pairing Code P. 152
Delete a Phone
You can delete the paired phone.
2 Deleting a Paired Phone P. 153
CR-V_KA-31T0A800.book 150 ページ 2011年7月4日 月曜日 午後1時56分
Page 161 of 212
160
�X�XBluetooth® HandsFreeLink®�XMaking a Call
Bluetooth ® HandsFreeLink®
•Volume : Select B or N to adjust the receiver and ring volume. If you change
the volume during a call, it is maintained at that level until you change it again.
Making a Call
Make calls by entering a number or using the imported phonebook, call history, or
speed dial entries.
2 Using the Phonebook P. 161
2Entering a Phone Number P. 161
2Using Call History P. 162
2Using Speed Dial P. 162
1Making a Call
You can control the HFL system using voice
commands.
2 HFL Menus P. 164
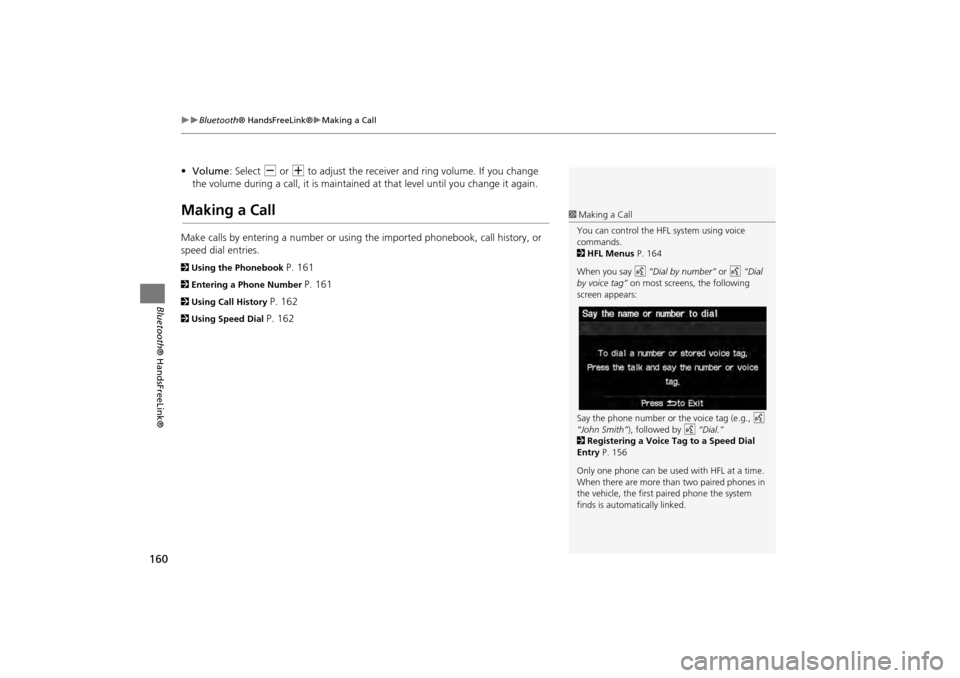
When you say d “Dial by number” or d “Dial
by voice tag” on most screens, the following
screen appears:
Say the phone number or the voice tag (e.g., d
“John Smith” ), followed by d “Dial.”
2 Registering a Voice Tag to a Speed Dial
Entry P. 156
Only one phone can be used with HFL at a time.
When there are more than two paired phones in
the vehicle, the first paired phone the system
finds is automatically linked.
CR-V_KA-31T0A800_04.fm 160 ページ 2012年1月24日 火曜日 午前11時32分
Page 176 of 212
175
TroubleshootingMap, Voice, Entering Destinations
Troubleshooting
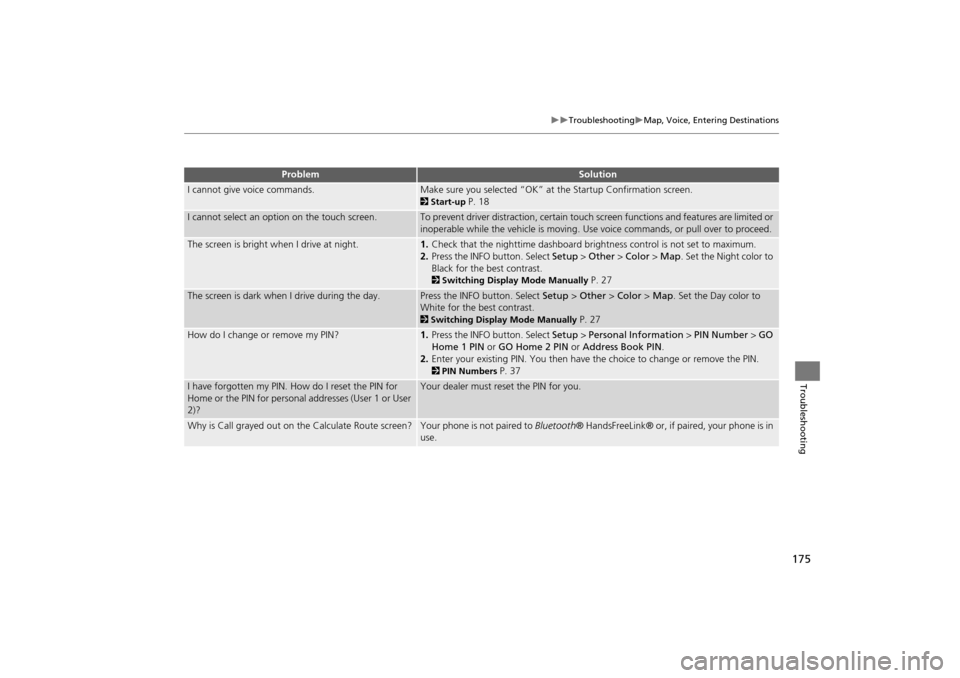
I cannot give voice commands.Make sure you selected “OK” at the Startup Confirmation screen.
2Start-up P. 18
I cannot select an option on the touch screen.To prevent driver distraction, certain touch screen functions and features are limited or
inoperable while the vehicle is moving. Use voice commands, or pull over to proceed.
The screen is bright when I drive at night.1. Check that the nighttime dashboard brig htness control is not set to maximum.
2. Press the INFO button. Select Setup > Other > Color > Map. Set the Night color to
Black for the best contrast.
2 Switching Display Mode Manually P. 27
The screen is dark when I drive during the day.Press the INFO button. Select Setup > Other > Color > Map. Set the Day color to
White for the best contrast.
2 Switching Display Mode Manually P. 27
How do I change or remove my PIN?1. Press the INFO button. Select Setup > Personal Information > PIN Number > GO
Home 1 PIN or GO Home 2 PIN or Address Book PIN .
2. Enter your existing PIN. You then have the choice to change or remove the PIN.
2PIN Numbers P. 37
I have forgotten my PIN. How do I reset the PIN for
Home or the PIN for personal addresses (User 1 or User
2)?Your dealer must reset the PIN for you.
Why is Call grayed out on the Calculate Route screen?Your phone is not paired to Bluetooth® HandsFreeLink® or, if paired, your phone is in
use.
ProblemSolution
CR-V_KA-31T0A800.book 175 ページ 2011年7月4日 月曜日 午後1時56分
Page 178 of 212
177
TroubleshootingGuidance, Routing
Troubleshooting
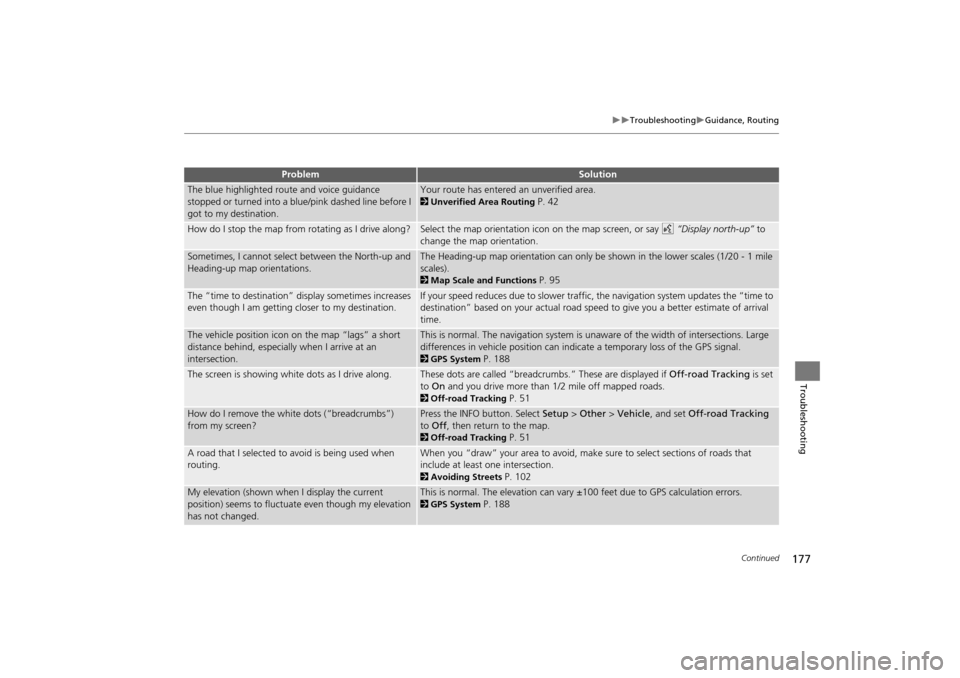
The blue highlighted route and voice guidance
stopped or turned into a blue/pink dashed line before I
got to my destination.Your route has entered an unverified area.
2Unverified Area Routing P. 42
How do I stop the map from rotating as I drive along?Select the map orientation icon on the map screen, or say d “Display north-up” to
change the map orientation.
Sometimes, I cannot select between the North-up and
Heading-up map orientations.The Heading-up map orientation can only be shown in the lower scales (1/20 - 1 mile
scales).
2 Map Scale and Functions P. 95
The “time to destination” display sometimes increases
even though I am getting closer to my destination.If your speed reduces due to slower traffic, the navigation system updates the “time to
destination” based on your actual road speed to give you a better estimate of arrival
time.
The vehicle position icon on the map “lags” a short
distance behind, especially when I arrive at an
intersection.This is normal. The navigation system is un aware of the width of intersections. Large
differences in vehicle position can indicate a temporary loss of the GPS signal.
2 GPS System P. 188
The screen is showing white dots as I drive along.These dots are called “breadcrumbs.” These are displayed if Off-road Tracking is set
to On and you drive more than 1/2 mile off mapped roads.
2Off-road Tracking P. 51
How do I remove the white dots (“breadcrumbs”)
from my screen?Press the INFO button. Select Setup > Other > Vehicle , and set Off-road Tracking
to Off , then return to the map.
2Off-road Tracking P. 51
A road that I selected to avoid is being used when
routing.When you “draw” your area to avoid, make sure to select sections of roads that
include at least one intersection.
2Avoiding Streets P. 102
My elevation (shown when I display the current
position) seems to fluctuate even though my elevation
has not changed.This is normal. The elevation can vary ±100 feet due to GPS calculation errors.
2GPS System P. 188
ProblemSolution
Continued
CR-V_KA-31T0A800.book 177 ページ 2011年7月4日 月曜日 午後1時56分