Electrical HONDA CR-V 2020 (in English) User Guide
[x] Cancel search | Manufacturer: HONDA, Model Year: 2020, Model line: CR-V, Model: HONDA CR-V 2020Pages: 671, PDF Size: 33.11 MB
Page 520 of 671
uuWhen Driving uBlind spot information System*
518
Driving
1Blind spot information System*
Blind spot information sy stem may be adversely
affected when:
•Objects (guard rails, poles, trees, etc,.) are
detected.
•An object that does not re flect radio waves well,
such as a motorcycle, is in the alert zone.
•Driving on a curved road.•A vehicle is moving from a far lane to the adjacent
lane.
•The system picks up external electrical interference.•The rear bumper or the sens ors have been improperly
repaired or the rear bu mper has been deformed.
•The orientation of the sensors has been changed.•In bad weather (Heavy rain, snow, and fog).
•Making a turn at an intersection.
•Driving on a bumpy road.•Making a short turn that slightly tilts the vehicle.
For proper blind spot information system use:
•Always keep the rear bumper corner area clean.•Do not cover the rear bumper corner area with
labels or sticke rs of any kind.
•Take your vehicle to a dealer if you need the rear
bumper corner area or the radar sensors to be repaired,
or the rear bumper corner area is strongly impacted.
The system does not operate when in
( R.
* Not available on all models
20 CR-V PET ELP_MAP_HMIN_HCM_J-31TLA6310.book 518 ページ 2019年10月3日 木曜日 午後4時55分
Page 602 of 671
600
uuBattery uCharging the Battery
Maintenance
Charging the Battery
Disconnect both battery cables to prevent da maging your vehicle's electrical system.
Always disconnect the negative (–) cable first, and reconnect it last.
*1: Models with the smart entry system have an ENGINE START/STOP button instead of an
ignition switch.
1 Battery
When you find corrosion, cl ean the battery terminals
by applying a baking powder and water solution.
Clean the terminals with a damp towel. Cloth/towel
dry the battery. Coat the terminals with grease to
help prevent future corrosion.
When replacing the battery, the replacement must be
of the same specifications.
Consult a dealer for more information.
The battery installed in this vehicle is specifically
designed for a model wi th Auto Idle Stop.
Using a battery other than this specified type may
shorten the battery life, a nd prevent Auto Idle Stop
from activating. If you need to replace the battery,
make sure to select the specified type. Ask a dealer
for more details.
The indicators for the Adaptive Cruise Control (ACC)
with Low Speed Follow
*, Road Departure Mitigation
(RDM) System*, Vehicle Stability AssistTM (VSA ®)
system, Vehicle Stability AssistTM (VSA ®) OFF, Collision
Mitigation Braking SystemTM (CMBSTM)*, Low Tire
Pressure/TPMS, and Parking Brake and Brake System
(Amber) may come on along with a message in the
Driver Information Interface when you turn the
ignition switch to ON
( w*1 after re-connecting the
battery.
Drive a short distance at more than 12 mph
(20 km/h). The indicator shoul d go off. If it does not,
have your vehicle ch ecked by a dealer.
* Not available on all models
20 CR-V PET ELP_MAP_HMIN_HCM_J-31TLA6310.book 600 ページ 2019年10月3日 木曜日 午後4時55分
Page 606 of 671
604
Maintenance
Cleaning
Interior Care
Use a damp cloth with a mixture of mild detergent and warm water to remove dirt.
Use a clean cloth to remove detergent residue.
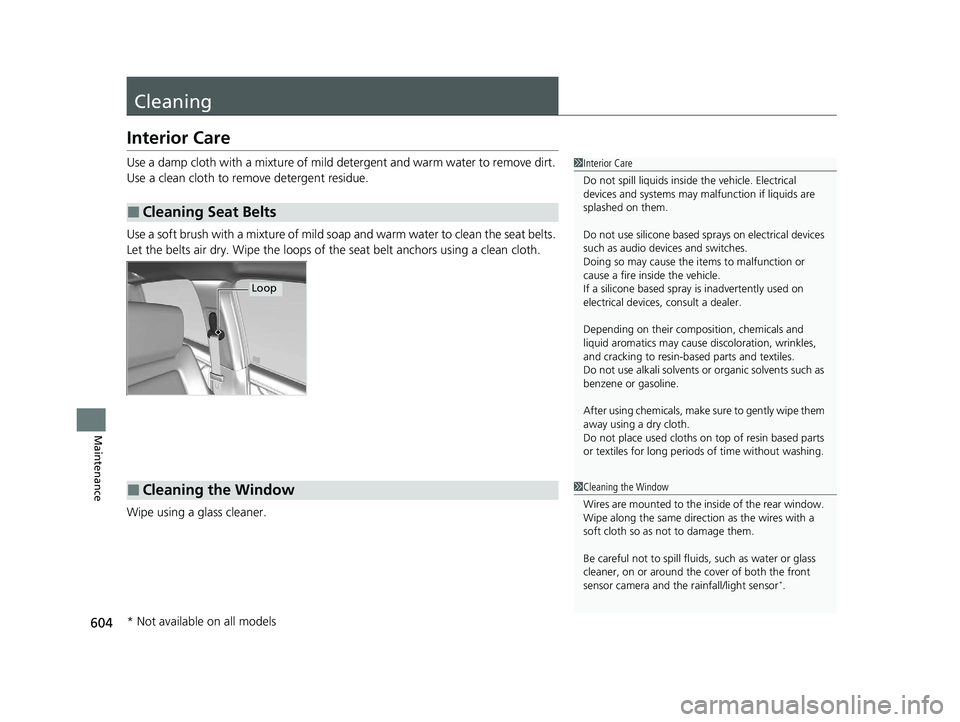
Use a soft brush with a mixture of mild soap and warm water to clean the seat belts.
Let the belts air dry. Wipe the loops of the seat belt anchors using a clean cloth.
Wipe using a glass cleaner.
■Cleaning Seat Belts
1 Interior Care
Do not spill liquids inside the vehicle. Electrical
devices and systems may ma lfunction if liquids are
splashed on them.
Do not use silicone based sprays on electrical devices
such as audio devices and switches.
Doing so may cause the items to malfunction or
cause a fire inside the vehicle.
If a silicone based spray is inadvertently used on
electrical devices, consult a dealer.
Depending on their compos ition, chemicals and
liquid aromatics may cause discoloration, wrinkles,
and cracking to resin-ba sed parts and textiles.
Do not use alkali solvents or organic solvents such as
benzene or gasoline.
After using chemicals, make su re to gently wipe them
away using a dry cloth.
Do not place used cloths on top of resin based parts
or textiles for long periods of time without washing.
Loop
■Cleaning the Window1Cleaning the Window
Wires are mounted to the in side of the rear window.
Wipe along the same direct ion as the wires with a
soft cloth so as not to damage them.
Be careful not to spill fluids, such as water or glass
cleaner, on or around the co ver of both the front
sensor camera and the rainfall/light sensor
*.
* Not available on all models
20 CR-V PET ELP_MAP_HMIN_HCM_J-31TLA6310.book 604 ページ 2019年10月3日 木曜日 午後4時55分
Page 611 of 671
609
Maintenance
Accessories and Modifications
Accessories
When installing accessories, check the following:
• Do not install accessories on the windsh ield. They can obstruct your view and
delay your reaction to driving conditions.
• Do not install any accessories over areas marked SRS Airbag, on the sides or backs
of the front seats, on front or side pillars, or near the side windows.
Accessories installed in these areas may interfere with proper operation of the
vehicle’s airbags or may be propelled into you or another occupant if the airbags
deploy.
• Be sure electronic accessories do not overload electrical circuits or interfere with
proper operation of your vehicle.
2 Fuses P. 635
•Before installing any electro nic accessory, have the installer contact a dealer for
assistance. If possible, have a deal er inspect the final installation.
Modifications
Do not modify your vehicle in a manner that may affect its handling, stability, or reliability,
or install non-genuine Honda parts or accessories that may have a similar effect.
Even minor modifications to vehicle systems can affect overall vehicle performance.
Always make sure all equipment is properly installed and maintained, and do not make any
modification to your vehicle or its systems that might cause your vehicle to no longer meet
federal, state, province, territory, and local regulations.
The on-board diagnostic port (OBD-II/SAE J1 962 connector) installed on this vehicle
is intended to be used with automobile system diagnostic devices or with other
devices that Honda has approved. Use of any other type of device may adversely
affect the vehicle's electronic systems or allow them to be compromised, possibly
resulting in a system malfunction, drained battery, or other unexpected problems.
Do not modify or attempt to repair any of the electrical components.
1Accessories and Modifications
Honda Genuine accessor ies are recommended to
ensure proper operati on on your vehicle.
3WARNING
Improper accessories or modifications can
affect your vehicle's handling, stability, and
performance, and cause a crash in which
you can be seriously hurt or killed.
Follow all instruction s in this owner's
manual regarding accessories and
modifications.
20 CR-V PET ELP_MAP_HMIN_HCM_J-31TLA6310.book 609 ページ 2019年10月3日 木曜日 午後4時55分
Page 631 of 671
629
Handling the Unexpected
Indicator, Coming On/Blinking
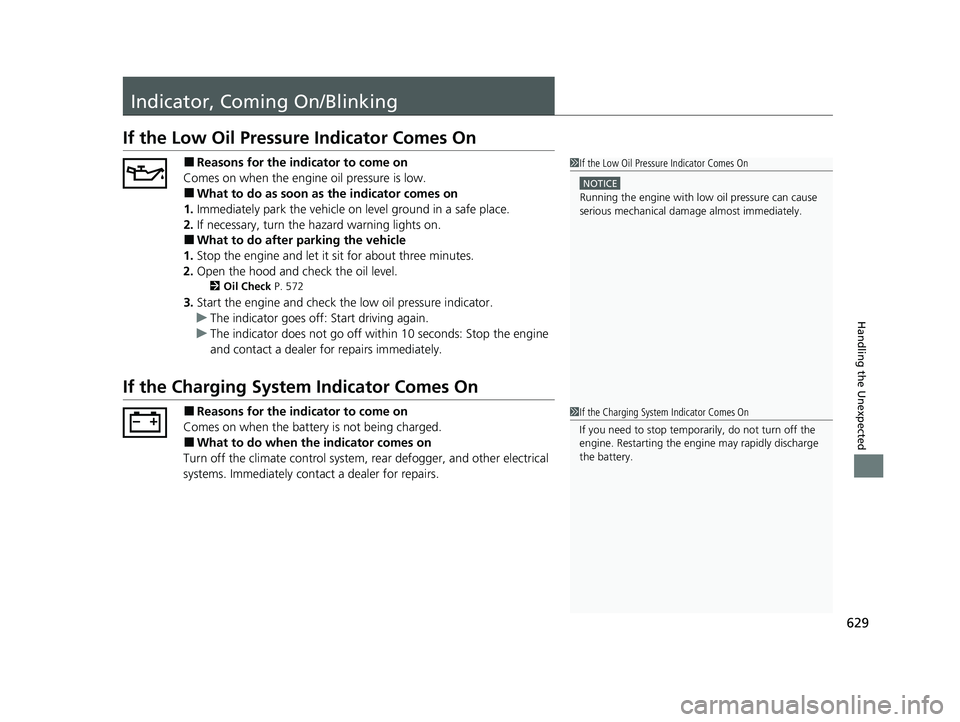
If the Low Oil Pressure Indicator Comes On
■Reasons for the indicator to come on
Comes on when the engine oil pressure is low.
■What to do as soon as the indicator comes on
1. Immediately park the vehicle on level ground in a safe place.
2. If necessary, turn the hazard warning lights on.
■What to do after parking the vehicle
1. Stop the engine and let it sit for about three minutes.
2. Open the hood and check the oil level.
2 Oil Check P. 572
3.Start the engine and check th e low oil pressure indicator.
u The indicator goes off: Start driving again.
u The indicator does not go off within 10 seconds: Stop the engine
and contact a dealer for repairs immediately.
If the Charging System Indicator Comes On
■Reasons for the indicator to come on
Comes on when the battery is not being charged.
■What to do when th e indicator comes on
Turn off the climate control system, rear defogger, and other electrical
systems. Immediately cont act a dealer for repairs.
1If the Low Oil Pressure Indicator Comes On
NOTICE
Running the engine with low oil pressure can cause
serious mechanical damage almost immediately.
1If the Charging System Indicator Comes On
If you need to stop temporarily, do not turn off the
engine. Restarting the engi ne may rapidly discharge
the battery.
20 CR-V PET ELP_MAP_HMIN_HCM_J-31TLA6310.book 629 ページ 2019年10月3日 木曜日 午後4時55分
Page 637 of 671
635Continued
Handling the Unexpected
Fuses
Fuse Locations
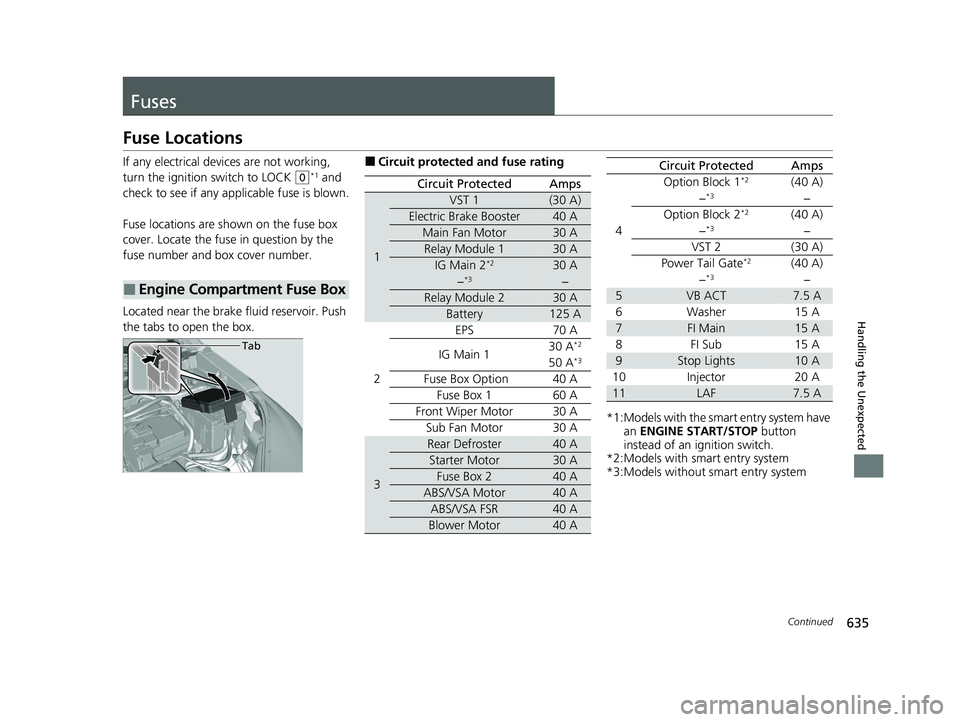
If any electrical devices are not working,
turn the ignition switch to LOCK
(0*1 and
check to see if any appl icable fuse is blown.
Fuse locations are shown on the fuse box
cover. Locate the fuse in question by the
fuse number and box cover number.
Located near the brake fluid reservoir. Push
the tabs to open the box.
■Engine Compartment Fuse Box
Tab
■Circuit protected and fuse rating
Circuit ProtectedAmps
1
VST 1(30 A)
Electric Brake Booster40 A
Main Fan Motor30 A
Relay Module 130 A
IG Main 2*230 A
−*3−
Relay Module 230 A
Battery125 A
2
EPS70 A
IG Main 130 A*2
50 A*3
Fuse Box Option40 A
Fuse Box 160 A
Front Wiper Motor30 A
Sub Fan Motor30 A
3
Rear Defroster40 A
Starter Motor30 A
Fuse Box 240 A
ABS/VSA Motor40 A
ABS/VSA FSR40 A
Blower Motor40 A
*1:Models with the smart entry system have an ENGINE START/STOP button
instead of an ignition switch.
*2:Models with smart entry system
*3:Models without smart entry system
4
Option Block 1*2(40 A)
−*3−
Option Block 2*2(40 A)
−*3−
VST 2(30 A)
Power Tail Gate*2(40 A)
−*3−
5VB ACT7.5 A
6Washer15 A
7FI Main15 A
8FI Sub15 A
9Stop Lights10 A
10Injector20 A
11LAF7.5 A
Circuit ProtectedAmps
20 CR-V PET ELP_MAP_HMIN_HCM_J-31TLA6310.book 635 ページ 2019年10月3日 木曜日 午後4時55分
Page 641 of 671
639
uuFusesuInspecting and Changing Fuses
Handling the Unexpected
Inspecting and Changing Fuses
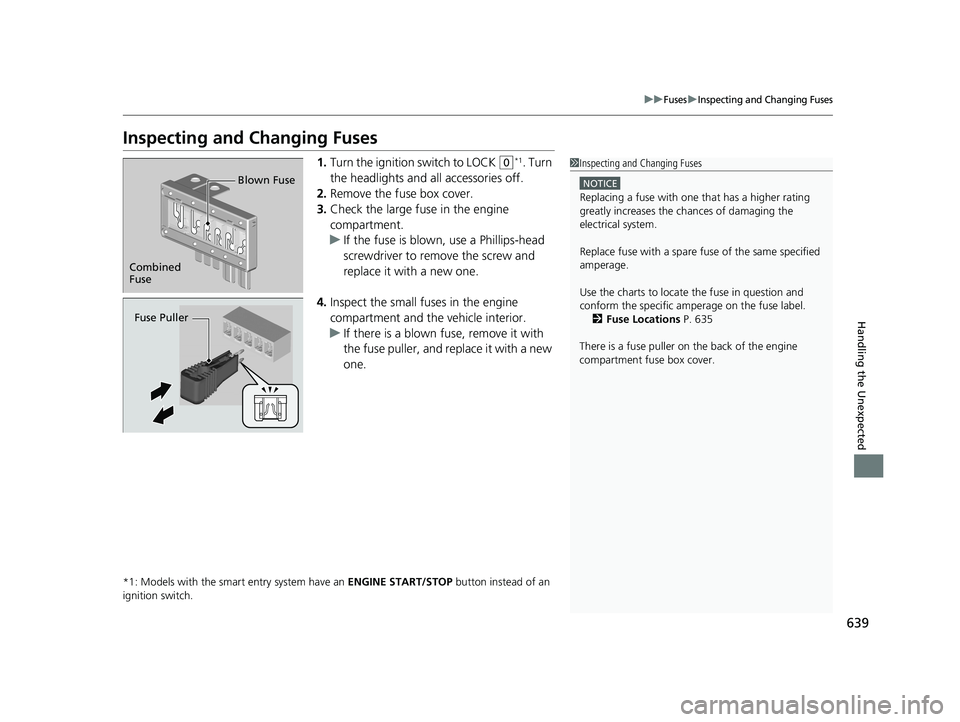
1.Turn the ignition switch to LOCK (0*1. Turn
the headlights and all accessories off.
2. Remove the fuse box cover.
3. Check the large fuse in the engine
compartment.
u If the fuse is blown, use a Phillips-head
screwdriver to remove the screw and
replace it with a new one.
4. Inspect the small fu ses in the engine
compartment and the vehicle interior.
u If there is a blown fuse, remove it with
the fuse puller, and replace it with a new
one.
*1: Models with the smart entry system have an ENGINE START/STOP button instead of an
ignition switch.
1 Inspecting and Changing Fuses
NOTICE
Replacing a fuse with on e that has a higher rating
greatly increases the chances of damaging the
electrical system.
Replace fuse with a spare fuse of the same specified
amperage.
Use the charts to locate the fuse in question and
conform the specific ampe rage on the fuse label.
2 Fuse Locations P. 635
There is a fuse puller on the back of the engine
compartment fuse box cover.
Combined
Fuse Blown Fuse
Fuse Puller
20 CR-V PET ELP_MAP_HMIN_HCM_J-31TLA6310.book 639 ページ 2019年10月3日 木曜日 午後4時55分