light HONDA CR-Z 2013 1.G Owner's Manual
[x] Cancel search | Manufacturer: HONDA, Model Year: 2013, Model line: CR-Z, Model: HONDA CR-Z 2013 1.GPages: 325, PDF Size: 11.73 MB
Page 107 of 325
106
Controls
Security System
Immobilizer System
The immobilizer system prevents a key that has not been pre-registered from
starting the engine. Each key contains electronic transmitters that use electronic
signals to verify the key.
Pay attention to the following when inserting the key into the ignition switch: •Do not allow objects that emit strong radio waves near the ignition switch.
• Make sure the key is not covered by or touching a metal object.
• Do not bring a key from another ve hicle's immobilizer system near the ignition
switch.
Security System Alarm
The security system alarm activates when the doors, hatch, or hood are opened
without the key, or remote transmitter. ■ When the security system alarm activates
The horn sounds intermittently, and all of the exterior lights flash. ■ To deactivate the security system alarm
Unlock the vehicle using the key or remote transmitter or turn the ignition switch to ON
(w . The system, along with the horn and flashing lights, is deactivated.
1Immobilizer System
NOTICE
Leaving the ignition key in the vehicle can result in
theft or accidental movement of the vehicle.
Always take the ignition key with you whenever you
leave the vehicle unattended.
Do not alter the system or add other devices to it.
Doing so may damage the system and make your
vehicle inoperable.
1Security System Alarm
The security alarm continues for a maximum of two
minutes until the security system alarm deactivates.
Main MenuTable of Contents
Page 108 of 325
107
uuSecurity SystemuSecurity System Alarm
Controls
■Setting the security system alarm
The security system alarm automatically sets when the following conditions have
been met: • The ignition switch is in LOCK
(0 , and the key has been removed from the
ignition switch.
• The hood is closed.
• Both doors and the hatch are locked with the key or the remote transmitter.
■ When the security system alarm sets
The security system alarm indicator in the instrument panel blinks. When the
blinking interval changes after about 15 seconds, the security system alarm is set. ■ To cancel the security system alarm
The security system alarm is canceled when the vehicle is unlocked using the key or
remote transmitter, or the ignition switch is turned to ON
(w . The security system
alarm indicator goes off at the same time.
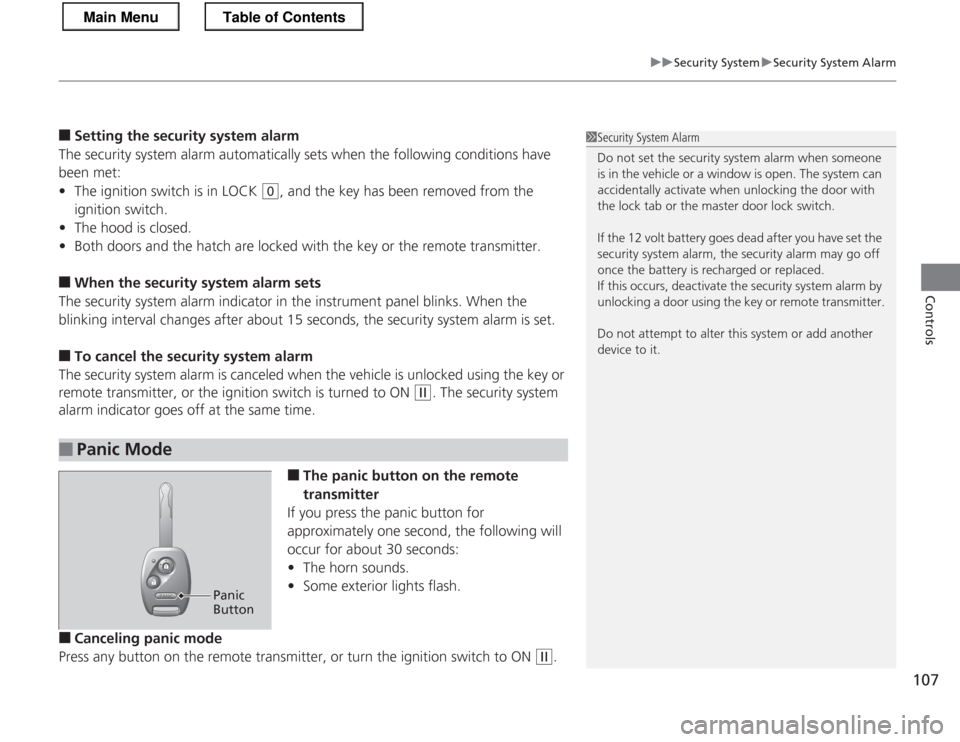
■The panic button on the remote
transmitter
If you press the panic button for
approximately one second, the following will
occur for about 30 seconds: • The horn sounds.
• Some exterior lights flash.
■ Canceling panic mode
Press any button on the remote transmitter, or turn the ignition switch to ON
(w .
■Panic Mode
1Security System Alarm
Do not set the security system alarm when someone
is in the vehicle or a window is open. The system can
accidentally activate when unlocking the door with
the lock tab or the master door lock switch.
If the 12 volt battery goes de ad after you have set the
security system alarm, the security alarm may go off
once the battery is recharged or replaced.
If this occurs, deactivate the security system alarm by
unlocking a door using the key or remote transmitter.
Do not attempt to alter this system or add another
device to it.
Panic Button
Main MenuTable of Contents
Page 109 of 325
108
Controls
Opening and Closing the Windows
Opening/Closing the Power Windows
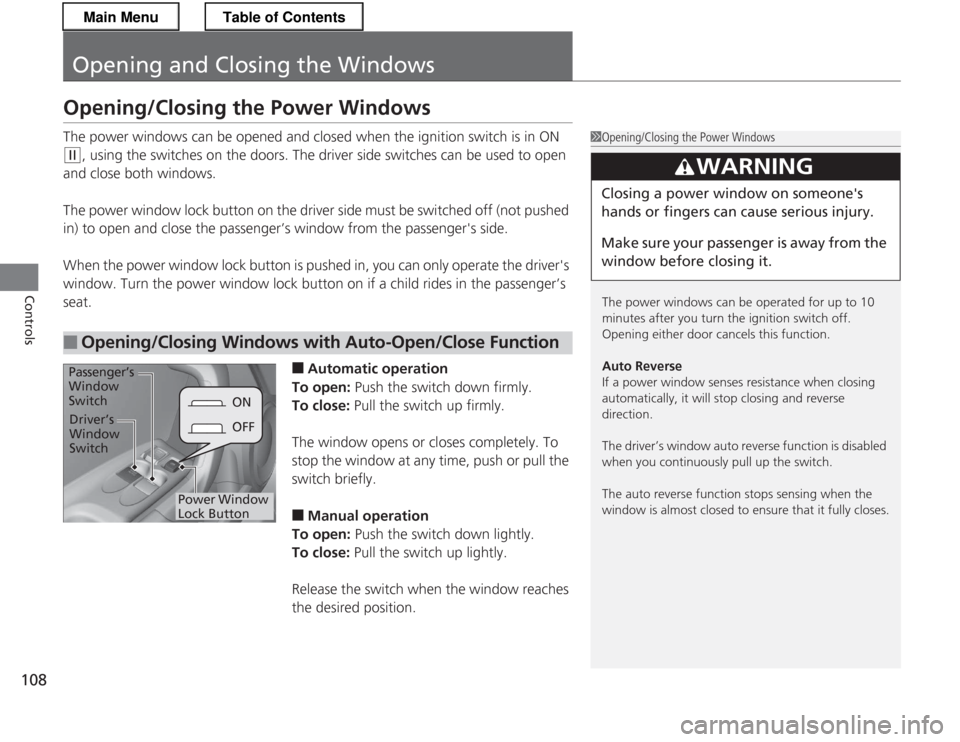
The power windows can be opened and closed when the ignition switch is in ON
(w, using the switches on the doors. The driver side switches can be used to open
and close both windows.
The power window lock button on the driver side must be switched off (not pushed
in) to open and close the passenger’s window from the passenger's side.
When the power window lock button is pushed in, you can only operate the driver's
window. Turn the power window lock button on if a child rides in the passenger’s seat.
■Automatic operation
To open: Push the switch down firmly.
To close: Pull the switch up firmly.
The window opens or closes completely. To stop the window at any time, push or pull the
switch briefly. ■ Manual operation
To open: Push the switch down lightly.
To close: Pull the switch up lightly.
Release the switch when the window reaches the desired position.
■Opening/Closing Windows with Auto-Open/Close Function
1Opening/Closing the Power Windows
The power windows can be operated for up to 10
minutes after you turn the ignition switch off.
Opening either door cancels this function.
Auto Reverse
If a power window senses resistance when closing
automatically, it will stop closing and reverse direction.
The driver’s window auto reverse function is disabled
when you continuously pull up the switch.
The auto reverse function stops sensing when the
window is almost closed to ensure that it fully closes.
3WARNING
Closing a power window on someone's
hands or fingers can cause serious injury.
Make sure your passenger is away from the
window before closing it.
ON
OFF
Power Window Lock Button
Driver’s
Window Switch
Passenger’s
Window Switch
Main MenuTable of Contents
Page 112 of 325
111
uuOperating the Switches Around the Steering WheeluTurn Signals
Continued
Controls
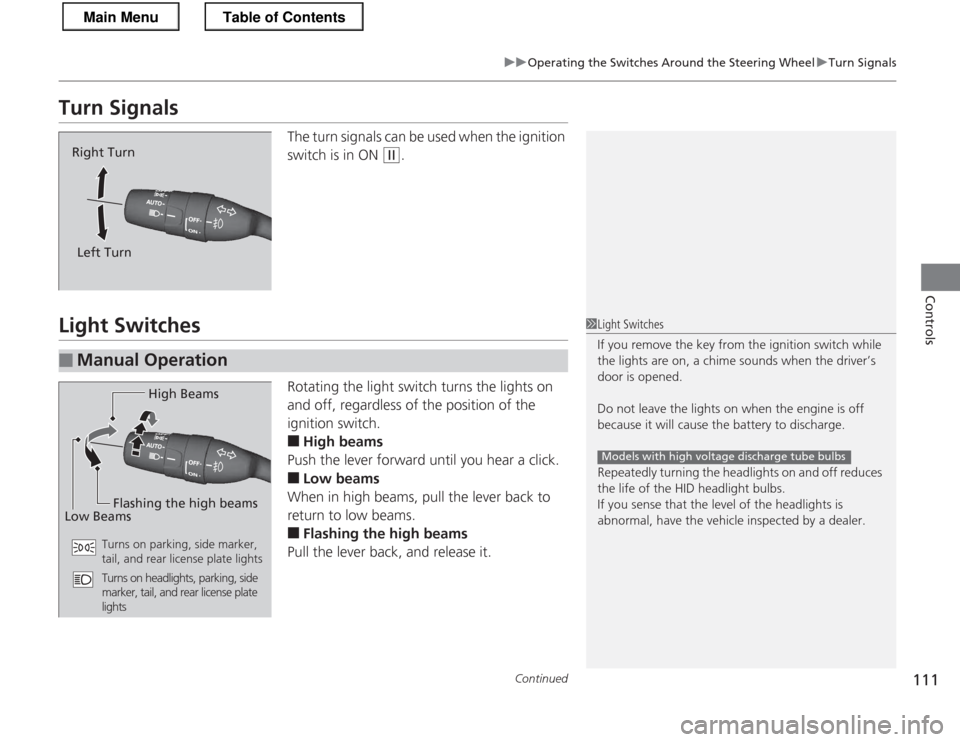
Turn SignalsThe turn signals can be used when the ignition
switch is in ON
(w.
Light Switches
Rotating the light switch turns the lights on
and off, regardless of the position of the
ignition switch. ■High beams
Push the lever forward until you hear a click. ■ Low beams
When in high beams, pull the lever back to
return to low beams. ■ Flashing the high beams
Pull the lever back, and release it.
Right Turn
Left Turn
■Manual Operation
1Light Switches
If you remove the key fr om the ignition switch while
the lights are on, a chime sounds when the driver’s door is opened.
Do not leave the lights on when the engine is off
because it will cause the battery to discharge.
Repeatedly turning the headlights on and off reduces
the life of the HID headlight bulbs.
If you sense that the level of the headlights is
abnormal, have the vehicle inspected by a dealer.
Models with high voltage discharge tube bulbs
High Beams
Flashing the high beams
Low Beams
Turns on parking, side marker,
tail, and rear license plate lights
Turns on headlights, parking, side
marker, tail, and rear license plate
lights
Main MenuTable of Contents
Page 113 of 325
uuOperating the Switches Around the Steering WheeluLight Switches
112
Controls
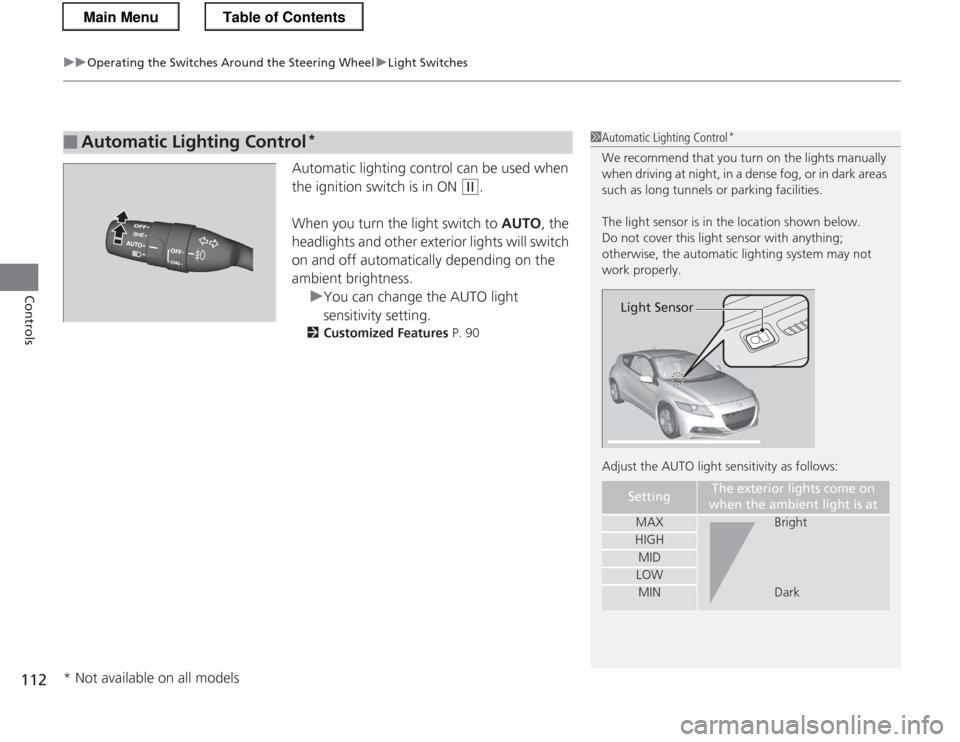
Automatic lighting control can be used when
the ignition switch is in ON
(w .
When you turn the light switch to AUTO, the
headlights and other exterior lights will switch
on and off automatically depending on the ambient brightness.
uYou can change the AUTO light
sensitivity setting.
2 Customized Features P. 90
■Automatic Lighting Control *1Automatic Lighting Control
*
We recommend that you turn on the lights manually
when driving at night, in a dense fog, or in dark areas
such as long tunnels or parking facilities.
The light sensor is in the location shown below.
Do not cover this light sensor with anything;
otherwise, the automatic lighting system may not work properly.
Adjust the AUTO light sensitivity as follows:
SettingThe exterior lights come on
when the ambient light is at
MAXBright
HIGH
MID
LOW
MINDark
Light Sensor
* Not available on all models
Main MenuTable of Contents
Page 114 of 325
113
uuOperating the Switches Around the Steering WheeluFog Lights*
Controls
Fog Lights *
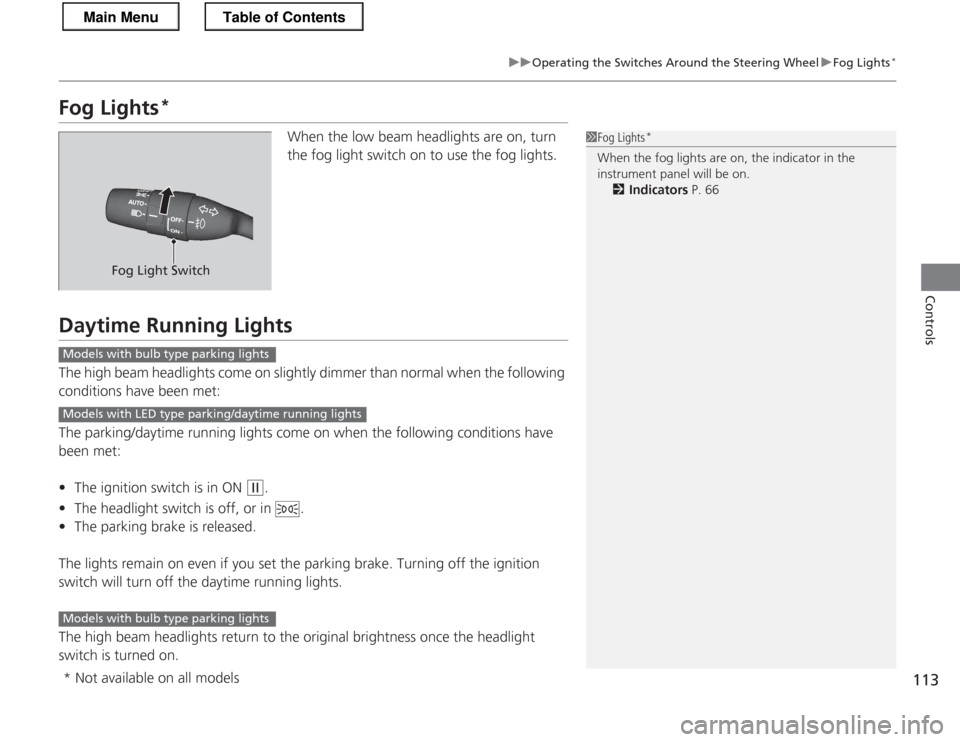
When the low beam headlights are on, turn
the fog light switch on to use the fog lights.
Daytime Running Lights
The high beam headlights come on slightly dimmer than normal when the following
conditions have been met:
The parking/daytime running lights come on when the following conditions have
been met: •The ignition switch is in ON
(w .
• The headlight switch is off, or in .
• The parking brake is released.
The lights remain on even if you set the parking brake. Turning off the ignition
switch will turn off the daytime running lights.
The high beam headlights return to the original brightness once the headlight
switch is turned on.
1Fog Lights *
When the fog lights are on, the indicator in the
instrument panel will be on. 2 Indicators P. 66
Fog Light Switch
Models with bulb type parking lights
Models with LED type parking/daytime running lights
Models with bulb type parking lights
* Not available on all models
Main MenuTable of Contents
Page 117 of 325
116
uuOperating the Switches Around the Steering WheeluBrightness Control
Controls
Brightness ControlWhen the ignition switch is in ON
(w, you can
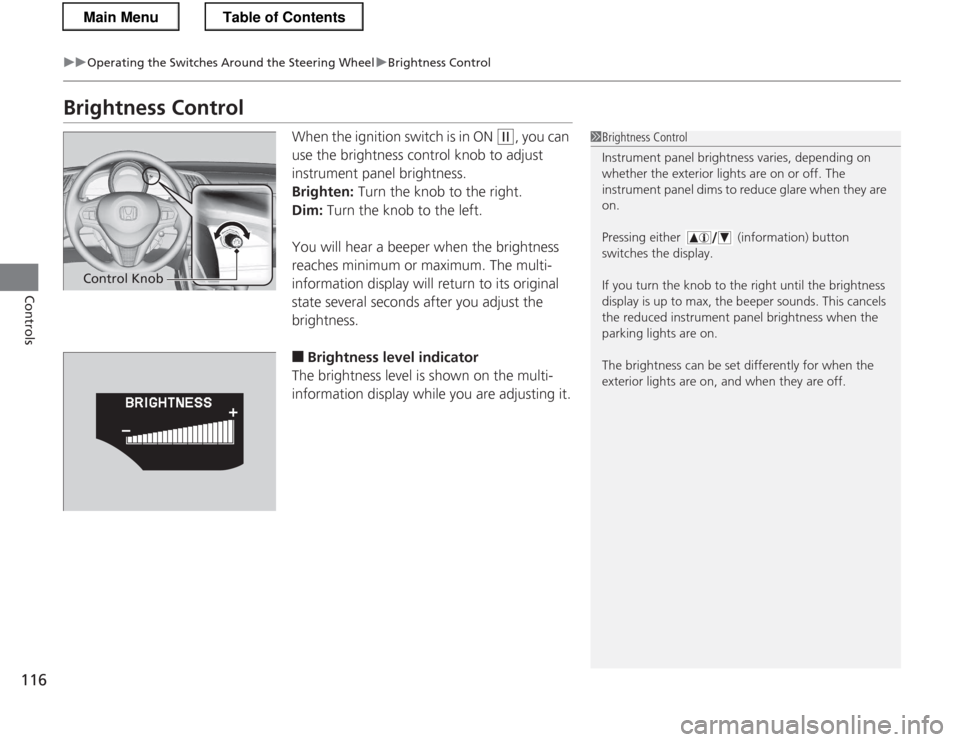
use the brightness control knob to adjust
instrument panel brightness.
Brighten: Turn the knob to the right.
Dim: Turn the knob to the left.
You will hear a beeper when the brightness
reaches minimum or maximum. The multi-
information display will return to its original
state several seconds after you adjust the
brightness. ■ Brightness level indicator
The brightness level is shown on the multi-
information display while you are adjusting it.1Brightness Control
Instrument panel brightness varies, depending on
whether the exterior lights are on or off. The
instrument panel dims to reduce glare when they are on.
Pressing either (information) button
switches the display. If you turn the knob to the right until the brightness
display is up to max, the beeper sounds. This cancels
the reduced instrument panel brightness when the parking lights are on.
The brightness can be set differently for when the
exterior lights are on, and when they are off.
Control Knob
Main MenuTable of Contents
Page 120 of 325
119
Controls
Adjusting the Mirrors
Interior Rearview Mirror
Adjust the angle of the rearview mirror when you are sitting in the correct driving
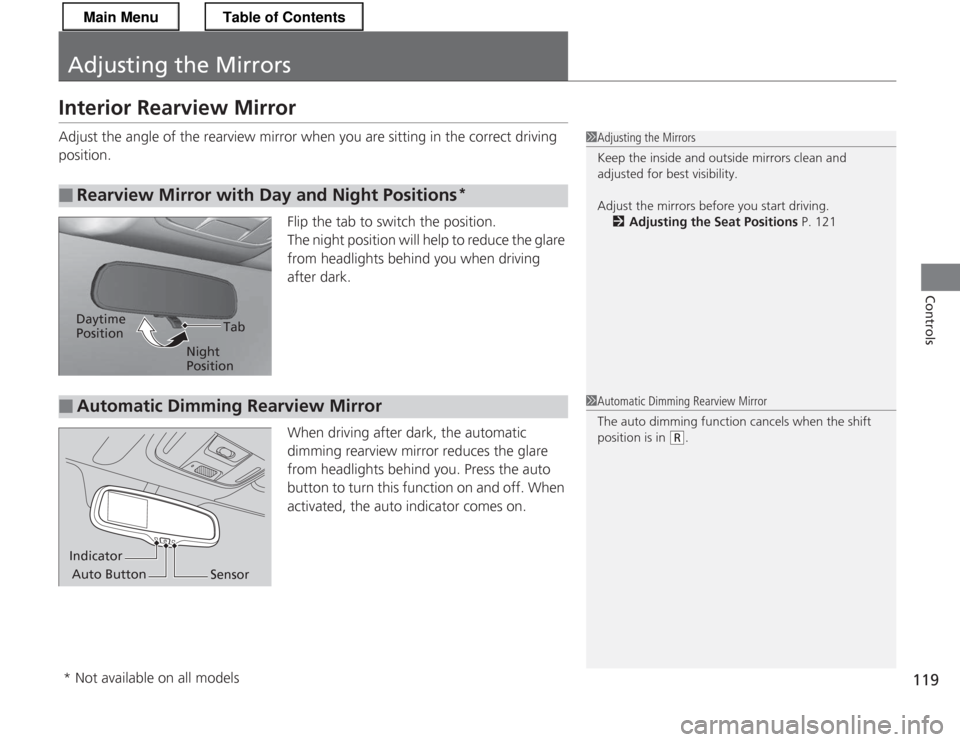
position.Flip the tab to switch the position.
The night position will help to reduce the glare
from headlights behind you when driving
after dark.
When driving after dark, the automatic
dimming rearview mirror reduces the glare
from headlights behind you. Press the auto
button to turn this function on and off. When
activated, the auto indicator comes on.
■Rearview Mirror with Day and Night Positions *
1Adjusting the Mirrors
Keep the inside and outside mirrors clean and
adjusted for best visibility.
Adjust the mirrors before you start driving.
2 Adjusting the Seat Positions P. 121
Tab
Daytime Position
Night Position
■Automatic Dimming Rearview Mirror1Automatic Dimming Rearview Mirror
The auto dimming function cancels when the shift
position is in
(R.
Indicator
Auto Button Sensor
* Not available on all models
Main MenuTable of Contents
Page 121 of 325
120
uuAdjusting the MirrorsuPower Door Mirrors
Controls
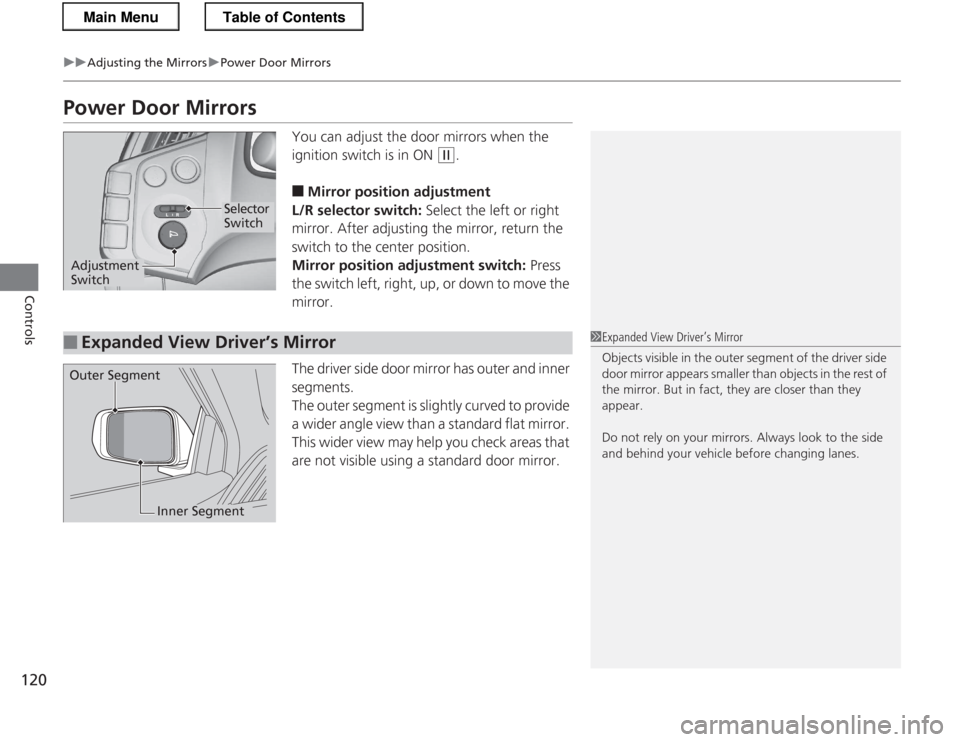
Power Door MirrorsYou can adjust the door mirrors when the
ignition switch is in ON
(w.
■ Mirror position adjustment
L/R selector switch: Select the left or right
mirror. After adjusting the mirror, return the
switch to the center position.
Mirror position adjustment switch: Press
the switch left, right, up, or down to move the mirror.
The driver side door mirror has outer and inner segments.
The outer segment is slightly curved to provide
a wider angle view than a standard flat mirror.
This wider view may help you check areas that
are not visible using a standard door mirror.
Selector Switch
Adjustment Switch
■Expanded View Driver’s Mirror1Expanded View Driver’s Mirror
Objects visible in the outer segment of the driver side
door mirror appears smaller than objects in the rest of
the mirror. But in fact, they are closer than they
appear.
Do not rely on your mirrors. Always look to the side
and behind your vehicle before changing lanes.
Outer Segment
Inner Segment
Main MenuTable of Contents
Page 125 of 325
uuAdjusting the SeatsuAdjusting the Seat Positions
124
Controls
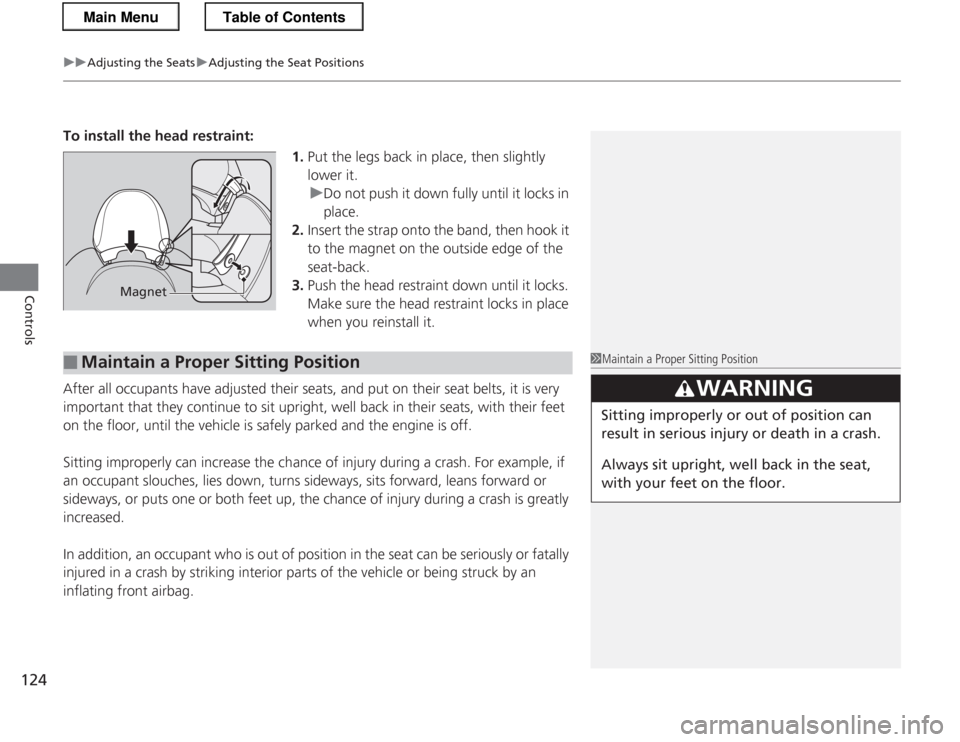
To install the head restraint: 1.Put the legs back in place, then slightly lower it.
uDo not push it down fully until it locks in
place.
2. Insert the strap onto the band, then hook it
to the magnet on the outside edge of the seat-back.
3. Push the head restraint down until it locks.
Make sure the head restraint locks in place
when you reinstall it.
After all occupants have adjusted their seats, and put on their seat belts, it is very
important that they continue to sit upright, well back in their seats, with their feet
on the floor, until the vehicle is safely parked and the engine is off.
Sitting improperly can increase the ch ance of injury during a crash. For example, if
an occupant slouches, lies down, turns sideways, sits forward, leans forward or
sideways, or puts one or both feet up, the chance of injury during a crash is greatly increased.
In addition, an occupant who is out of position in the seat can be seriously or fatally
injured in a crash by striking interior parts of the vehicle or being struck by an
inflating front airbag.
Magnet
■Maintain a Proper Sitting Position1Maintain a Proper Sitting Position
3WARNING
Sitting improperly or out of position can
result in serious injury or death in a crash.
Always sit upright, well back in the seat,
with your feet on the floor.
Main MenuTable of Contents